How to Add Keyframes on Kapwing

Keyframing is the process of creating markers on a timeline to indicate a change in any given video, image, GIF, text, or shape layer. These markers, or "keyframes," allow you to create smooth transitions between different settings or effects.
With keyframing, you can do a lot of things to make your videos more engaging and dynamic. For example, you can use it to create animations, and pan and zoom effects.
- How to position keyframes
- How to add zoom keyframes
- How to add adjustment keyframes
- Can I add position and adjustment keyframes to one asset
- How to view animation
- How to delete a keyframe

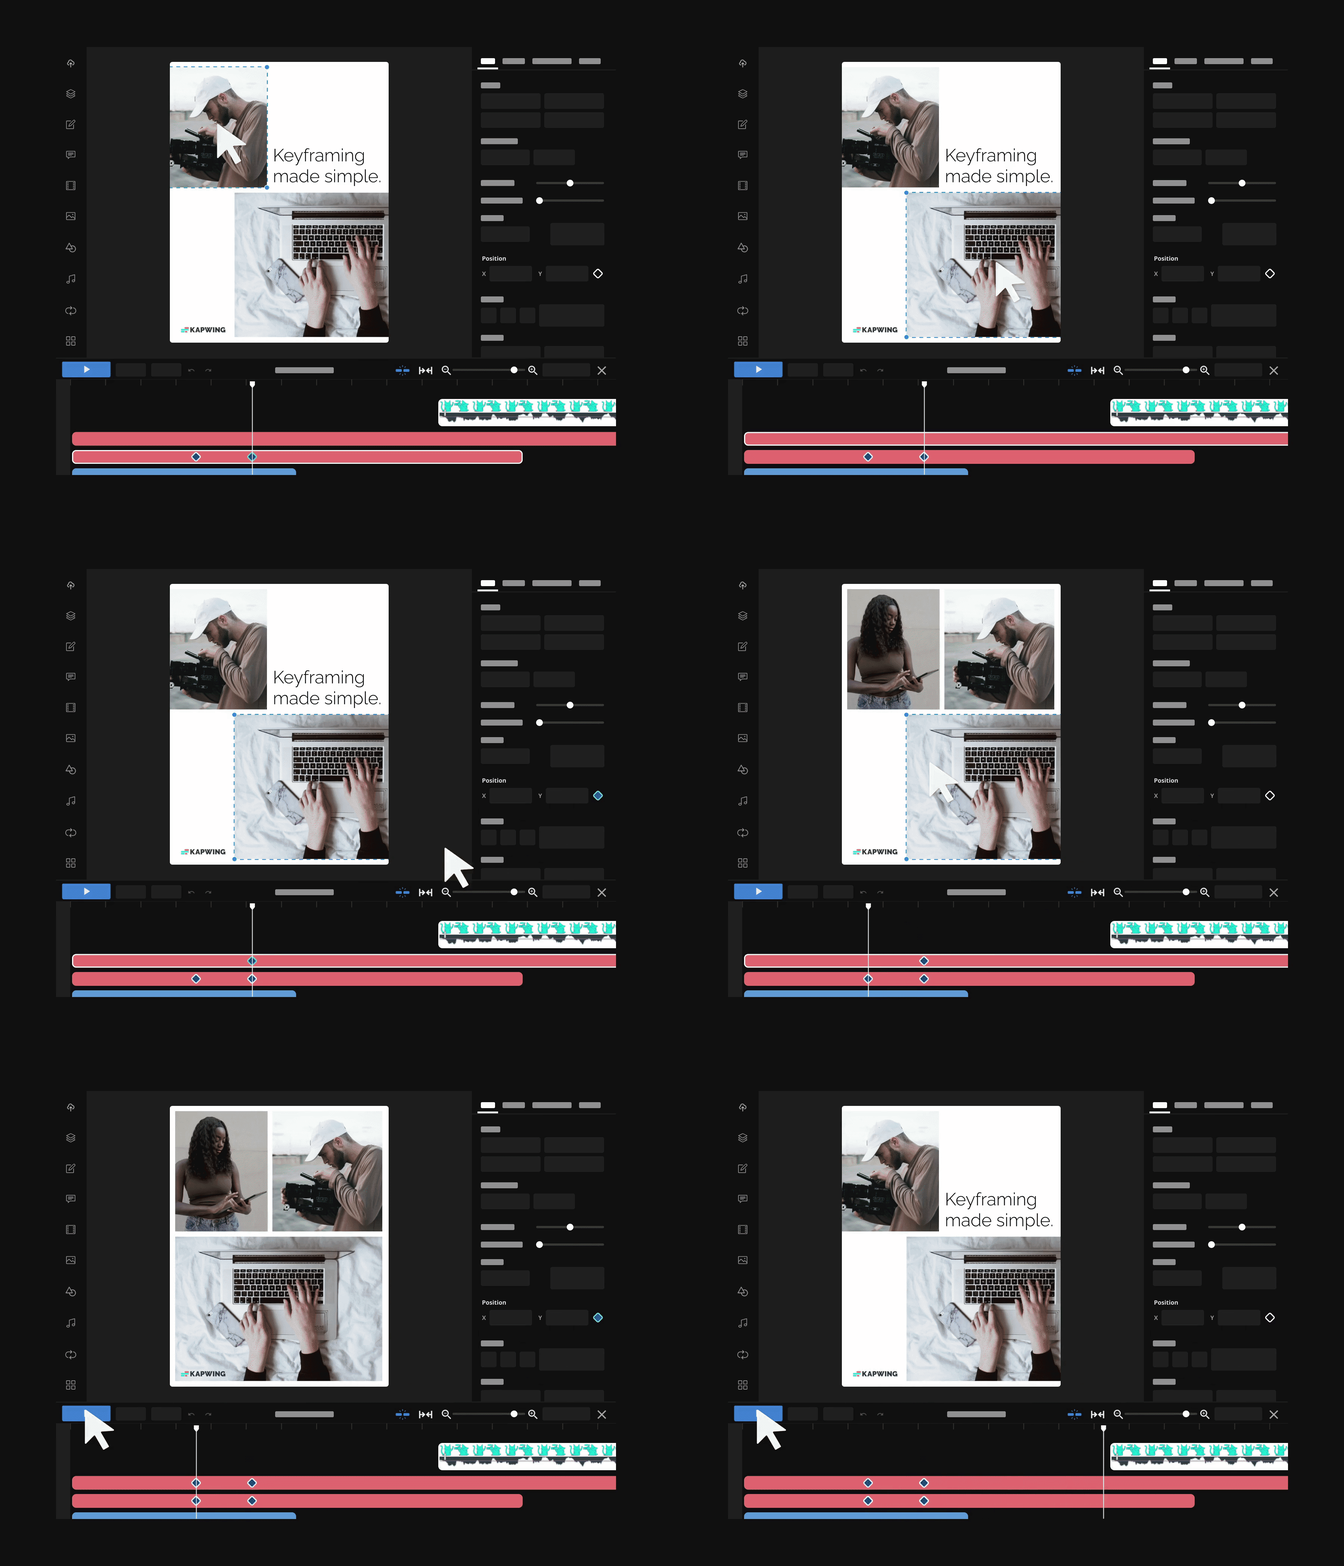
How to add position keyframes:
Position keyframes include editing an asset's location to create an animation.
- Select the layer you want to animate in the timeline.
- Move the seeker along the timeline to the point where you want to start your animation.
- Click on the diamond icon next to "Position" in the right-hand edit sidebar to add a keyframe to that point on the layer.
- Move the seeker along the timeline to the point where you want to continue your animation.
- Click and drag the layer to a new position on the canvas and release to add a keyframe.
- Continue adding keyframes and adjusting the layer position as needed to create the desired animation.
How to add zoom keyframes:
Zoom keyframes are editing an asset's zoom levels to create an animation.
- Select the layer you want to animate in the timeline.
- Move the seeker along the timeline to the point where you want to start your Zoom.
- Click on the diamond icon next to "Zoom" in the right-hand edit sidebar to add a keyframe to that point on the layer.
- Move the seeker along the timeline to the point where you want to continue your animation.
- Click and shrink/zoom the layer to your desired size on the canvas and release to add a keyframe.
- Continue adding keyframes and adjusting the layer position as needed to create the desired animation.
How to add adjustment keyframes:
Adjustment keyframes include editing an asset's opacity, brightness, contrast, saturation, and blur.
- Select the layer you want to adjust in the timeline.
- Move the seeker along the timeline to the point where you want to start your adjustment.
- Click on the diamond icon next to as many of the adjustment options in the right-hand edit sidebar to add a keyframe to that point on the layer.
- Move the seeker along the timeline to the point where you want to continue your animation.
- Repeat step 3 and release to add another keyframe.
- Continue adding keyframes and adjusting the layer position as needed to create the desired animation.
Note: If you want the asset's adjustment(s) to remain the same throughout, select the asset, adjust the opacity, brightness, contrast, etc. as desired, and do not select the diamond keyframe.
Can I add both position & zoom keyframes to one asset?
Yes, to do both keyframe options simultaneously, follow the steps above but ensure you have clicked the diamond for both zoom & position keyframes before moving your asset around the canvas.
Check out our YouTube tutorial on how to add keyframes:
How to view animation:
To view the animation ensure the seeker is before the keyframes and click play above the timeline.
How to delete a keyframe:
To delete a keyframe select the keyframe diamond you no longer want, then click the delete button on your keyboard or the diamond icon next to "Position" in the right-hand edit sidebar.
If you just added that keyframe, you can also simply "undo" the keyframe.
Pro Tip: If you want to delete all the keyframes on a layer, delete the layer from the timeline and re-add it.
If you have any additional questions or feedback about keyframes you'd like to share, please contact us.
Additional Resources:
Getting Started with the Kapwing Studio
How to Request a Feature on Kapwing


