How to use Brand Kit and Brand Templates in Kapwing

Consistency is key when it comes to creating content. In order to raise awareness of your brand or to grow an audience, creators need to be putting out multiple pieces of content consistently. This means finding ways simplify and streamline the creation process.
One way creators can use Kapwing to streamline creation processes is to create a Brand Kit. Kapwing has supported Brand Kits for Pro, Business, and Enterprise workspaces since 2020. Even free users can try it out!
What is a Brand Kit?
A Brand Kit is a collection of assets and stylistic choices that comprises your brand's visual identity.
Brand Kits are a way for creators to build visual consistency across their pieces of content with recognizable color palettes, fonts, and logos. Having this consistency allows viewers to quickly identify your content among the other content they see on social media platforms.
With a Brand Kit collaboration is also made easier, as multiple people can access the same brand assets for different projects without looking for the specific assets each time a new project is created.
What is saved in the Kapwing Brand Kit?
Within a Kapwing Brand kit, team admins can save and edit elements for future use. The saved sections include:
- Brand Templates: Formats or layouts that to use as a starting point
- Colors: Hex codes for easy access in the product
- Custom font uploads
- Text and subtitle styles
- AI Personas and voices
- Brand media: Logos, intros, outros, overlays, or other common elements
- Custom spelling for transcription and pronunciation guide for Text-to-Speech
Where can I find my Brand Kit on Kapwing?
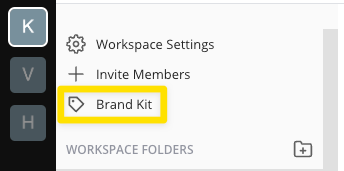
On Kapwing, you can find find and create Brand Kits in the "Brand Kit" tab in the top left corner of your workspace. Since Brand Kits are created in a specific workspace, each workspace has its own Brand Kit.
You can also invite team members or collaborators to your workspace to set up the Brand Kit together and compile all of the assets that each person uses. They can also be invited after you've set up the Brand Kit so that they can use it as well and collaborate within a workspace to create projects.
How do I set up my Brand Kit?
Once you're in the Brand Kit tab, you can find options to specify your brand media (logos), colors, and fonts.
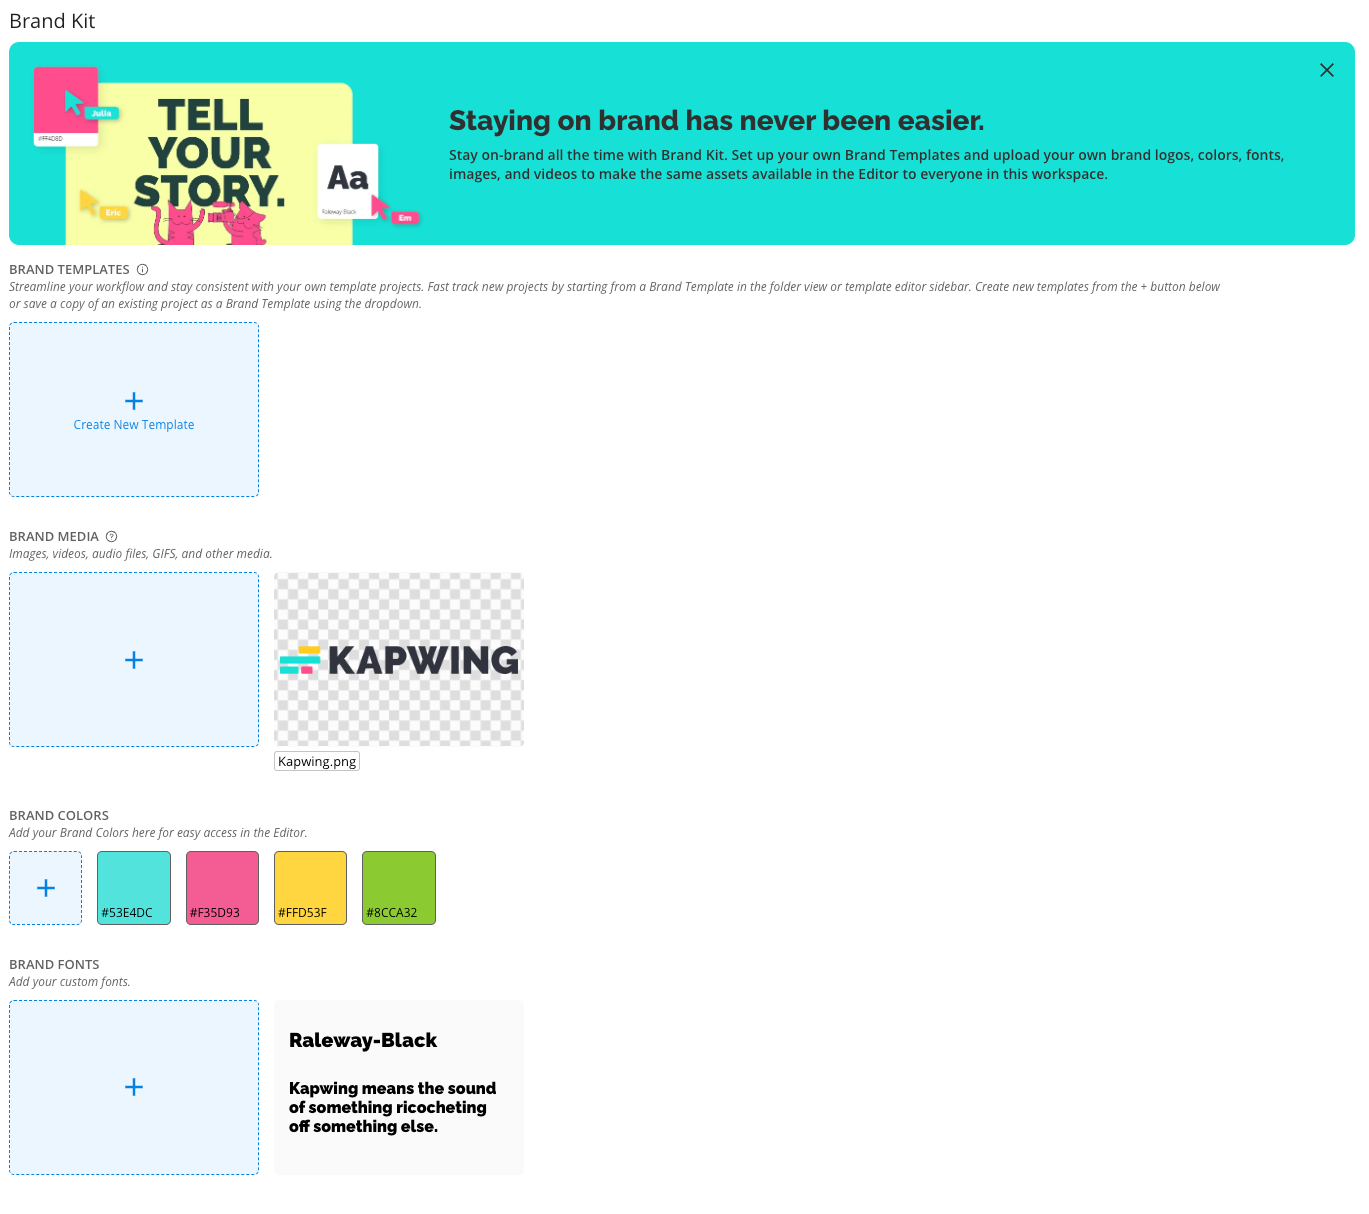
As a default, Kapwing's company logo, colors, and font appear in blank Brand Kits to serve as an example. To make it your own, you can remove our assets and add your own!
Upload any logos, color palettes, or fonts that you have used or want to use consistently in your content.
Does Kapwing Support Custom Font Uploads?
Yes! When you're a Pro or Business customer, all Font uploads are saved in your Brand Kit. Add a new font by uploading a .ttf or .otf file. Delete a font by hovering over the font in brand kit and using the "x" button.
How do I use my Brand Kit assets, colors, and fonts?
Once you've set up your Brand Kit, you can use it in multiple ways.
When you enter the editor, you should see that:
- The color palette you chose populates in the right side bar:
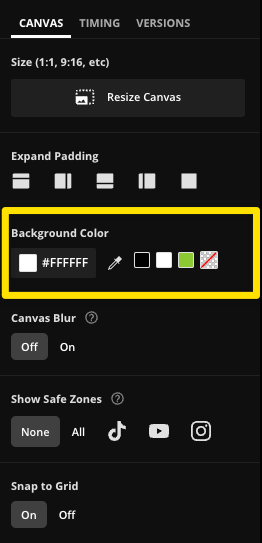
2. When you add text, the font selected in your Brand Kit will be the default font. If you have multiple fonts in your Brand Kit, you can also see them in the font dropdown under the "Brand Font" section

3. For your logos, you can find them in the media tab on the left side bar, under the "my media" tab:
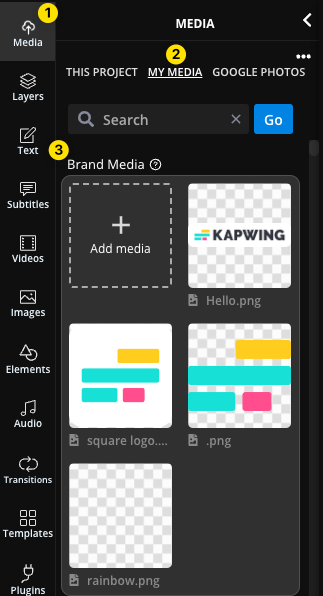
You can utilize the different brand assets in the above areas, or you can make content creation even simpler by creating a Brand Template.
Having a Brand Template allows you to truly streamline your content creation process. Whenever you need to create a new piece of content, you can use Brand Templates to create canvases that look similar every time. All you have to do is add your content to the template and you're done!
How do I set up Brand Templates on Kapwing?
Create a Brand Template from Brand Kit
At the very top of your Brand Kit, is a section to create a Brand Template, which combines all aspects of your Brand Kit into a Template. This allows you to streamline your editing by having a ready-made skeleton to upload your media into.
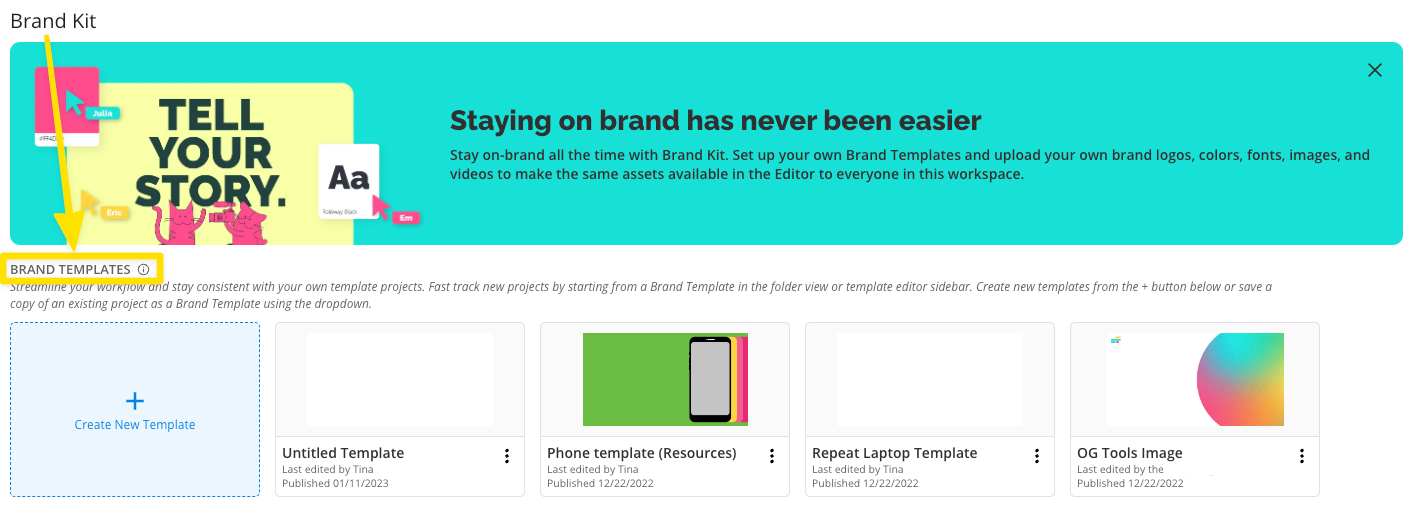
If you click "Create New Template," a new template project will be created. You do not need to save it. If you close your project, the latest version will be saved as a brand template in your account. Give the Brand Template a name that your team will be able to identify easily.
Create a Brand Template from an Existing Project
Another quick way to set up a Brand Template is by starting with a pre-made templates on Kapwing from our Template Library.
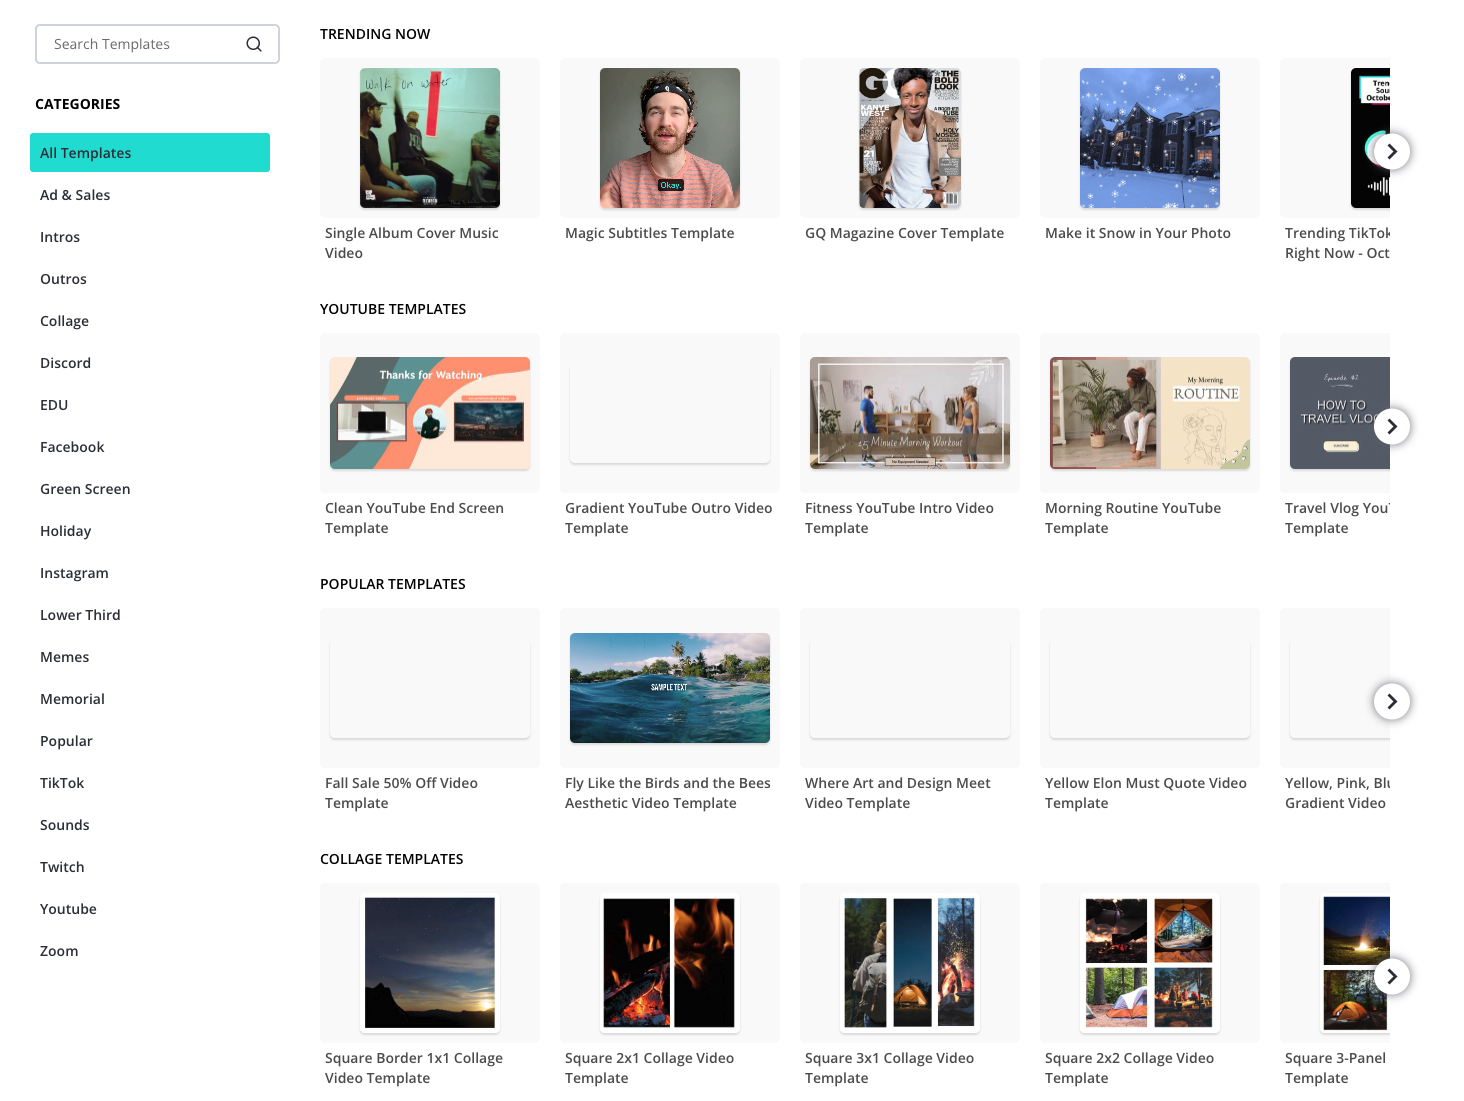
After you select the template that you want to modify, open the template in the editor. From there, you can use the Brand Kit that you built to modify the template to fit your brand:
- changing the background, text, and element layer colors
- changing the font
- adding a logo
You can also add a placeholder so that it's easier for you to upload a new image or video layer into your template.
After you're done editing your template, rename the project so that it's easier to identify in your workspace. Navigate back to your workspace, and find your project, click the three dots next to the project name to open the drop down menu and select the "Save as Brand Template" option:
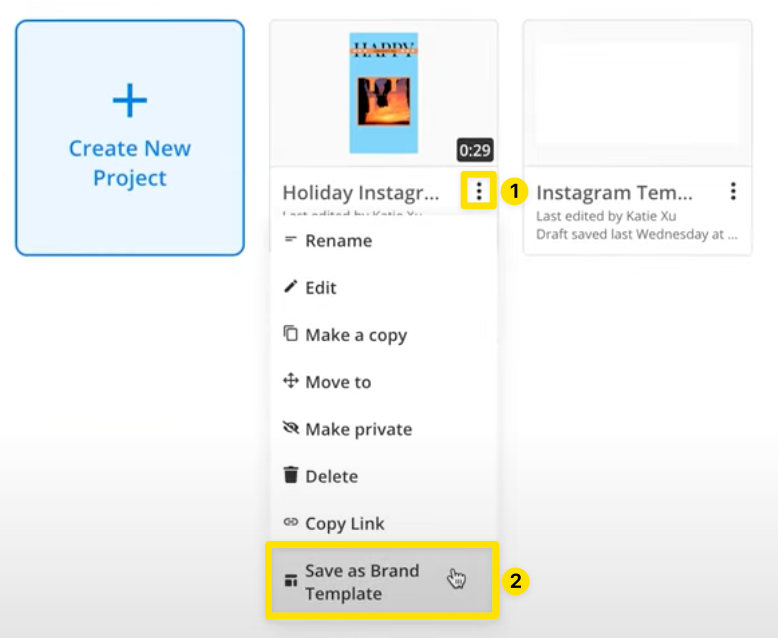
Alternatively, you can create a Brand Template from scratch by going to Kapwing's Video Editor, and selecting the ratio for the content you'd like to create under the "start with a blank canvas" section.
Starting with a blank canvas allows for more customization as you can choose any ratio you'd like and create the Template completely from scratch to fit your needs. After you open a new blank project, you can use your Brand Kit again to create your template for future content.
Can I have multiple Brand Kits in one Workspace?
Not at this time. As of 2025, Workspaces on Kapwing only support one Brand Kit. Enterprises or Freelancers can set up multiple different Workspaces for brand if they prefer, although each of these are billed separately.
How do I make new projects from my Brand Templates?
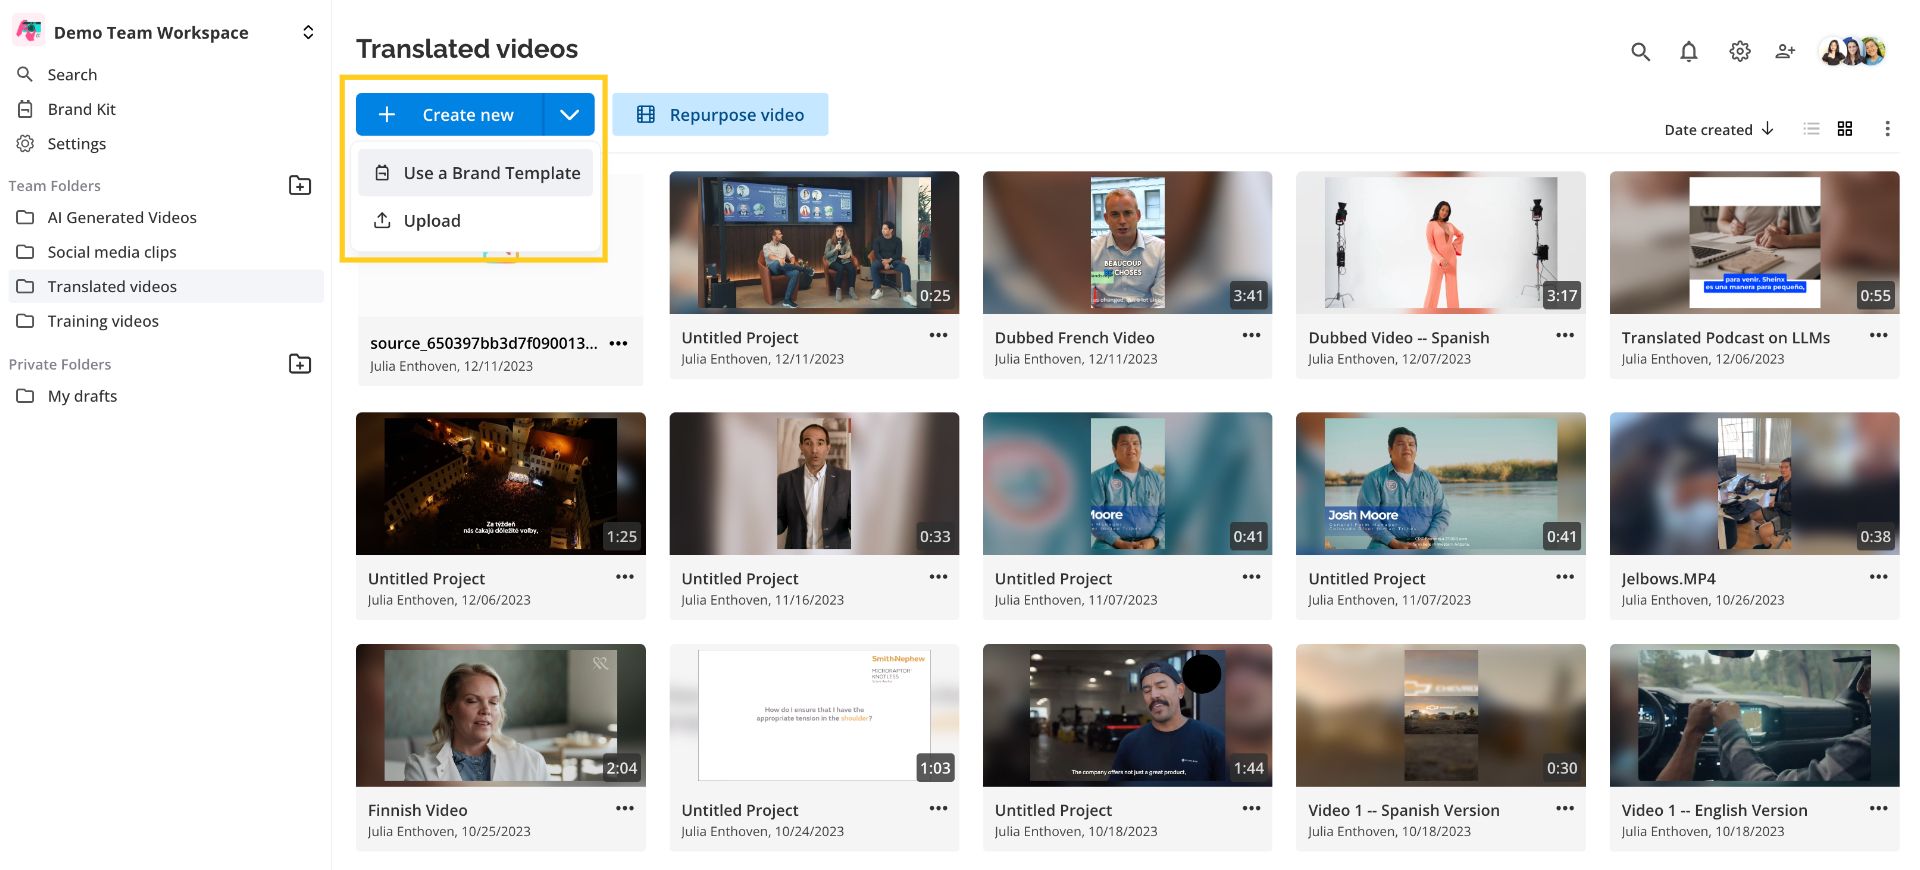
Head to one of your folders in the workspace and click the dropdown arrow next to the "Create new" button. Then click "Use a Brand Template".
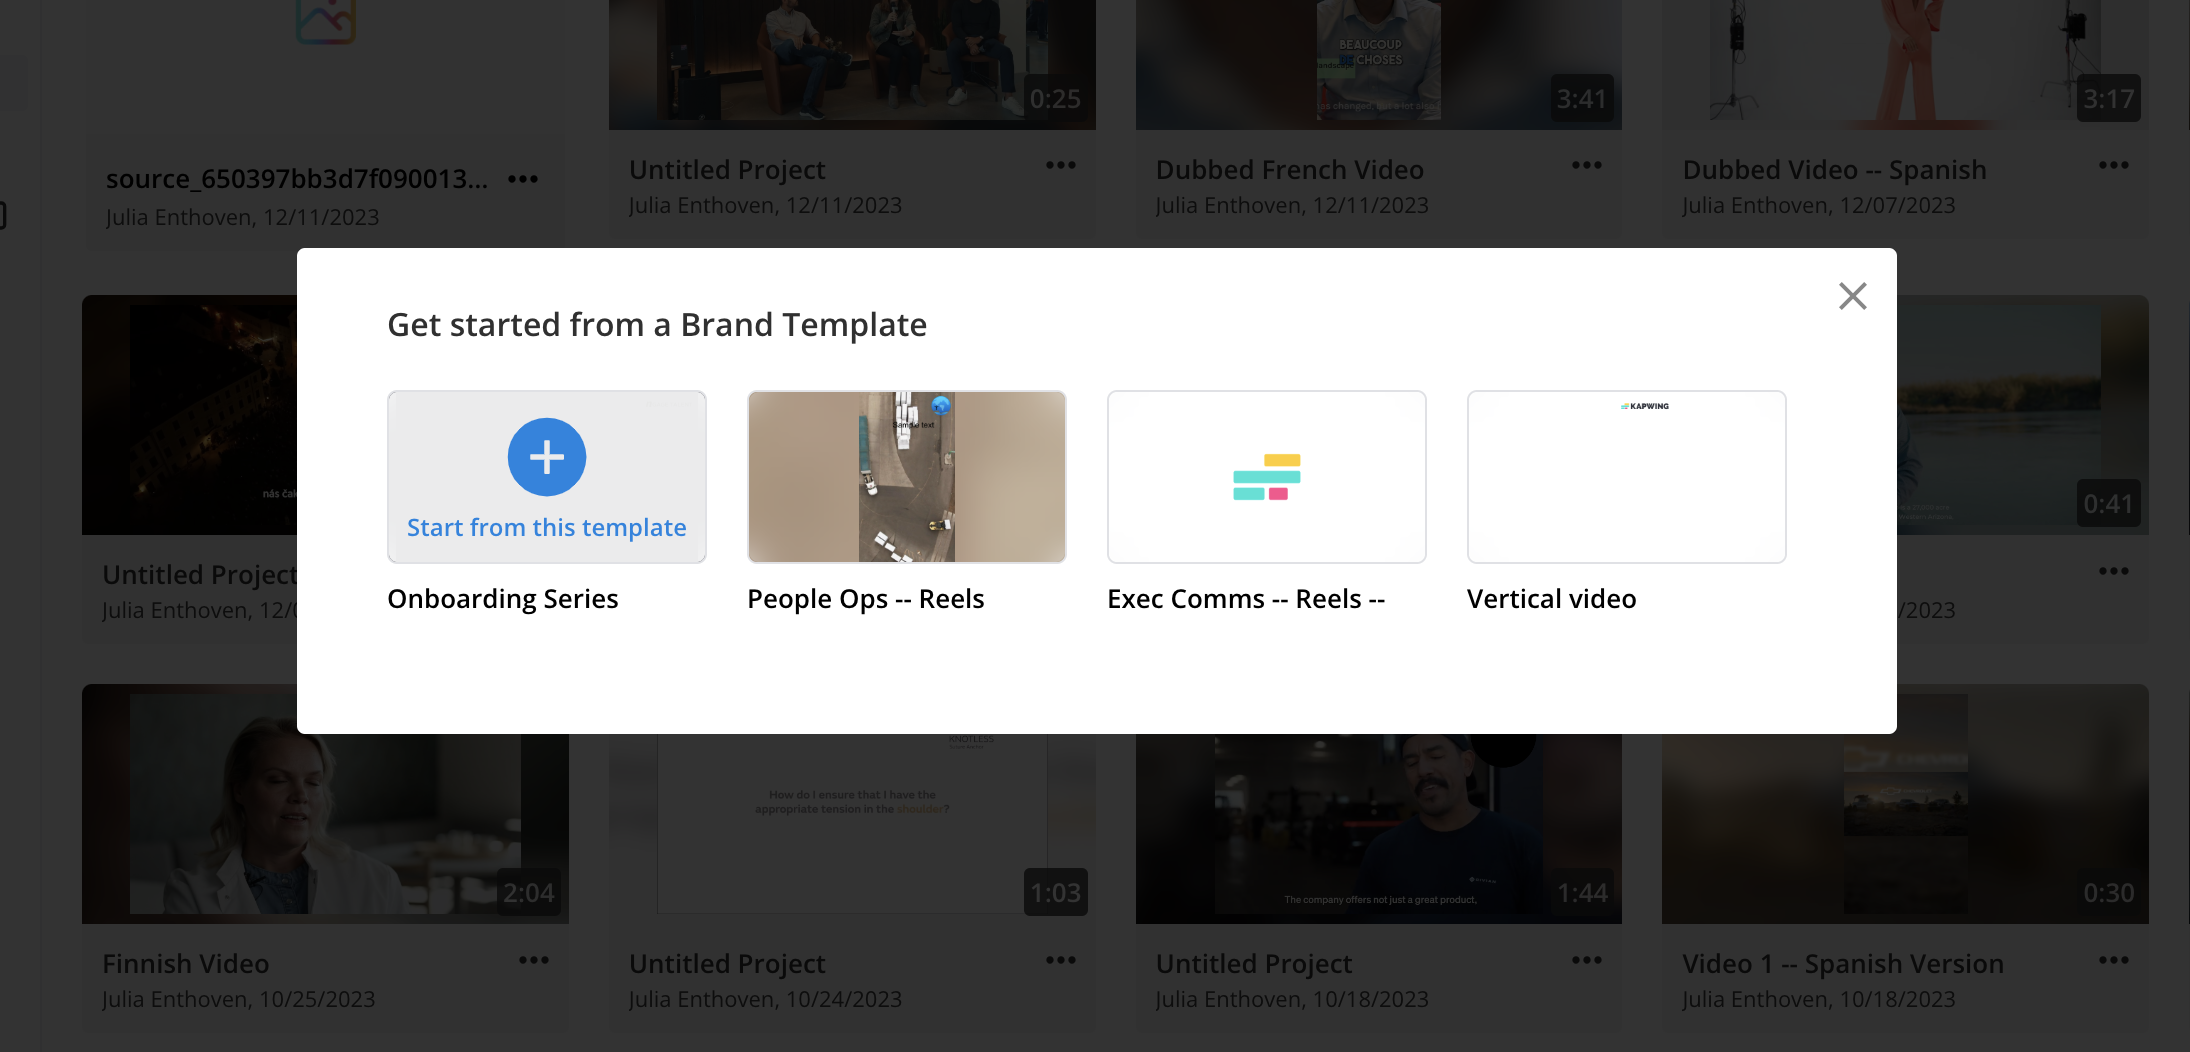
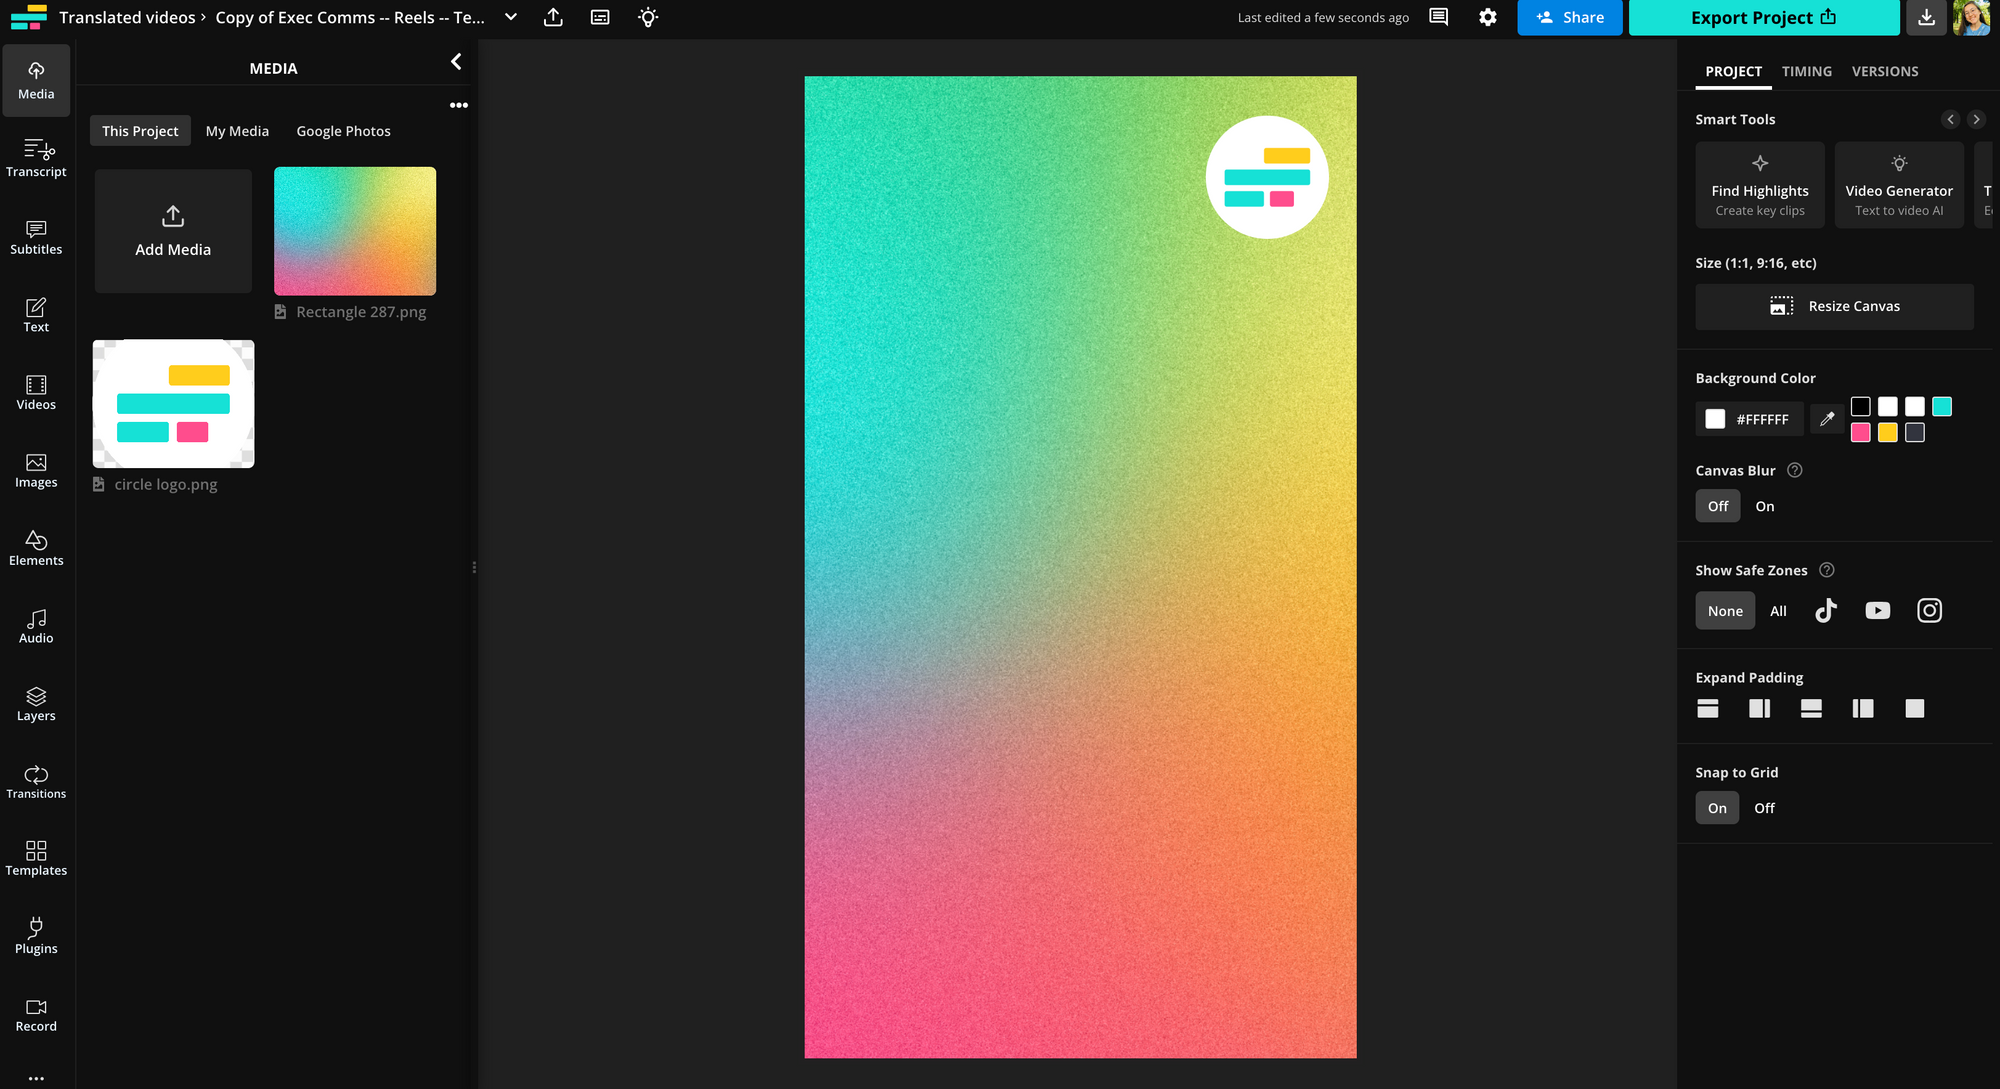
Select the template you want to use and you'll be dropped into the editor with the layers of that template already in the project.
From here, customize the elements of your project by uploading media, adding images, text, elements, or any additional edits, and then export it to finish.
Many of Kapwing's Enterprise teams use brand kit to maintain visual consistency across multiple creators.
How to Set up Custom Text Styles and Subtitle Styles
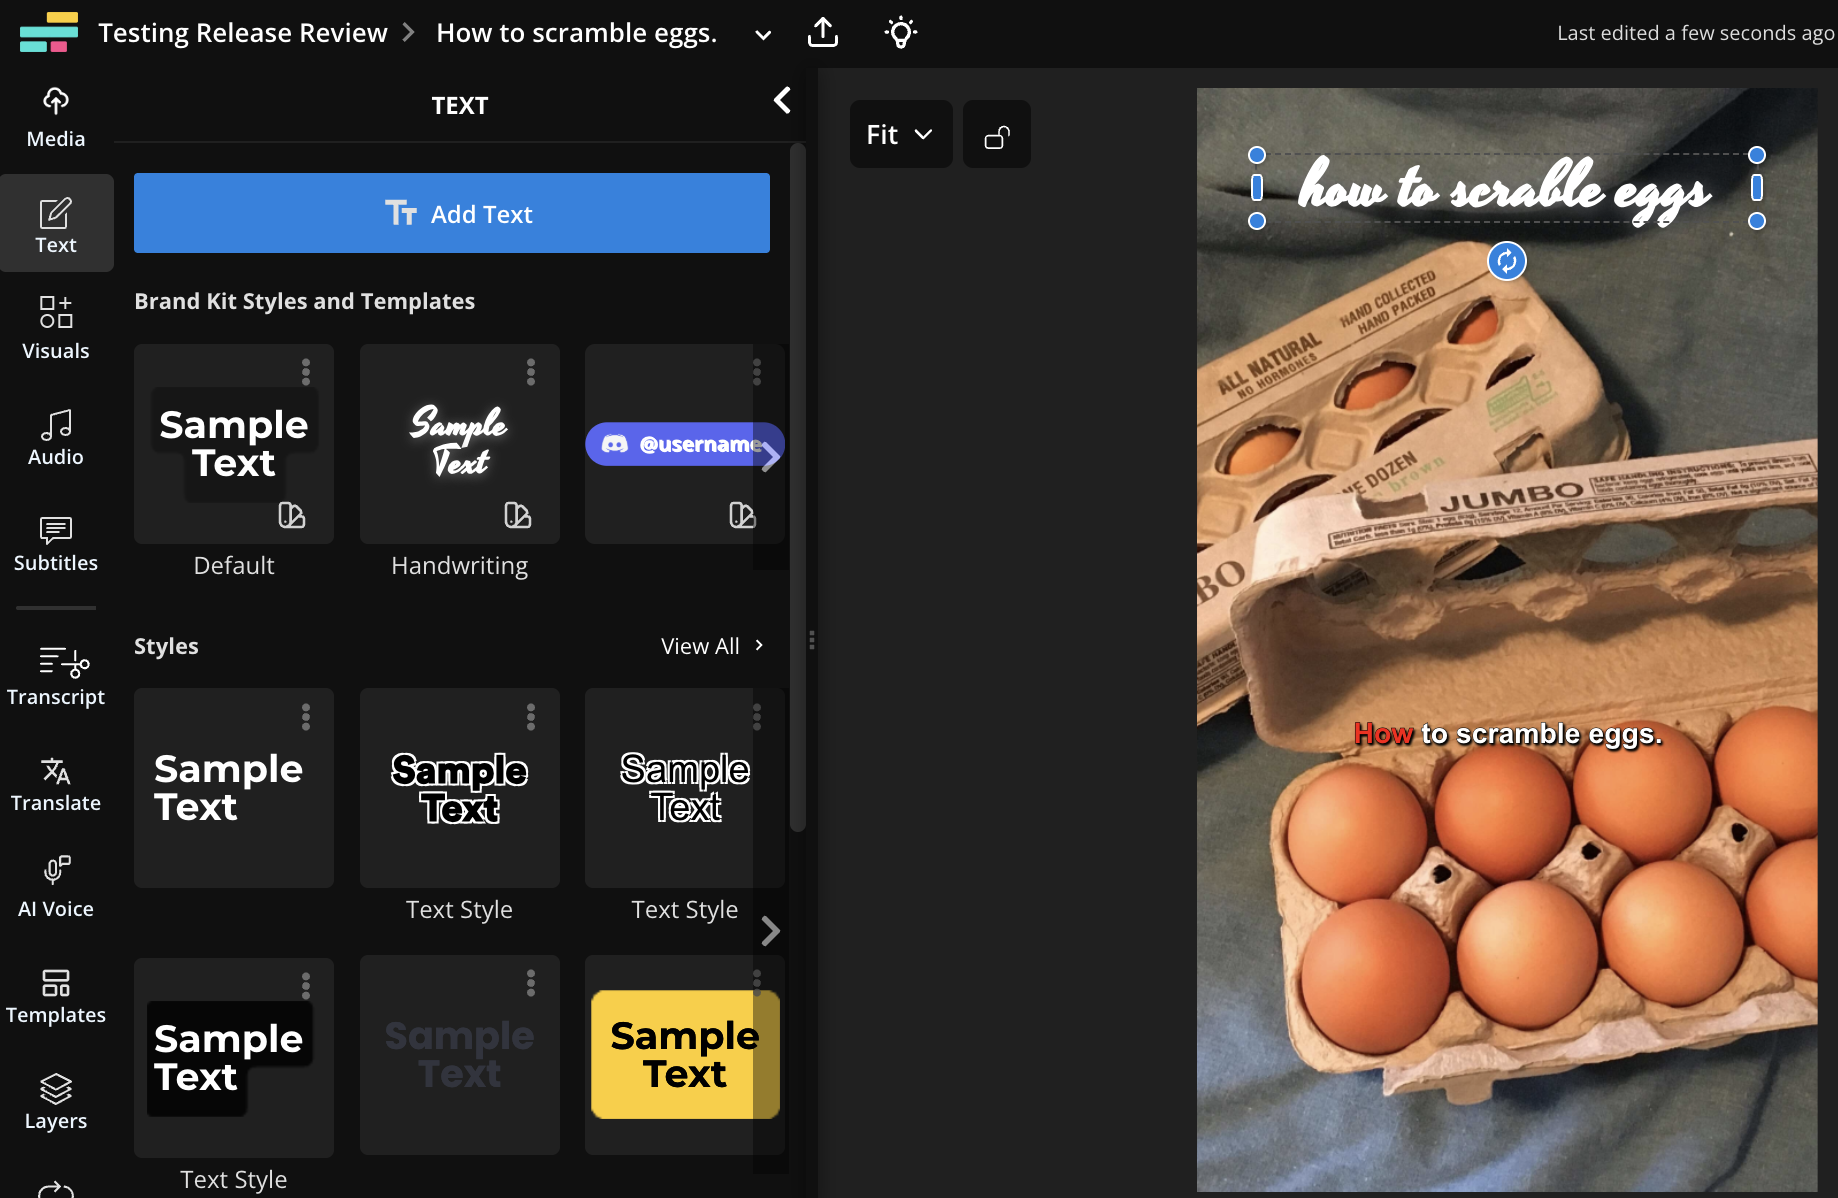
Kapwing offers dozens of font style options: background, color, font, size, line height, drop shadow, and more. For consistency across font layers, save a layer or group of layers as a "Text Style" that you can reuse in future project. Text Styles can be renamed from the "Text" menu on the left-side menu.
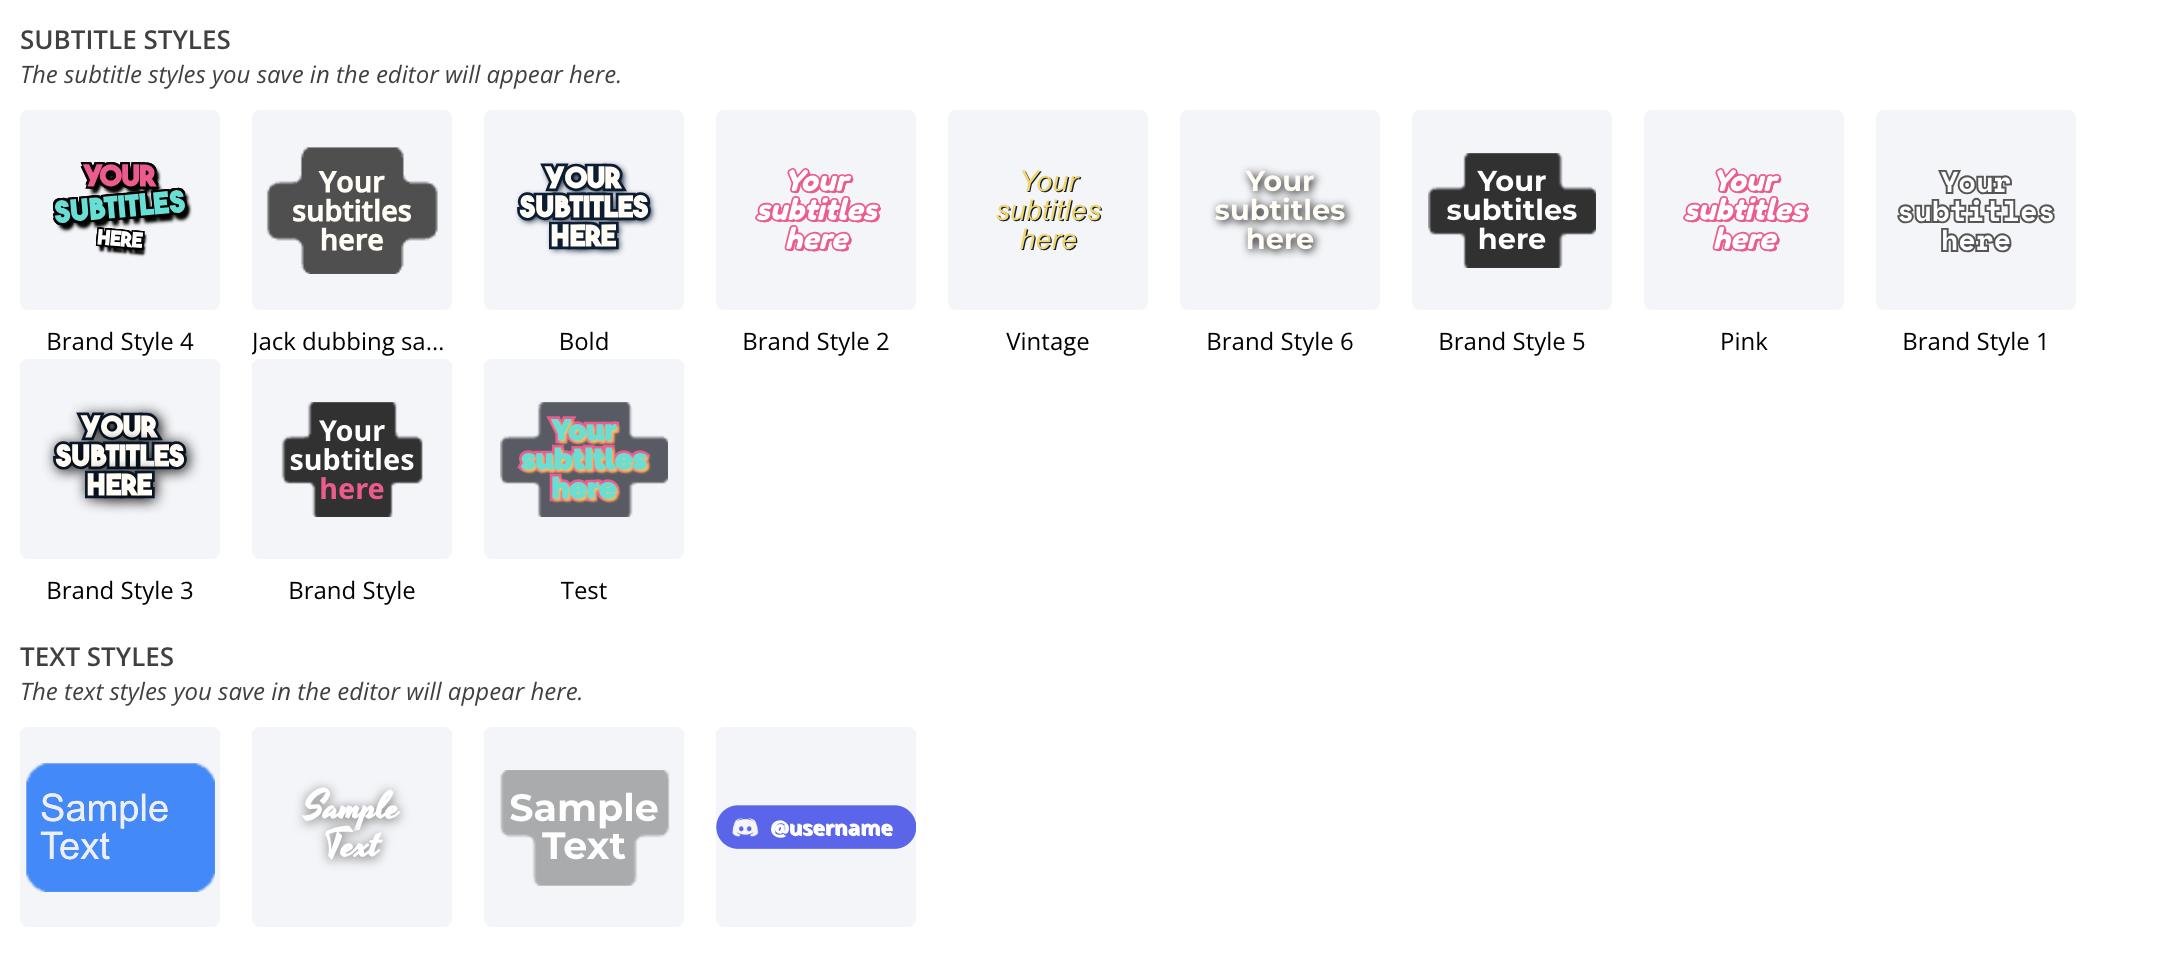
Caption font options can also be saved in your Brand Kit. Define the animations, outline, size, alignment, and more, then use the "..." menu to save the Caption style to brand kit. This helps brands have visually-consistent subtitle styling across videos. Subtitle Styles can be renamed in brand kit.
How to Use Brand Glossary
Brand Glossary allows users to enhance their subtitling, translation, and dubbing process. This tool allows you to customize how certain words or phrases are translated in your subtitles to ensure accuracy and consistency in your multilingual content. The Brand Glossary is made up of both "Custom Spelling" and "Translation Rules".
You can access the Brand Glossary through the Brand Kit or subtitle settings within Kapwing's Studio.
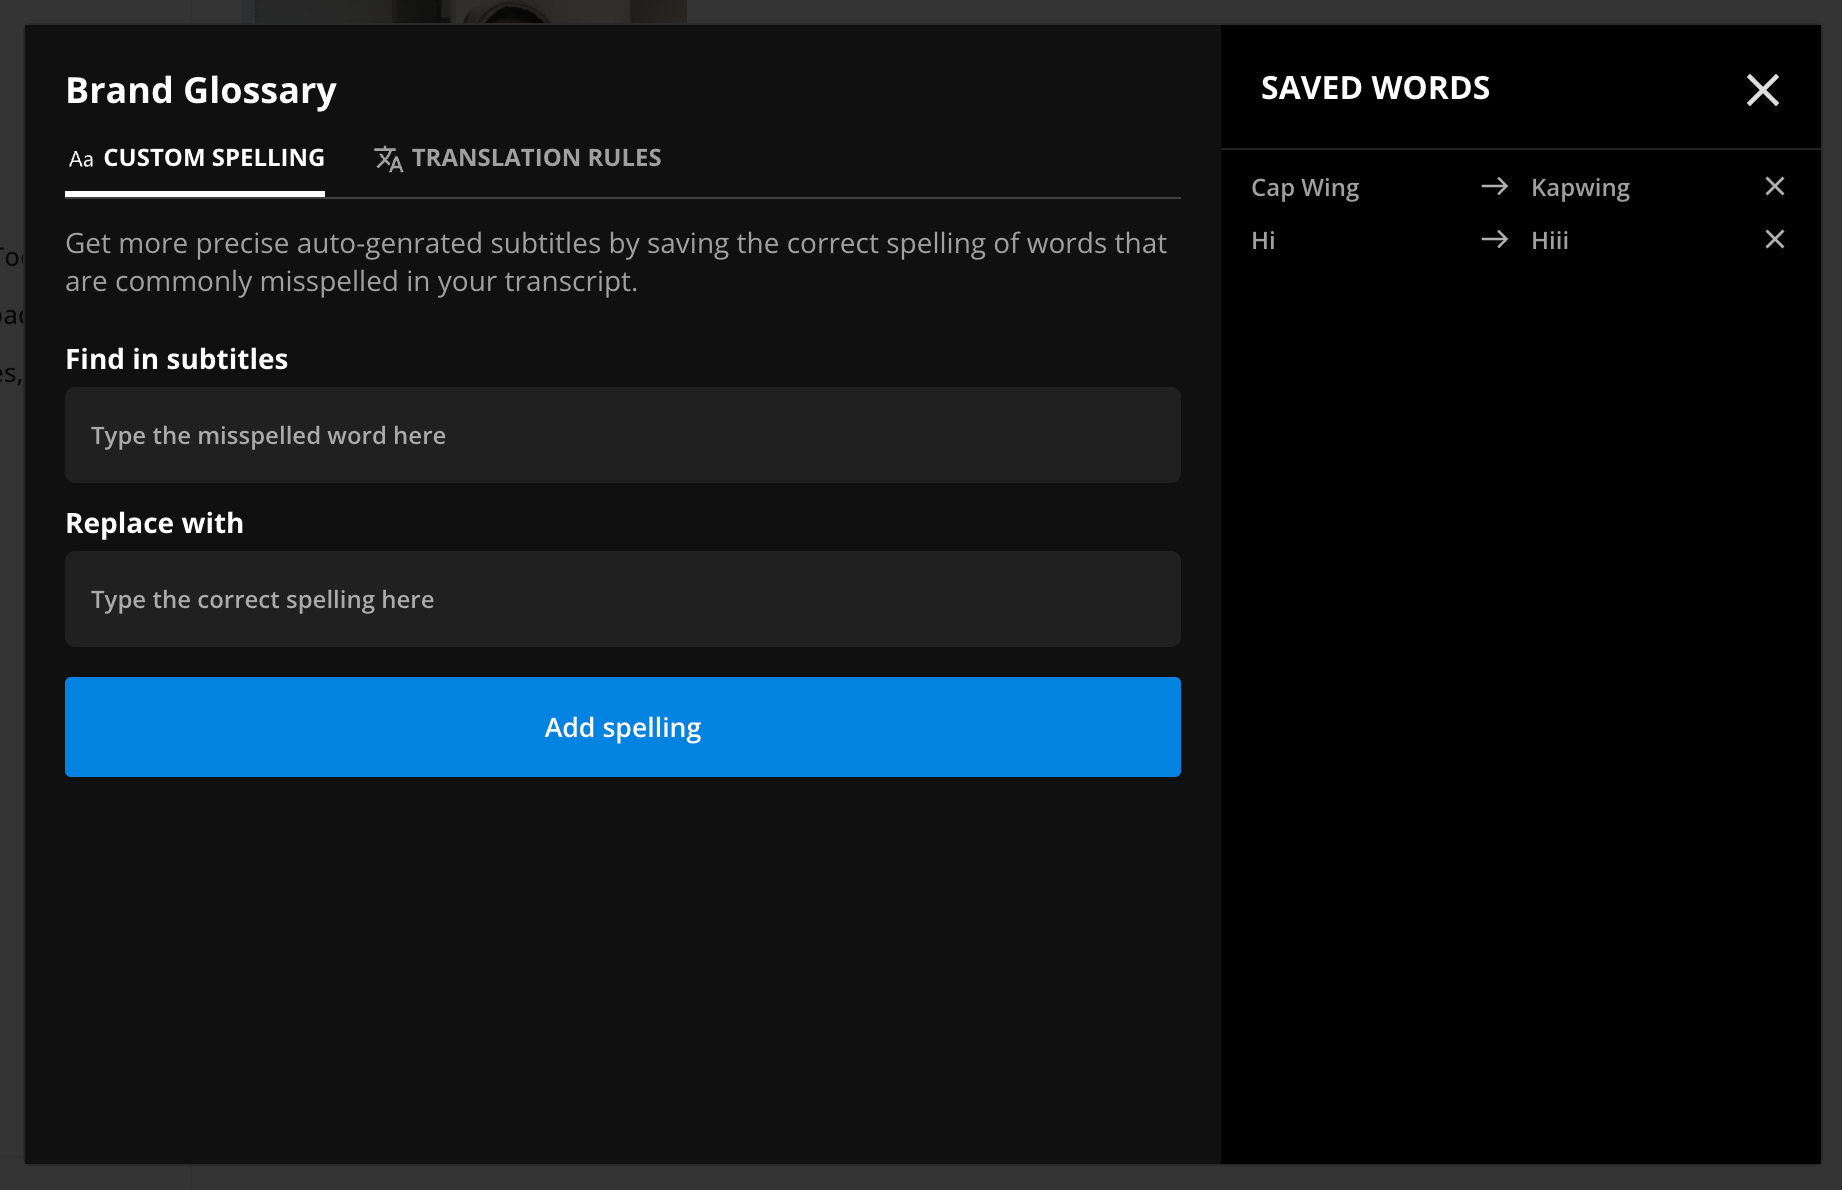
For "Custom Spelling" you can input a commonly-misspelled word and automatically replace it with the desired spelling so every video you subtitle will automatically use your spelling. These pairings are saved and automatically updated in every new transcription and SRT file. You can review and delete saved pairs in the Custom Spelling section of brand kit or in the subtitles panel under the Dictionary icon.
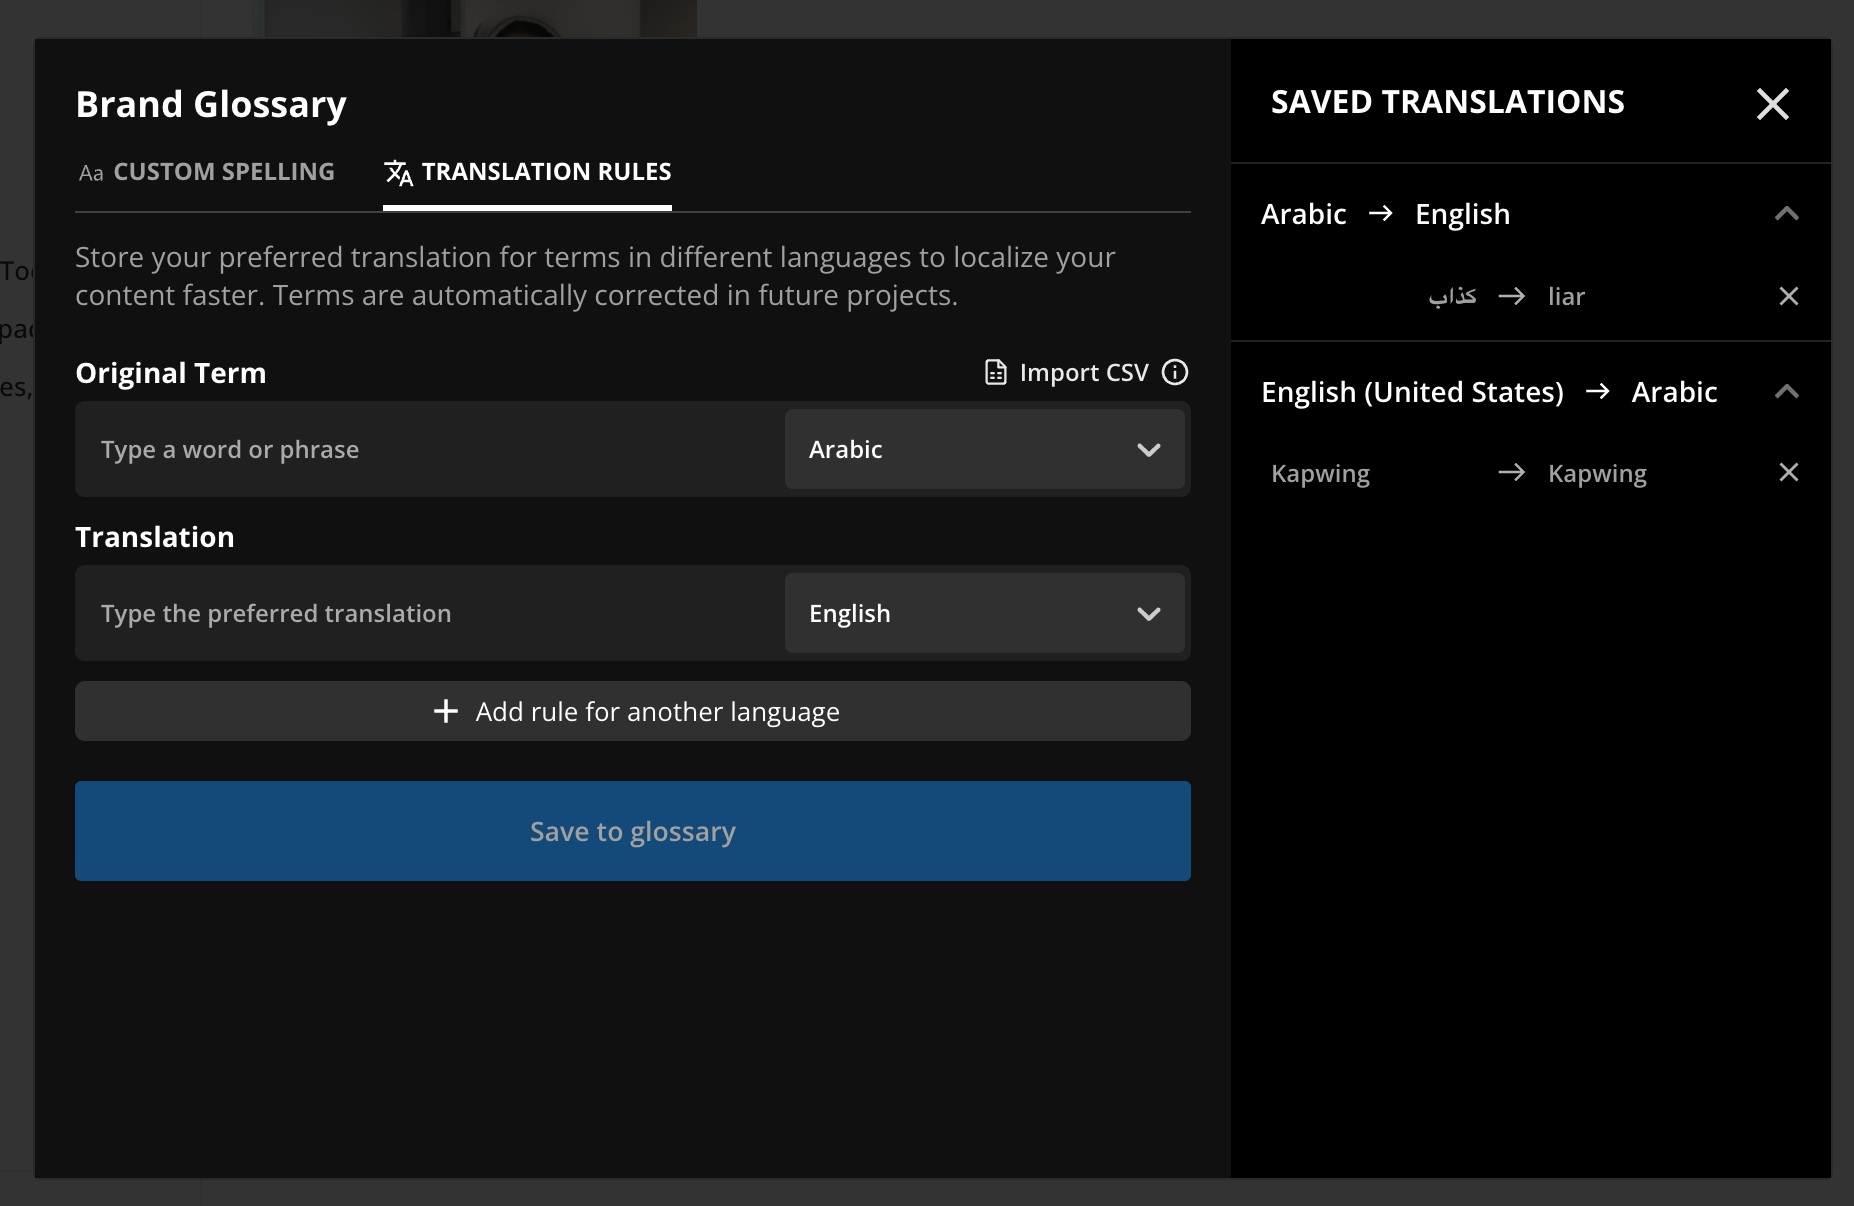
For "Translation Rules", similar to "Custom Spelling", you can select commonly-mistranslated words and automatically set them to the right or intended translation. You can also set "no-translate" words to keep brand names or specific terminology in their original language.
Can I lock layers in a brand template so that others cannot edit or change them?
Yes. Any layer in Kapwing can be locked so that it cannot be accidentally selected while editing. A layer lock in a brand template can ensure brand consistency with the same elements positioned in the same position on every export.
While setting up the brand template, select the layer on the canvas. To make that element uneditable, use the "Lock" button under the layer controls to freeze it in place. When others use that brand template to make a project, they won't be able to select or edit the locked element unless they open the "Layers" tab, select it there, and unlock it.
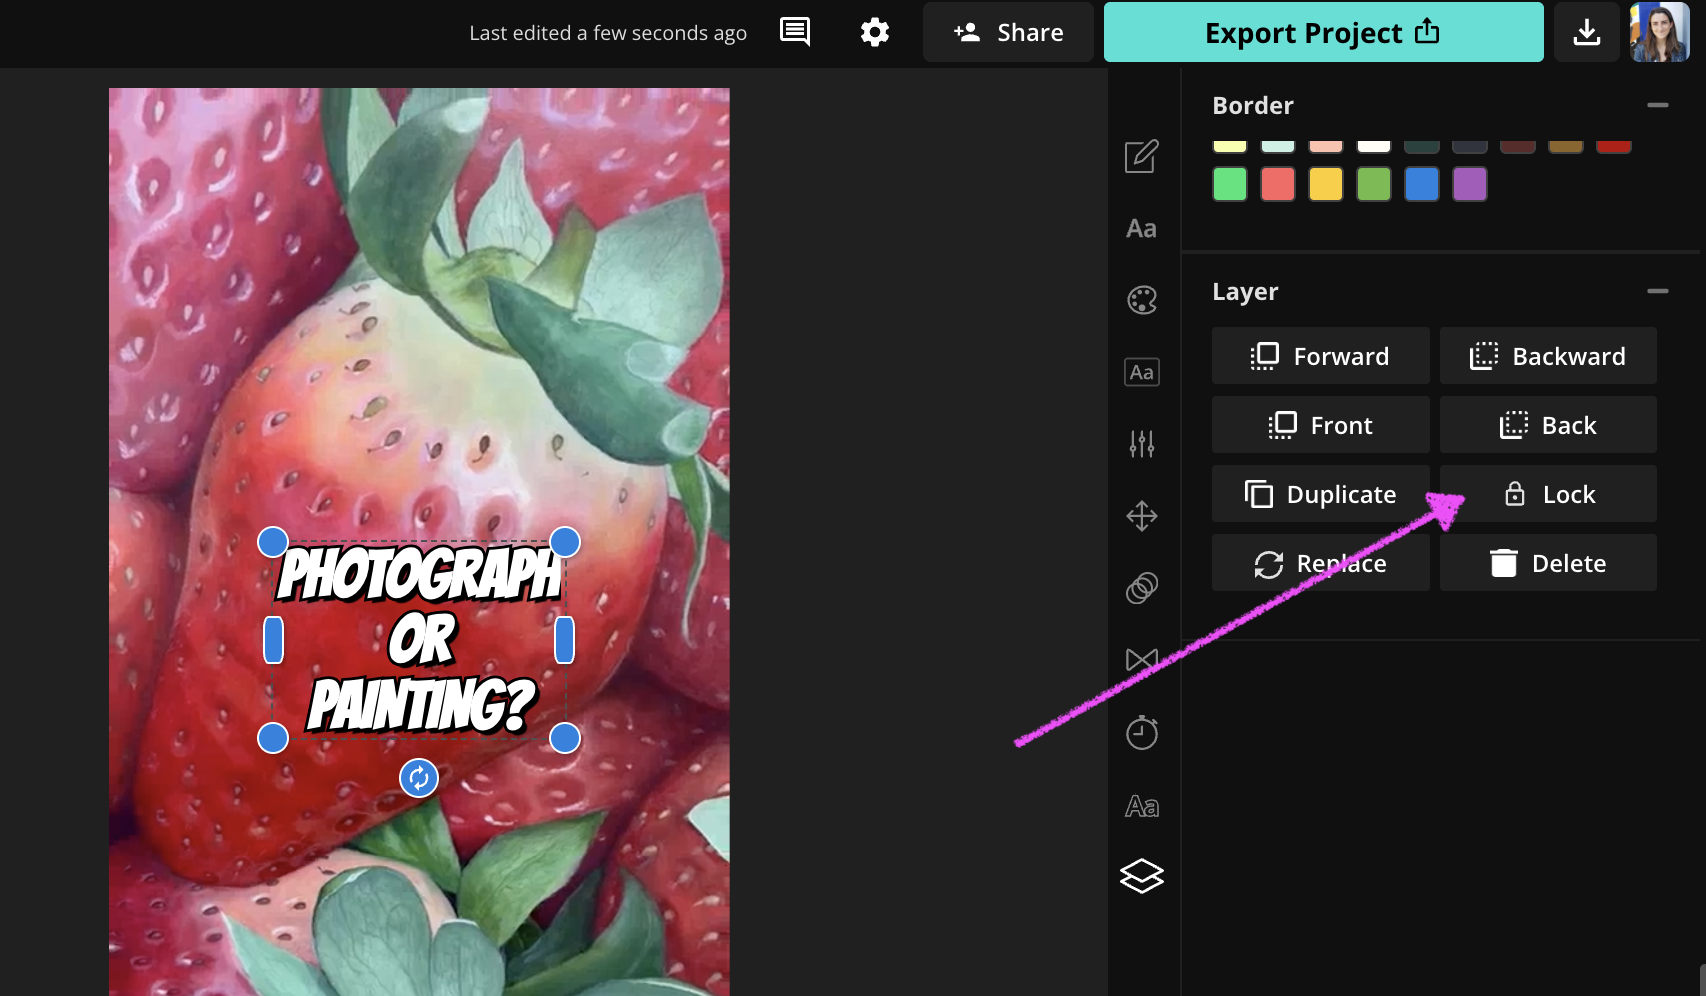
Design teams leverage this Lock action to preserve the integrity of their brand while scaling to more editors.
Additional resources:
