How to Add Lens Flare Effect to Photo or Video Online
Lens flare create a dramatic effect that can make your content more interesting and improve the production value if done right. In this tutorial, I’ll show you how to add a lens flare effect yourself using an online tool called Kapwing. If you're a design novice, this guide is for you.

When you take a photo or video with a light source in the background, the light flares out and reflects in your camera lens. This creates a dramatic effect that can make your content more interesting and improve the production value if done right. However, adding a lens flare is challenging without the expertise of a professional designer or the right tools to get the job done.
In this tutorial, I’ll show you how to add a lens flare effect using an online tool called Kapwing. With this tool, you can add the perfect lens flare to your photo or video and customize the look for free. This guide is made for beginners who just want to get the job done with simple instructions. If that sounds like you, follow the steps below and get started.
- Upload your content
- Add the perfect lens flare effect
- Adjust the look
- Download and share
1. Upload your content
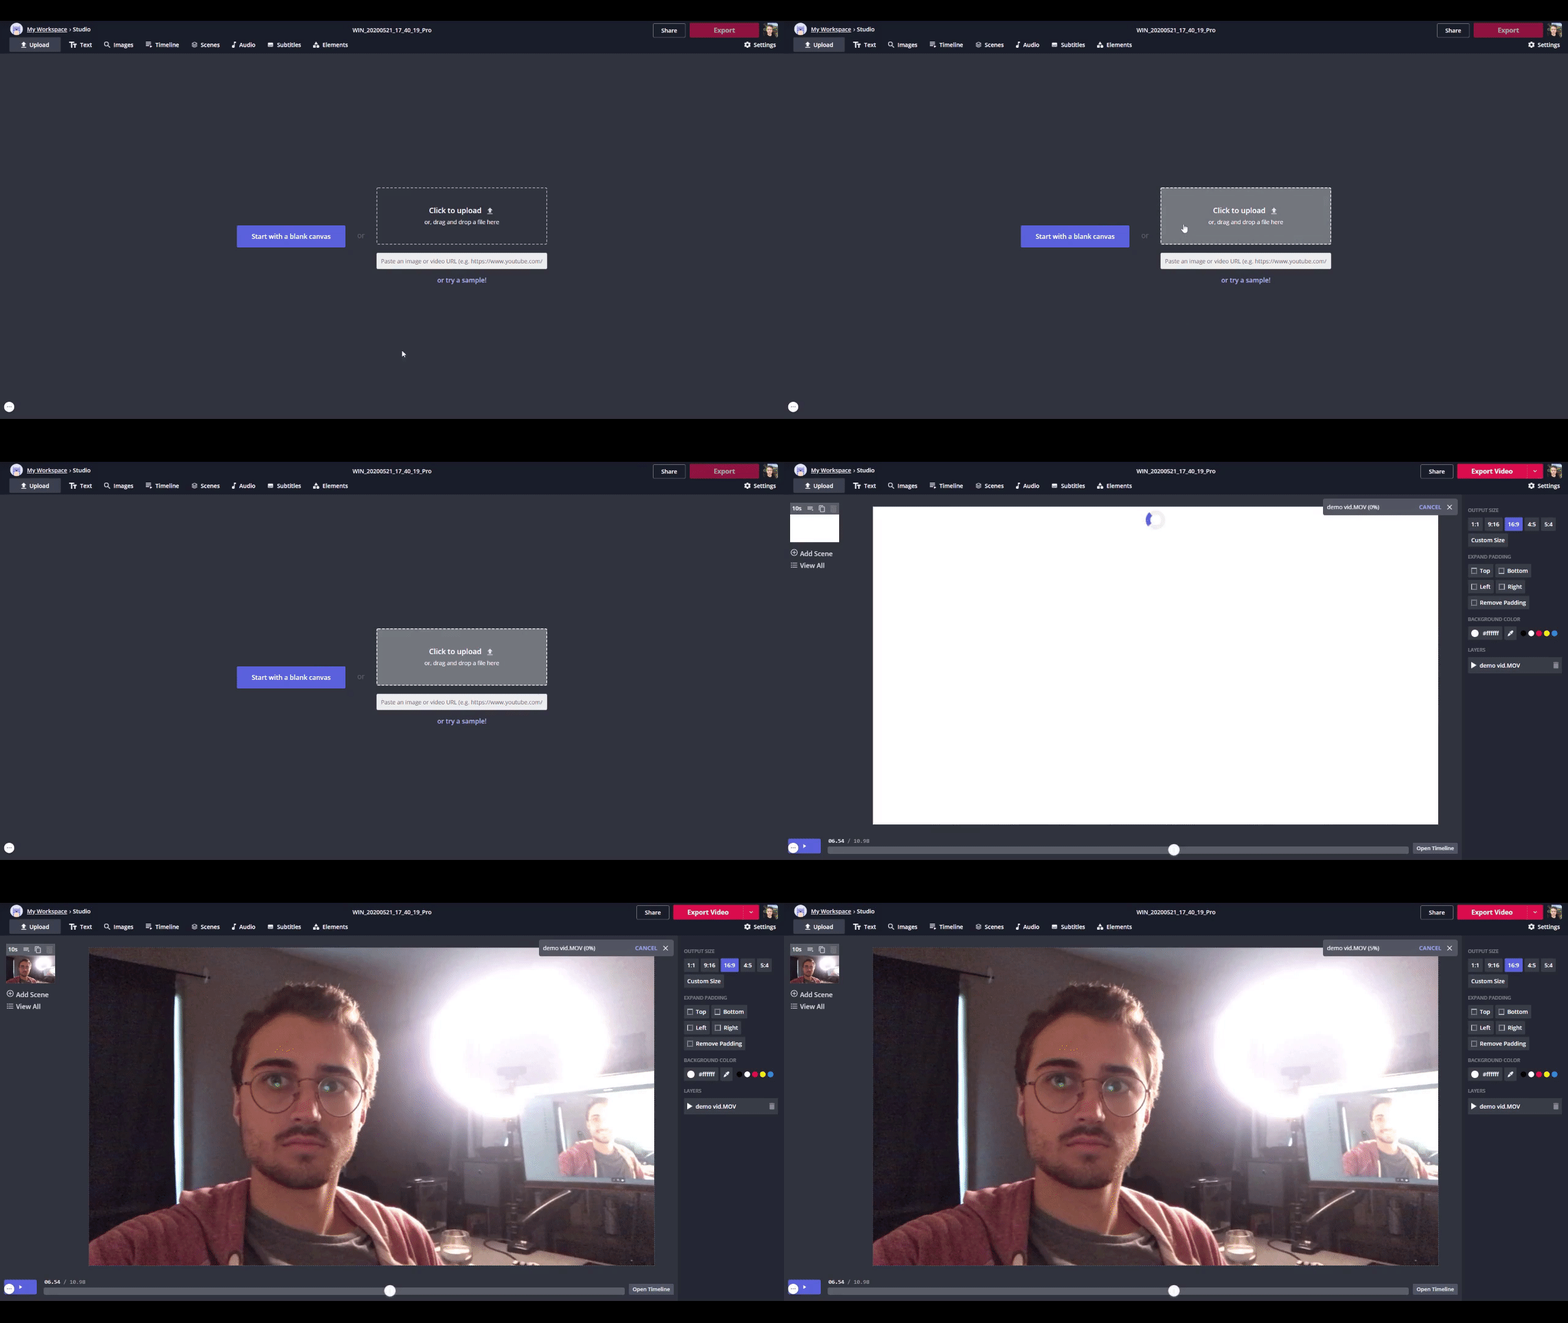
First, open the Kapwing Studio and click to upload your photo or video. If your content isn’t formatted correctly, use the tools from the ‘Edit’ menu on the right (I used rotate in the example below).
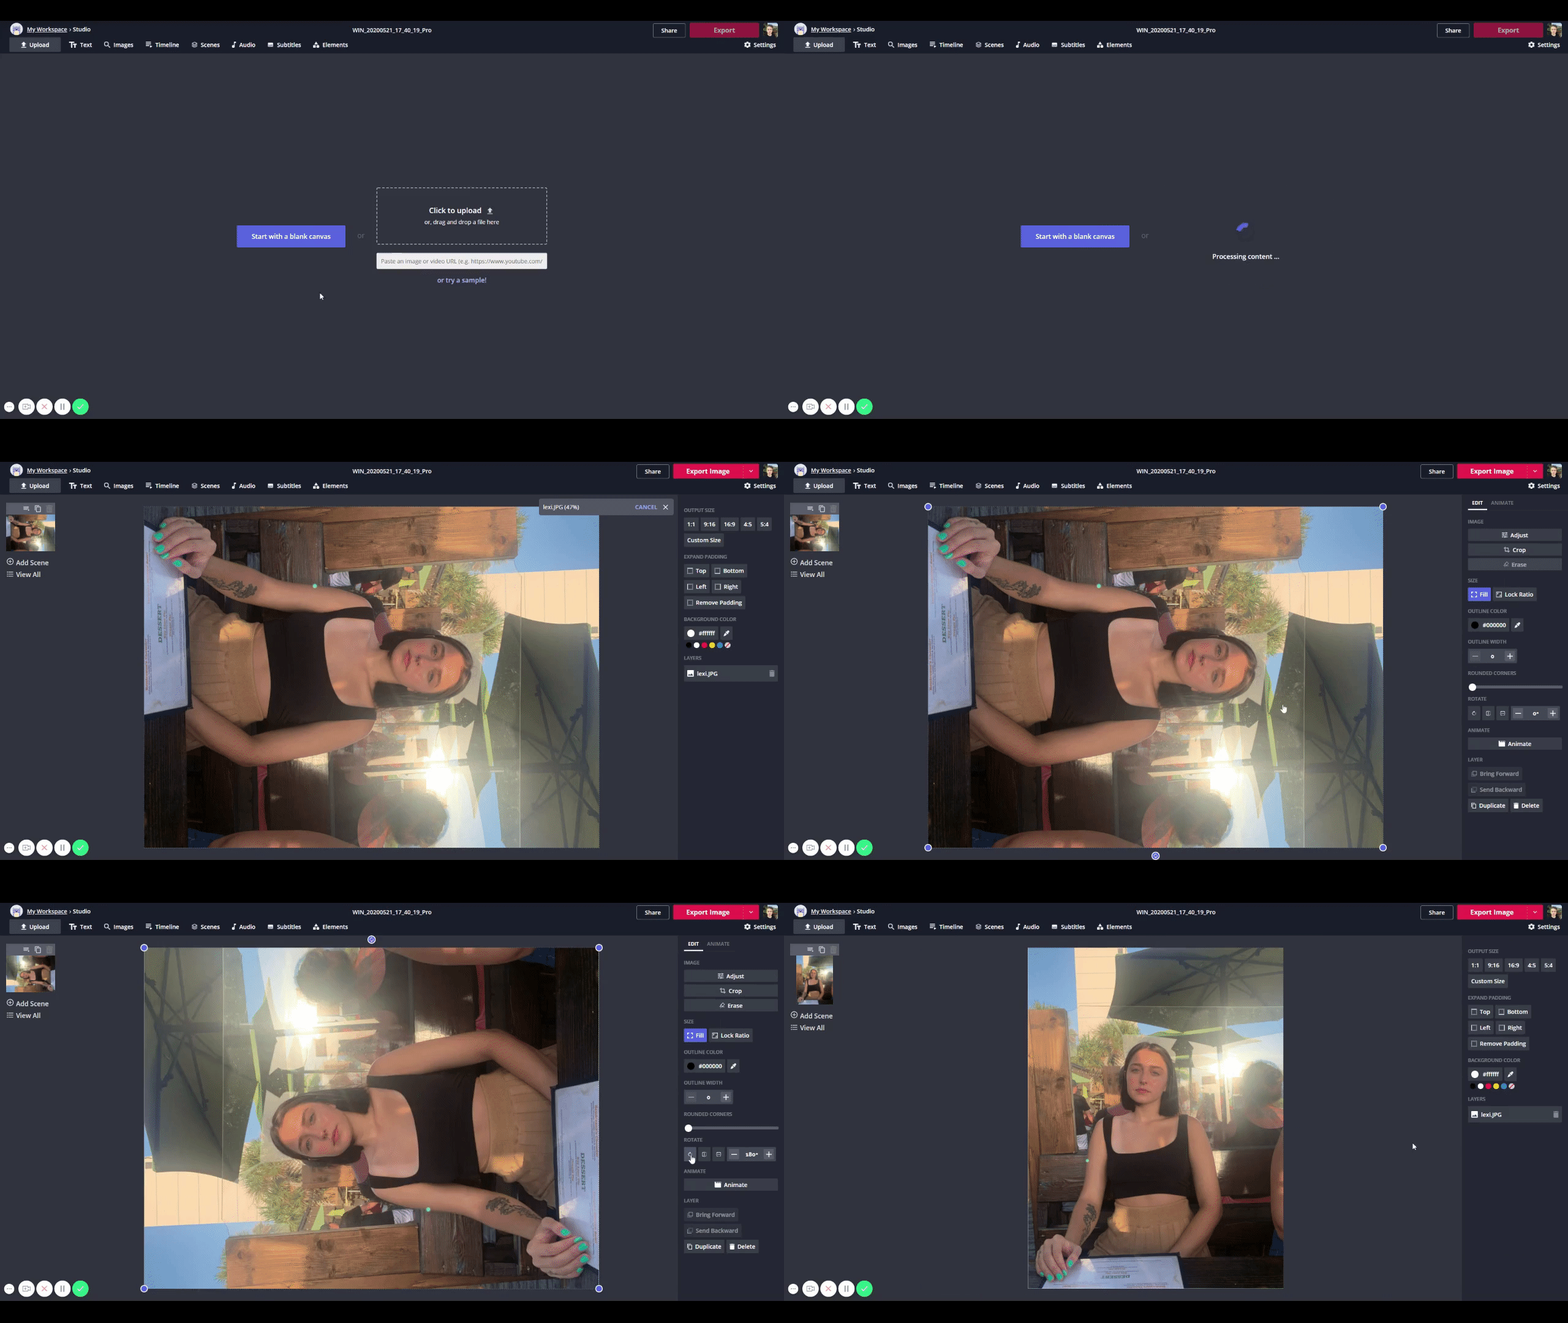
If you’re uploading a video, only use video where the source of light does not move and the camera stays fixed most of the time. Since this is a basic lesson, we won’t cover how to make the lens flare move along with the camera or light source.
2. Add the perfect lens flare effect
Now it’s time to pick out your lens flare effect online. The first option is to click ‘Images’ from the top and do an image search for ‘lens flare png’ directly within Kapwing. You may find a few effects that suit your photo or video. Otherwise, visit Free Icons PNG to search for a transparent lens flare effect. All the images are free to download so find the perfect one and move to the next step.
With your new lens flare, click ‘Upload’ in the top left corner and add your effect. Drag the effect over the source of light and resize the image to fit. Now, this overlay will appear as an overlay on your image or video.
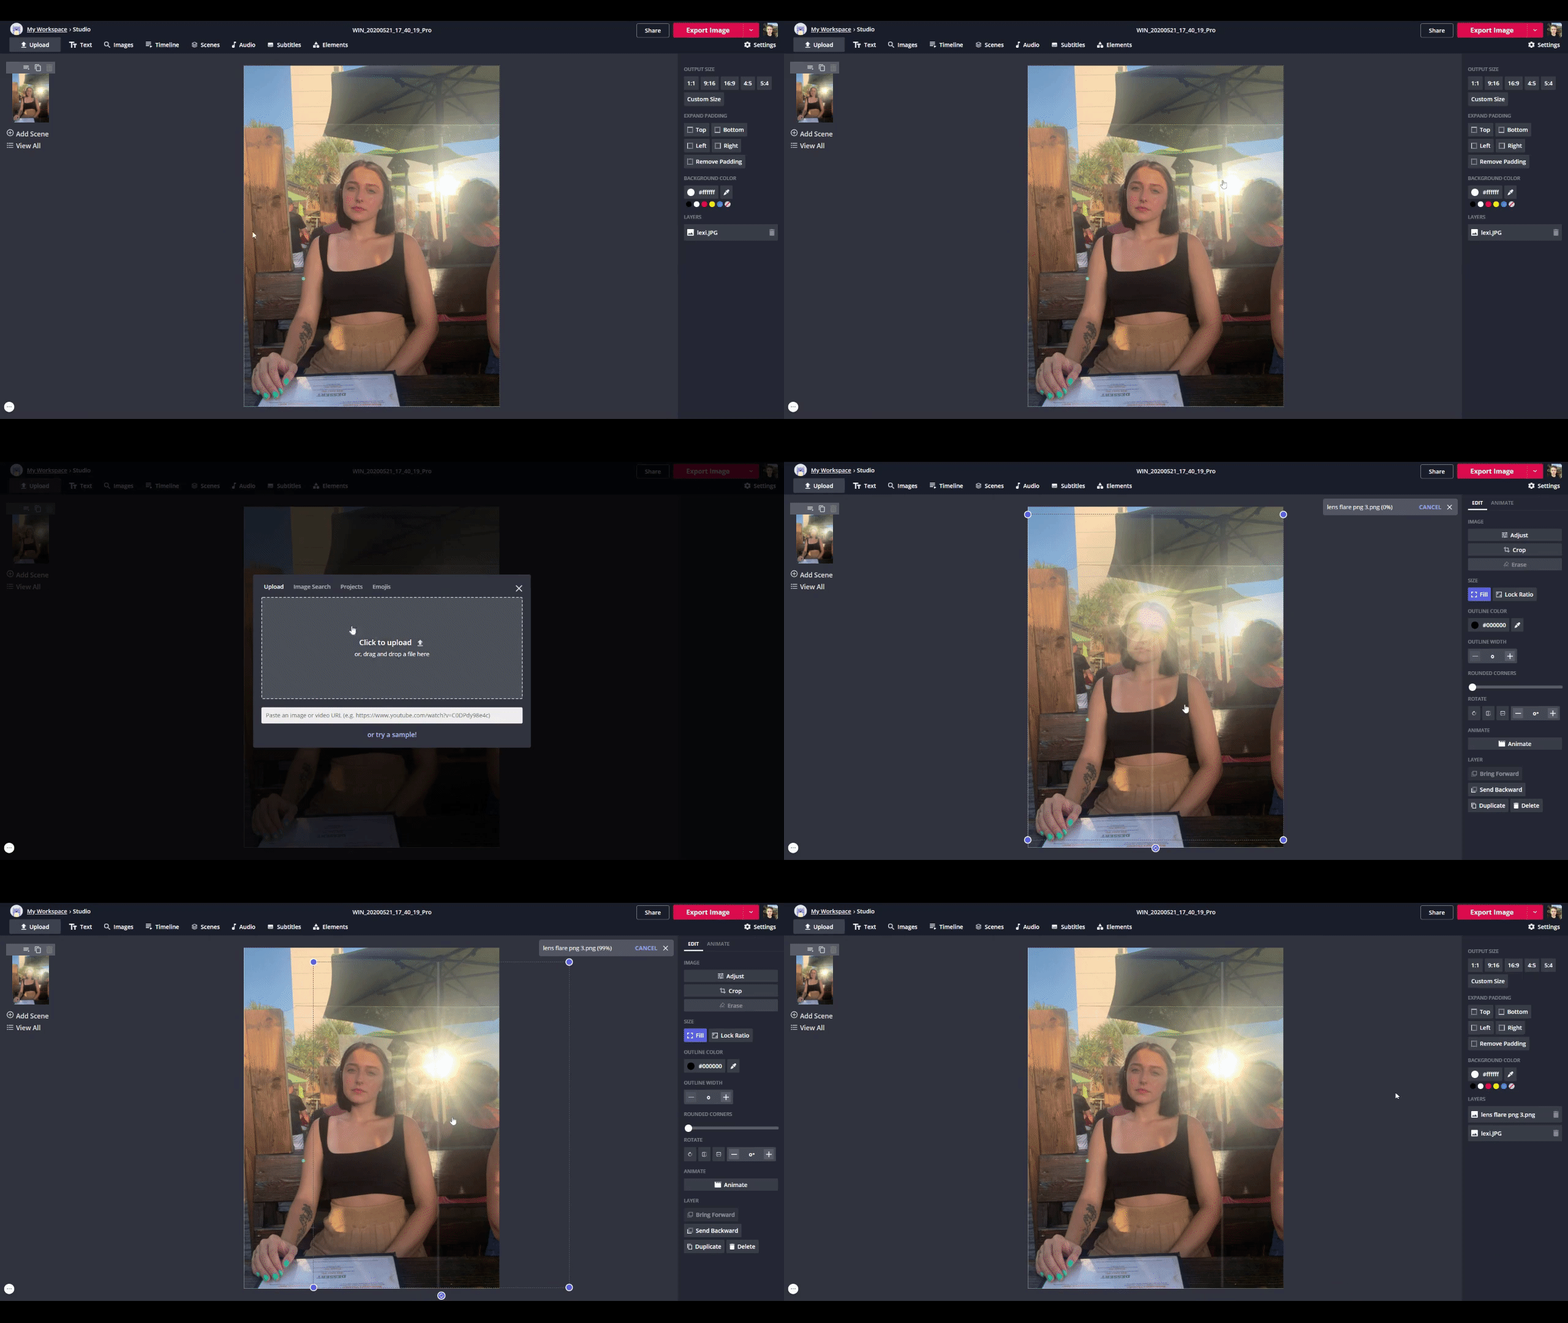
For video, do the same process and fit the image over the source of light. Also, you can rotate or flip the image to better suit your composition.
3. Adjust the look
At this point, your lens flare might look out of place and slightly overpowering. To solve this, adjust the look of your image. First, select the lens flare and click ‘Adjust’ from the editing menu on the right. Inside, you can change the opacity, brightness, contrast, saturation and blur. I recommend lowering the opacity, increasing the brightness and increasing the blur to create a natural but vibrant look.
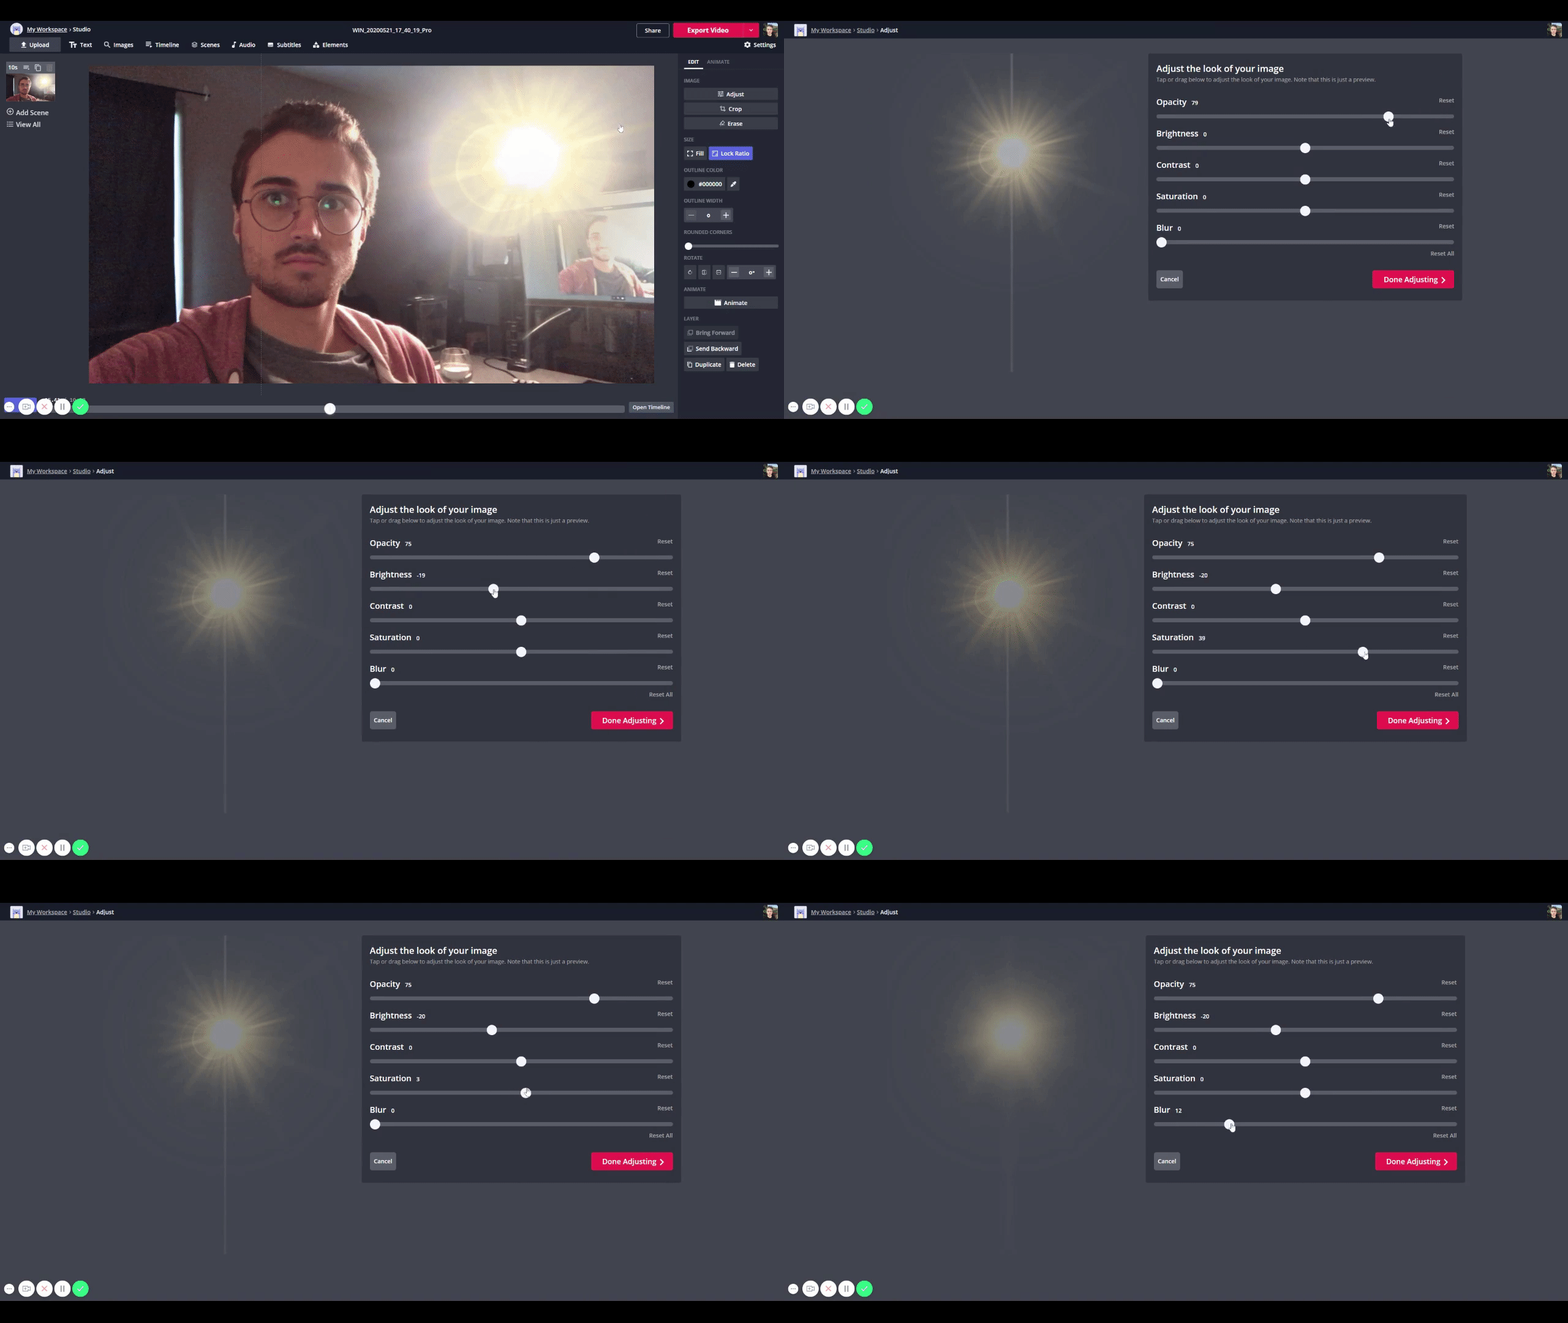
Also, you can adjust your photo or video to help the lens flare effect fit in. If you want to learn what else you can do with photos, check out the edit photos section in the Kapwing Resources. To learn more about video, check out this article on how to edit videos in Kapwing.
4. Download and share
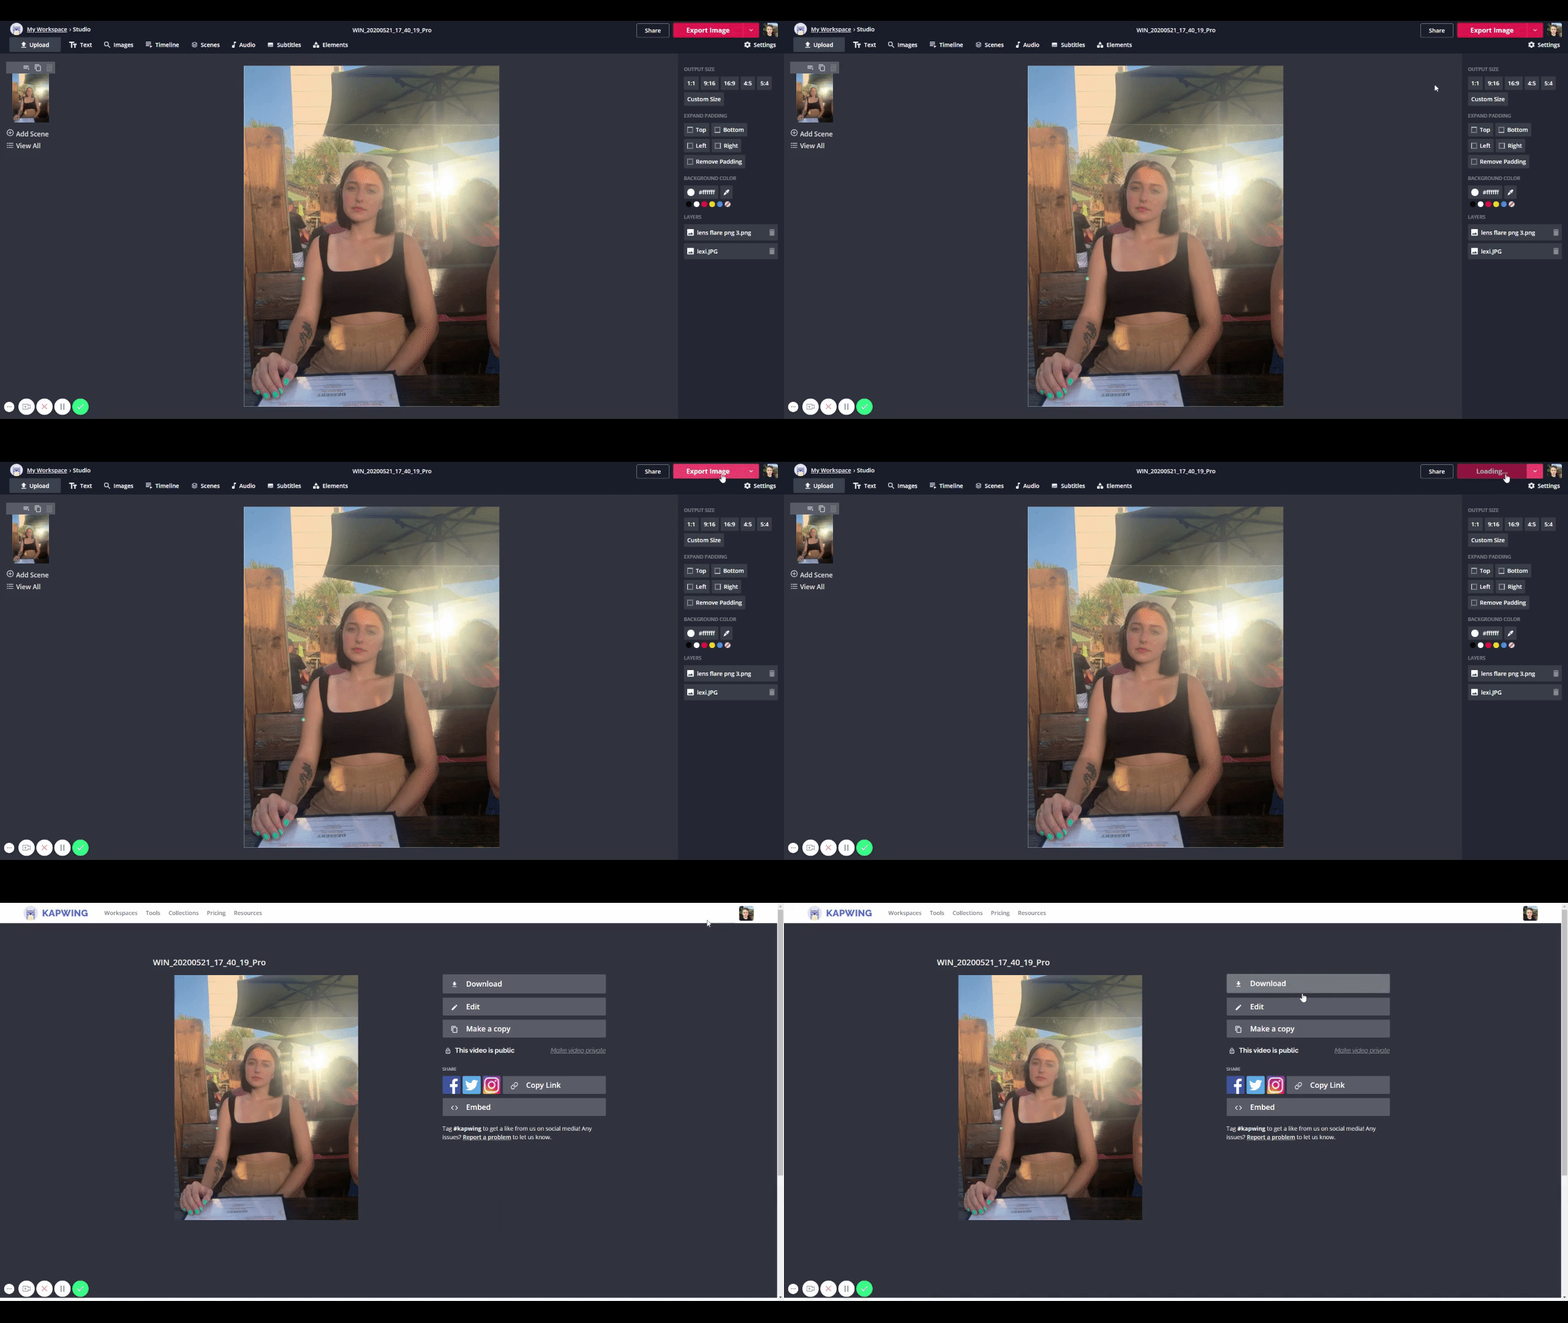
When you’re satisfied with your content, click ‘Export Image’ (or Video) in the top right to start processing the final version. Once that’s finished, download your new photo or video and share with your audience. Whether it’s to post on your social media or you just want to try something new, your content will truly shine bright after using this simple method.
If this brief tutorial helped you, be sure to subscribe to the Kapwing Resources page - we’re constantly writing new tutorials and features to help you make the most out of Kapwing. And, check out the related articles to keep learning:
Related Articles:


