How to Add a Voice Over with Subtitles to a Video
Today, high-quality videos often have both custom audio and added textual elements, but most online software makes it difficult to edit all three. I'm going to show you how to add custom voiceovers and professional subtitles to your videos all in one place.

The most professional video content is multimedia content. Today, high-quality videos often have both custom audio and added text elements. Newsreels, for example, need all three types of media to be successful: video, audio voiceover, and subtitles.
But most online video editing software don't have much multimedia editing capability, and you might end up transferring video files from one editor to another to make each edit, wasting time and storage space in the process. To add video edits, custom voiceovers, and professional subtitles to your videos, I recommend using Kapwing. With Kapwing, you can add video subtitles, audio tracks, titles, and footage in the same place, all online. Here's how to do it:
- Upload Your Video(s) to the Kapwing Studio
- Add Your Audio
- Add Your Subtitles
- Publish & Download
Step 1: Upload Your Video(s) to the Kapwing Studio
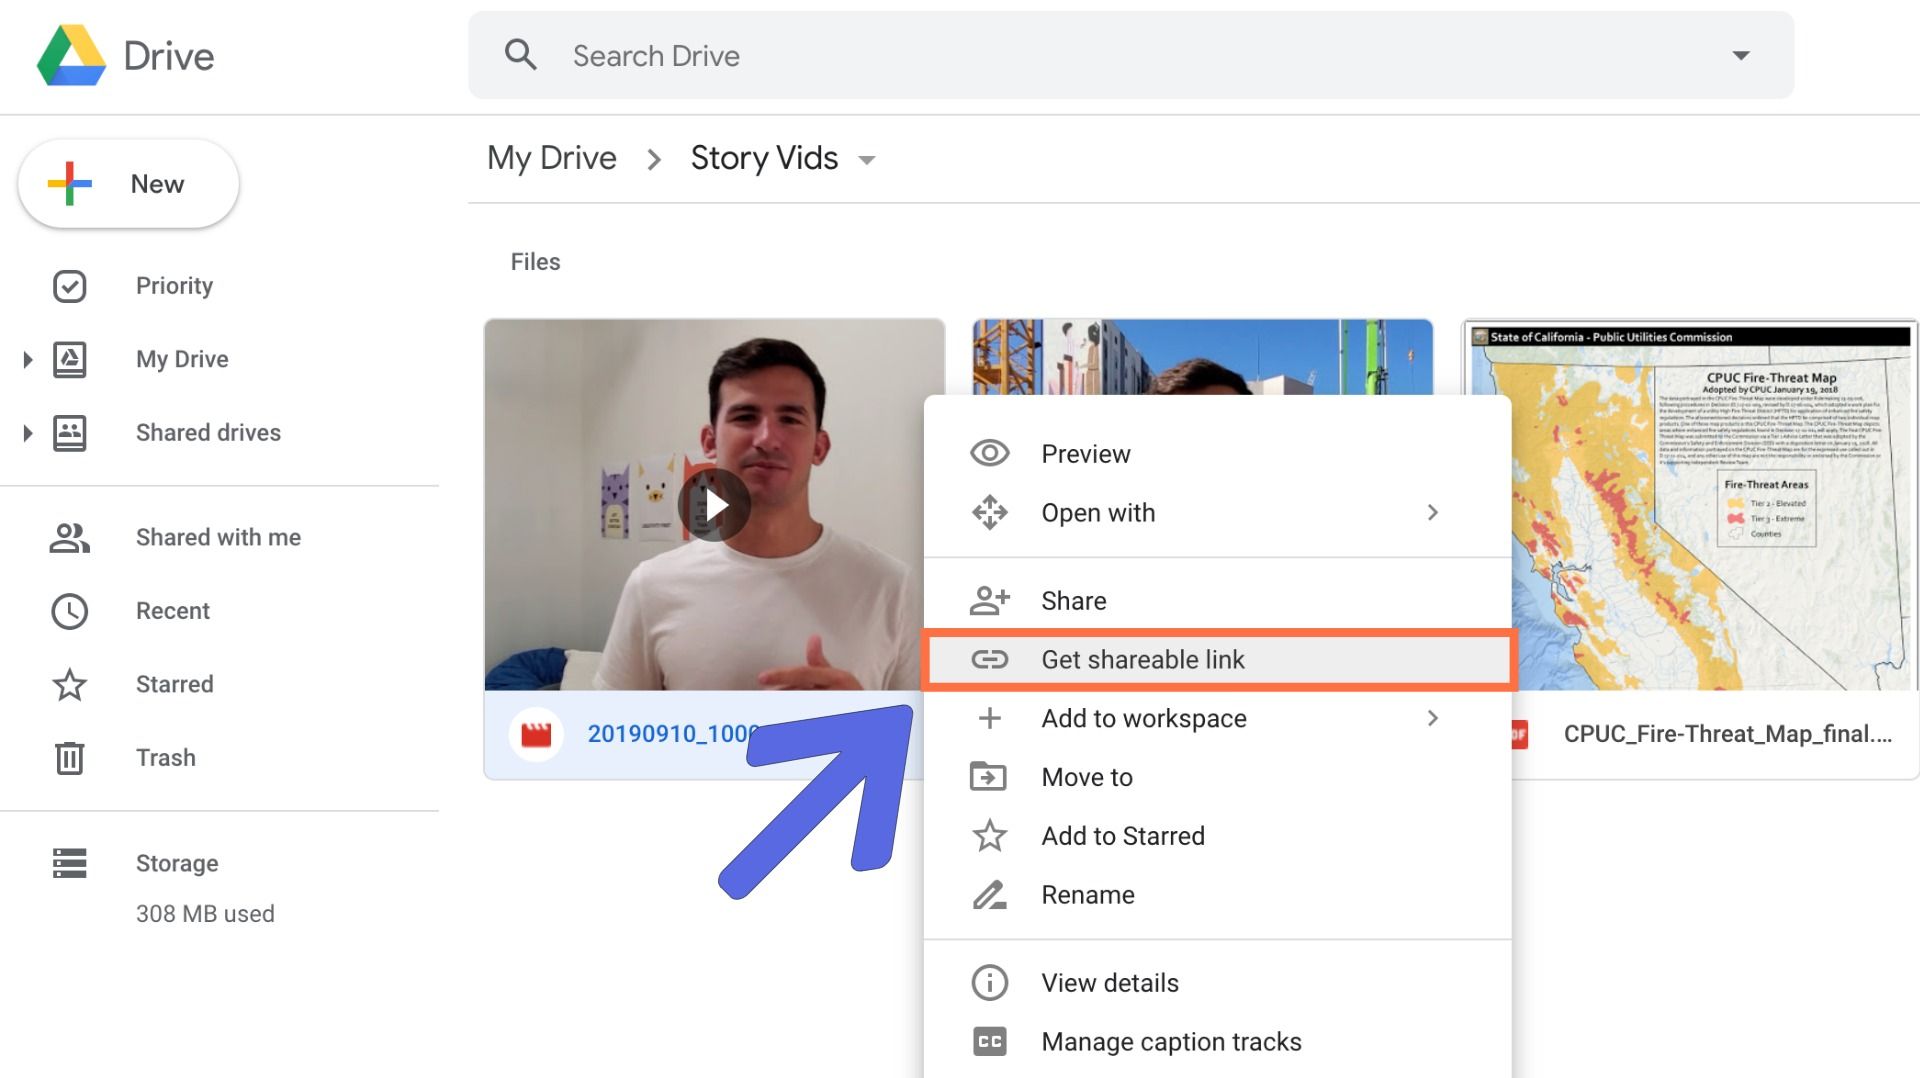
You can find your videos anywhere on the Internet, since Kapwing lets you easily import videos from almost any site. All you need to do is copy the link to the video or its webpage. And if you’ve saved your videos onto your device, just make sure you know where they’re located. If you're uploading videos from your own device, it's a good idea to have your file browser open, so you can click & drag your content into the Kapwing Studio.

To upload your content, just go to Kapwing.com and click “Start Editing.” Or, if you're already signed in, click "New Project," then "Start with Studio." This will take you to the Kapwing Studio, where you can use all of Kapwing’s editing tools in one place. Once you’re in the Studio, either click “Upload” and search in your file browser, or paste the link to the video you want to upload. If your video is easily accessible, you can just drag & drop it into the Studio window, and it will upload automatically.
Step 2: Add Your Audio
Now it's time to create your voice over. If you need to record a voiceover for your video, there are a couple things you should keep in mind:
- Practice and record your voiceover while watching the video you're using. It can be very hard to adjust your timing and delivery when recording if you're trying to synchronize it with the video for the first time.
- Record in quiet conditions. Some audio editors have decent white noise reduction software, but these features can't cover up all background noise. Your editing process will be much quicker and easier if you simply find suitable recording conditions.
- When writing the script for your voiceover, split your text into short paragraphs or, better yet, separate boxes or slides. This will automatically build necessary pauses into your voiceover and make the recording process smoother by allowing you to take natural breaks.

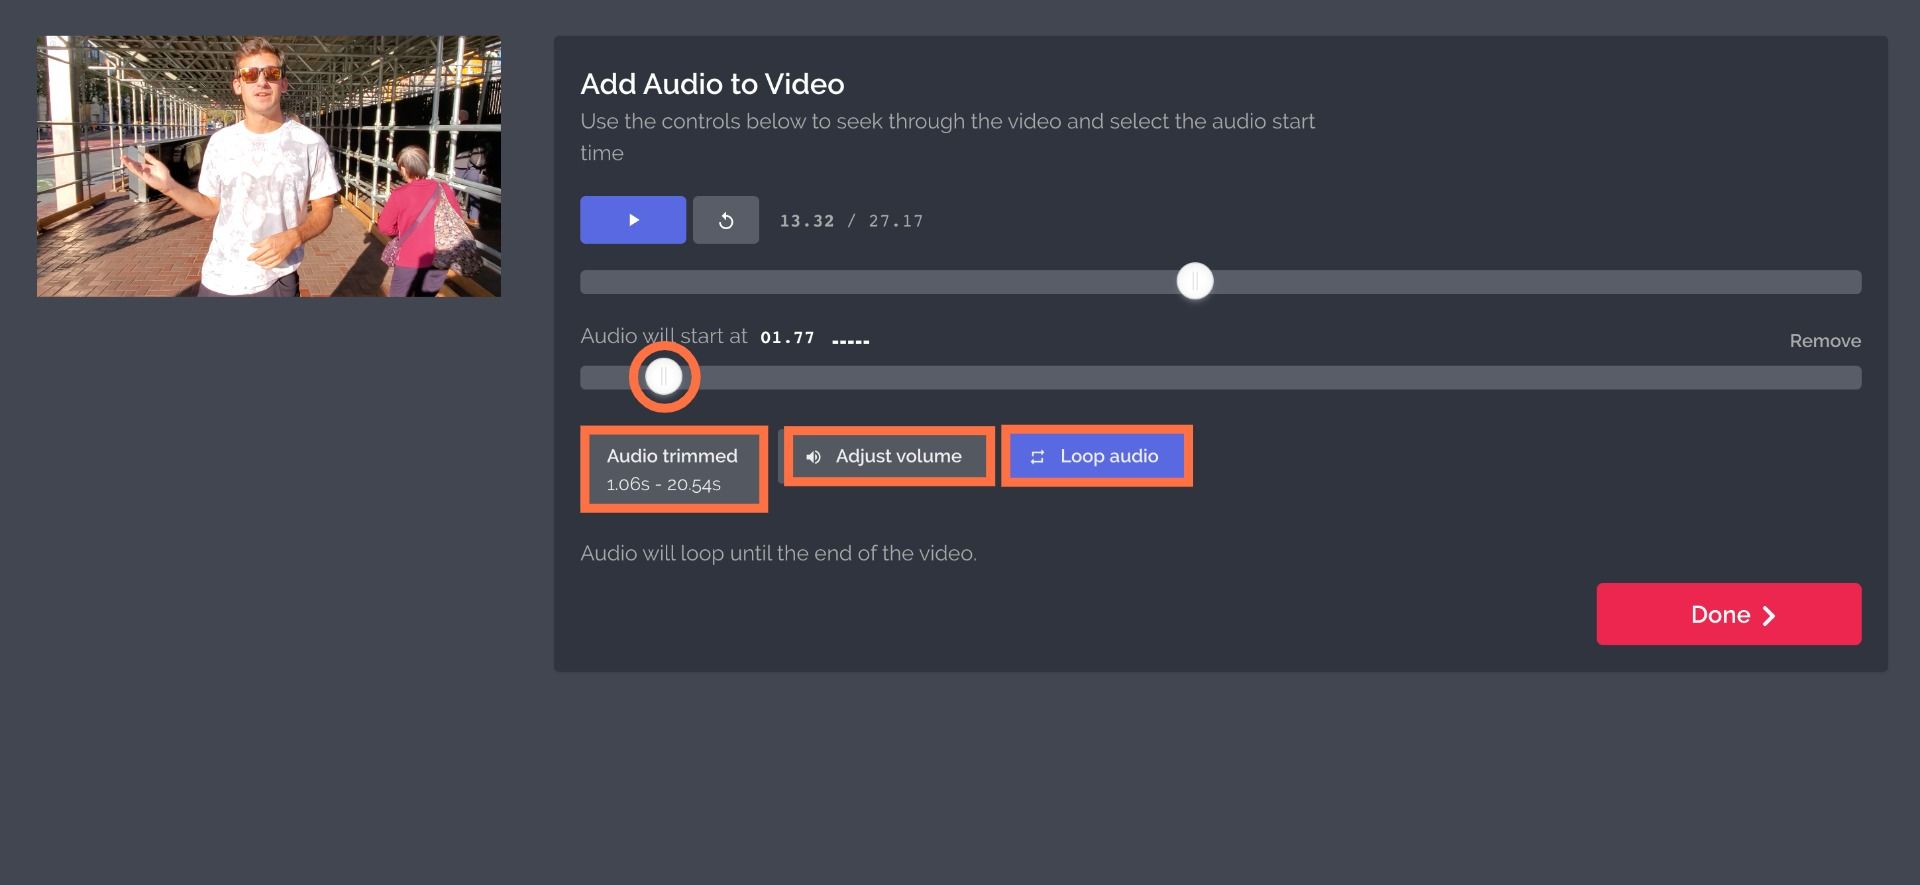
To add your voiceover in the Studio, select "Audio" from the top menu. Here, you can upload your audio file the same way you uploaded your video file, using either a link to a sharing/storage site or a file that you have saved on your device. Once your audio has been uploaded, you have several tools to edit it. In the audio window, you can trim the audio file, change when it starts, and adjust its volume. Kapwing will add the new audio layer to the existing audio by default. If you want to hear only the added voiceover, return to the Studio window, select the video layer, and click "Mute" from the toolbar on the right.
Step 3: Add Your Subtitles:
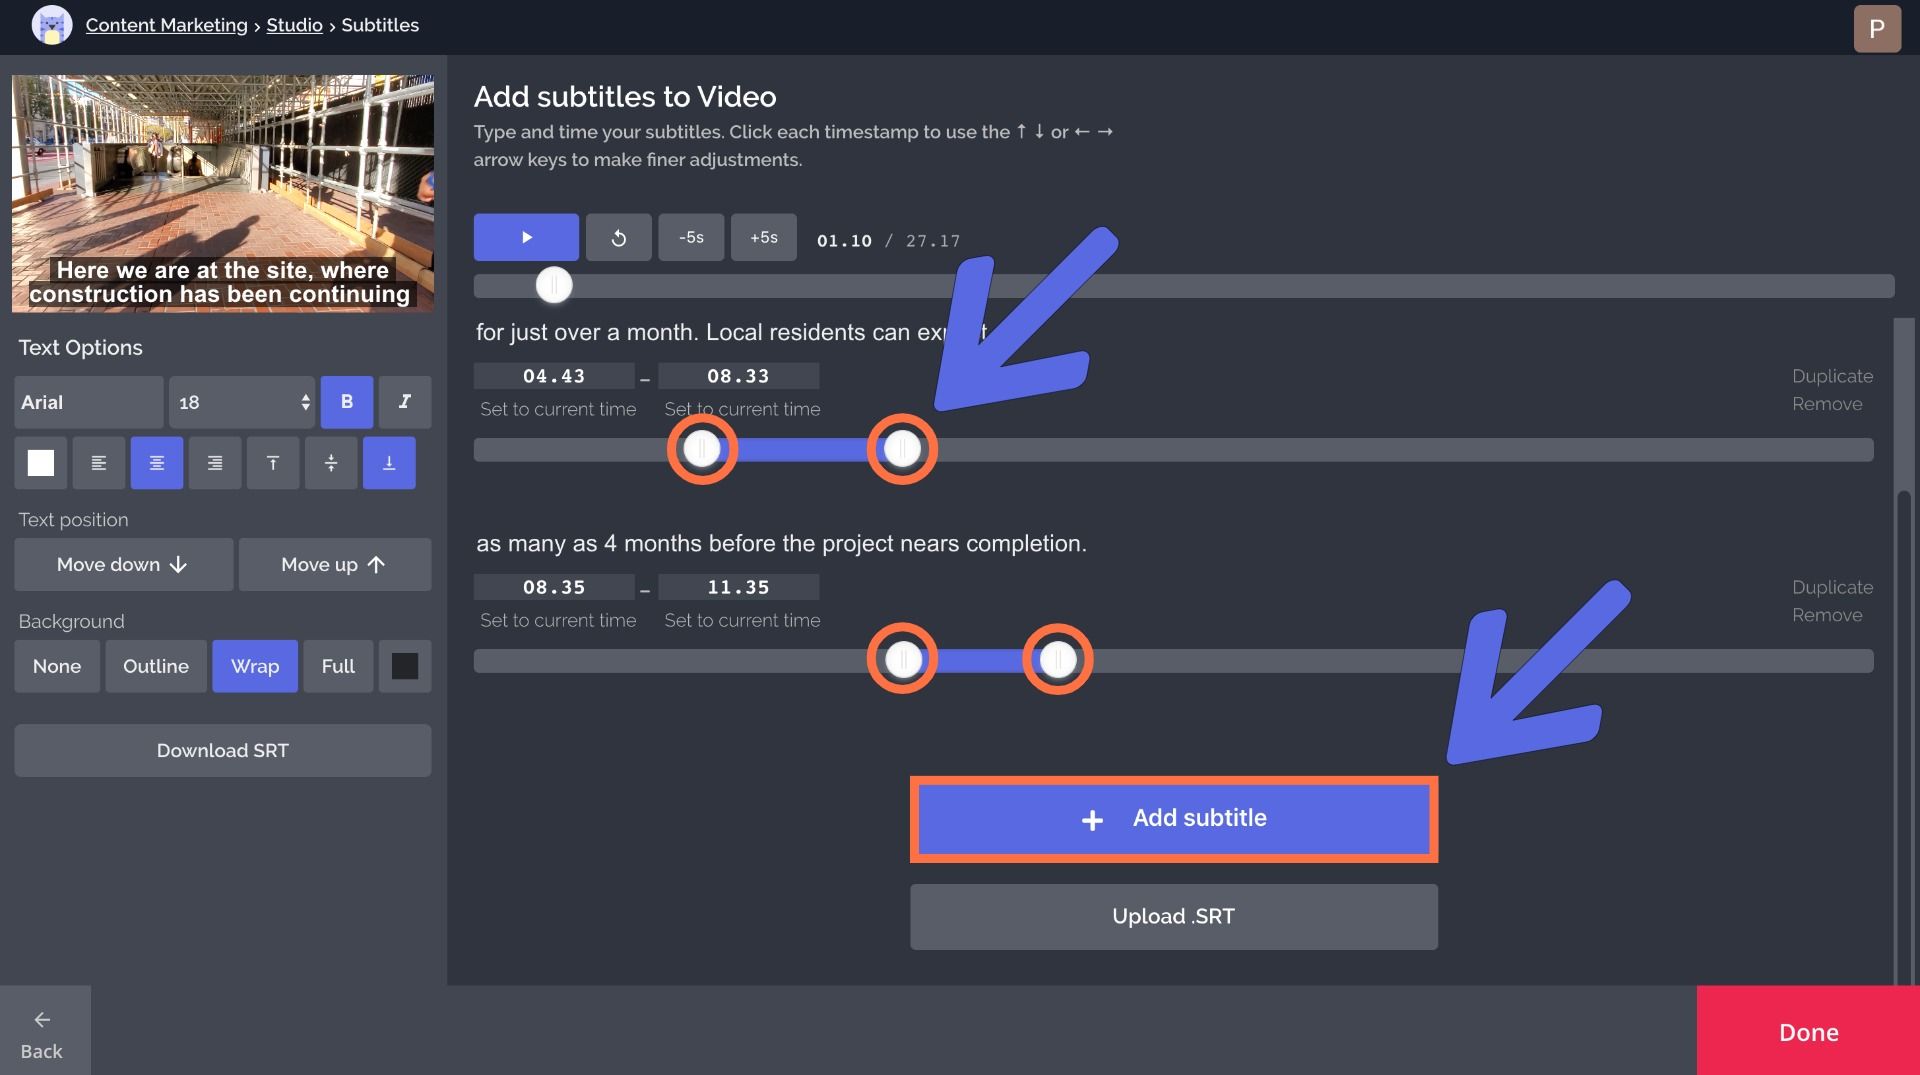
Once your audio has been added to your project, you can add your subtitles! Start by choosing "Subtitles" from the top menu. Kapwing can auto-generate AI subtitles based on the narration or spoken dialogue in your video. Simply click & drag the left and right buttons below the subtitle to align it with the speech in your voiceover.
When your timing is right, click "Add Subtitle" again in the Video Caption Generator, and the new caption will automatically begin where the previous one ends!

Repeat this process until you've added subtitles for your whole voiceover. In the subtitle window, you can change your captions' size, font, color, position, and background style by using the tools in the left-hand menu. To make your videos extra accessible, you can click "Download SRT" if you're a Kapwing Pro subscriber. This saves the SRT file of your subtitles, so you can quickly and easily generate a full transcript of your video for foreign-language audiences.
Step 4: Publish & Download
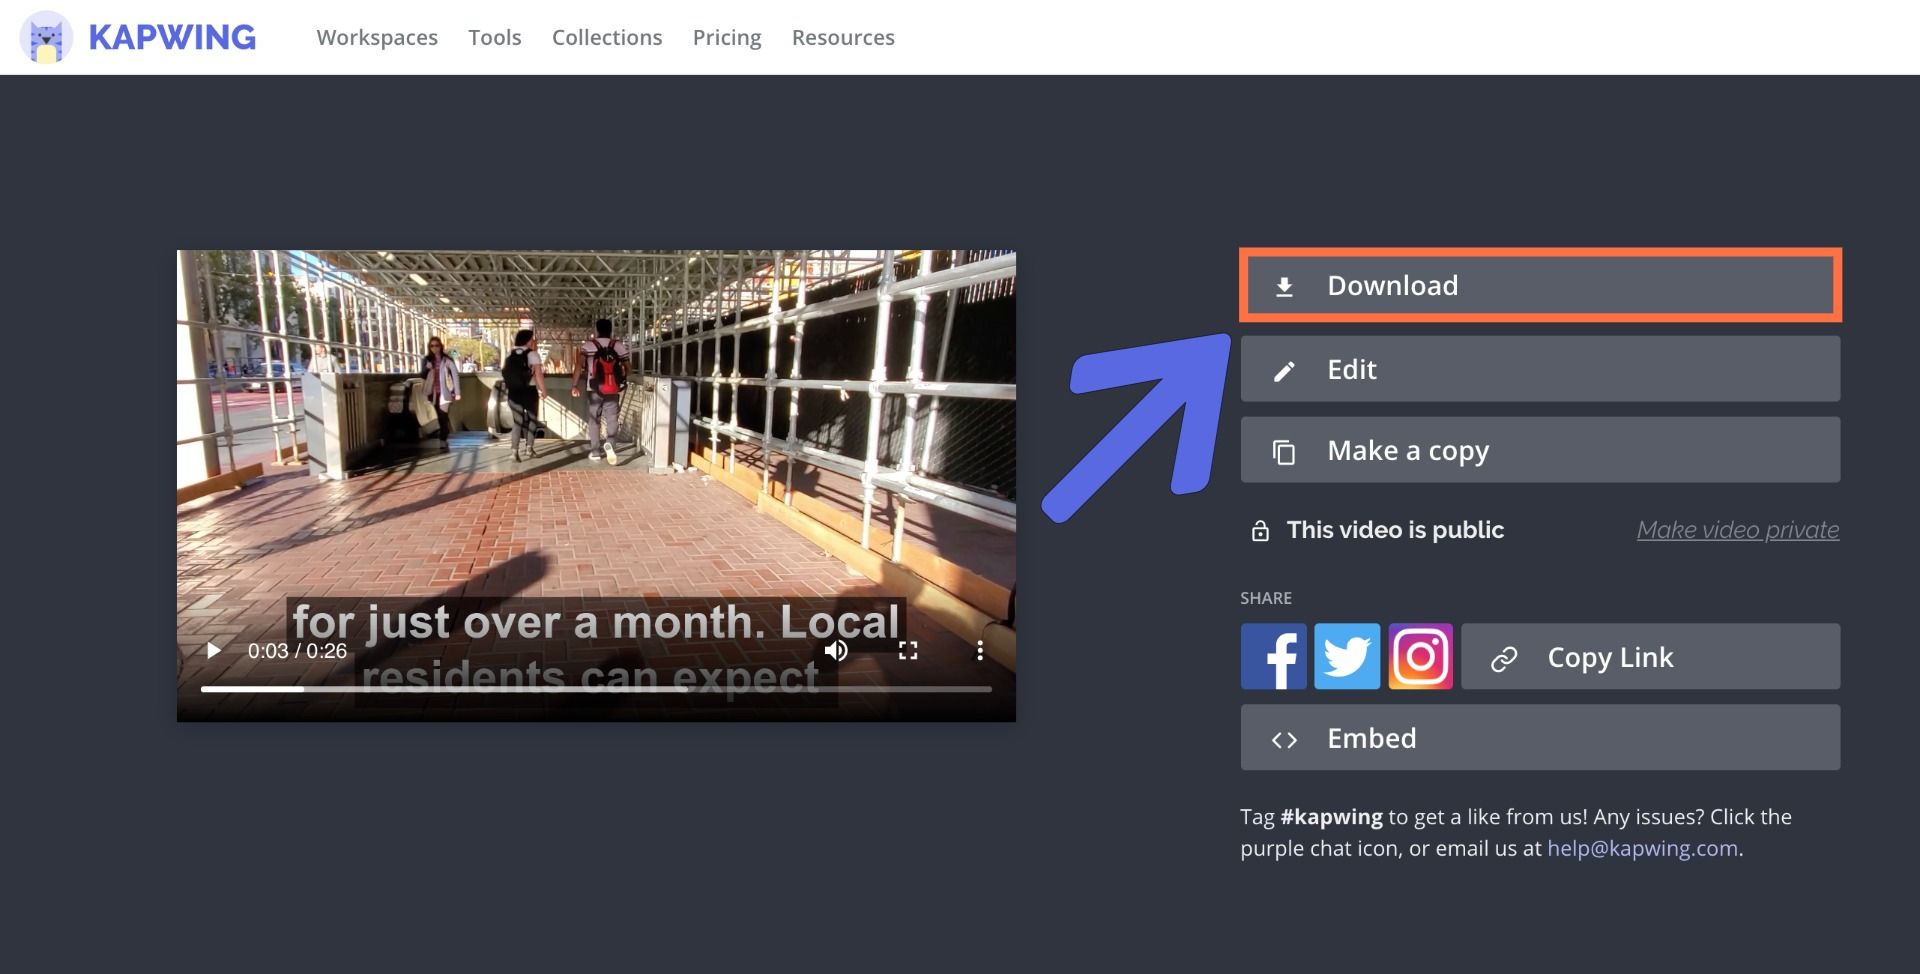
Double-check all your audio and subtitles, and you're ready to process your video. Click "Publish" in the upper right-hand corner of the Studio window. Large files will take longer to process, but you can expect your project to be ready within a couple minutes. Once your video has finished processing, select "Download" from the right side of the screen, and your video will be saved to your device.

If you’re using an iPhone, you’ll need to download the very small Kapwing mobile app from the App Store. The app doesn’t require any login – it’s only meant to help you download your videos! To download your video on your iPhone, just copy the URL of the download page and paste it into the URL field in the Kapwing app.
Remember to tag us @KapwingApp whenever you share your content on social media– we love to see what our creators are passionate about! And be sure to subscribe to the Kapwing Resources page – we’re constantly writing new tutorial and features to help you make the most out of Kapwing.
Related Articles:
• 7 Online Accessibility Lessons You Might Not Know
• How to Remove Stutters from Video
• How to Add Bilingual Subtitles to a Video
• How to Add Subtitles to an IGTV Video
• How to Add Text to iMovie For Free


