How to Censor a Video Online: Blurs, Black Bars, Bleeps, and Content Warnings
It’s hard to make sure everything you make is appropriate for everyone who sees it. In this article, I’ll go over the easiest, quickest way to censor video and audio, all for free & online.

The internet attracts everyone: all ages, nationalities, languages, interests. But, of course, there are difficulties in maintaining digital content that is accessible and safe for all audiences. Videos need to be translated with subtitles for international audiences, content needs to be made accessible for those with disabilities, and some content needs to be restricted or modified so it’s appropriate for users of any age. In other cases, faces need to be blurred or blacked out to maintain the privacy of the those in the video.
We're used to seeing these content modifications on many platforms, like bleeped-out words or blurred areas on network television. But online, where anyone can be a video content creator, those checks and balances aren't as readily in place. So, how can you make sure everything you make is appropriate for everyone who sees it?
In this article, I’ll go over the easiest, quickest way to censor video and audio, using an online video editor. For this example, I'll be using Kapwing.
- Upload your video to the Kapwing Studio
- Add blurs, black bars, and bleeps
- Cut out inappropriate sections if necessary
- Download and share with the right settings
Step 1: Upload your video to the Kapwing Studio
To start cleaning up your video content for all audiences, head over to Kapwing.com and click “Get Started” to enter the Kapwing Studio.

Here, you have two options: you can use the Click to Upload button to find the video you want to censor in your devices files (or drag and drop from your file browser), or you can paste a link in the URL field to upload a video file you’ve stored or found online.
Step 2: Add blurs, black bars, and bleeps
Now it’s time to do the censoring that you’re accustomed to seeing in video media. In the Kapwing Studio, you can make edits to both your video and audio, depending on which aspects of your content you need to censor.
How to censor video in Kapwing
Let’s start with blurs and black bars.
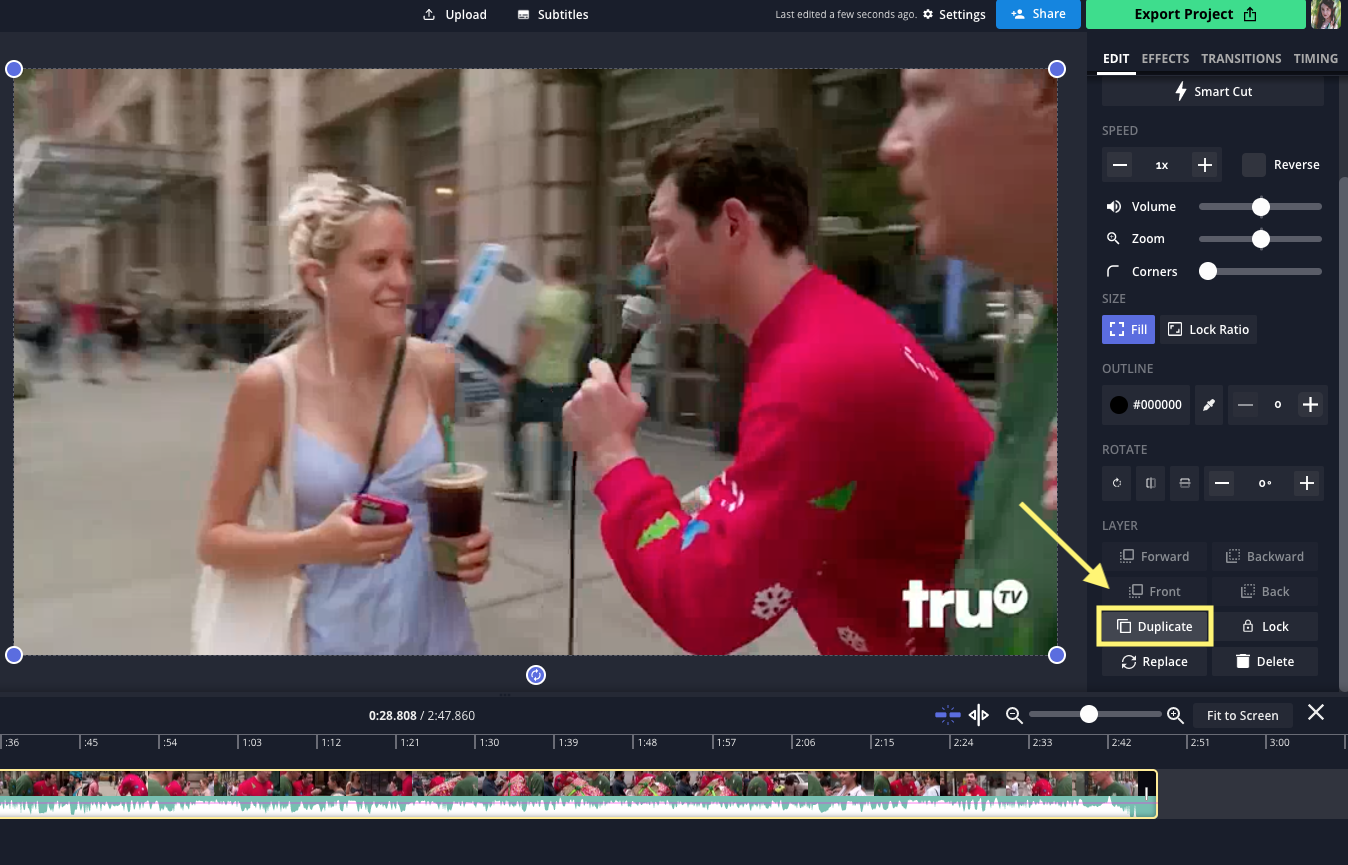
To blur just a section of your video, create a copy of the video layer. You'll find the Duplicate button in the Edit menu on the right when you select the layer.
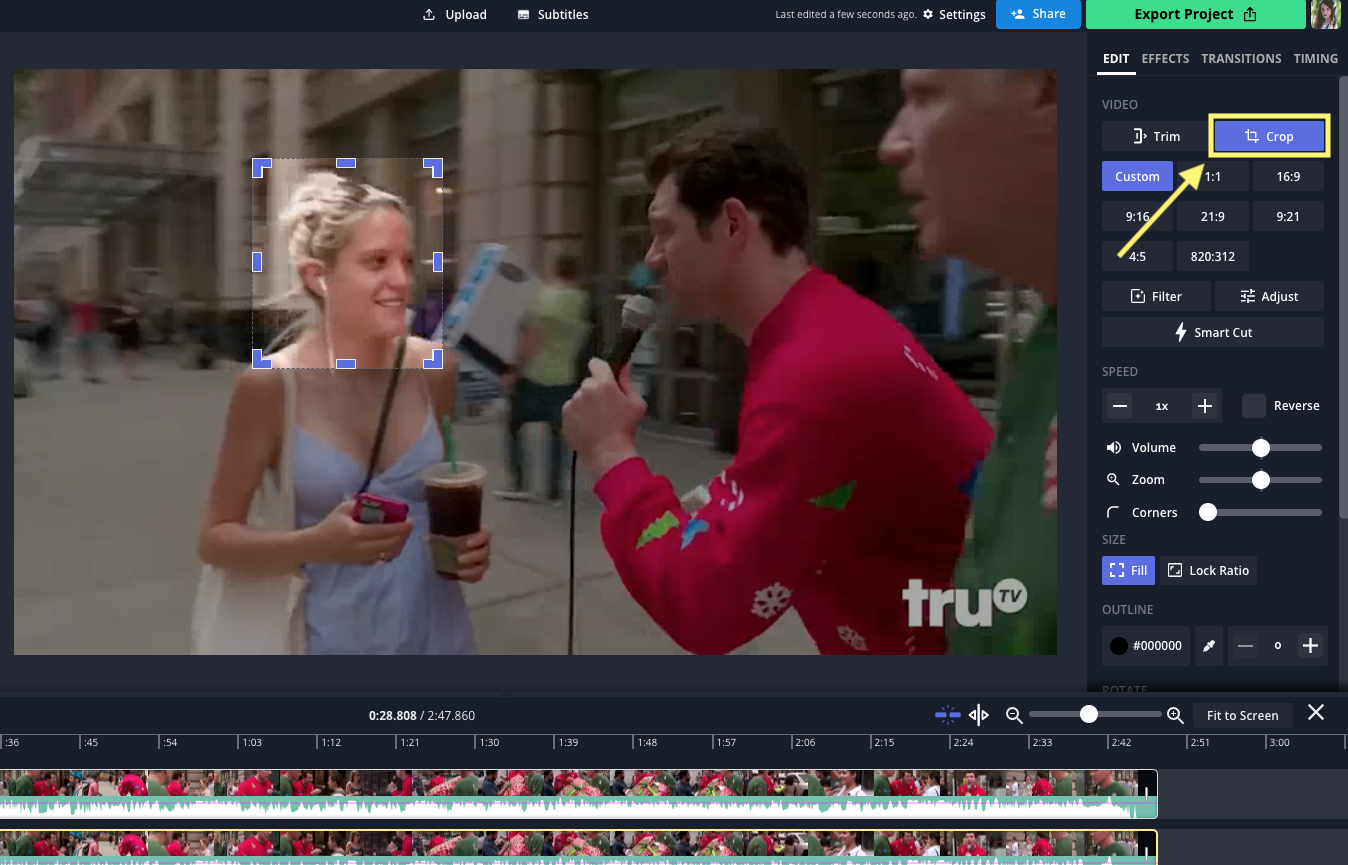
With the new layer selected, click “Crop" and use the inline crop feature to select just the part of the video you want to blur.
Then, click "Adjust" and to blur out the cropped layer. The Blur slider lets you control how much blur you add.
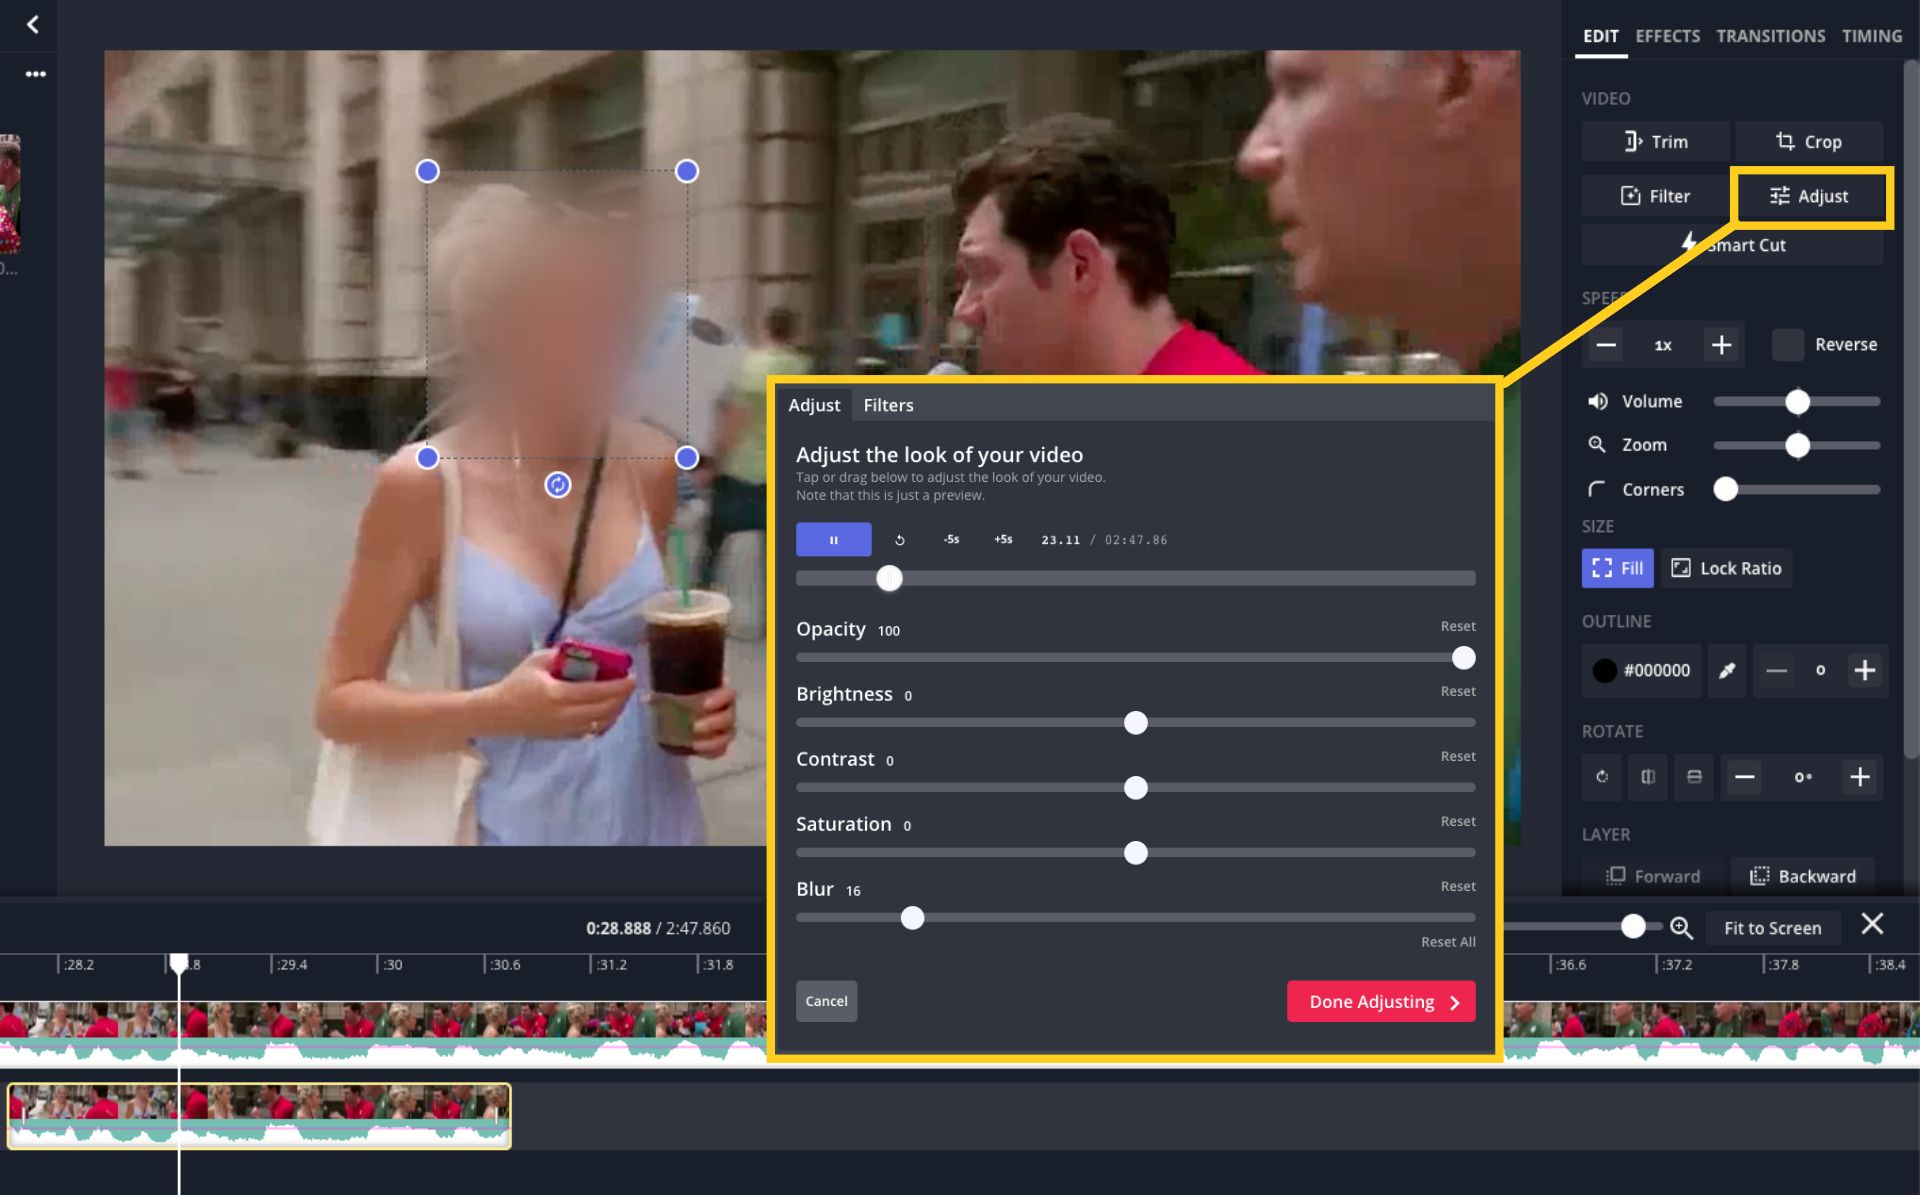
When you're done, drag the ends of the cropped layer in the Timeline to make sure it only covers that part of the video — otherwise you'll have a blurry square on the whole video, which won't make any sense.
Black bars are even easier to add.
Select “Elements” from the left toolbar, choose a rectangle, and position it on the video wherever you want to block the viewer. These bars are often used together with audio bleeps to cover up swear words so that the viewer can neither hear the word nor read the speaker's lips as they say it.
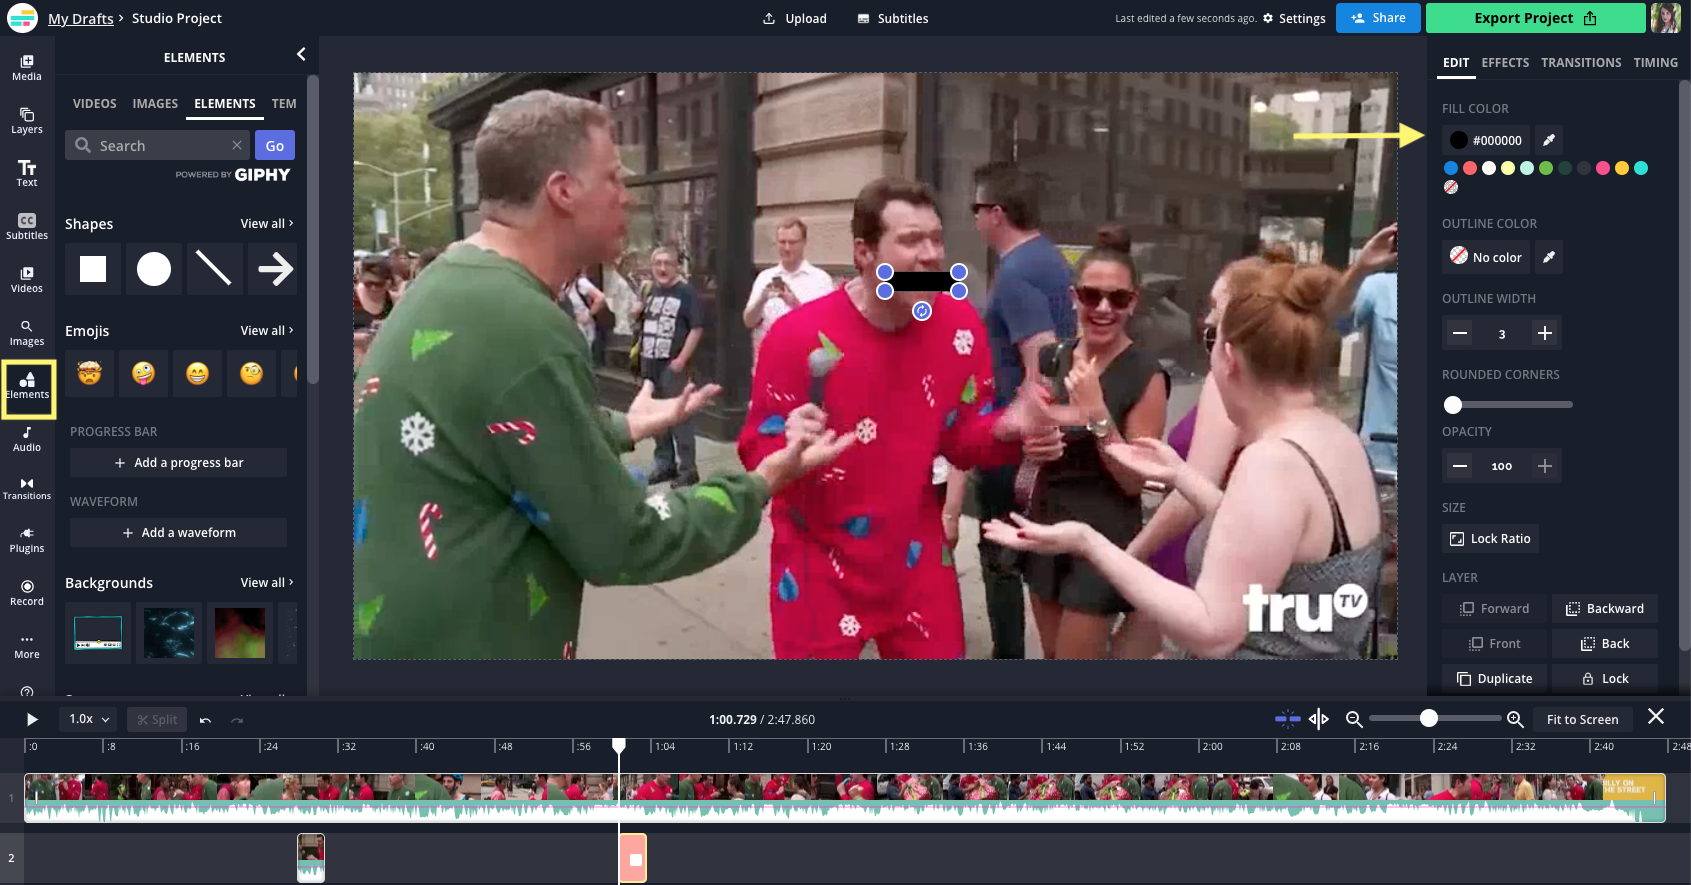
Change the bar's size, shape, angle, and position, all by dragging & dropping the rectangle layer and its corner buttons. Change the color using the toolbar on the right side of the screen.
Don't forget to trim this in the Timeline so it syncs up with what you're trying to cover.
How to censor audio in Kapwing
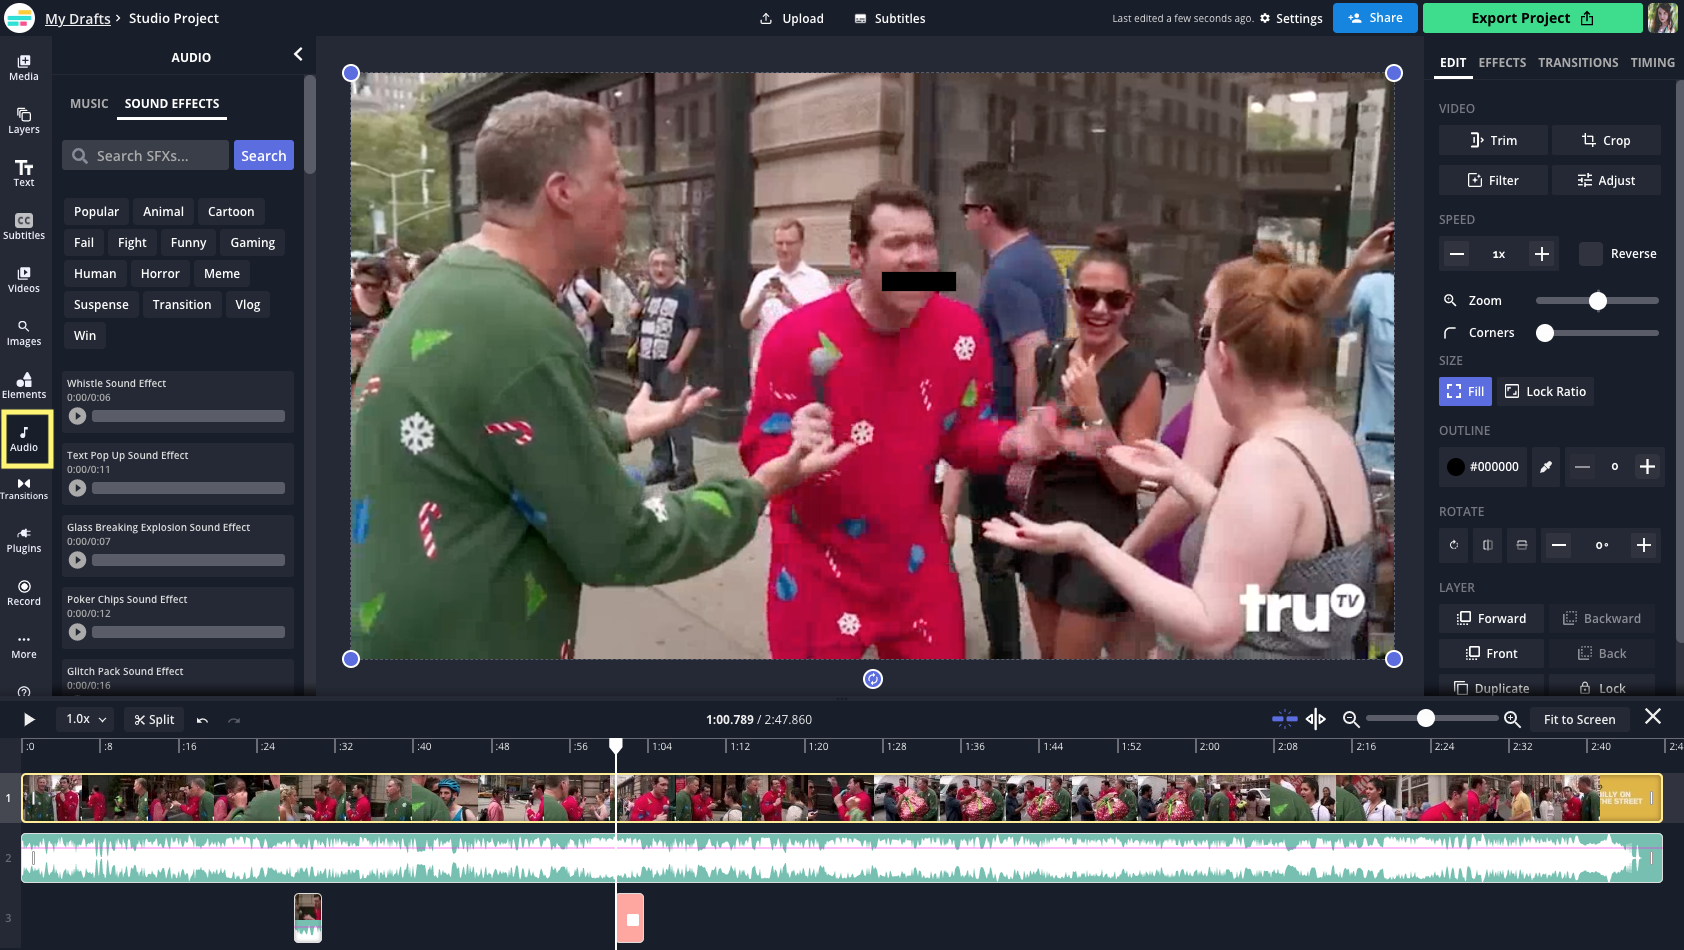
You can also bleep out sections of your video’s audio track. Open the Audio tab from the left-side menu to browse Kapwing's Sound Effects library or import your own sound effect you've created or found online. This bleep sound effect is a good, classic sound but feel free to get creative with the coverup audio you use.
To make sure that the audience cannot hear the bleeped out word at all, right click onto the video layer to "detach audio." This will create a separate layer for the audio where you can Split and decrease the volume on the offensive part or cut it out entirely without having to cut the whole the video.
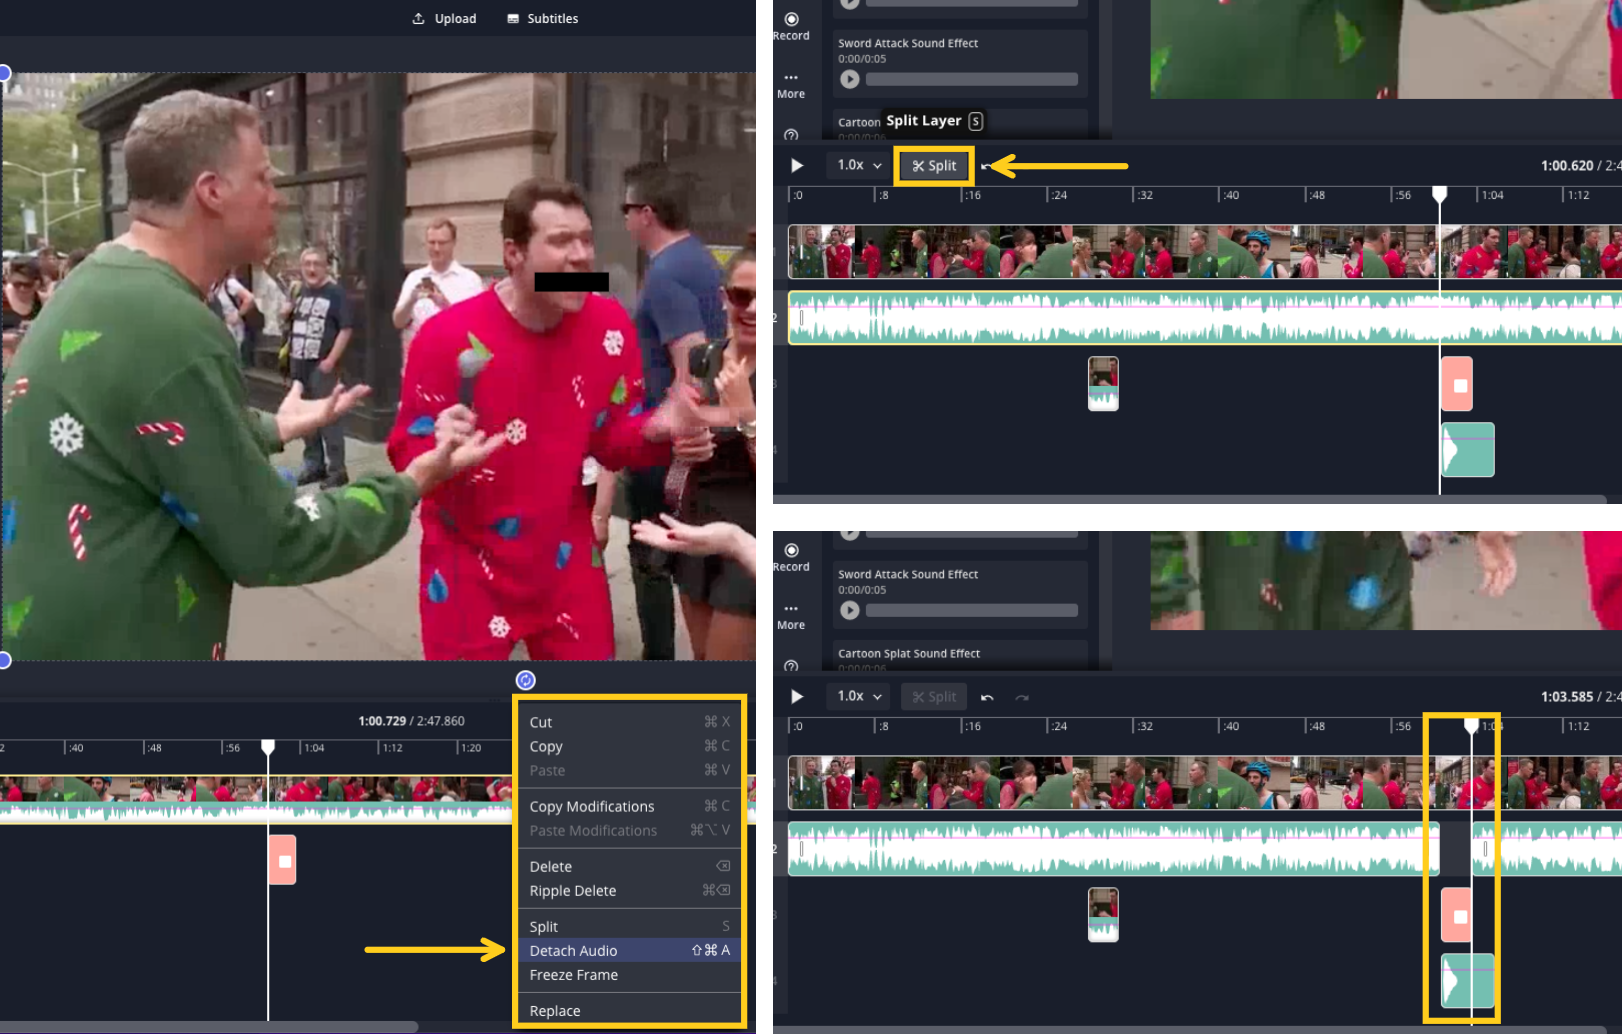
Then drag and drop the bleep (or other sound effect) layer so that it lines up with the cut audio. Drag the ends of the layer to trim it as needed.
Step 3: Cut out inappropriate sections and add a content warning if necessary
Another, simpler way to censor a video is by simply cutting out whole sections. Split the video layer at the beginning of the inappropriate content. Then drag the edge to trim out the whole section you want to omit from the final video. Drag the remaining clips over so they line up with no spaces between them on the Timeline.
If you've detached the audio in the previous step, make sure both audio and video layers are trimmed to make sure the audio and video sync up in the final video.
Additionally, it might be necessary for you to add a content warning to your video, if it still contains especially sensitive or potentially disturbing content. You can create your own by using the Text and Element features in the Studio or use this content warning template.
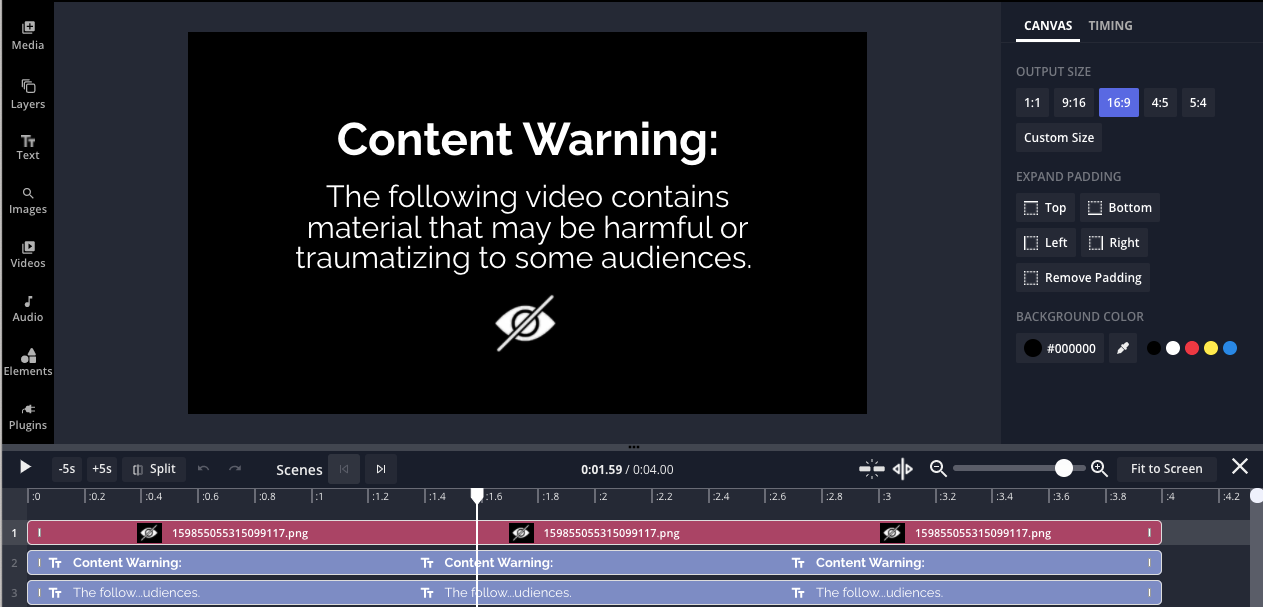
Set the duration for the slide to a few seconds so viewers have time to read it before the content plays.
Step 4: Download and share with the right settings
When your video is all cleaned up and you’ve blurred, covered, bleeped out, or removed everything you wanted to censor, hit the Export Project button in the upper right corner and select your preferred export format and resolution.
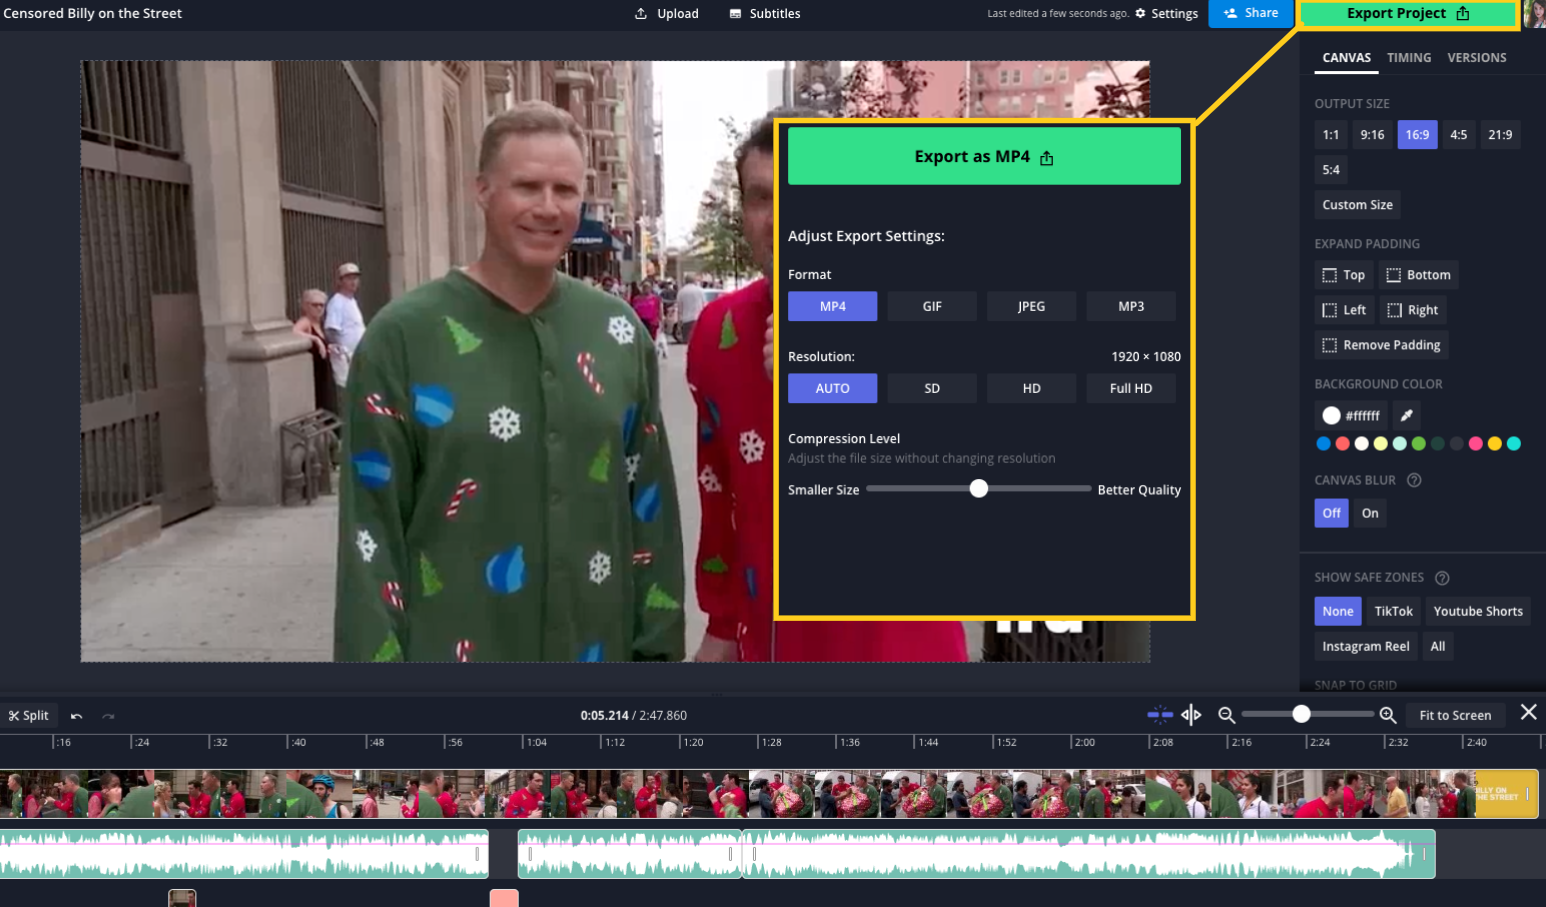
Once it’s ready to go, just click the Download button and your censored video will be downloaded straight to your device.
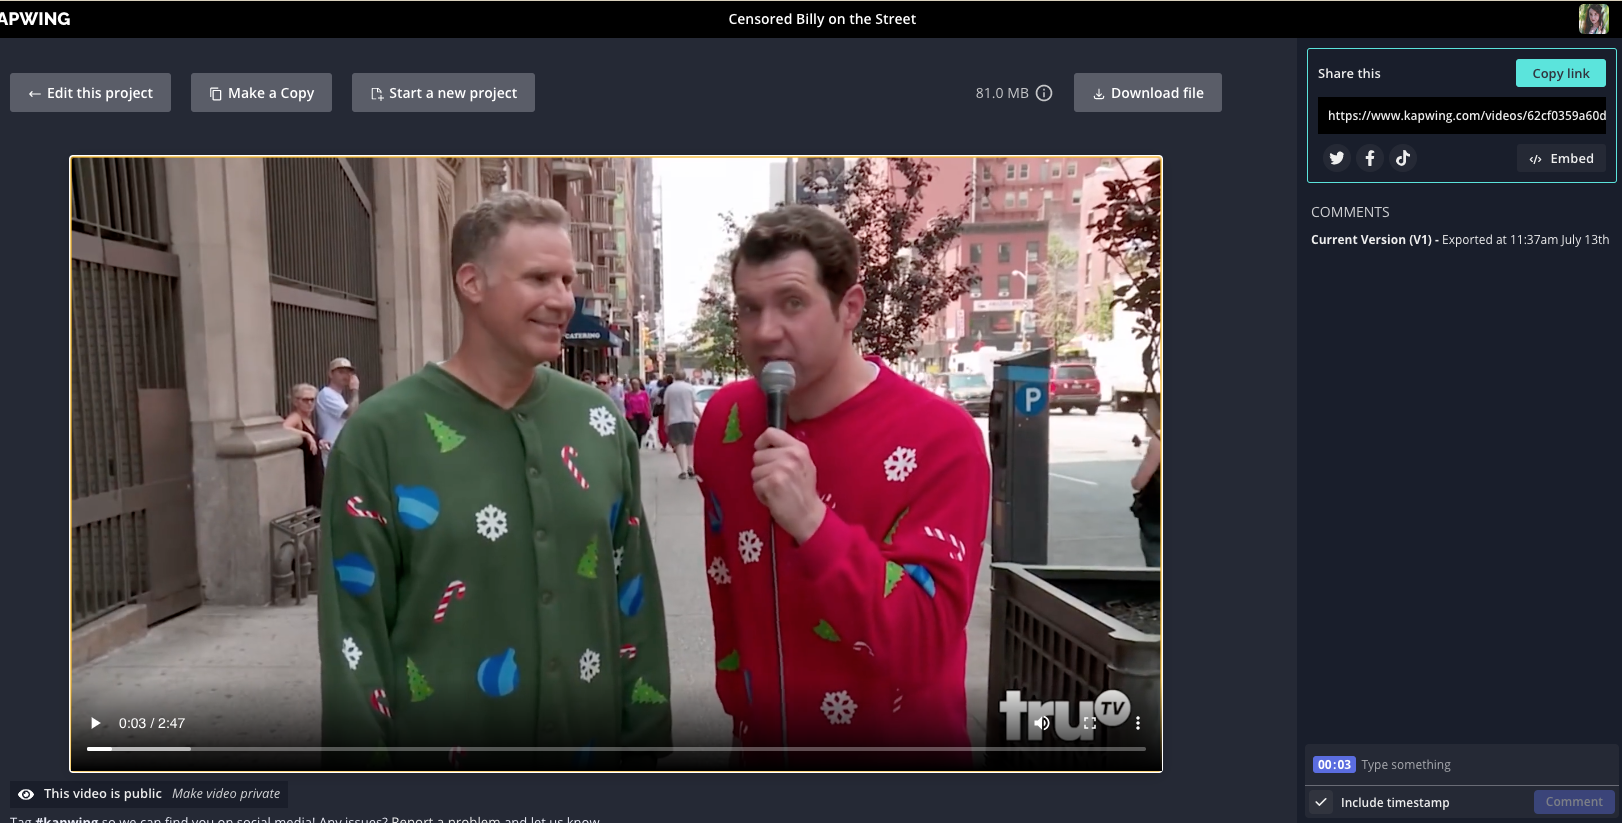
When you download your video, it’s ready to be shared anywhere on the web. If you want it to be especially appropriate for everyone who comes across it, there are some settings you should keep in mind on certain platforms. On YouTube, for instance, make sure your content isn’t being published as “for kids” if it has adult themes or disturbing content. And if you have any doubts about how it might affect your audience, don't pay to promote it on any of your platforms. This could result in a higher report volume, adversely affecting your channel or profile.
I hope this article helps you create content that’s safe and appropriate for your whole audience! For more content tips, product updates, and technical tutorials, subscribe to Kapwing App on YouTube or follow us on Twitter @KapwingApp. In the meantime, check out these related articles on the accessibility and safety of online content:
• How to Get Community Captions on YouTube Back
• How to Add Bilingual Subtitles to a Video
• How to Add Subtitles to TV Episode Online
• 5 tips for Remote Learning in 2020


