How to Download All Photos and Videos from Facebook
Users are fleeing Facebook following their revised rules on fact-checking

The average American spends over 30 minutes a day on Facebook. If you feel like your time on the platform is no longer productive, you’re not alone — about 9% of millennials have already decided to ditch Facebook for good. Among the reasons, data privacy concerns, “drama,” and politics rank high, with many users opting to leave the platform following the recent announcement that independent fact-checkers were being replaced.
Yet for many users, Facebook is also where our most important memories have been stored. Fortunately, you don’t have to lose them all before leaving the app for a smarter alternative. Before deleting your account, you can download your information to keep your photos, videos, and other important content safe.
Table of Contents
- How to Download All Photos and Videos (in One)
- How to Download and Edit Individual Photos and Videos
- How to Deactivate or Delete Your Facebook Account
- Facebook FAQs
How to Download All Photos and Videos (in One)
While it’s possible to manually download your photos and videos, Facebook offers a built-in tool that far outperforms any third-party apps. By following these nine simple steps, you can effortlessly download all your content in one organized batch.
Step 1) Navigate to Facebook Settings
Once logged into your Facebook account, head to your Settings.
Your settings are found under Profile > Settings, but you can also click the following link.
Step 2) Find the “Download Your Information” Tool
In the left-hand panel, scroll down until you see the header “Your information.” Below “Your information, click on “Download Your Information.”
A modal window will pop up, explaining what information you’re about to download. Facebook will first prepare the information for you and, once the information has been packaged, you’ll be able to download it.
Your Facebook information includes all your photos and videos, as well as any messages and text posts you've made.
Click “Download or transfer information.”
Step 3) Select the Accounts You Want to Save
Next, Facebook will give you an option of which accounts you want to download. This includes not only your Facebook account but also your Instagram accounts.
Click the checkbox next to every account you want to save.
Click “Next.”
Step 4) Select the Data You Want to Save
Once you’ve selected your accounts, Facebook will ask you how much information you want. You will have two options:
- Available Information: This is likely the option you want to pick. It includes things like photos and messages, but not data logs. If you want your photos and videos, "Available Information" is fine.
- Specific Information: This option lets you pick and choose what data you want to download. Use this if you just want to download your photos and videos and nothing else.
If you select “Available Information,” you’ll move on to step 5 directly.
If you select “Specific Types of Information,” you will instead be given an optional screen where you can manually select which items you want to download.
Options include: Messages, Posts, Friends, Followers, Preferences, Ads, and Data Logs. Facebook’s Data Logs include a variety of information that Facebook stores regarding your activity and preferences.
Step 5) Select How You Want Your Photos and Videos Delivered
Once you’ve selected your data, you then need to determine how you want your data delivered.
Facebook gives two options:
- Download to Device: Downloading all your files directly to your device, such as your personal computer or mobile phone.
- Transfer to Destination: Transferring your files directly to Google Drive or Dropbox.
If you select “Download to Device,” you can proceed directly to creating your download. Otherwise, you can optionally choose to “Transfer to Destination.”
(Optional) Step 6) Transfer Your Photos and Videos to a Destination
Instead of downloading your information to your device, you can transfer it directly to a location. You can either transfer it to your Google Drive or to your Dropbox.
When you select “Transfer to Destination,” Facebook will ask you two questions:
- Where to: Either “Google Drive” or “Dropbox.”
- How often: Whether to make this a recurring data transfer. You can select options such as “One Time” or “Weekly.” Creating a recurring data transfer is a great way to back up your information.
When you select a destination, you’ll be asked to connect your accounts.
Click “Connect” and log into your Google Drive or Dropbox account.
Step 7) Prepare Your Download
Whether you’ve selected “Download to Device” or “Transfer to Destination,” you should now be at the download tool.
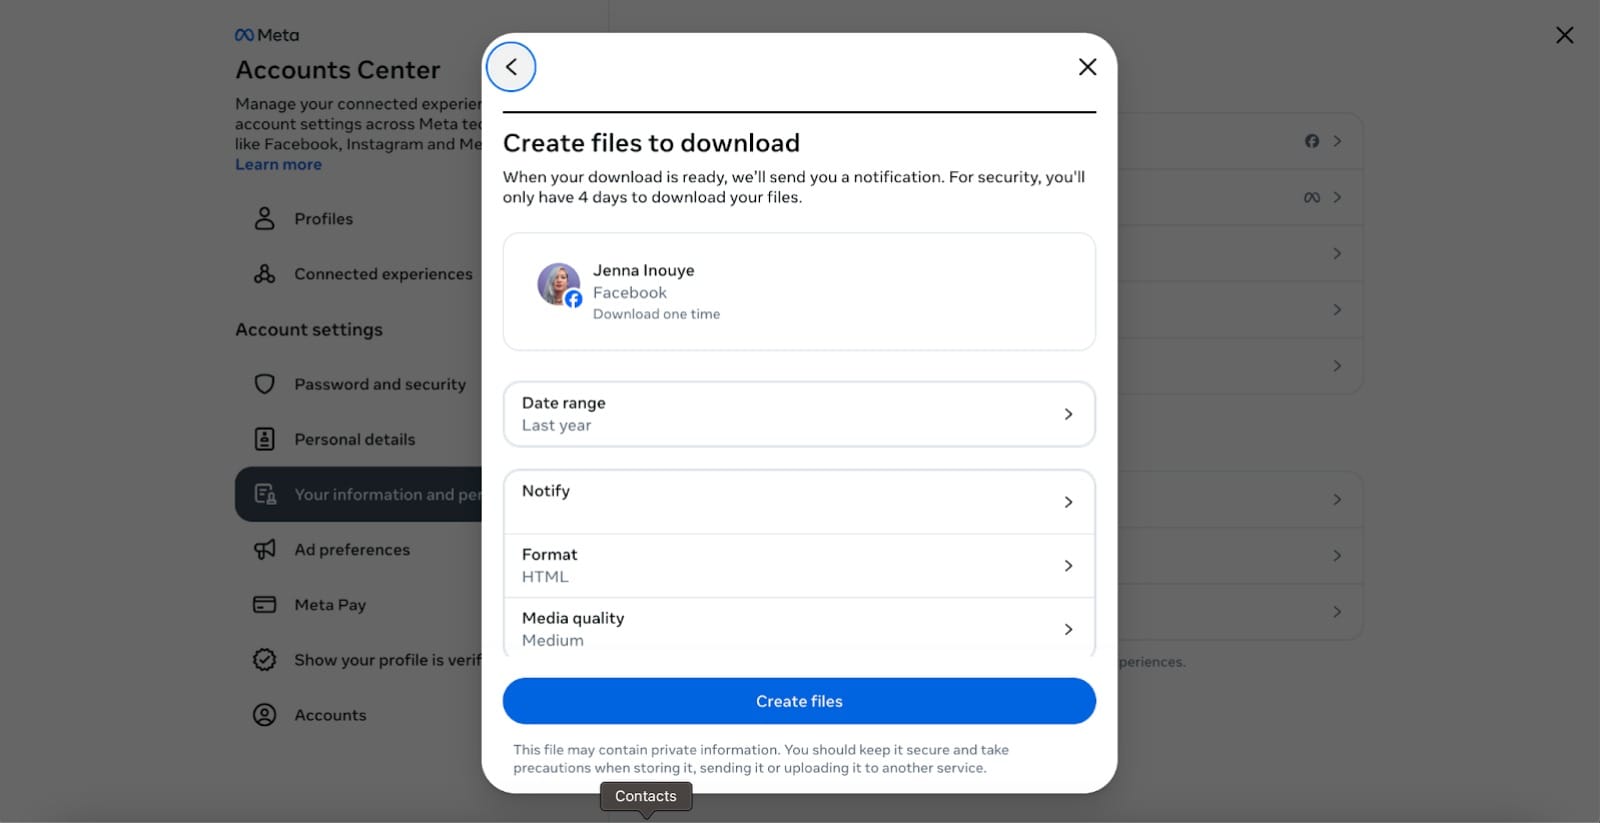
Here, you can select the “Date Range” of the information you want to download, ranging from “Last Week” to “All Time.” There are also a few other options:
- Notify: Facebook will prepare a download for you. This email address is how it will notify you that the download has been completed.
- Format: This is how Facebook will format your post information. You can select HTML or JSON.
- Media Quality: You can select High, Medium, or Low. High will take longer to download.
Once you’ve selected the above options, click “Create Files.”
Step 8) Wait for Your Download
Facebook doesn’t immediately provide your download. Instead, it has to package and prepare the download.
Once you’ve gone through the above steps, you’ll be brought back to the “Download Your Information” tool.
However, now there’ll be something new.
At the bottom, you’ll see an “In Progress” information download. Here, you can cancel the download or wait for it to be complete.
Once your download is complete, you’ll be emailed by Facebook at your “Notify” email address.
Step 9) Download Your Facebook Photos and Videos
When your download is ready, you’ll be able to download it directly from the “Download Your Information” tool.
Click the “Download” button to save your information.
It's been a long journey, but it's finally done. Once you've downloaded your package, you'll have all your photos and videos as a zipped file that you can then extract.
How to Download and Edit Individual Photos and Videos
Let's say you need to download and edit individual photos and videos from your account.
First, go to your "Profile" and then click on either "Photos" or "Videos."
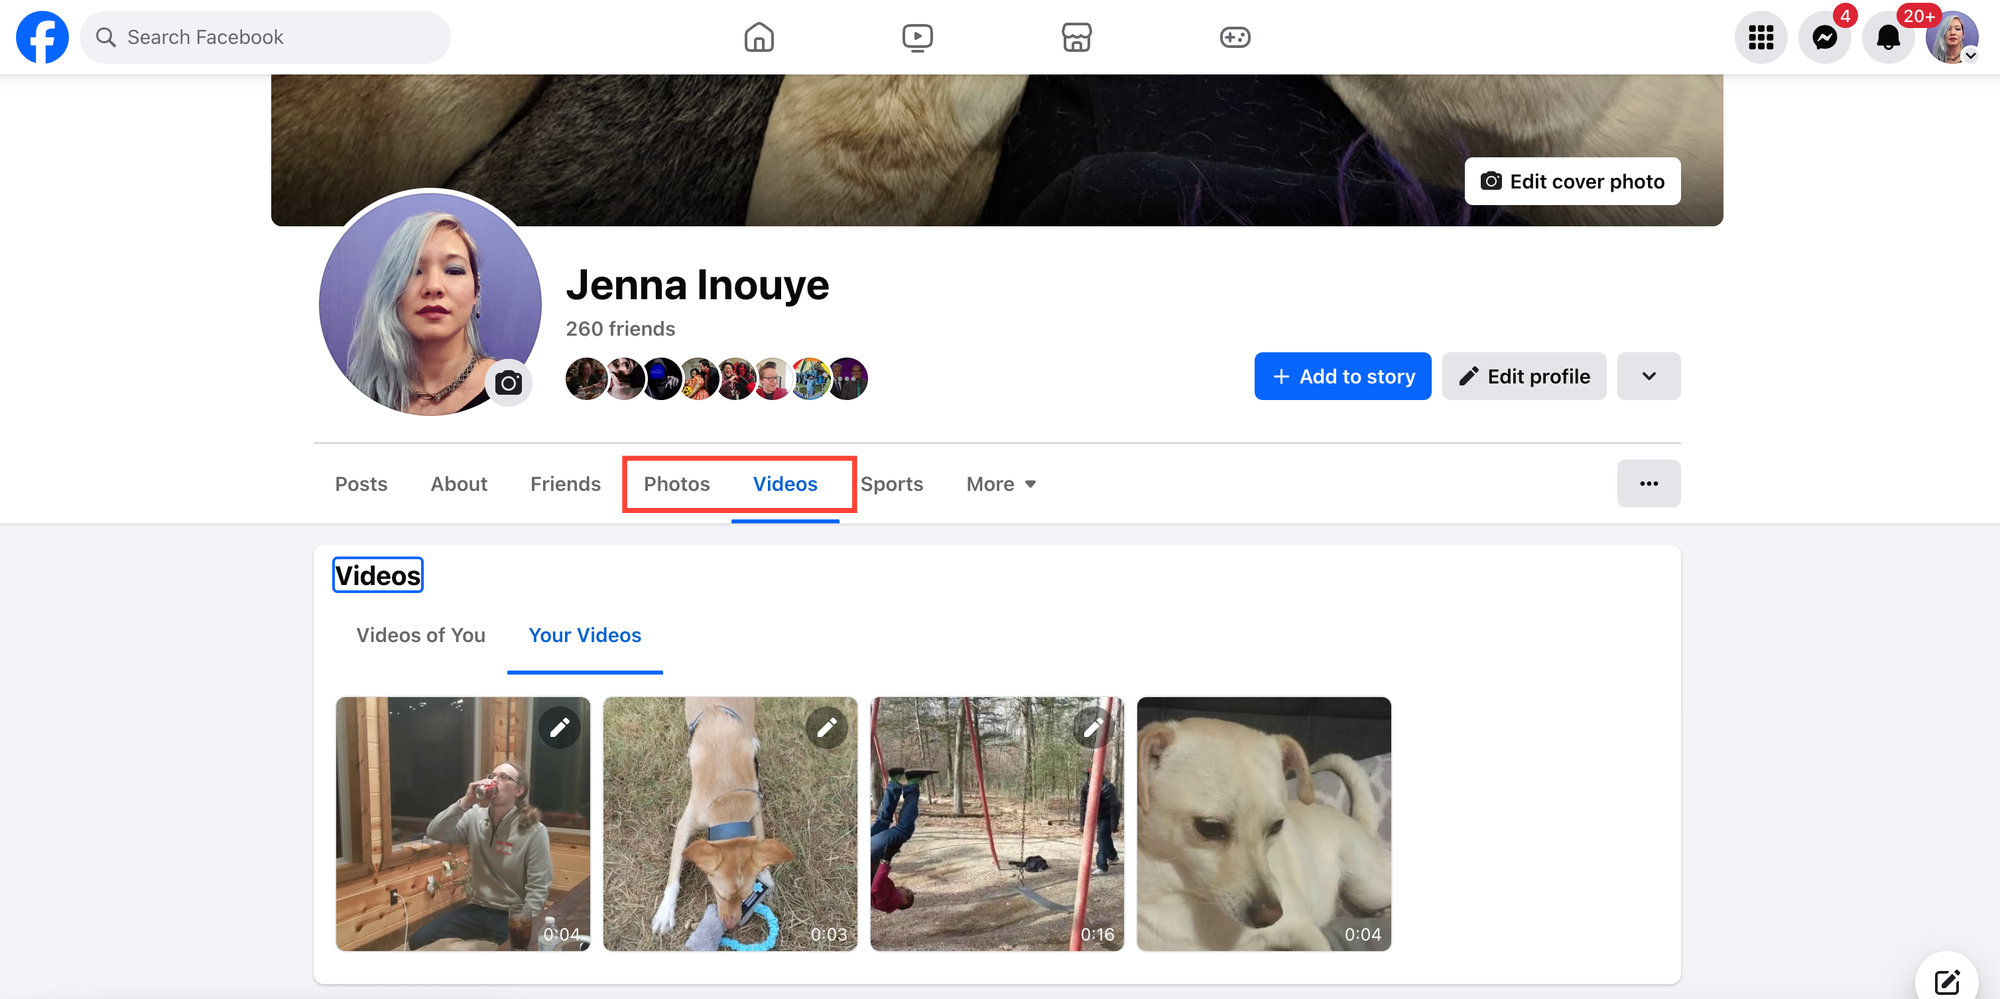
Click on the photo or video that you want to save. To the right, you will see three dots:
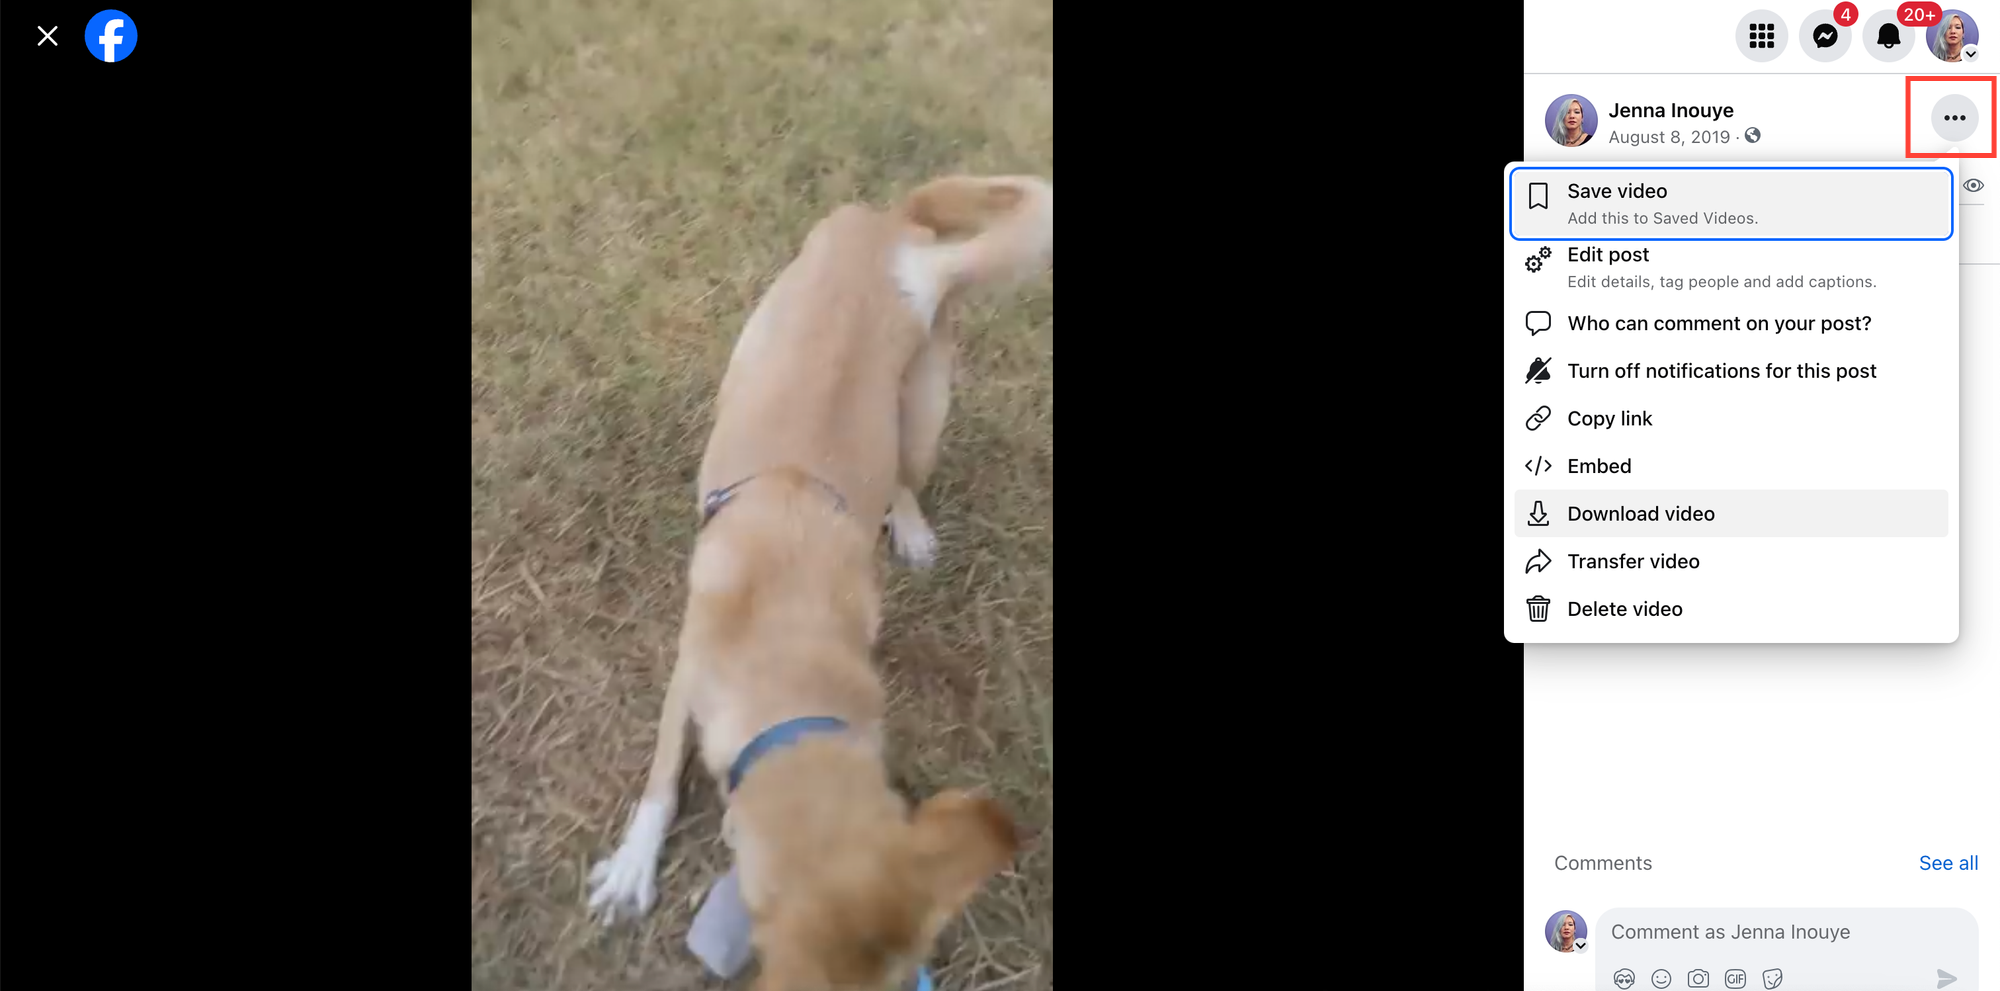
Select "Download video" or "Download photo" and your content will be automatically downloaded to your device.
Your video will be downloaded as an MP4. If you need to edit your photos and videos further, you can then bring them into Kapwing.
Go to the Kapwing editor and "Click to upload."
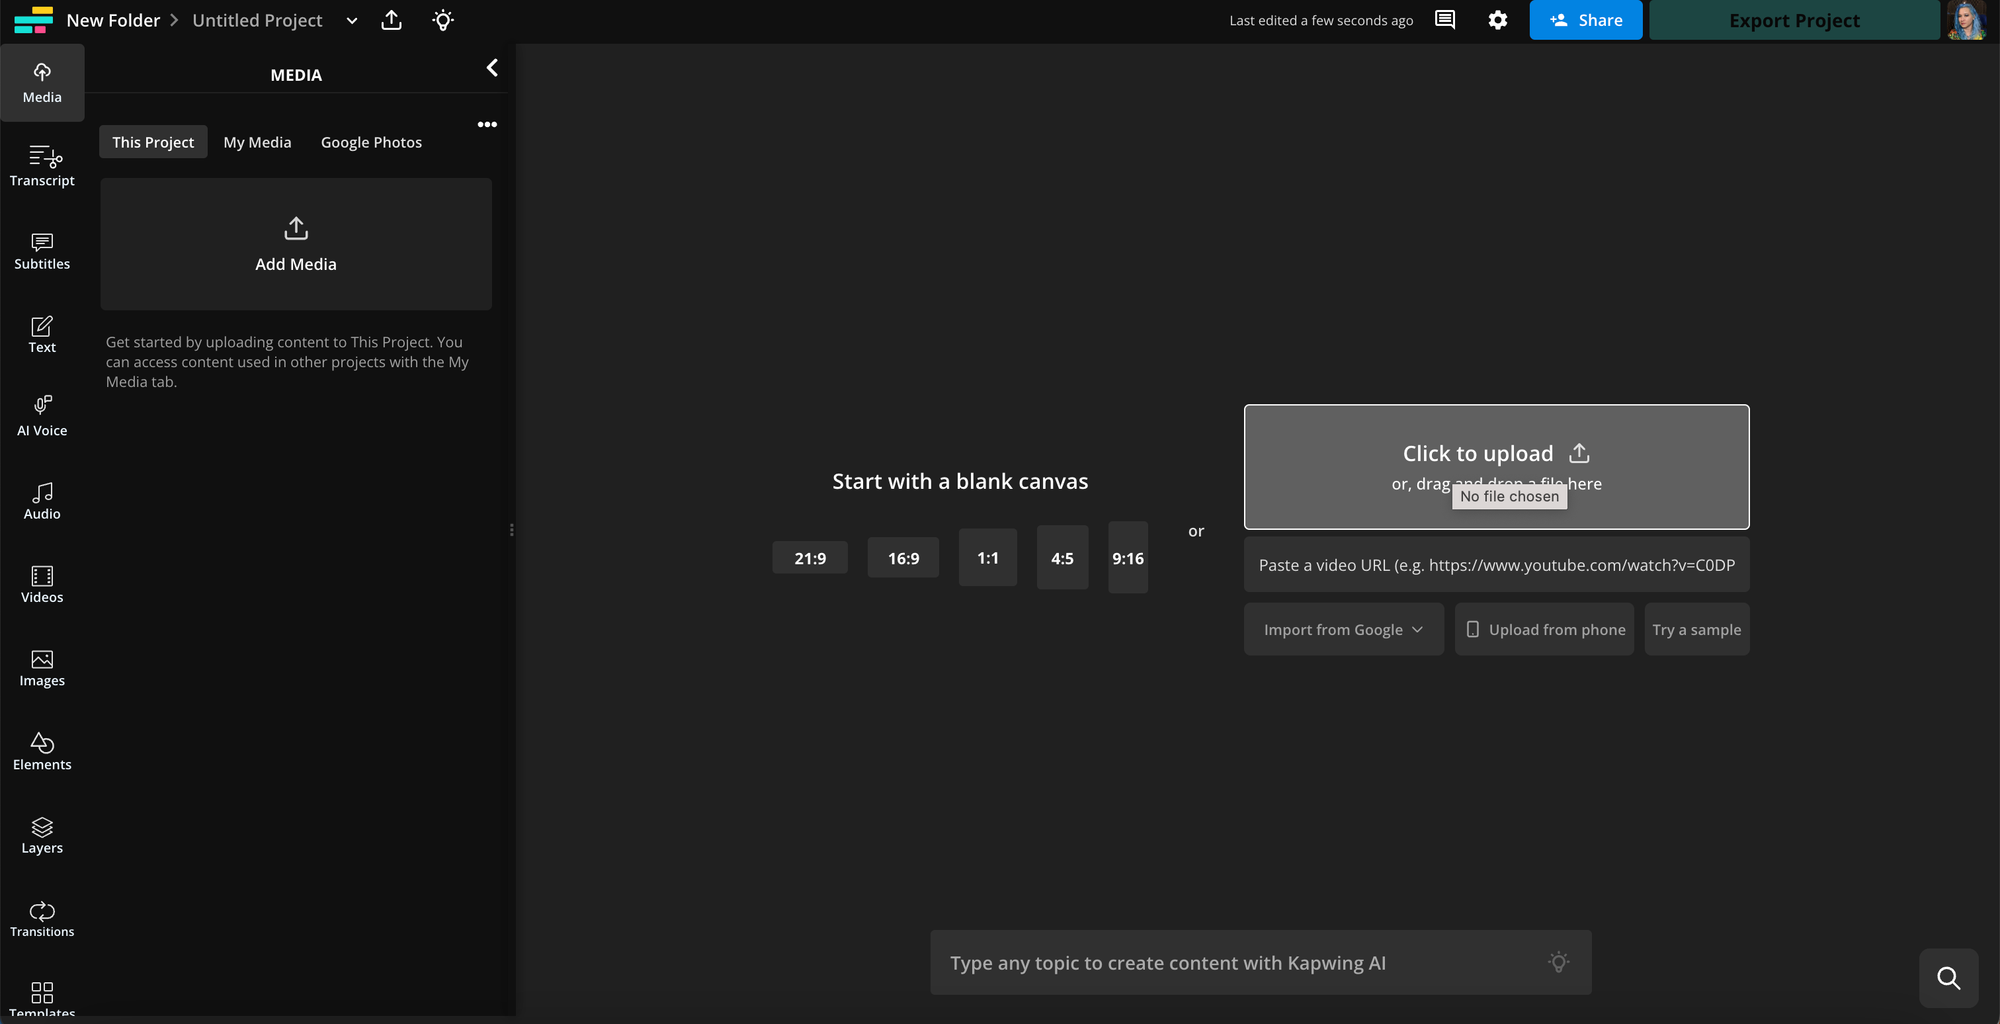
Your downloaded videos and images will be added to your timeline.
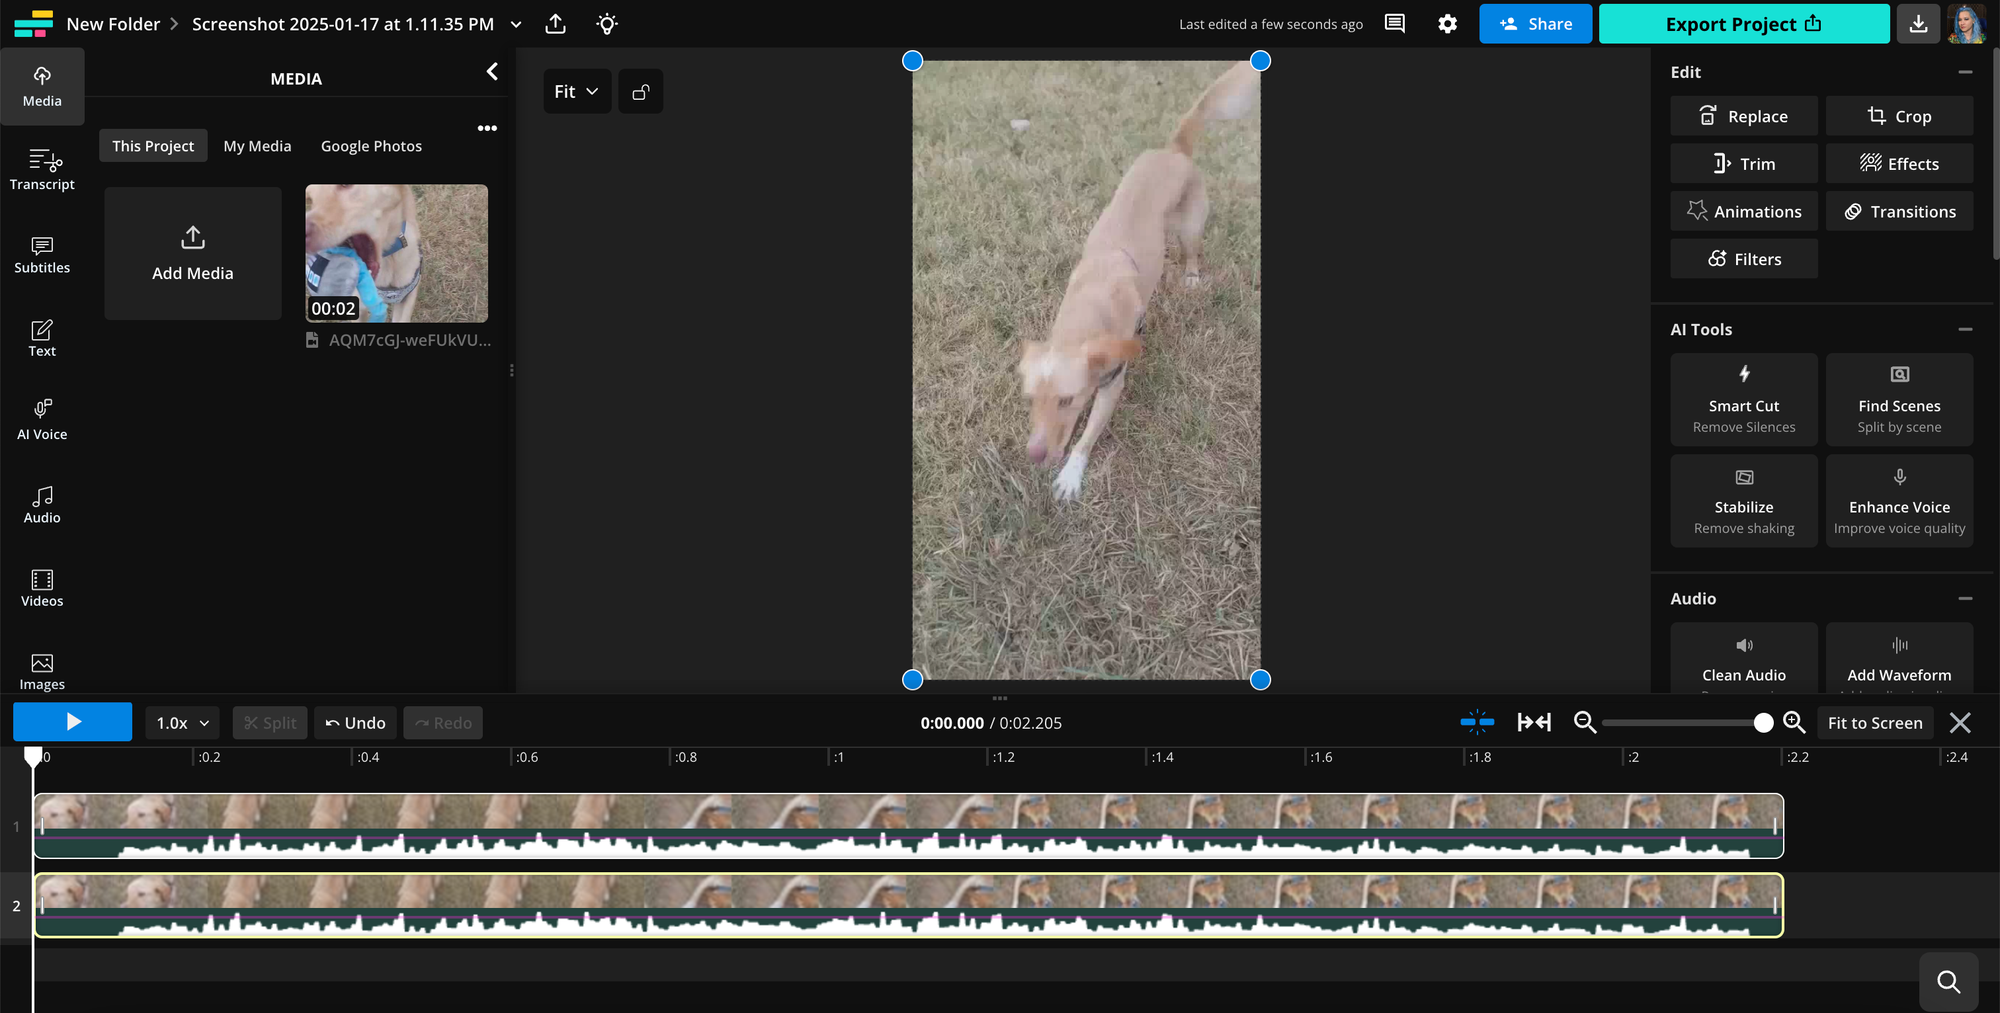
If you're downloading videos from Facebook, one important step to consider is resizing your video. Resizing ensures that your content fits the specific aspect ratios required for different social media platforms, helping to maximize its visual impact and reach.
For example, a 16:9 landscape video might look great on YouTube but could appear awkward or cropped on platforms like Instagram, which often favor square (1:1) or vertical (9:16) formats.
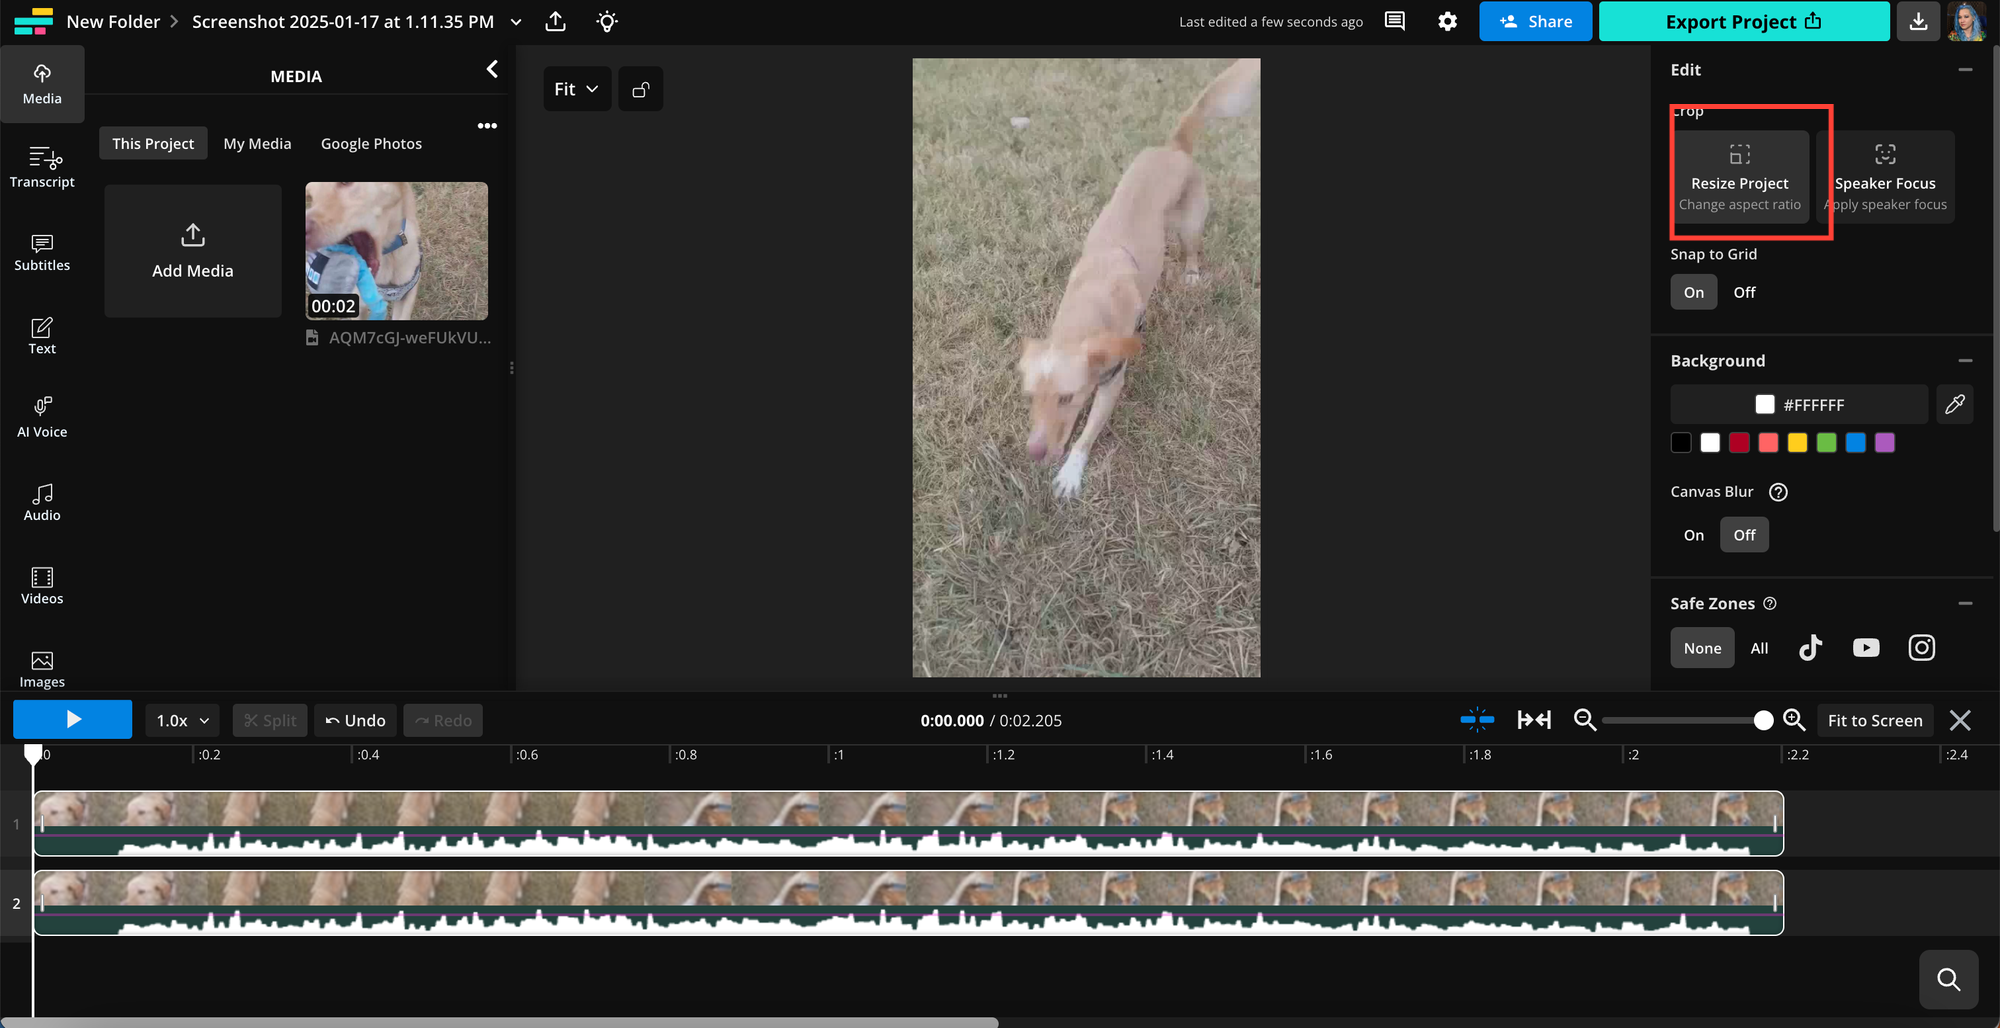
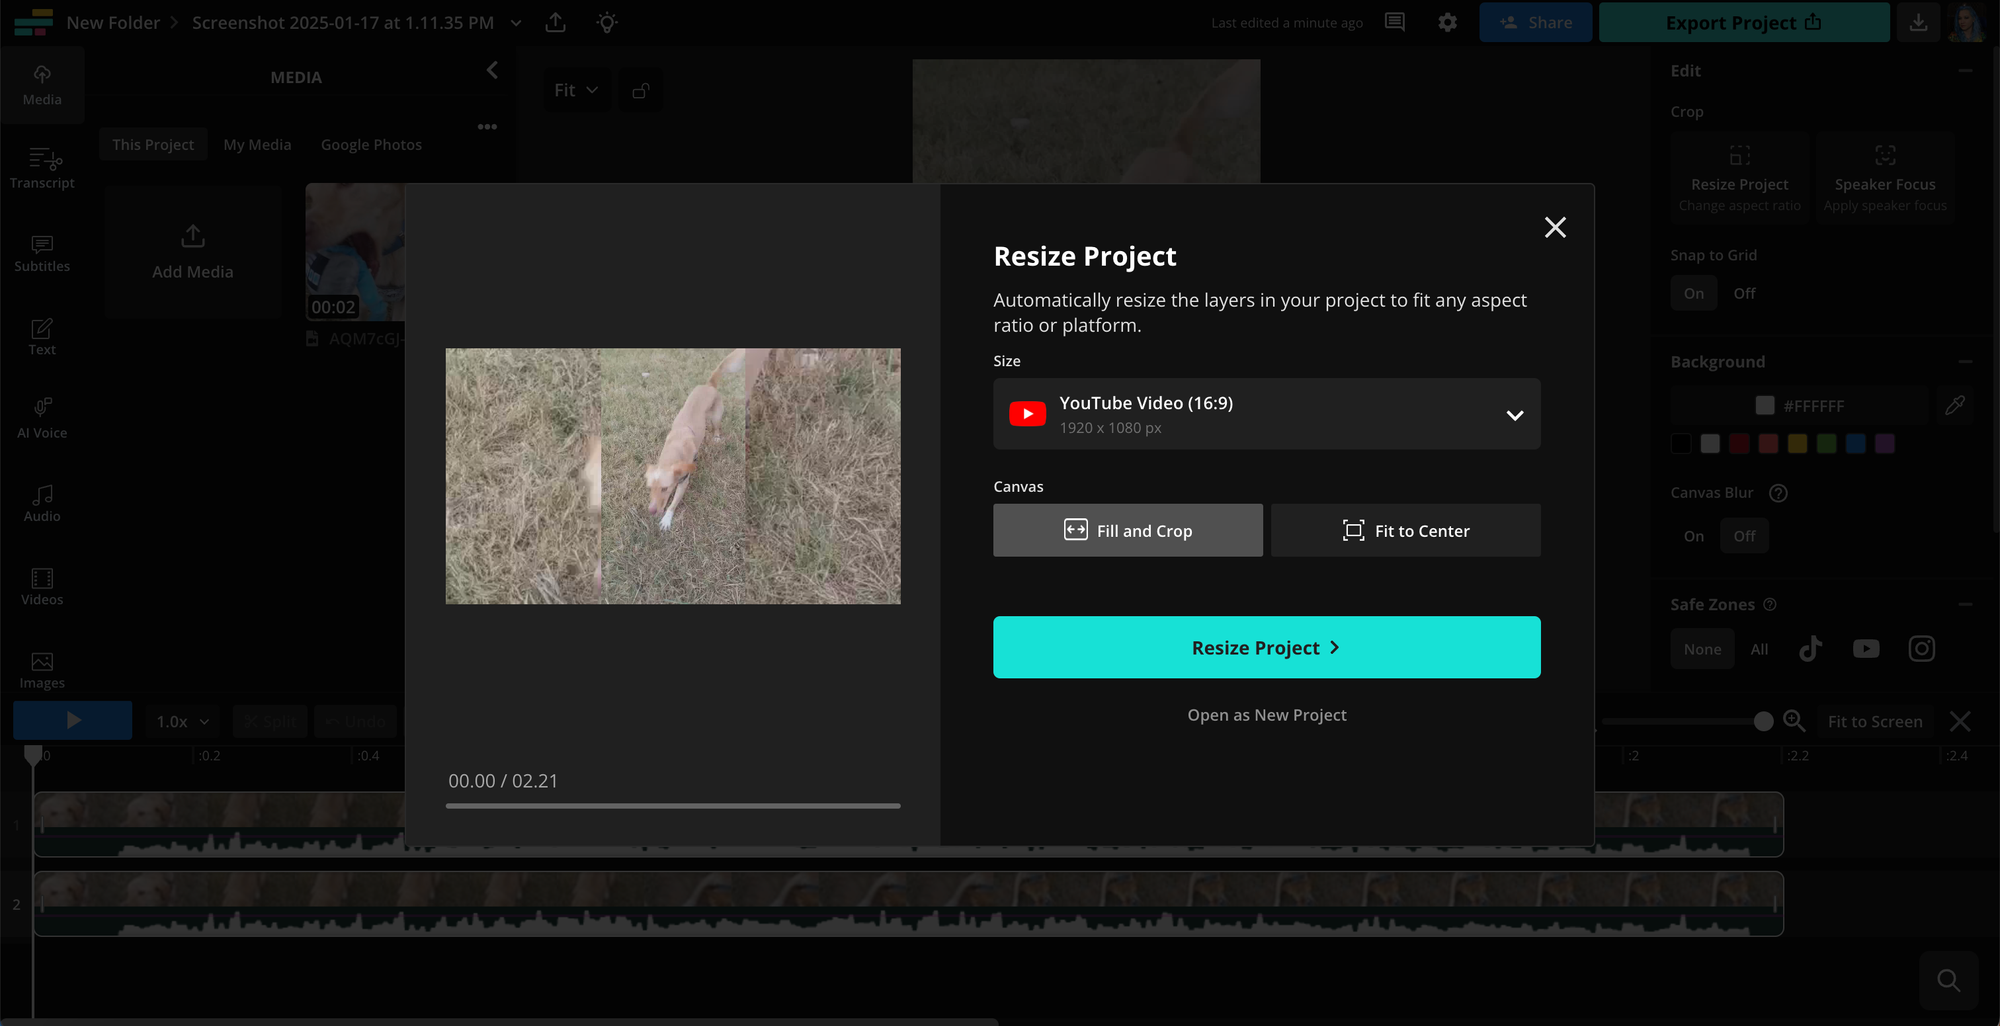
Using the "Resize Project" tool in the right toolbar, you can quickly adjust your video to match the needs of various platforms, ensuring your content looks its best wherever it’s shared.
If you’re considering transitioning to a new social media platform and relocating your photos and videos, it’s essential to familiarize yourself with key video editing techniques to ensure your content is optimized for its new audience.
Some key features you can use on Kapwing after uploading your downloaded Facebook content include:
- Resize: Each platform has its ideal aspect ratio for content. With Kapwing, you can automatically resize your videos and images to perfectly fit these ratios with just one click.
- Split: You can quickly split a single video into multiple videos with Kapwing's easy-to-use manual editing tools. For example, you might want to split a large video into short chunks for uploading to YouTube Shorts or Instagram.
- Merge: On the other hand, you might consider merging your Facebook videos into one larger compilation, such as a year-end highlight reel. This is a great way to streamline storage on your device while keeping your content organized and easy to revisit.
Explore our social media video maker for more ideas.
How to Deactivate or Delete Your Facebook Account
Once you’ve downloaded your Facebook information, the next step could be deactivating or deleting your account. For that, you’ll want to go back to Facebook Settings.
This time, click on “Accounts Center.”
In the “Accounts Center” click on “Personal Details” and then “Account Ownership and Control.”
Click on “Deactivation or “Deletion” and select your account.
You can then select from the following:
- Deactivate: Your account will still exist, but no one will be able to view your profile or your content. You can reactivate your account at any time.
- Delete: Your account will be entirely deleted. This is permanent.
Facebook FAQs
Why should I download my Facebook information before deleting my account?
Downloading your Facebook information ensures you have a backup of your photos, posts, messages, and other important data. Once your account is deleted, this data cannot be recovered.
What data can I download from Facebook?
You can download: photos and videos, posts, comments, messages, chats, friends lists, and even ads you’ve interacted with. If you’re big on privacy, you can download your activity logs, too.
How long does it take for Facebook to prepare my download?
It all depends on the size of your data. Small downloads could be ready within minutes, but larger downloads are likely to take several hours.
Should I deactivate or delete my Facebook account?
Deactivating is good for a “detox,” but you may want to delete your data entirely if you’re more concerned about privacy.
Will deleting my Facebook account also delete my Messenger?
Yes; deleting your Facebook account will not only delete your messenger, but you also may not be able to log into any accounts that you used Facebook to log into. However, you can deactivate your account and keep these options.


