How to Download Facebook Live Videos
Facebook Live is used by people, businesses, churches, and performers to broadcast their services, stream gaming content or play live sets, and with Kapwing it couldn't be easier to download this content.

Facebook Live is used by people, businesses, churches, and performers to broadcast their services, stream gaming content or play live sets.
But if you want to share these videos somewhere else, make edits to them, cut out sections to watch later, or play them outside of Facebook, you can't download the livestream directly from Facebook. Instead, you need to use alternative software to save Facebook Live videos to your computer or phone.
Thankfully, in four easy steps, you can use Kapwing to download and edit your favorite Facebook Live content.
Steps:
- Copy the video link
- Upload it to the Kapwing Studio
- Edit your Facebook Live clip
- Export & download
Step 1: Copy the video's link
Find the live video you wish to download by browsing Facebook's Video tab, scrolling through your timeline, reading a Messenger conversation, or looking back in your Favorites folder. There is a section for Live videos within the Facebook Video tab.
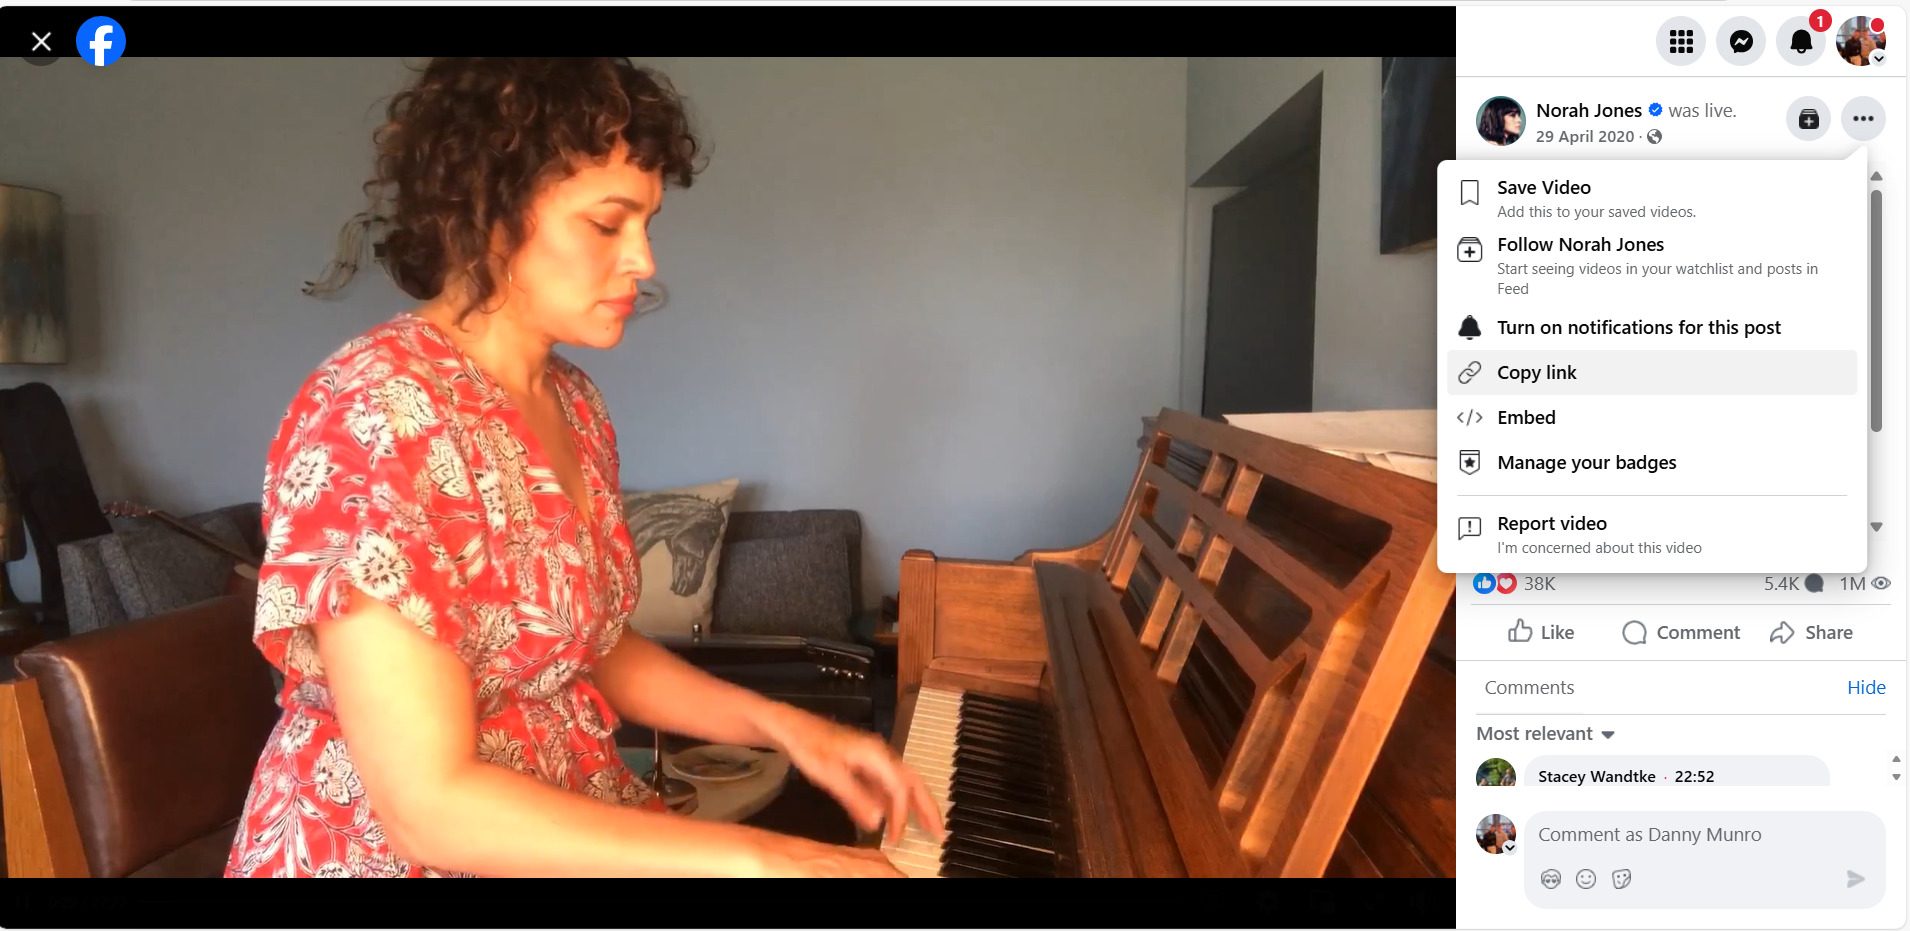
Once you have found the archived live stream, copy the link from the three-dot menu in the top right hand corner, or manually copy and past the URL from the search bar at the top of your screen.
Step 2: Upload it to the Kapwing Studio
With your Facebook Live link copied, head over to Kapwing.com and select Create New. This will take you to the Kapwing Studio, where you can use all of Kapwing's video editing tools in one place. Select the URL field on the right hand side and paste the link to your footage. Your video will immediately begin uploading to the Studio.
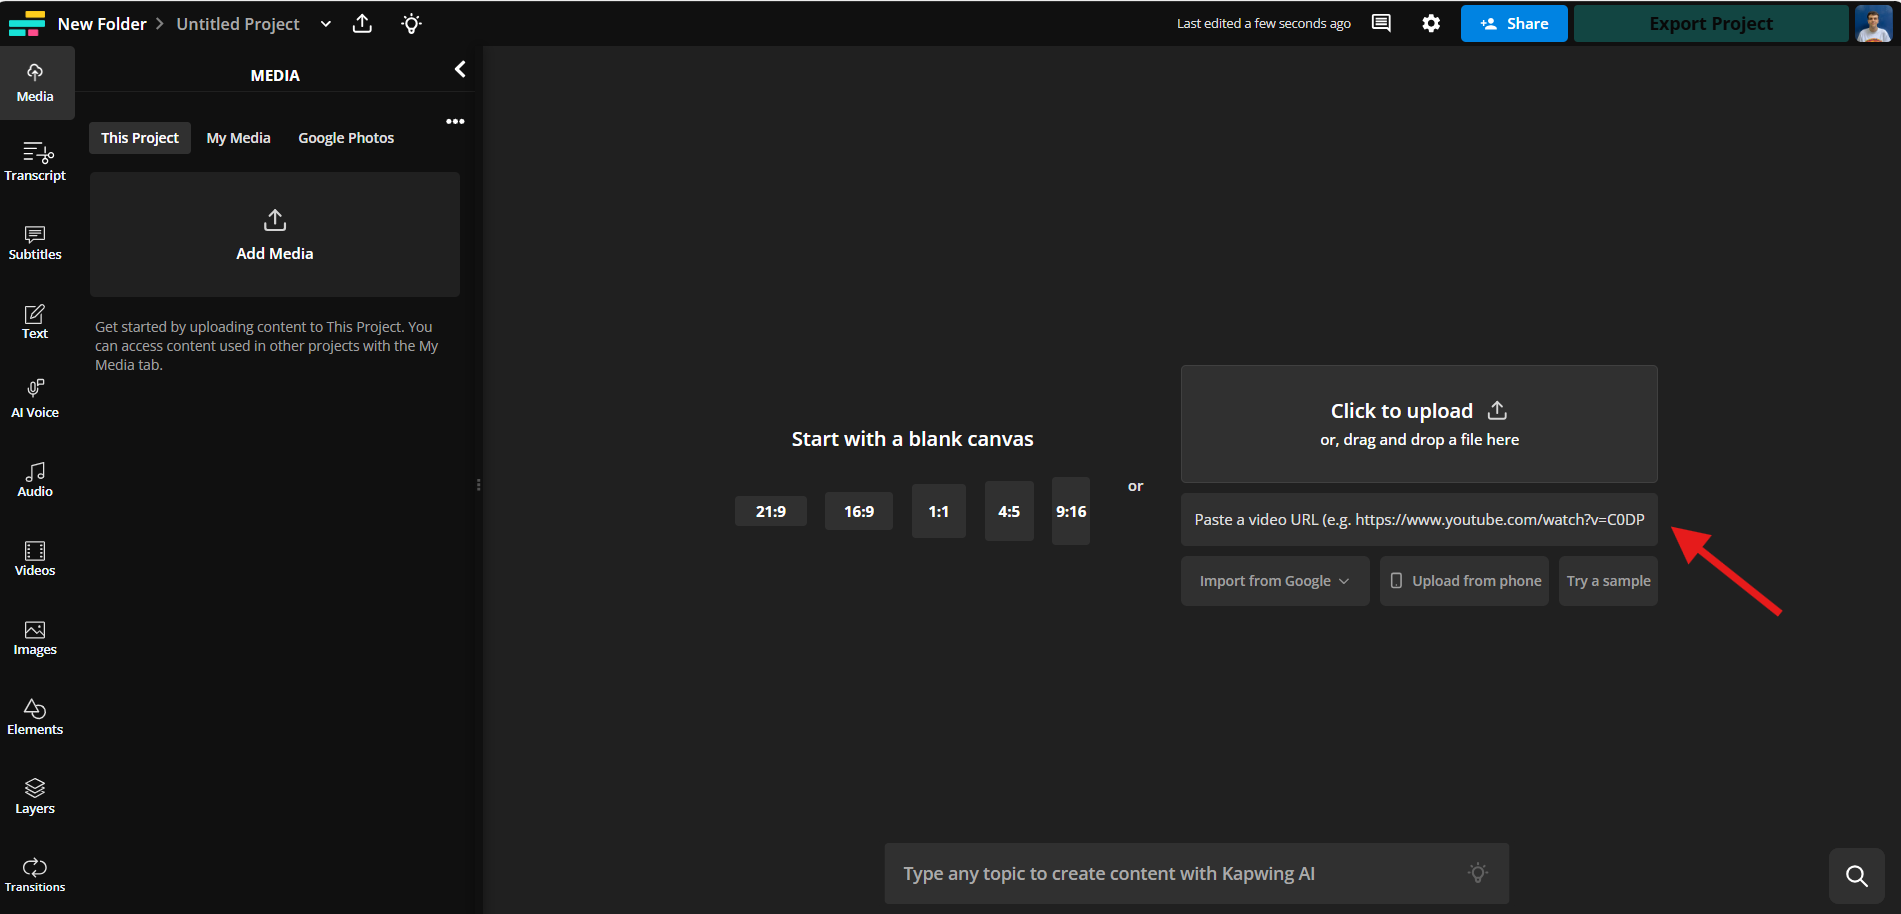
Once your video is uploaded to the Studio, you can cut the parts you wish to save. Kapwing can support lengthy content, but it cannot export videos longer that exceed two hours running time, so you may wish to trim your content into smaller segments.
Step 3: Edit Your Facebook Live Clip
Once you have uploaded your live stream clip, you can use the Kapwing Studio to edit the content - either for personal use, or in order to produce your own content in tribute to your favorite Facebook streamer - such as a compilation or highlight reel.
Kapwing users can add captions using the Auto Subtitle Generator, which saves creators from having to manually transcribe the audio from the Facebook footage.
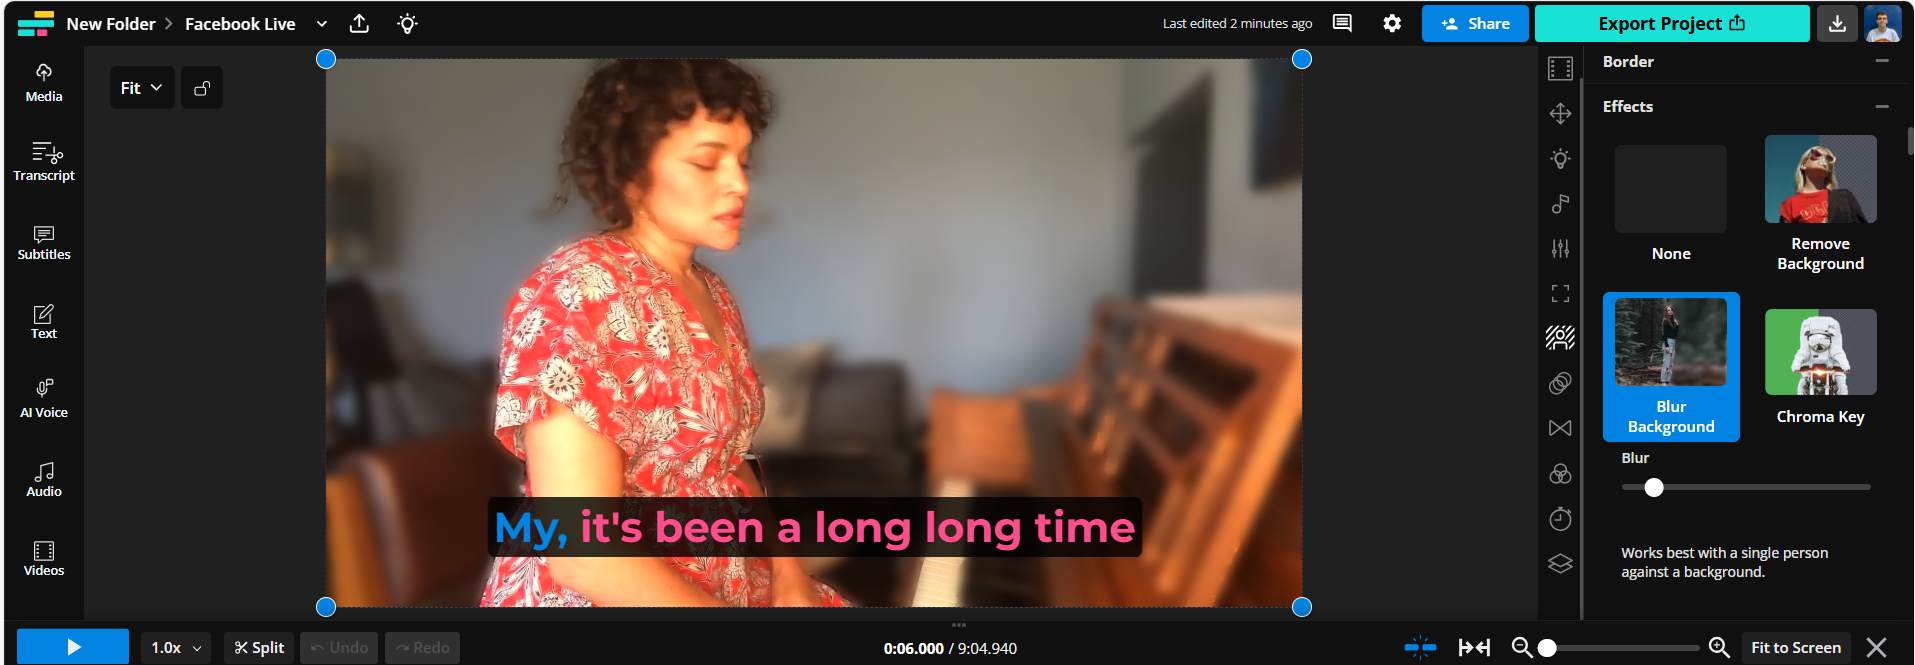
In this instance, the Video Stabilizer Tool has been applied in order to minimize any shaking the camera may have picked up during the live stream. The background has also been blurred to emphasize focus on the subject.
Step 4: Export & download
Once you are satisfied with the any edits made to your video and the content has been trimmed to under two hours, you can download the footage to your device.
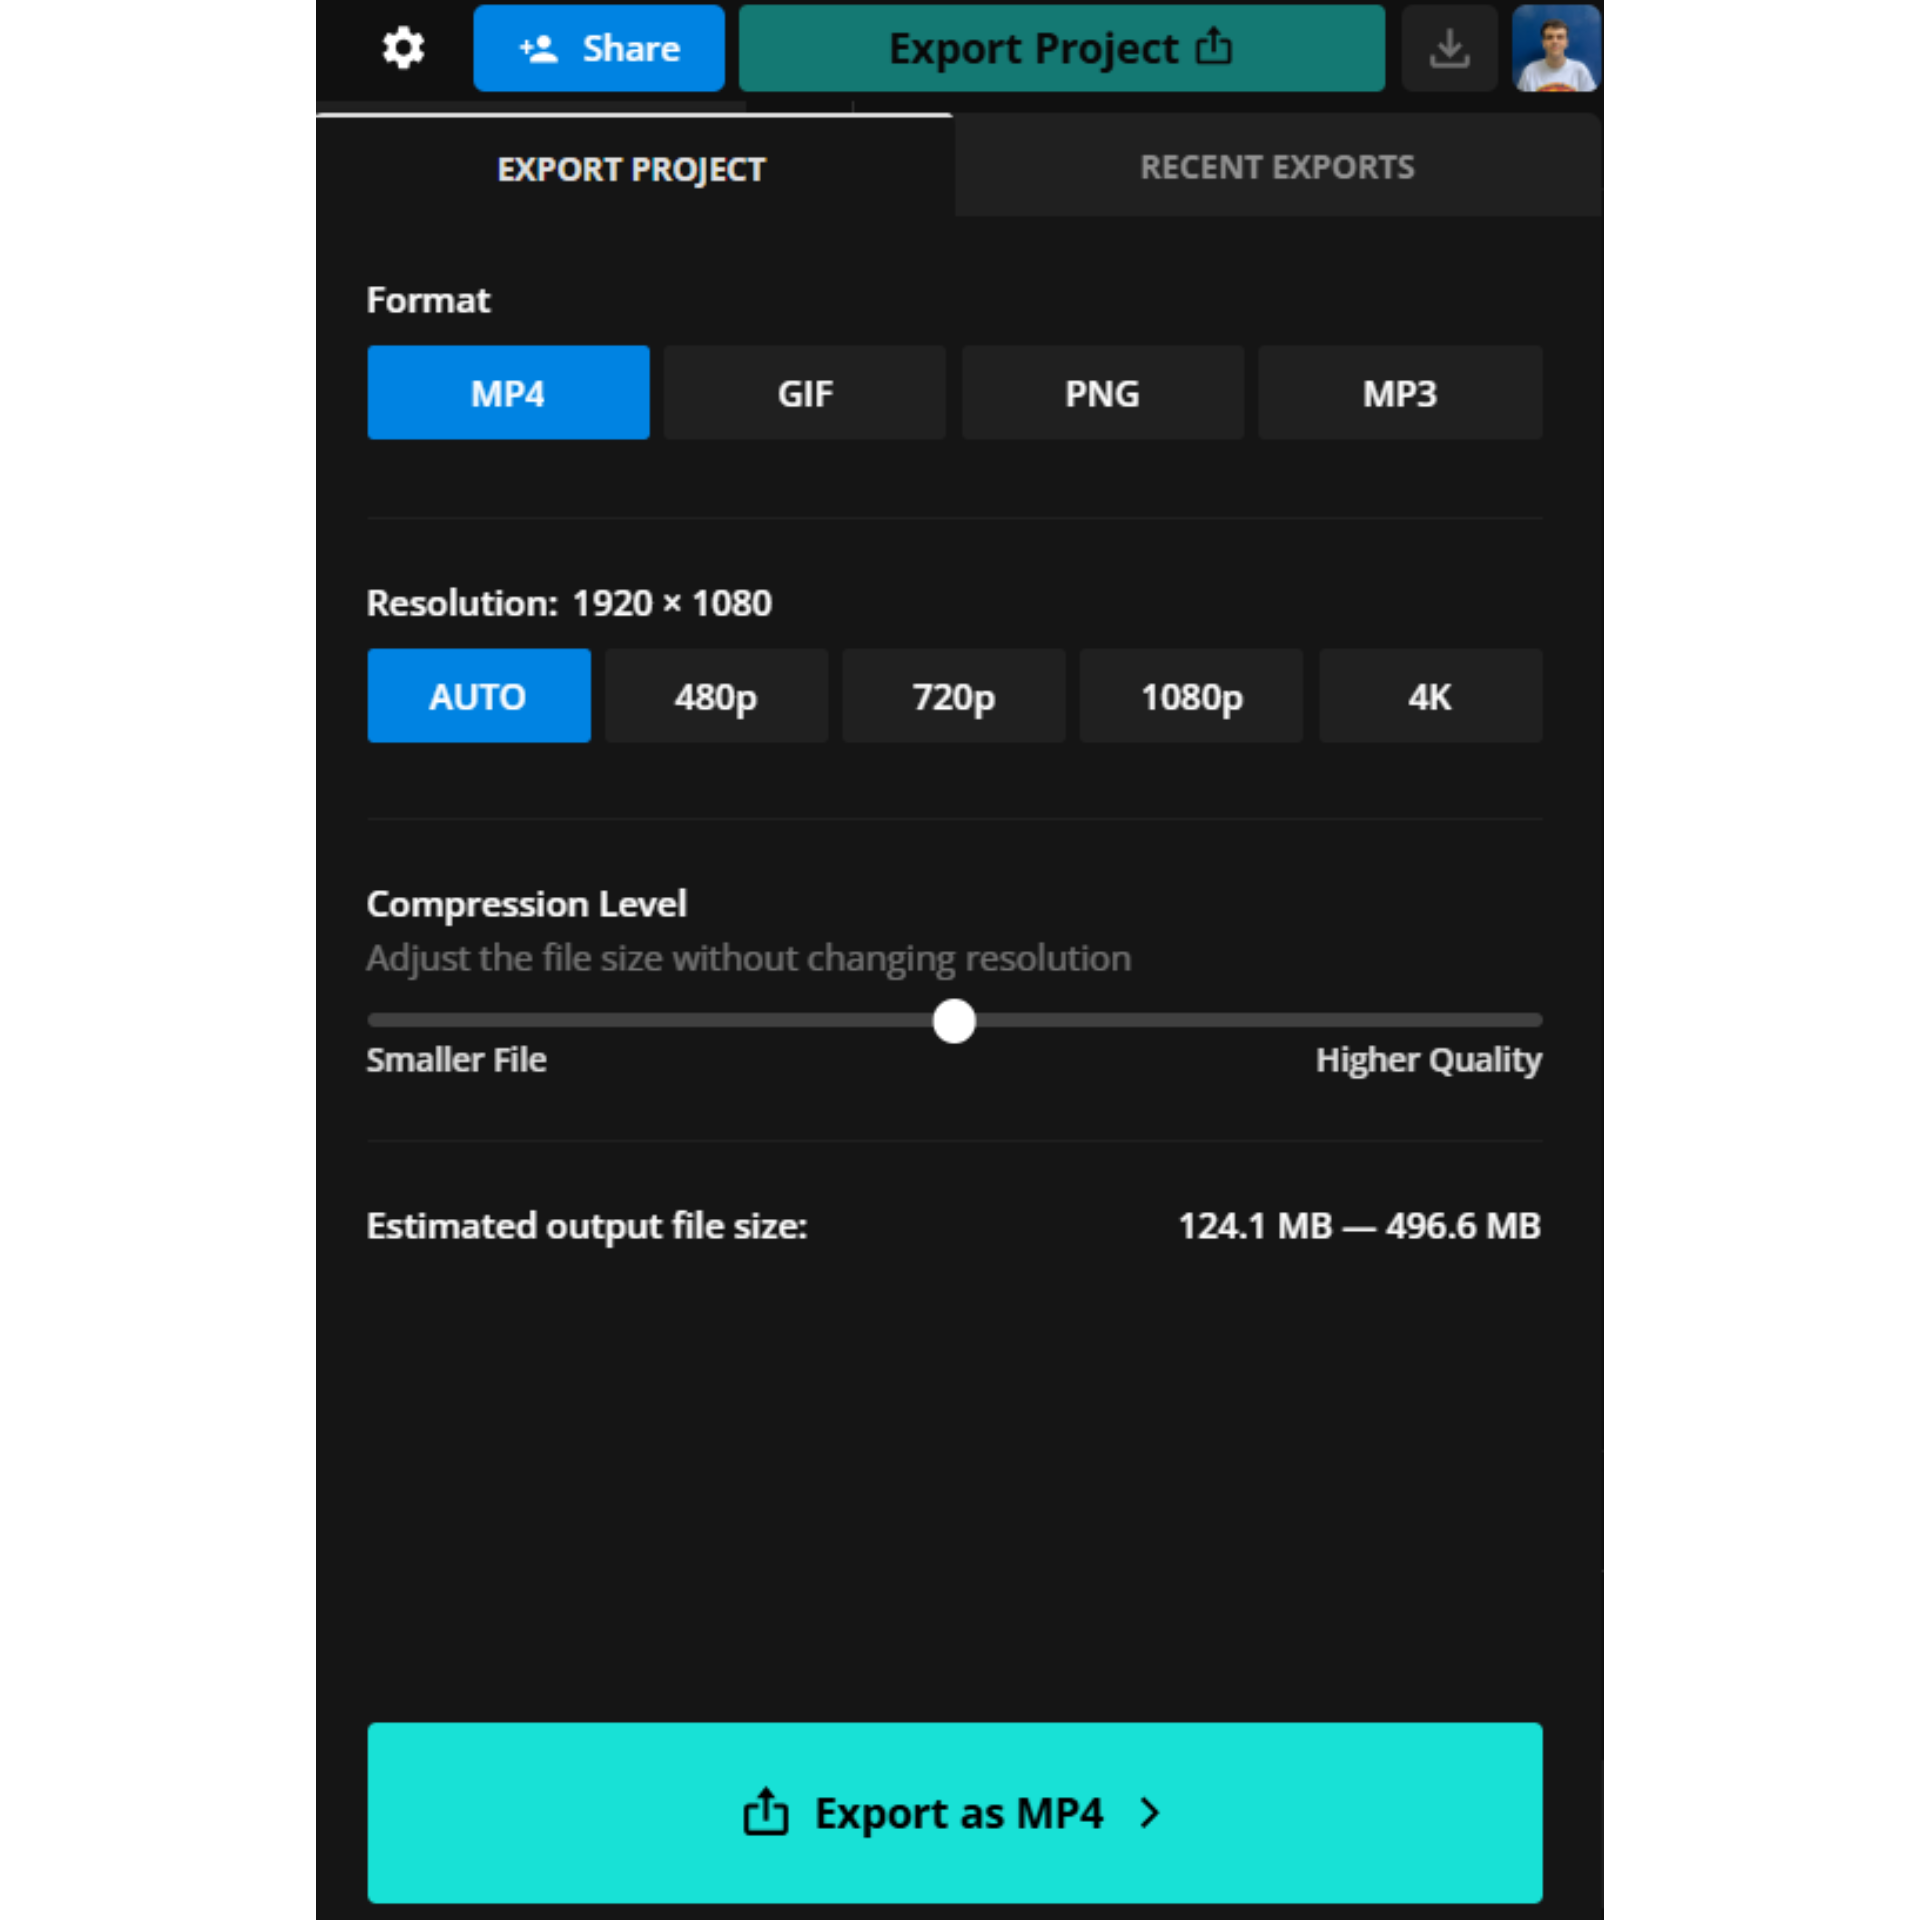
In order to do this, select the blue Export Project option in the top right hand corner and select the MP4 option from the drop down menu.
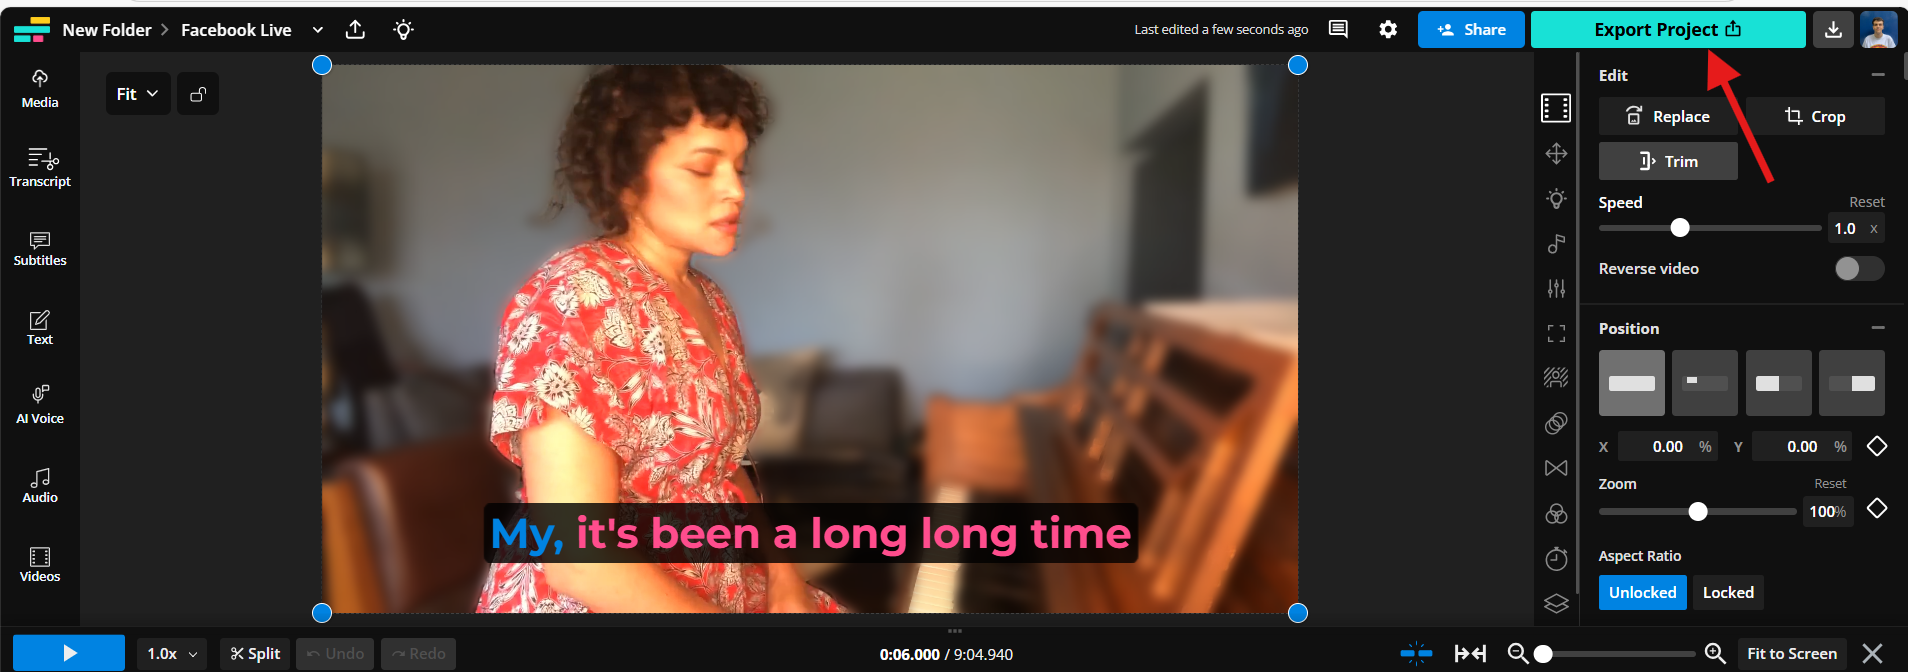
Users can adjust their preferred Compression Level based on their desired resolution size. Content with a higher resolution will be better quality, but may take longer to export and occupy more space in your files.
If you're not signed into a Kapwing account, sign in or sign up using your Google or Facebook account. Your content will have a Kapwing watermark, unless you are signed up to a Pro account, in which case the watermark in the lower right corner will be removed from your final project.
Remember to tag us @KapwingApp whenever you share your content on social media – we love to see what our creators are passionate about! And be sure to subscribe to the Kapwing Resources page – we’re constantly writing new tutorials and features to help you get the most out of Kapwing.


