How to Make a Custom Clubhouse Profile Picture
Adding a custom profile picture to your Clubhouse bio is one of the only ways to stand out on the app. In this tutorial, we'll show you how to create a colorful profile photo for the exclusive audio-based app.

Clubhouse - the exclusive audio-only chat app launched in 2020 is growing at an astounding rate. Despite the app's strict rule barring new users from signing up until they receive an invite, more than two million people are logging in to chat and network on the platform each week.
A new contender in the social app space dominated by legacy giants like Facebook and Twitter, Clubhouse currently offers little in the way of bio or profile photo customization. As a result, many users have found clever ways to add a little color and make their images pop among the hoards of avatars in popular rooms.

In this tutorial, I'll show you how to change your profile photo in the Clubhouse app and how to create several different profile image styles that are common in the app today.
How to Change Your Profile Photo on Clubhouse
Your Clubhouse profile photo is the main identifier of who you are on the audio-based app. Anytime you join a Clubhouse room, your profile photo is visible to everyone else in that room. First impressions are important, and you want to choose a photo that reflects who you are even at a glance. To change your profile photo:
- Tap on your profile photo in the top right of the screen
- Tap on your current profile photo inside your bio
- Tap on your profile photo again to change it

Clubhouse lets you choose any photo from your phone or take a new photo when updating your profile picture. The app automatically crop images to an irregular oblong shape that we'll have to work around. More on that later.
How to Make a Colorful Cut-Out Profile Picture
One of the more popular profile picture styles you'll see in marketing and business focused rooms on Clubhouse is the perfect cut-out of a person's face with a colorful background behind them.

This effect is achieved by removing the background behind the person in the original photo and then adding it to a colored square background.
- Upload a photo to the Kapwing Studio
- Resize the photo to 1:1
- Erase the background in your photo
- Change the background color
- Export, Download and Add Your Picture to Clubhouse
Step 1: Upload a photo to the Kapwing Studio
Start by uploading a photo of yourself to the Kapwing Studio editor. You can upload photos from your phone or computer or copy any image of yourself from another website or social media profile.

Step 2: Resize the photo to 1:1
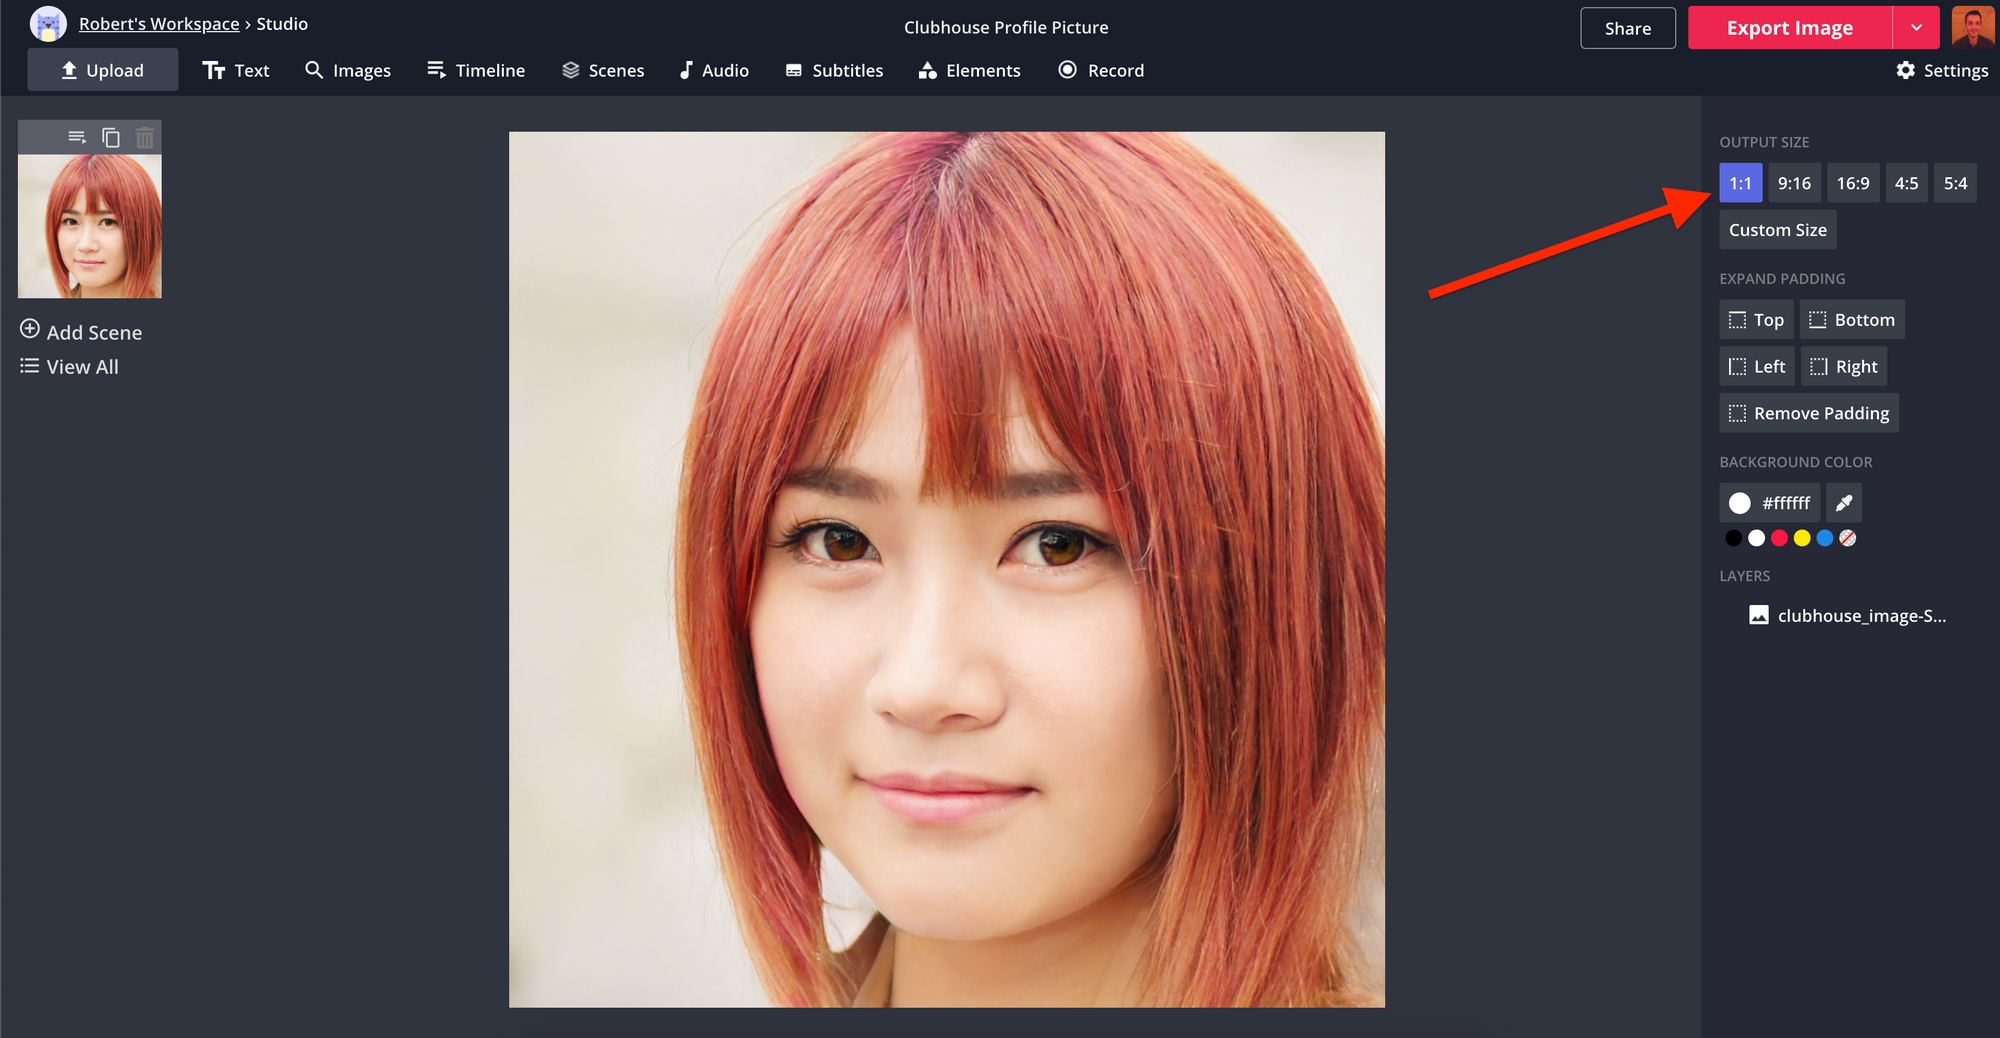
With your profile photo uploaded into the Studio Editor, click the 1:1 button on the right side of the screen to resize the image into a square shape. Your image needs to be a perfect square to properly fit into the Clubhouse profile picture.
If you want to continue cropping your image to fit your face, click on your photo and then select Crop from the menu on the right side of the screen. You can adjust the image any way you want as long as it ends up in a 1:1 square.
Step 3: Erase the background in your photo
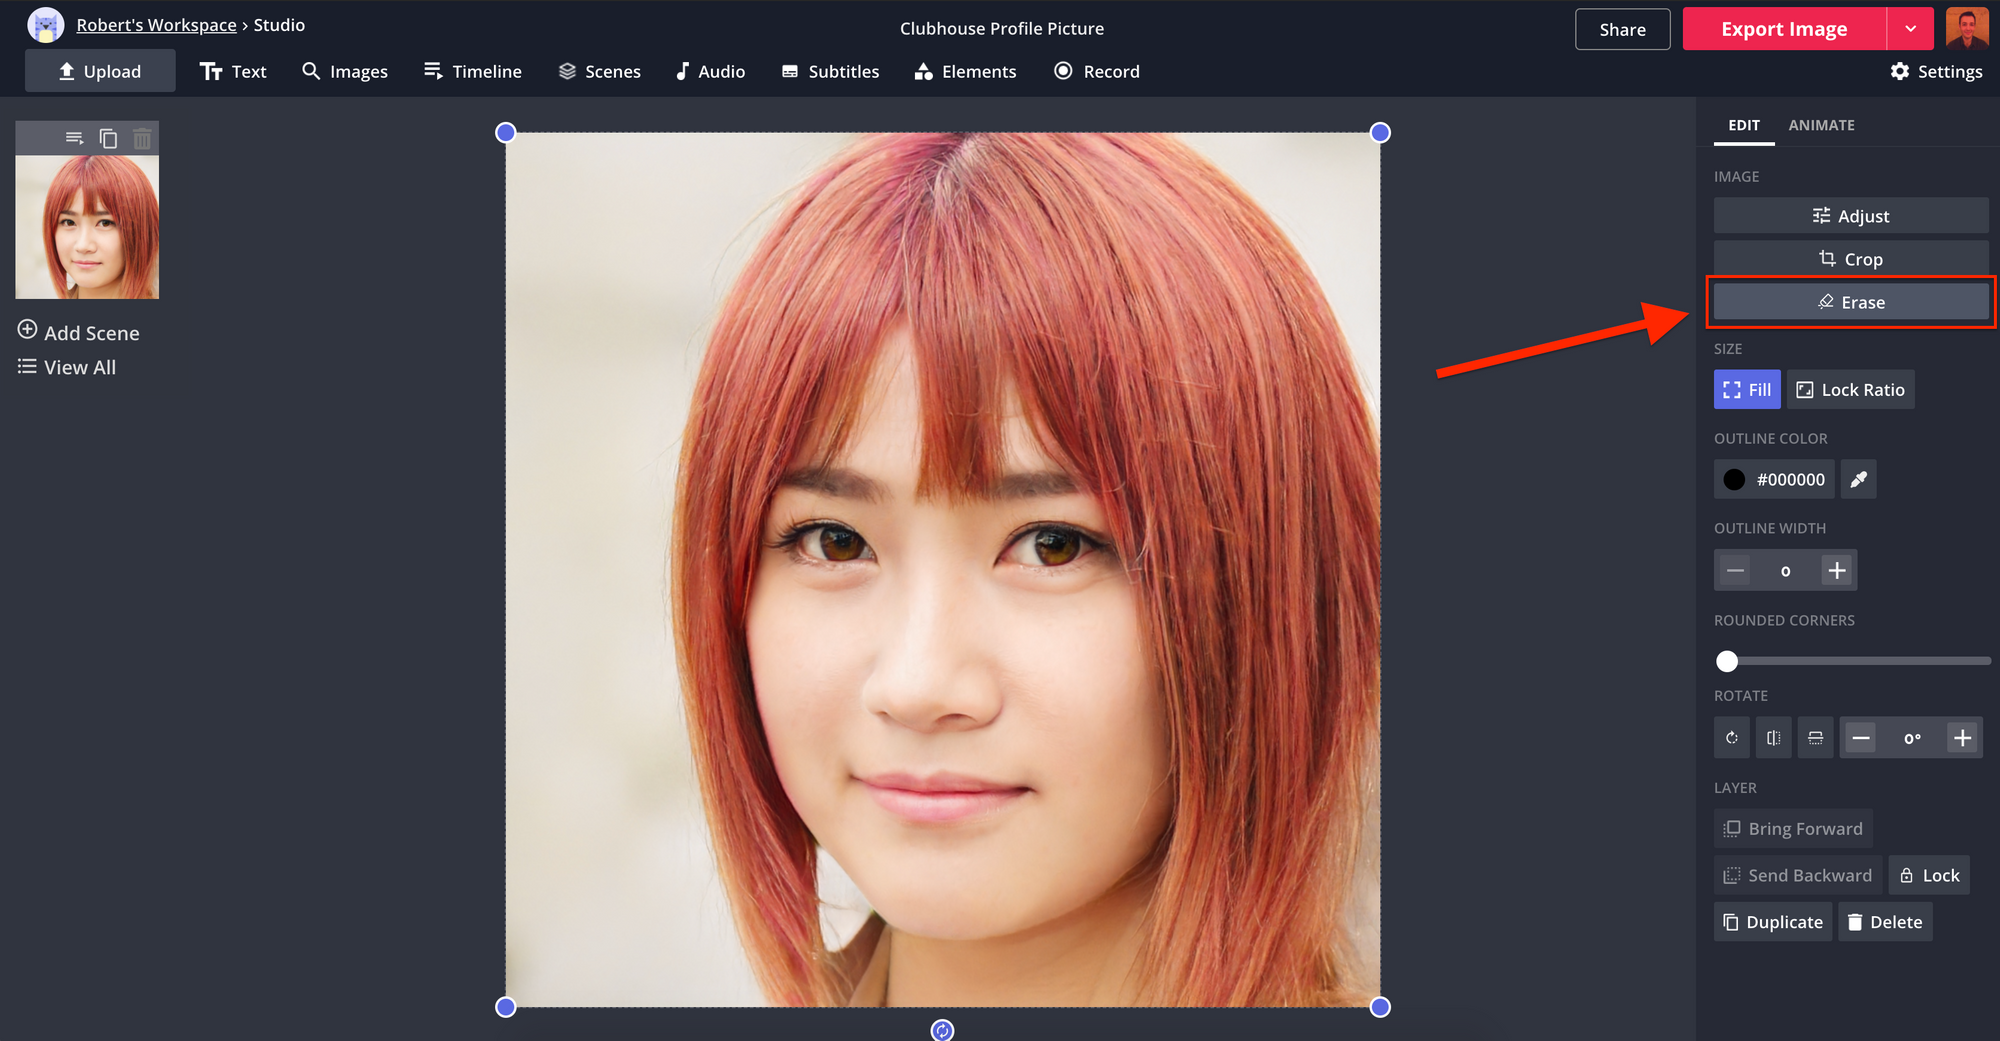
Now that your image is resized, it's time to cut yourself out and remove the background. Click on your image and then select Erase from the menu on the right side of the editor.

Inside the Erase tool, select the magic wand tool and click on part of the background. This will automatically select a large section of the background for you to remove. Double-check the area that is selected and click Remove Pixels in the right-hand menu.
Start clicking on different parts of the background to remove as much as possible. If your photo features a mostly solid background, it's likely that you can erase the majority background with the magic wand tool alone.
Content made on Kapwing
If you need more precise control, select Erase from the right-hand menu and click & drag your cursor over the sections of the background that you want to remove. If the eraser tool is too large or too small, change its diameter by dragging the Eraser Size slider to the left or right.
Once, you've removed all of the background, click the red Done button to return to the studio editor.
Step 4: Change the background color
With the original background fully removed, you're ready to add a new colorful background that will stand out and hopefully earn you lots of new followers on Clubhouse.
Click on the Background Color on the right-hand side of the screen to change the color that appears behind your face. You can choose from any of the colors that appear in the menu or enter a hex color code to find an exact shade. It's generally a good idea to pick a color that contrasts with the color of your clothing or hair. This will make your face pop more in the small profile image.
Content made on Kapwing
Step 5: Export, Download and Add Your Picture to Clubhouse
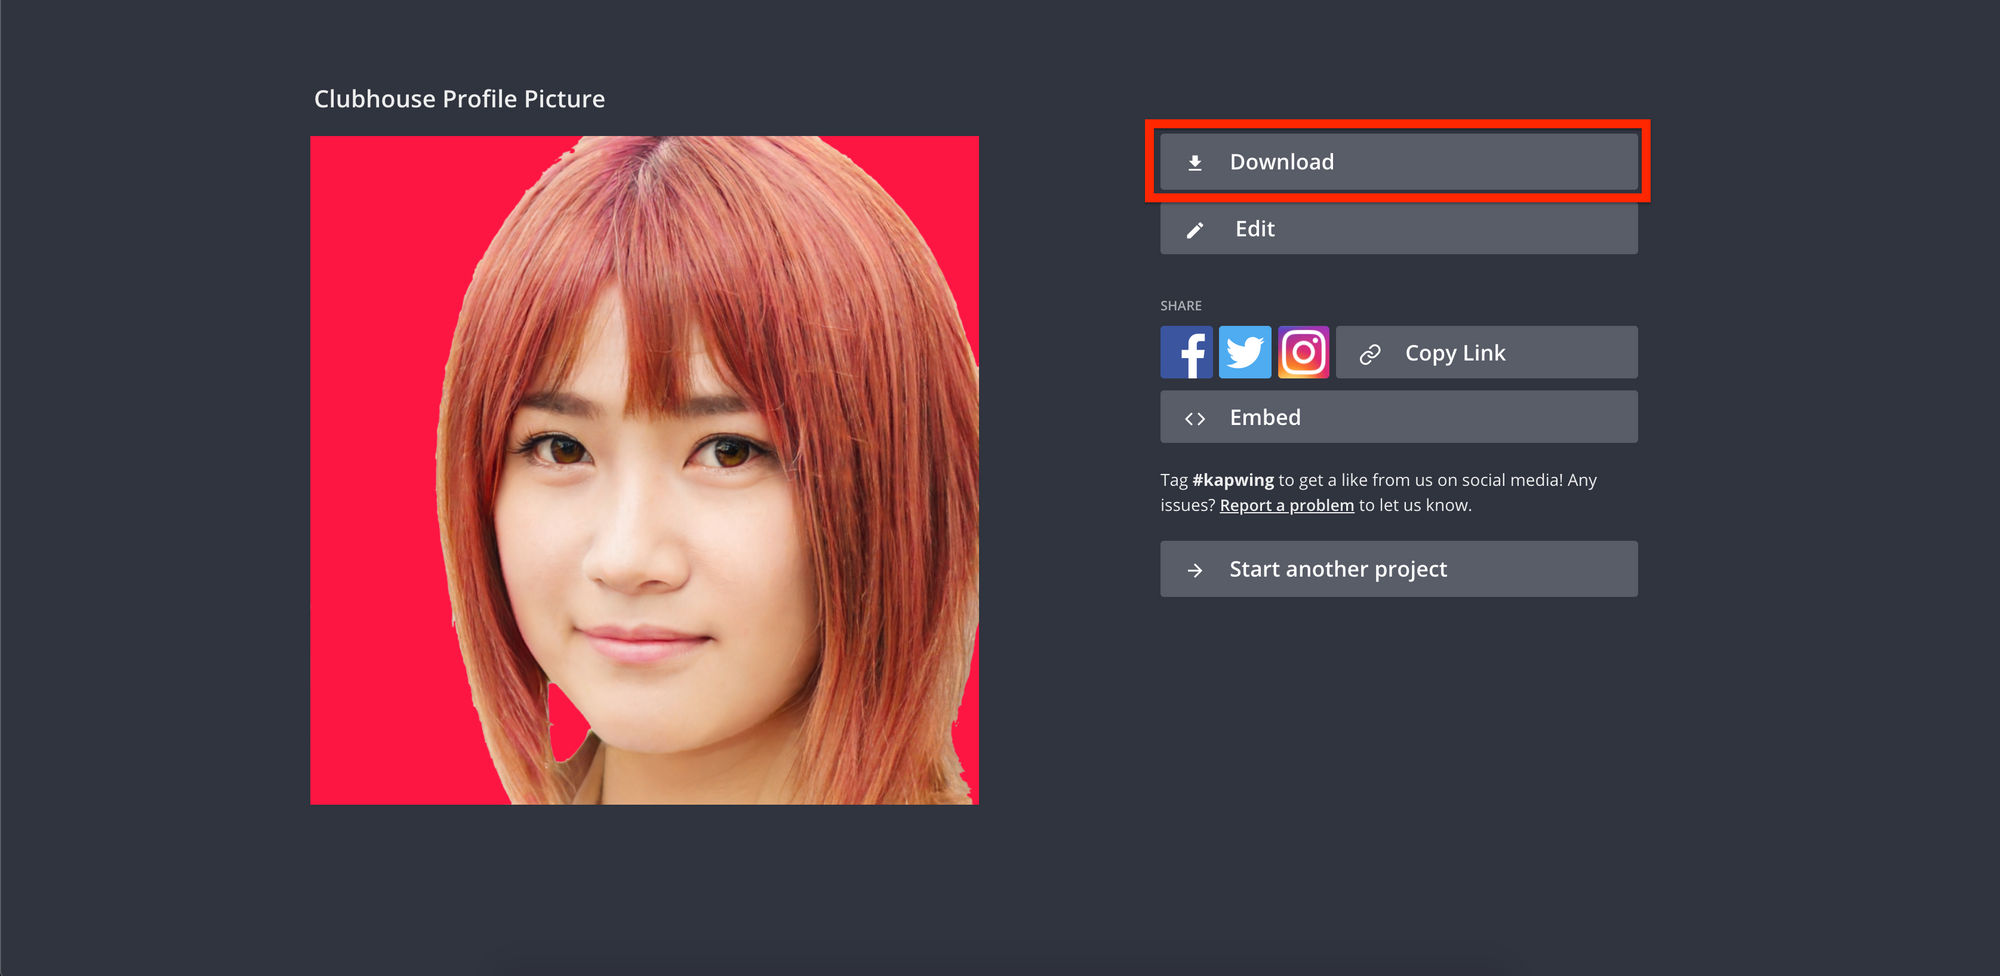
When you're happy with your profile picture, click the red Export button in the top right-hand corner of the screen. Kapwing will automatically process your image and make it ready for download in just a few seconds.

Tap Download to save your new profile picture to your phone or computer. You're now ready to open the Clubhouse app and upload your new colorful cutout photo to your profile using the instructions above.
If you're not signed into a Kapwing account, sign in or sign up using your Google or Facebook account – once you've signed into a Kapwing account, the watermark in the lower right corner will be removed from your final image.
How to Add a Colorful Ring To Your Profile Picture
Many prominent Clubhouse users are using a ring of color around their profile picture to stand out in rooms. This is a technique we've seen people use on Instagram and LinkedIn for years and naturally it's making its way to Clubhouse.

In this section, I'll show you two different methods for adding a colorful ring around your profile picture and discuss the benefits of each.
- Upload a photo to the Kapwing Studio
- Resize the photo to 1:1
- Round the corners in your image
- Choose a ring style for your profile picture
- Export, Download and Add Your Picture to Clubhouse
Step 1: Upload a photo to the Kapwing Studio
Start by uploading a photo of yourself to the Kapwing Studio editor. You can upload photos from your phone or computer or copy any image of yourself from another website or social media profile.

Step 2: Resize the photo to 1:1
With your profile photo uploaded into the Studio Editor, click the 1:1 button on the right side of the screen to resize the image into a square shape. Your image needs to be a perfect square to properly fit into the Clubhouse profile picture.
If you want to continue cropping your image to fit your face, click on your photo and then select Crop from the menu on the right side of the screen. You can adjust the image any way you want as long as it ends up in a 1:1 square.

Step 3: Round the corners in your image
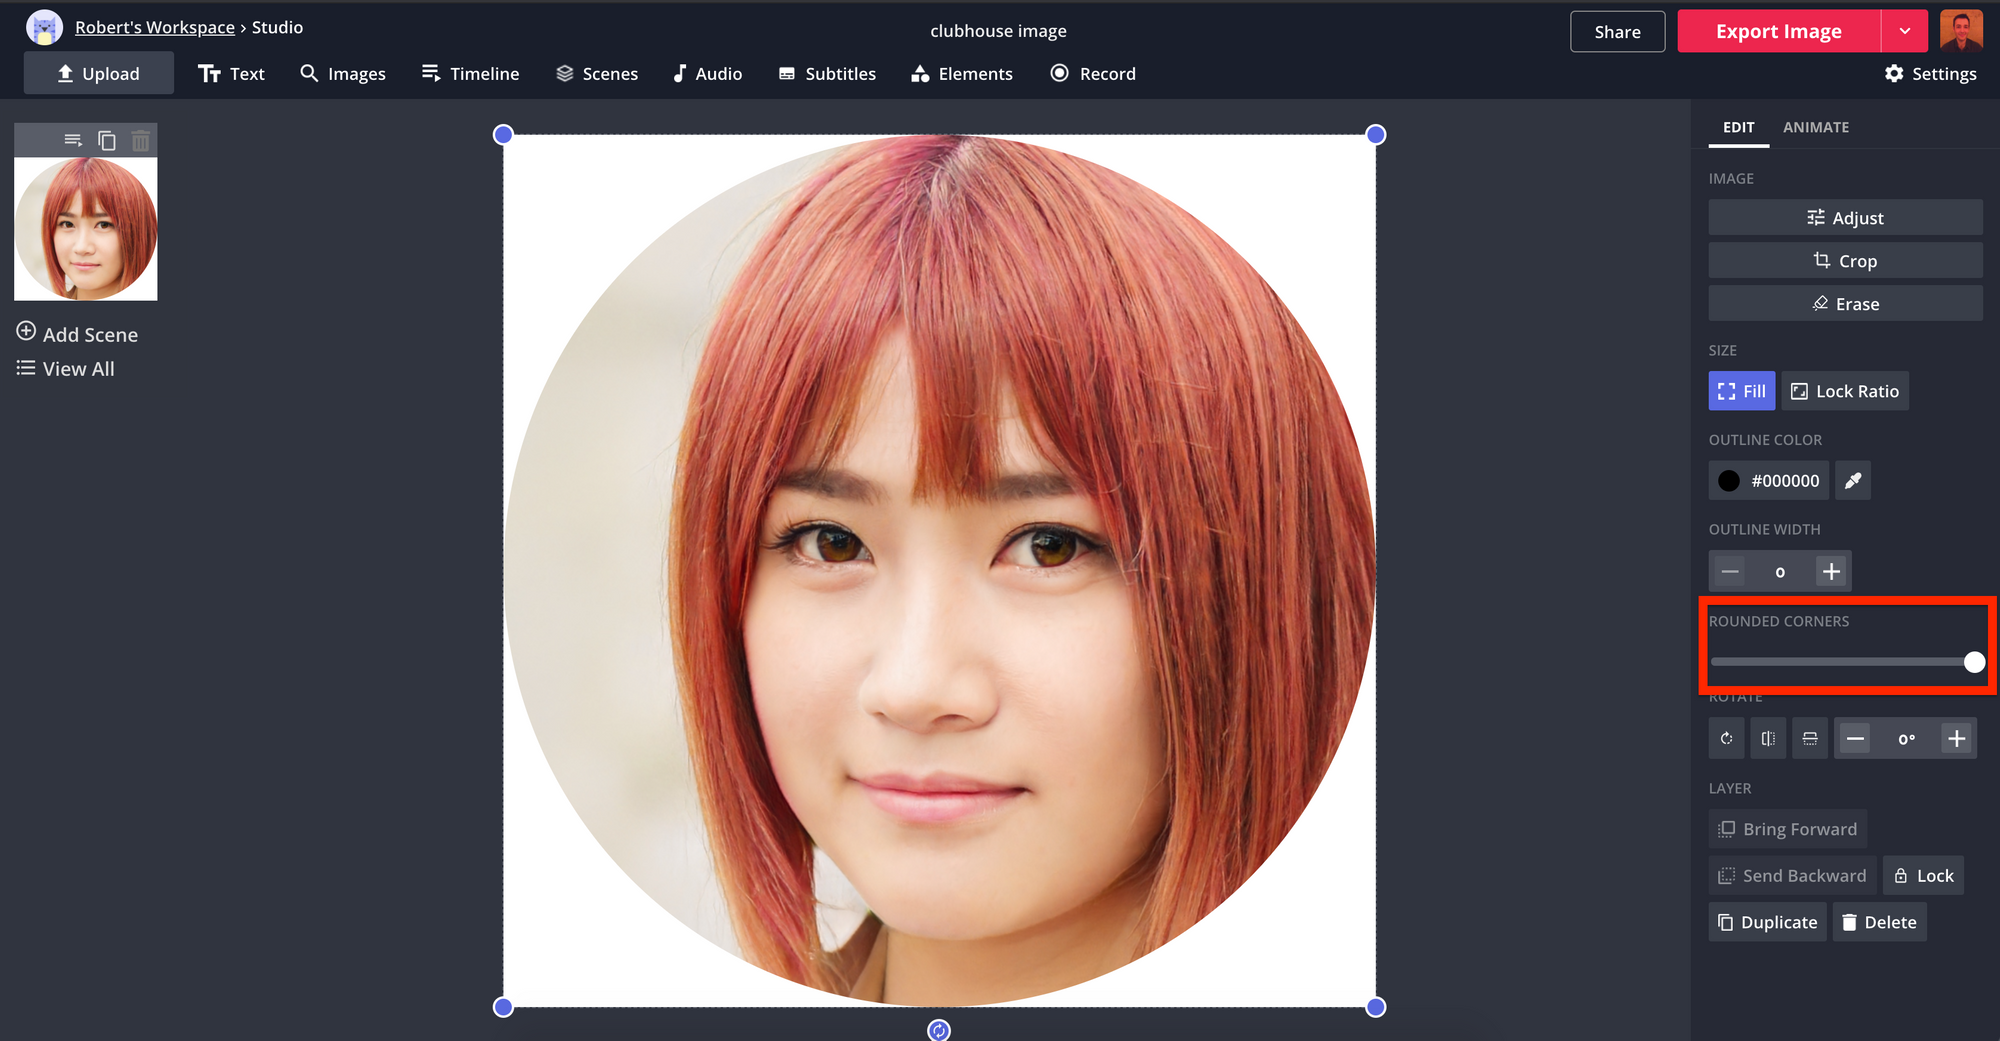
Click on your profile picture to select it and then drag the Rounded Corners Slider all the way to the right to resize your image into a circle.

You now have a few options as to what kind of ring you can add to your Clubhouse profile picture that we'll cover in the next step.
Step 4: Choose a ring style for your profile picture
Clubhouse crops profile pictures into an oblong egg shape that makes it difficult to create a perfect ring around your profile picture. For this reason, I'm going to show you two different ways to add a ring depending on your taste.
The Basic Ring
The simplest option to add a color ring to your profile image is to make your photo a bit smaller and change the color of your background.
Select your image layer and click on Lock Ratio on the right side of the screen. Next, Select your image and drag the handles to make your profile picture a bit smaller - this will help create the ring effect. You want to keep the image centered as you resize to roughly the same size you see in the screenshot below.

With your image resized, click the Background Color on the right-hand side of the screen. The color you choose next will be the color of the ring that goes around your Clubhouse profile picture. Choose from any of the colors that appear in the menu or enter a hex code to find an exact color.

If you choose the basic ring style, then your Clubhouse profile picture will come out looking like the image below.

The Circular Ring
This method will add a perfectly circular ring around your Clubhouse profile picture similar to the circular profile photo styles often seen on Instagram and LinkedIn.
Select your image layer and click on Lock Ratio on the right side of the screen. Next, Select your image and drag the handles to make your profile picture a bit smaller - this will help create the ring effect. You want to keep the image centered as you resize to roughly the same size you see in the screenshot below.

Select your image layer, and click the Outline Color on the right-hand side of the screen. The color you choose next will be the color of the ring that goes around your Clubhouse profile picture. Choose from any of the colors that appear in the menu or enter a hex code to find an exact color.
Next, click the + button beneath Outline Width and raise the size to 20.

If you choose the circular ring style, then your Clubhouse profile picture will come out looking like the screenshot below.

Clubhouse hasn't released the exact dimensions of its profile photo size yet. If you want to create a ring for your profile photo that more accurately fits the oblong shape of photos in the app - I'd recommend going back to Step 3 and rounding the corners less.
You may to play with it and test your image in the app a few times to find the ring fit that looks best to you.
Step 5: Export, download, and add your picture to Clubhouse
When you're done creating your profile image, click the red Export button in the top right-hand corner of the screen. Kapwing will automatically process your image and make it ready for download in just a few seconds.

Tap Download to save your new profile picture to your phone or computer. You're now ready to open the Clubhouse app and upload your new colorful ring photo to your profile using the instructions above.
If you're not signed into a Kapwing account, sign in or sign up using your Google or Facebook account – once you've signed into a Kapwing account, the watermark in the lower right corner will be removed from your final image.
Clubhouse is still in its infancy as a social media platform and there are plenty of unexplored opportunities to build an innovative profile that draws more users to follow you. We'll continue to keep you updated on new Clubhouse developments that impact creators as they happen. Until then, subscribe to our YouTube channel and check out our other articles on profile picture customization.
Related Articles
Online Profile Picture Maker for Every Social Media Site
How to Make a Twitch Profile Picture for Free
How to Add Text to Your Cover Photos and Profile Pictures
Resizing Photos and Videos for Facebook Cover


