How to Make a Google Classroom Profile Picture
Looking to make the perfect profile picture for Google Classroom? I'll go over the specs and tools you'll need.

In these times of virtual learning and digital classrooms, Google Classrooms has proven to be a vital resource for many educators. It comes with plenty of ways for users to best imitate the experience of an in-person class, including allowing you to add a profile picture so everyone knows who you are.
It’s always important to have a face to put with the person you are interacting with, and so if you are looking to have your picture on display for your students or your teachers to see, then this guide will help you make your Google Classroom profile even better.
- Edit Picture in Kapwing’s Image Resize Tool
- Export Profile Picture
- Upload Picture to Google Classroom
Step One: Edit Picture in Kapwing
You are going to want to make sure that your profile picture is the right size, quality, and looks the way you want it. This is where Kapwing can come in handy, as it will help you get the perfect picture for Google Classroom.
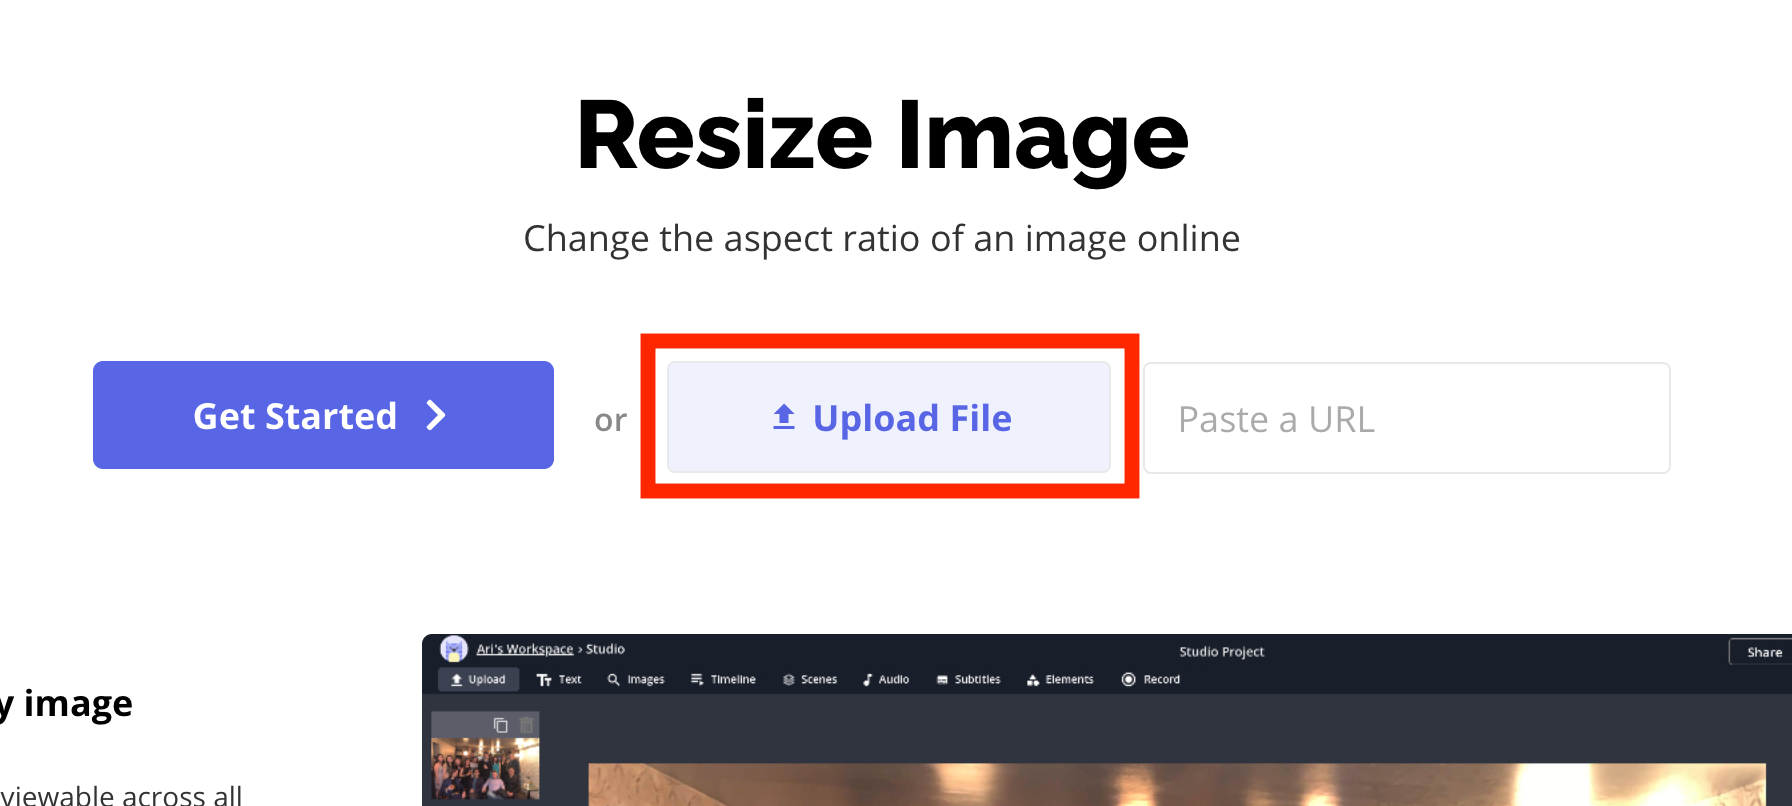
Head to Kapwing’s Image Resize tool, where you will see three options of what you how you can put your image in the editing studio: Get Started, Upload File, and Paste a URL. We are going to assume that you have the picture you want to use on your computer, so click on Upload File and that find the image wherever you have it stored and upload it.
Once the picture is in the studio, it’s time to resize the image to Google’s specifications. Luckily, when you upload a profile picture to Google Classroom, the site will automatically have you adjust what part of the photo you want to have shown, but we recommend that your picture meets the minimum dimensions of 250x250 pixels. This size will still maintain quality and size to work with when changing your picture.
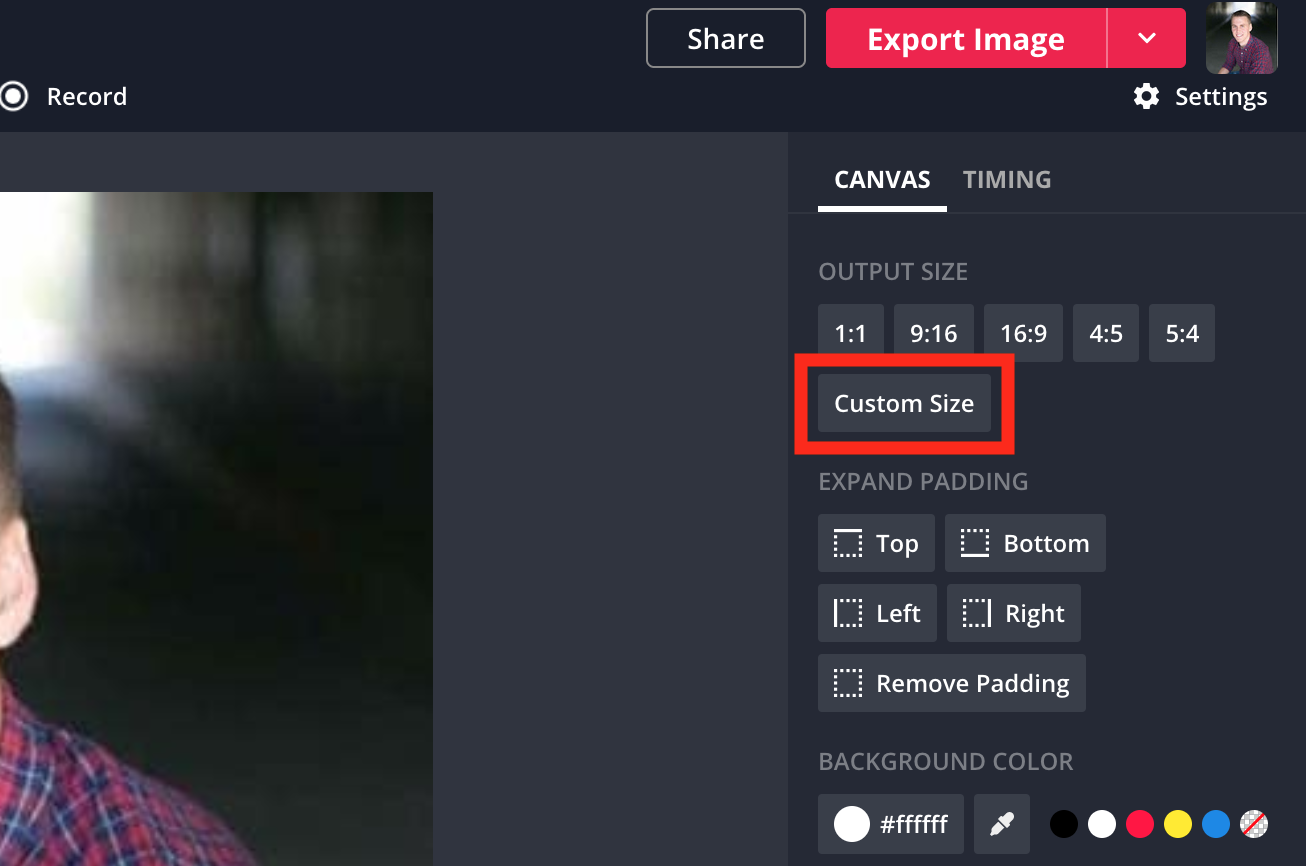
In order to change the dimensions, look to the right of the screen and find the Output Size section. Here, you will see a group of presets and the ability to choose a Custom Size.
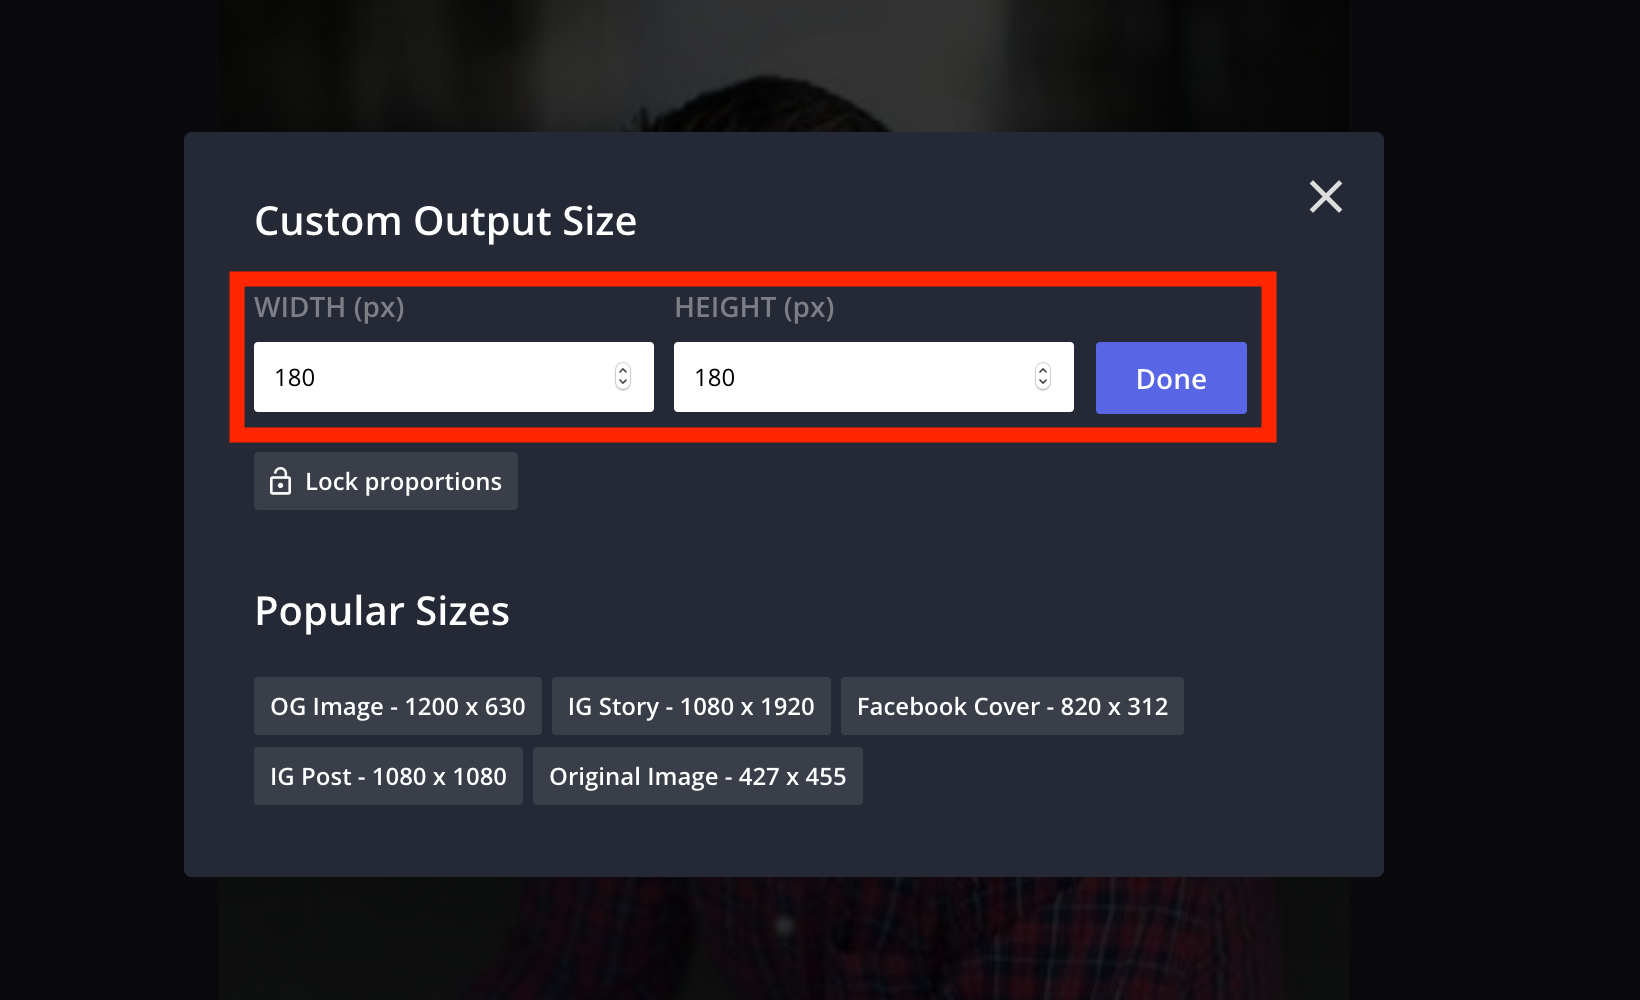
Click on this and in the new window that pops up, you can enter the dimensions of 250x250 or more. So go ahead and put in your width and height, then click Done.
Step Two: Export Profile Picture
When the size change has been made, look to the upper-right corner to find the Export Image button, which you will want to click and send the picture to process.
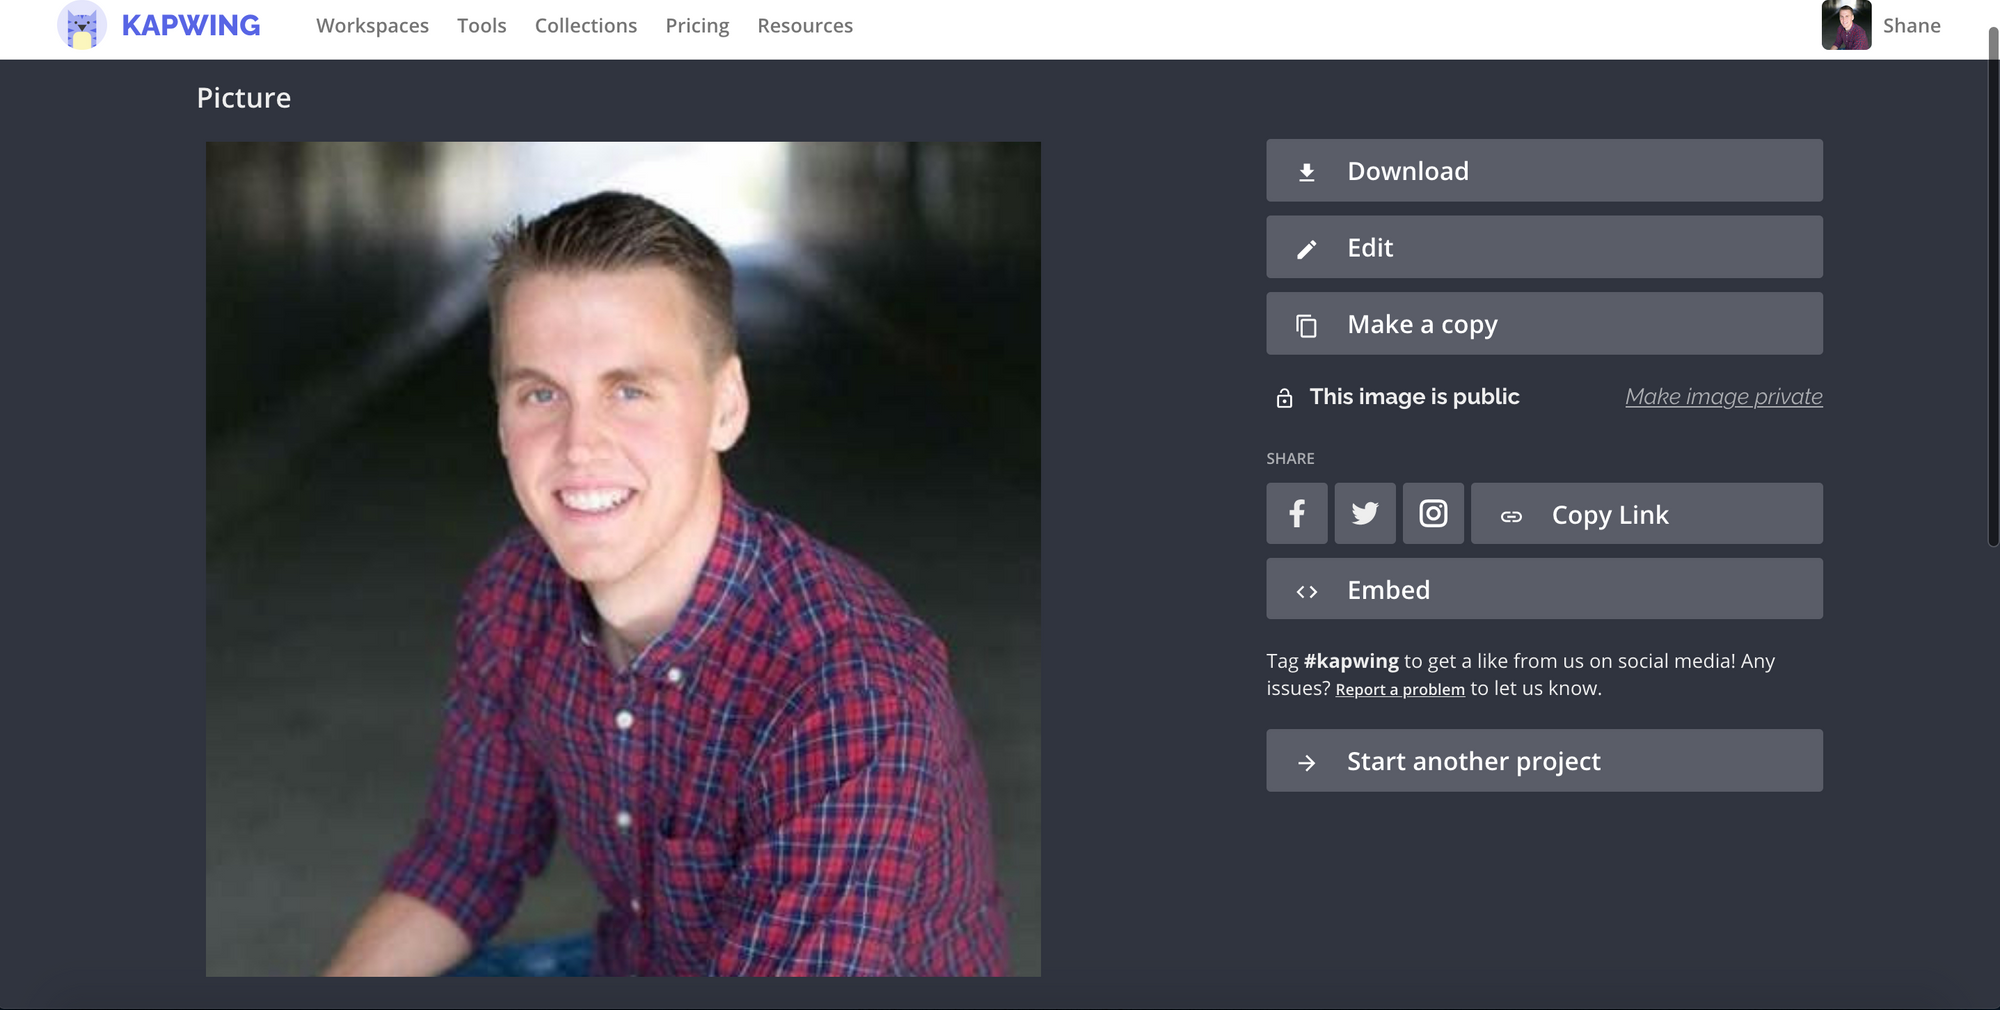
Once processing is done, you will be taken to a new screen with a variety of options for what you want to do what your new profile picture:
- Download the file to your computer.
- Head back into the studio for more editing.
- Copy the file.
Go ahead and download the picture to your computer so you will have it for whatever use you may need it for.
Step Three: Upload Picture to Google Classroom
Now it’s time to get your profile picture up-and-running on Google Classroom.
This means going to your Google Classroom account, and looking in the upper-left corner to see the icon of three lines. Click on this to bring up a menu.
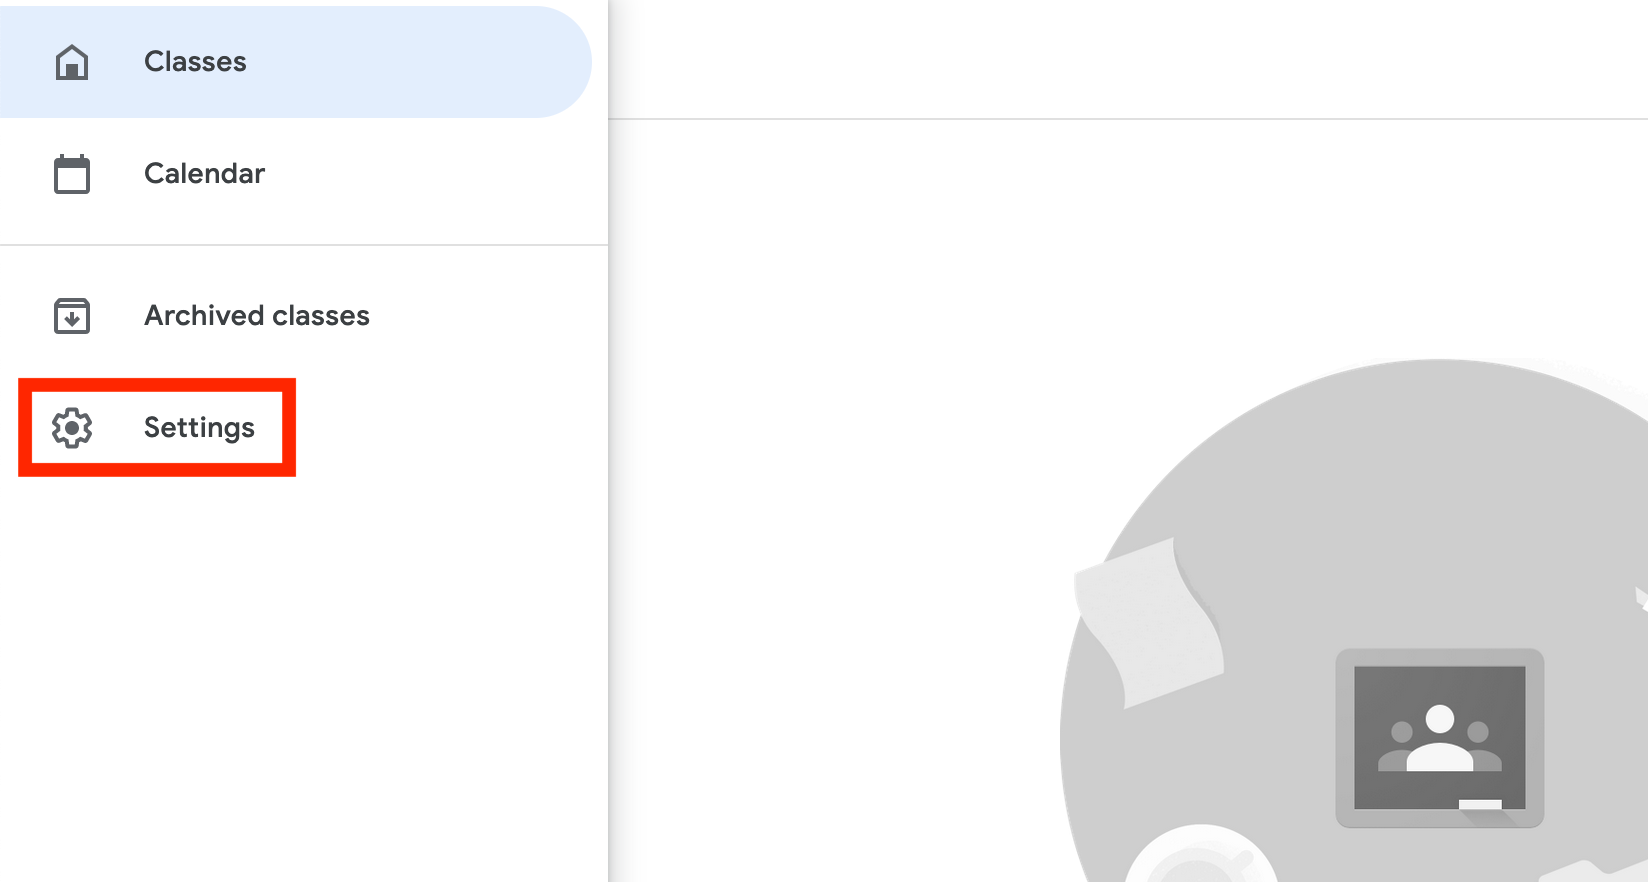
Here, you need to click on Settings to be taken to a new window. Here, you will see a Profile section with the option to change your profile picture in the middle of it.
Clicking on this option will bring up the window where you can click on a button saying: Select a photo from your computer. Find the profile picture you downloaded from Kapwing and select it. This will open a new window where you can choose how your picture is cropped for Classroom’s use.
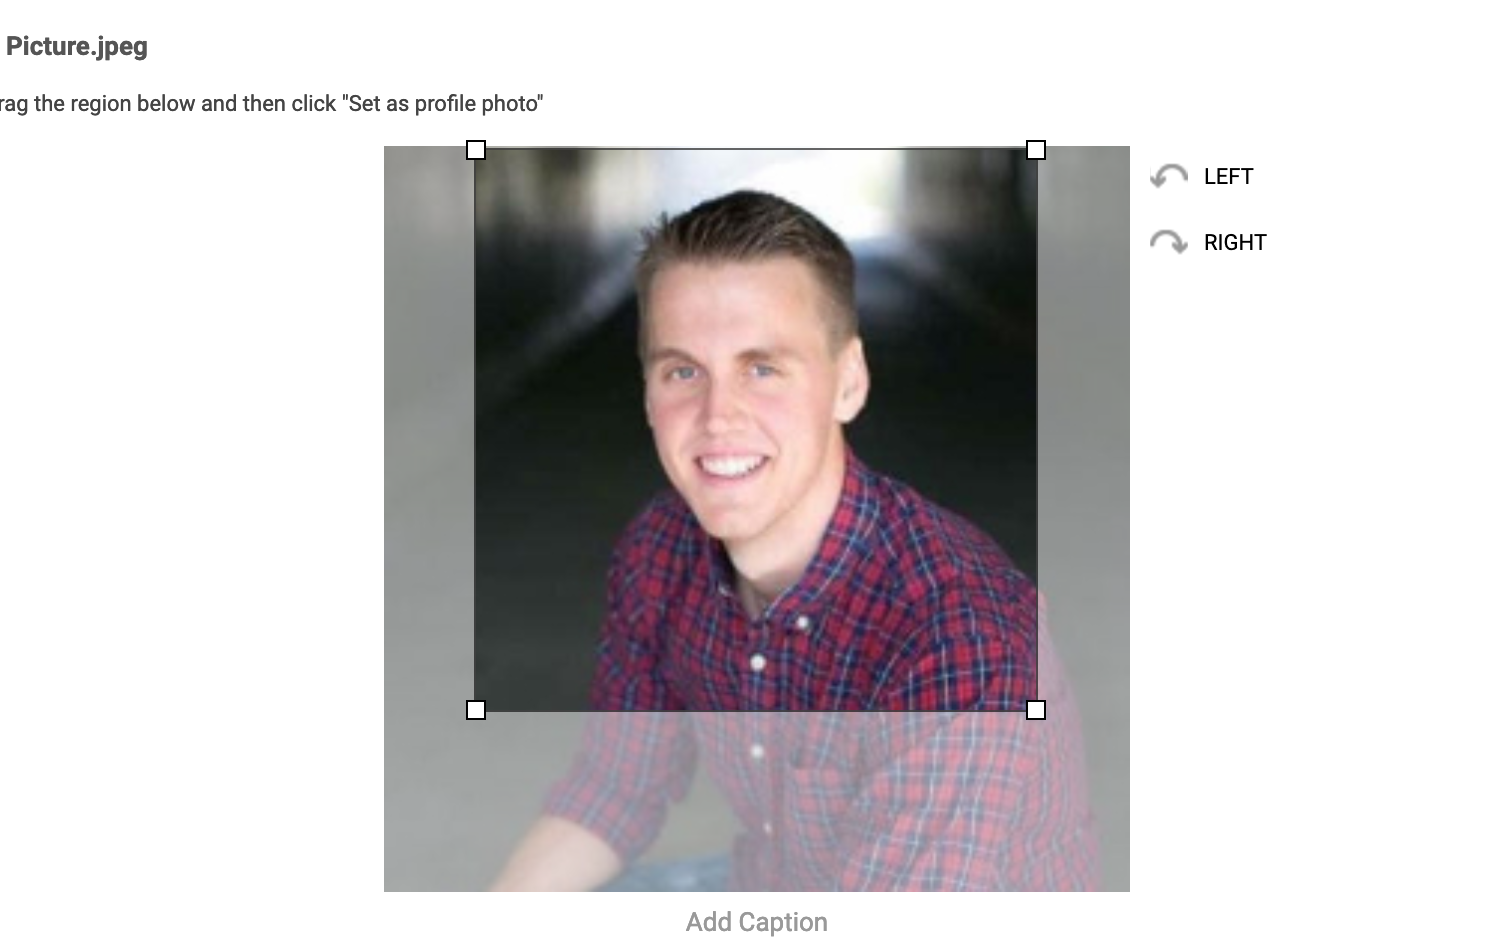
Once you have it set to how you want, you can go ahead and click on Set as profile photo in the bottom-left.
That’s how easy it is to create, and change, your Google Classroom profile photo. Whenever you want to change it, just follow these steps and you’re good to go. Meanwhile, check out Kapwing on YouTube and Instagram for more online tutorials, as well as follow us on Twitter for updates and news for our online video editor.
Related Articles


