How to Make a Rounded 4:3 Instagram Reel Template
Stand out from the crowd with vintage-style Instagram Reels

Inspired by retro film aesthetics, the rounded 4:3 frame is resurging in popularity, especially on Instagram. However, content creators looking to add a unique flair to their video content often face limitations from platforms with rigid aspect ratios and limited editing tools.
Kapwing's powerful online editing studio solves this problem, allowing you to resize and edit images to fit your vision. Whether experimenting with a new, distinctive style or ensuring your full image fit on Instagram without unnecessary cropping, Kapwing supports you every step of the way.
By following along, you'll learn how to create a rounded 4:3 Instagram Reel template step by step, so you can start sharing personalized, standout content today.
Table of Contents
- Starting Your Project on Kapwing
- Resizing Your Project as 4:3 Aspect Ratio
- How to Round the Corners for Instagram
- How to Change the Background Color of Your Project
- Editing Your Video on Kapwing
- Editing and Posting on Instagram Reels
Starting Your Project on Kapwing
When you begin a project, you'll be greeted with this screen.
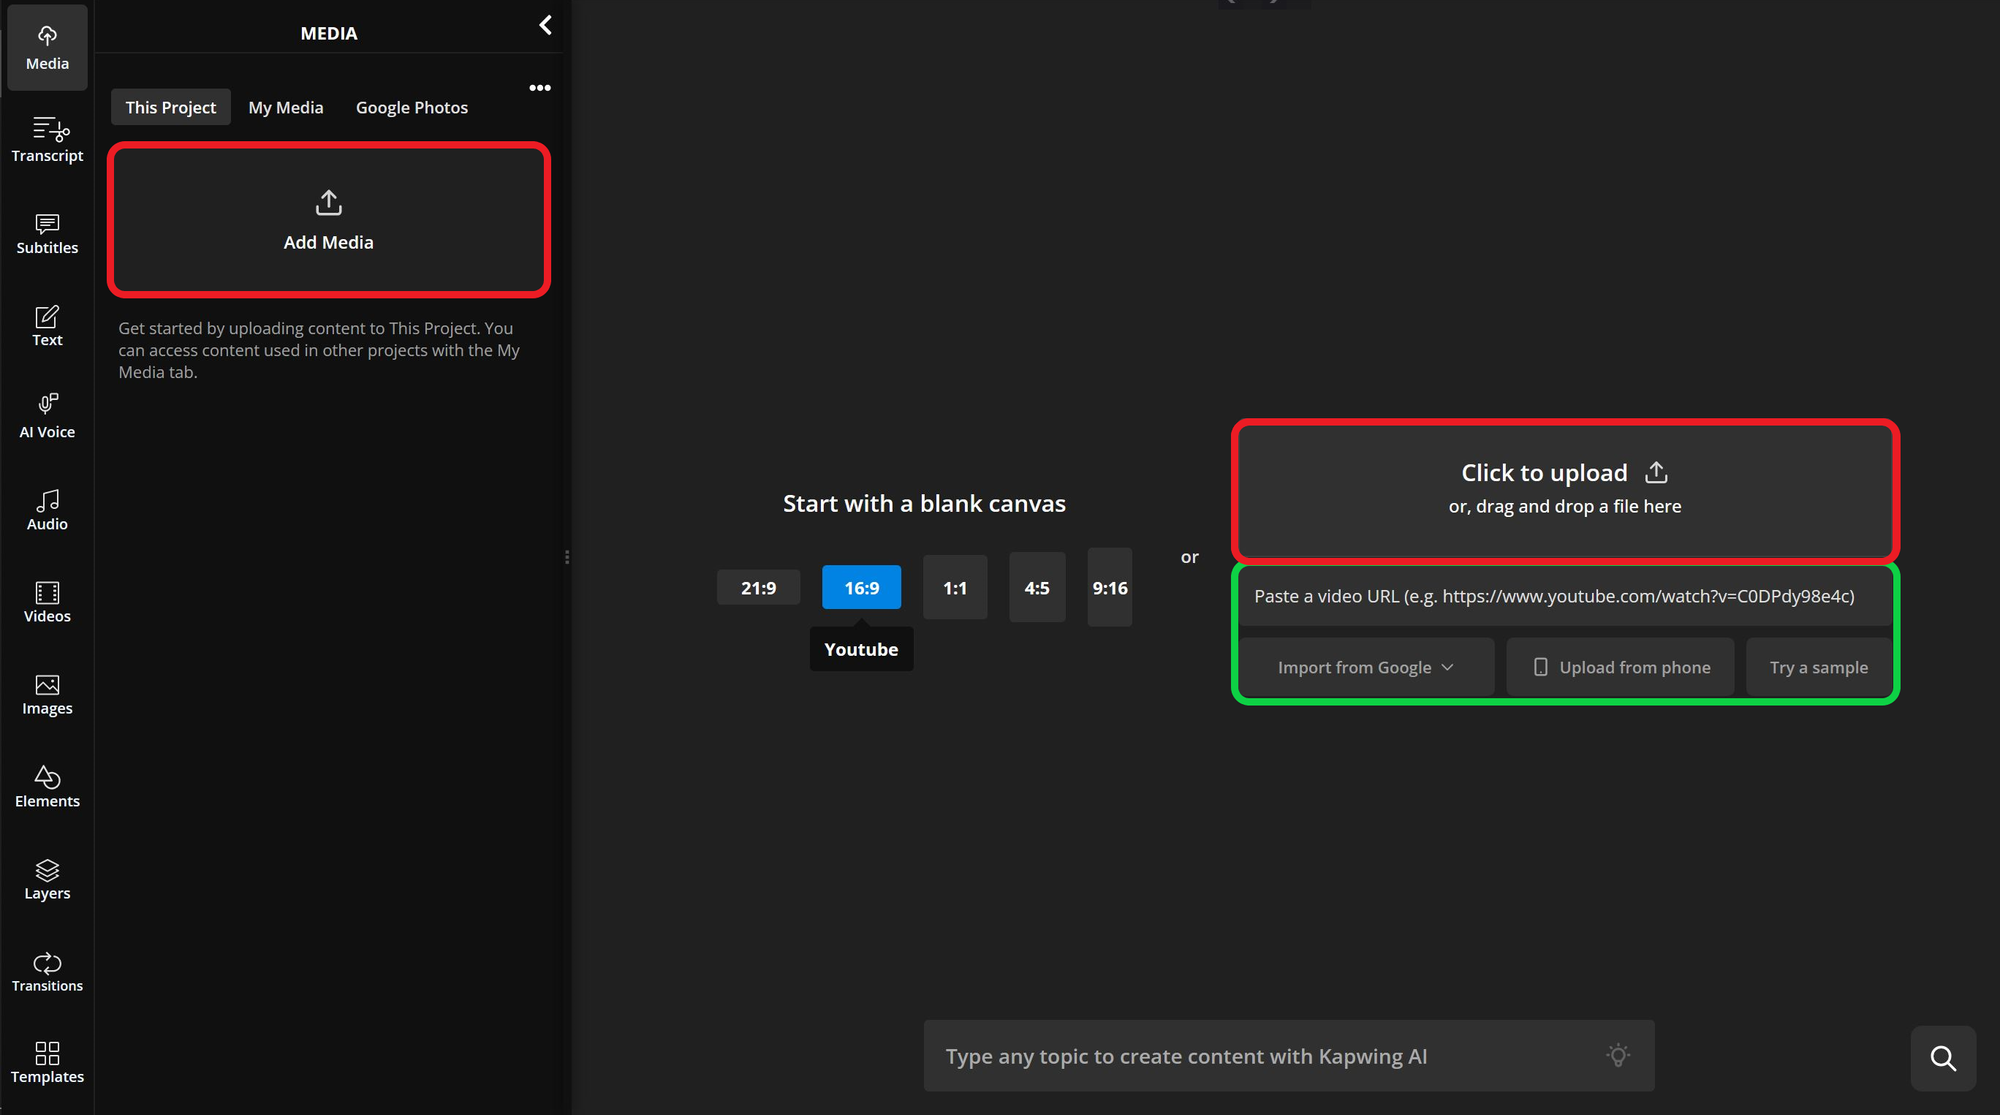
To upload your media, click either of the red-highlighted upload boxes or simply drag and drop your file anywhere on the screen. You can also import media directly from your Google Drive, Google Photos, a mobile device, or URL links such as YouTube. Alternatively, Kapwing boasts a library of stock footage in both the "images" and "videos" sections on the left-hand panel.
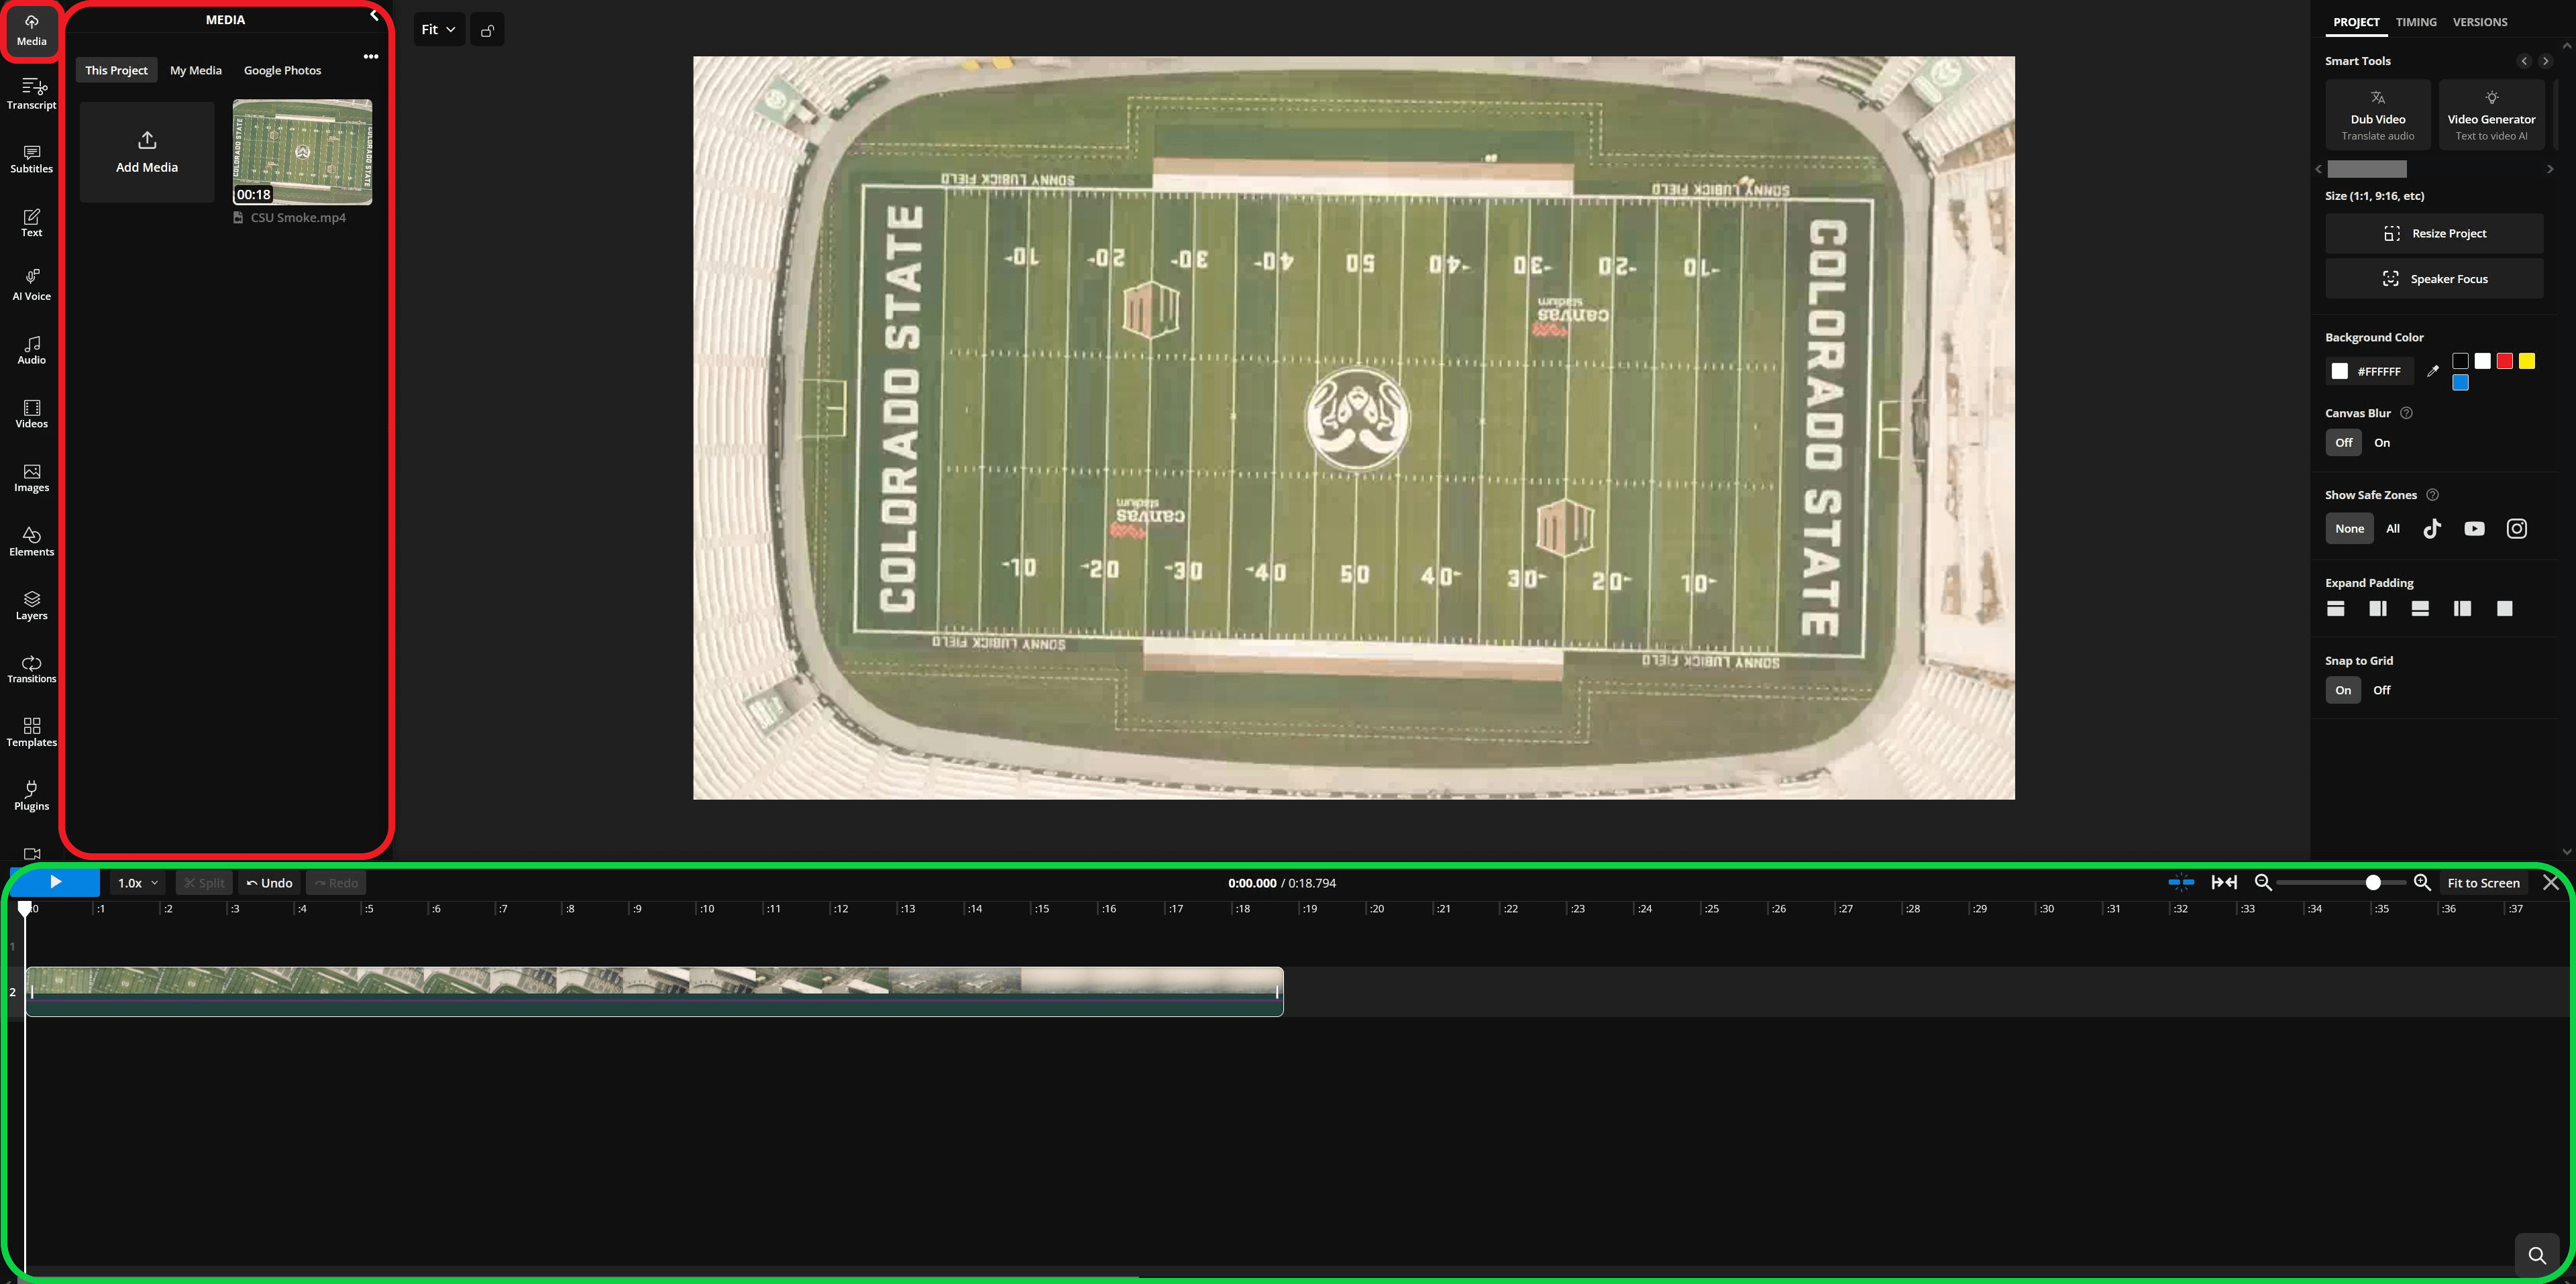
Once you’ve added media to your project, it will appear under the "Media" tab on the left-hand side. This menu displays all the media uploaded to your project, even if it hasn’t been added to your timeline yet. The timeline is where you’ll arrange your clips and apply effects to bring your video to life.
Resizing Your Project as 4:3 Aspect Ratio
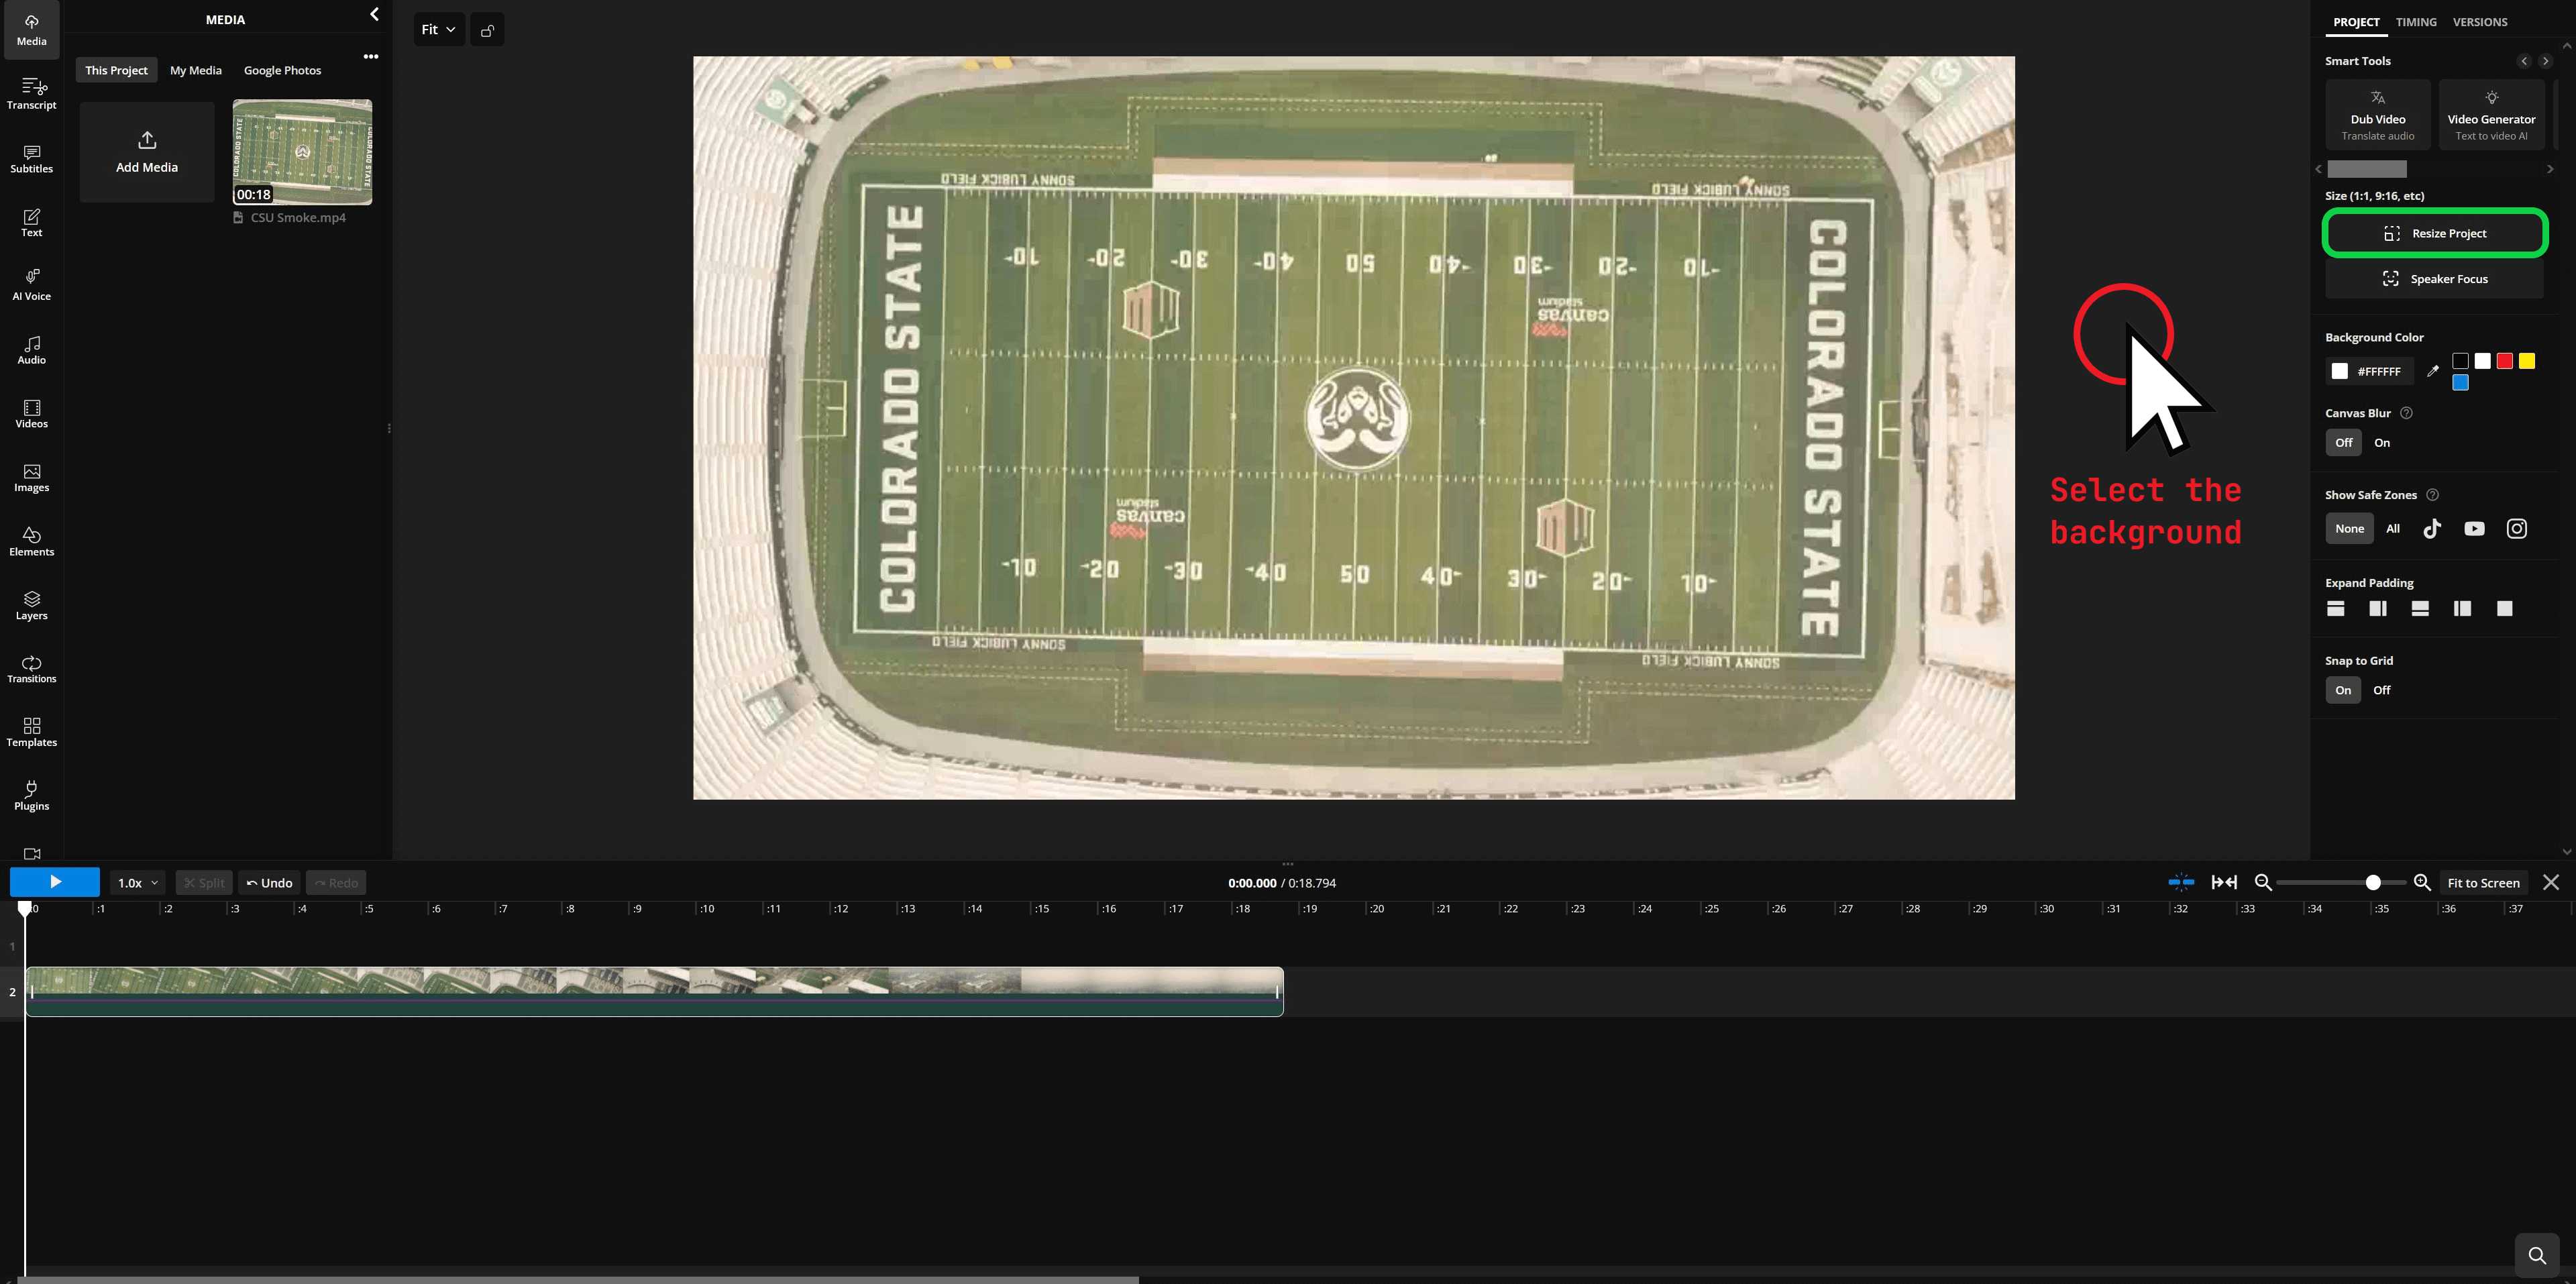
The first step in creating a 4:3 template for your Instagram Reel is resizing your project to the correct aspect ratio. To do this, click on the background behind your media and then select the "Resize Project" button.
Kapwing offers preset aspect ratios tailored for Facebook, Instagram, TikTok, YouTube, and LinkedIn. For more guidance, check out our detailed social media size guide to ensure your content fits each platform perfectly and enhances your social strategy.
In the resize menu, expand the dropdown and choose "Custom Size." The resolution you enter will depend on the quality of your clip:
- For videos shot in 1080p (Full HD, 1920 x 1080 pixels), enter a resolution of 1440x1080.
- For videos shot in 4K (Ultra HD, 3840 x 2160 pixels), enter a resolution of 2880x2160.
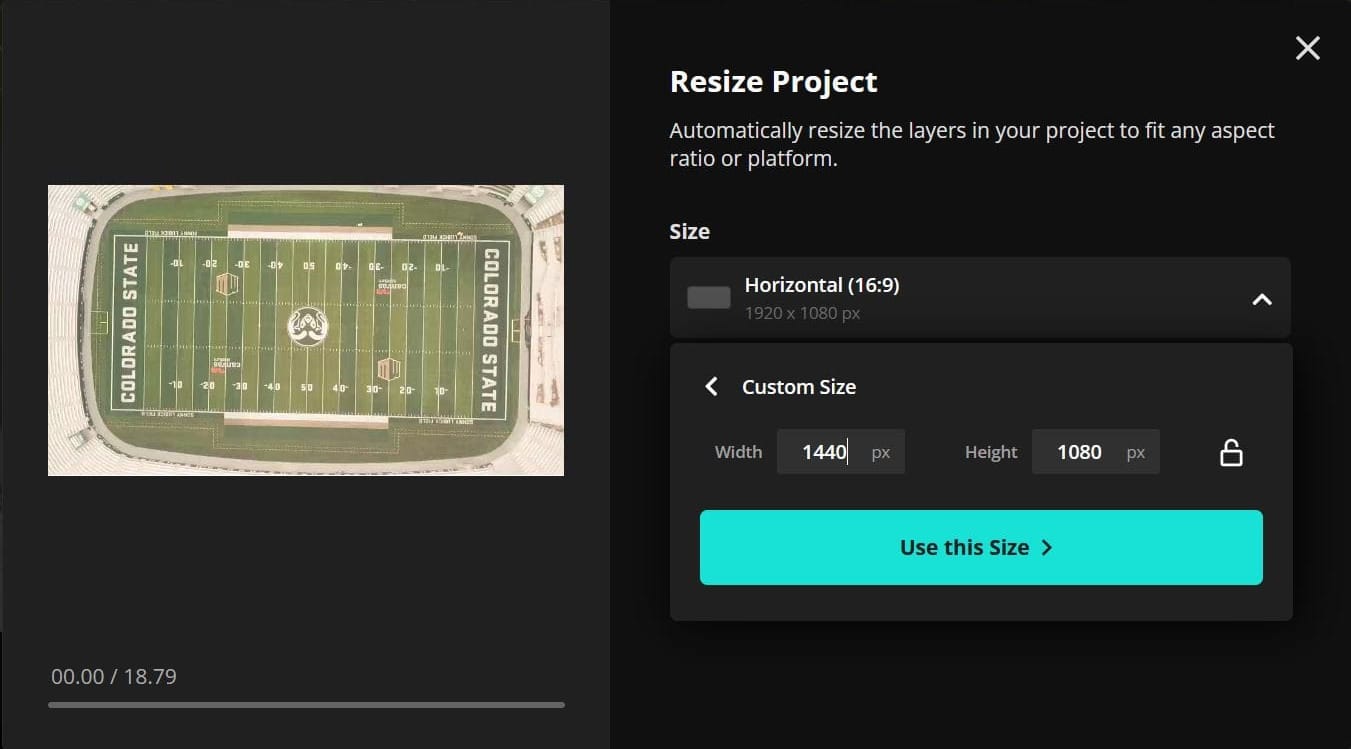
After entering your desired resolution, click "Use this Size >" and then "Resize Project" to confirm your changes. This will adjust your project to the 4:3 aspect ratio. If you'd like to experiment with different sizes in your social media projects, you can enter alternative values in the previous menu. For this project, however, we’ll proceed with the 4:3 ratio.
How to Round the Corners for Instagram
To create rounded corners reminiscent of a classic film strip, click on your clip and locate the "Corners" slider on the right-hand side.
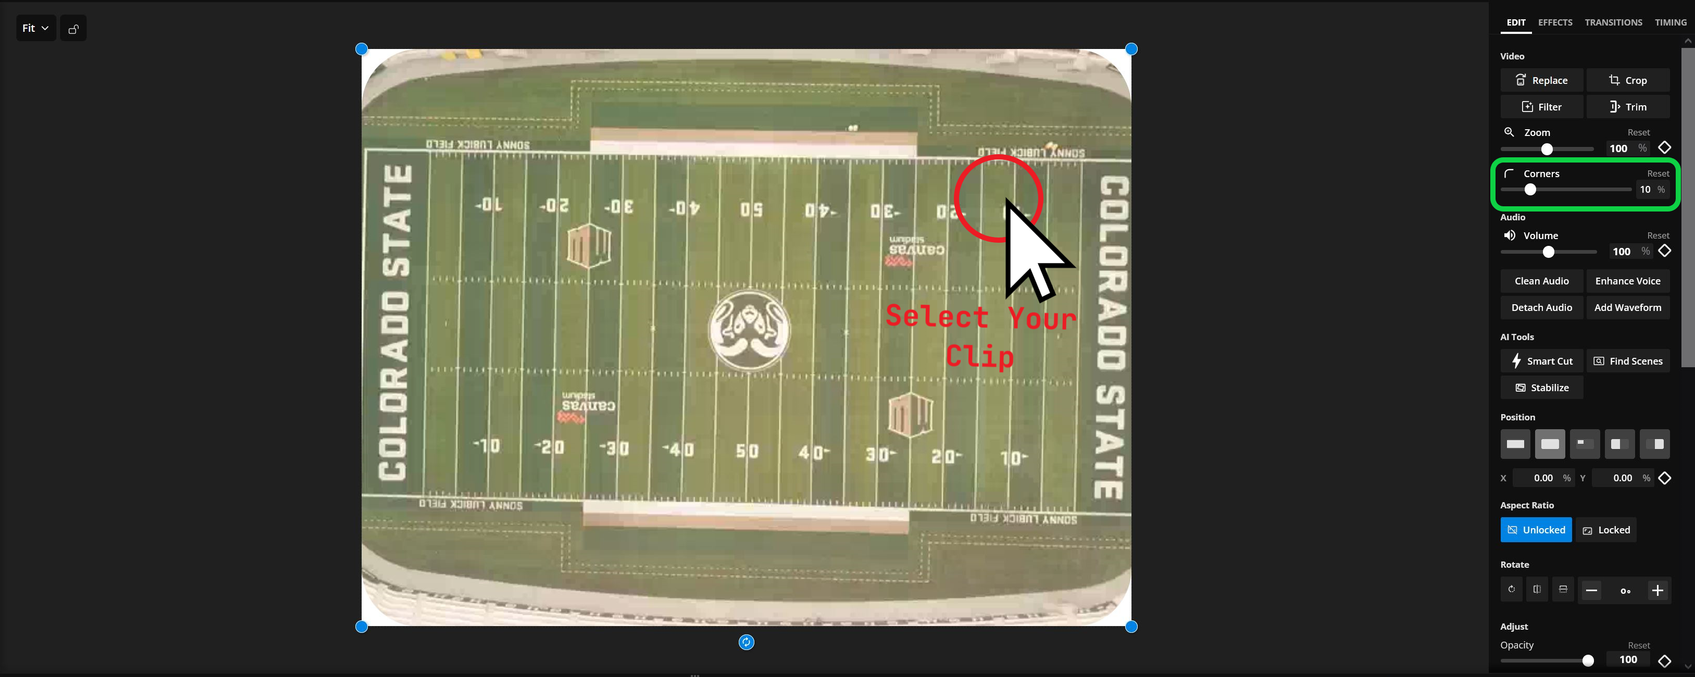
Adjusting this slider will round the corners of your media. The higher the value, the more pronounced the rounding effect. For a subtle yet noticeable crop, I recommend setting the value to 10. However, feel free to experiment with different settings to find what works best for your project.
How to Change the Background Color of Your Project
Finally, you can adjust the background color to ensure your video fits seamlessly within its frame. To do this, select the area behind your media and find the "Background Color" option. From here, you can choose or customize your desired color.
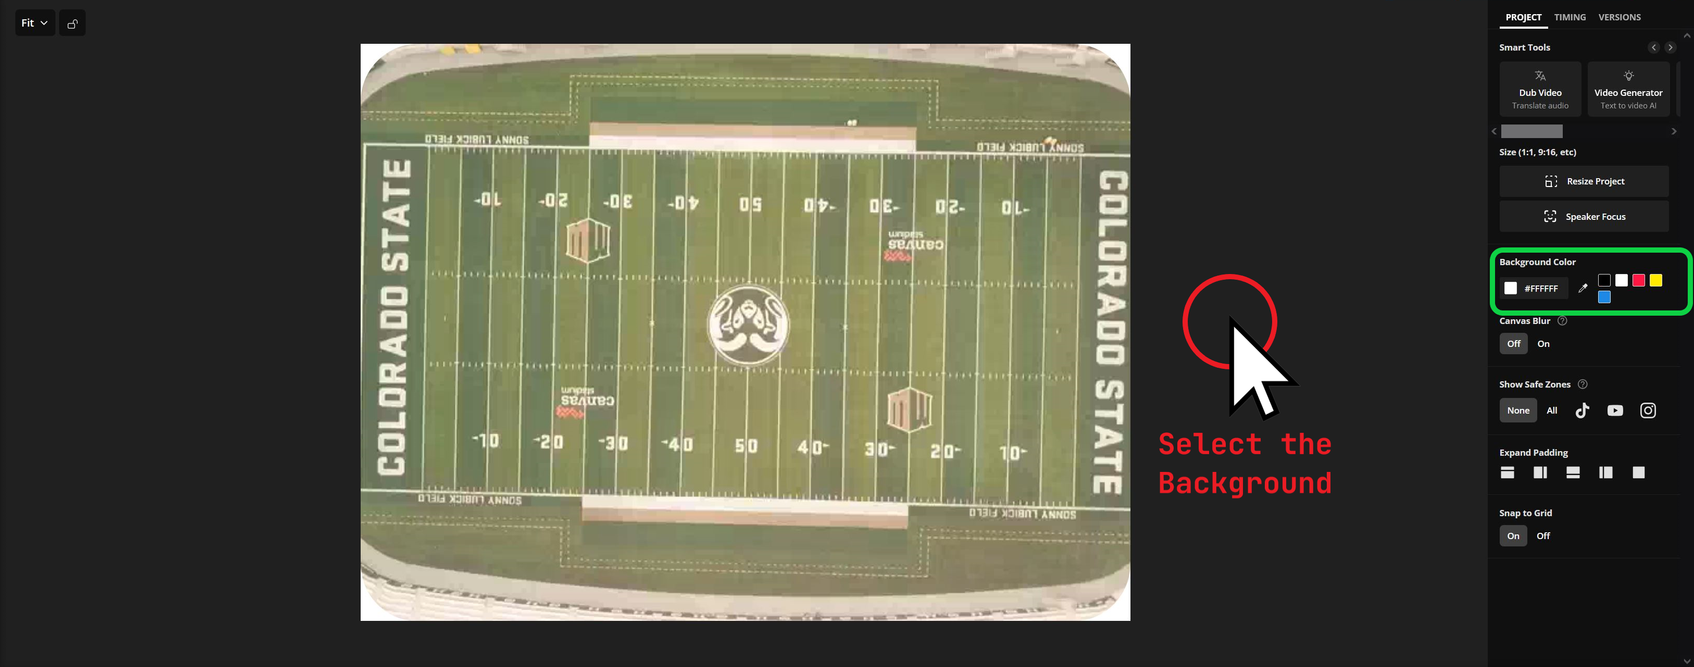
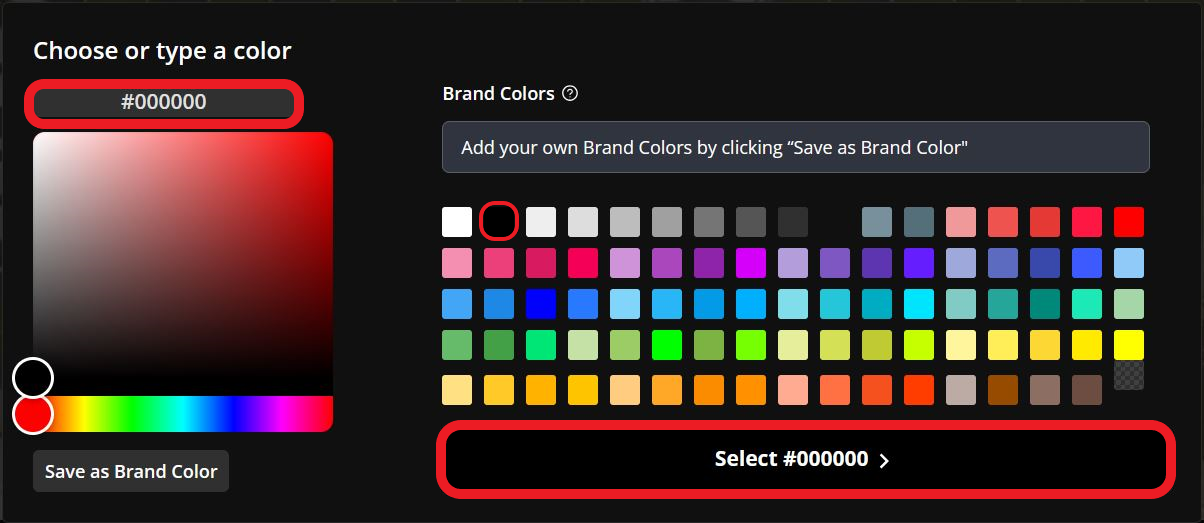
Next, choose your desired color. You can select from the preset options or enter a hex value directly above the color display box. For the best-rounded effect, most video players will display your video against a black background. To match this, select black or enter the hex value "#000000."
Check out our detailed blog to learn why black is often the ideal choice for most Instagram Reels and Story backgrounds.
At this stage, your video will have a 4:3 aspect ratio, rounded corners, and a black background. To preview how your video will appear outside of the Kapwing studio, click the "Export Project" button in the top-right corner.
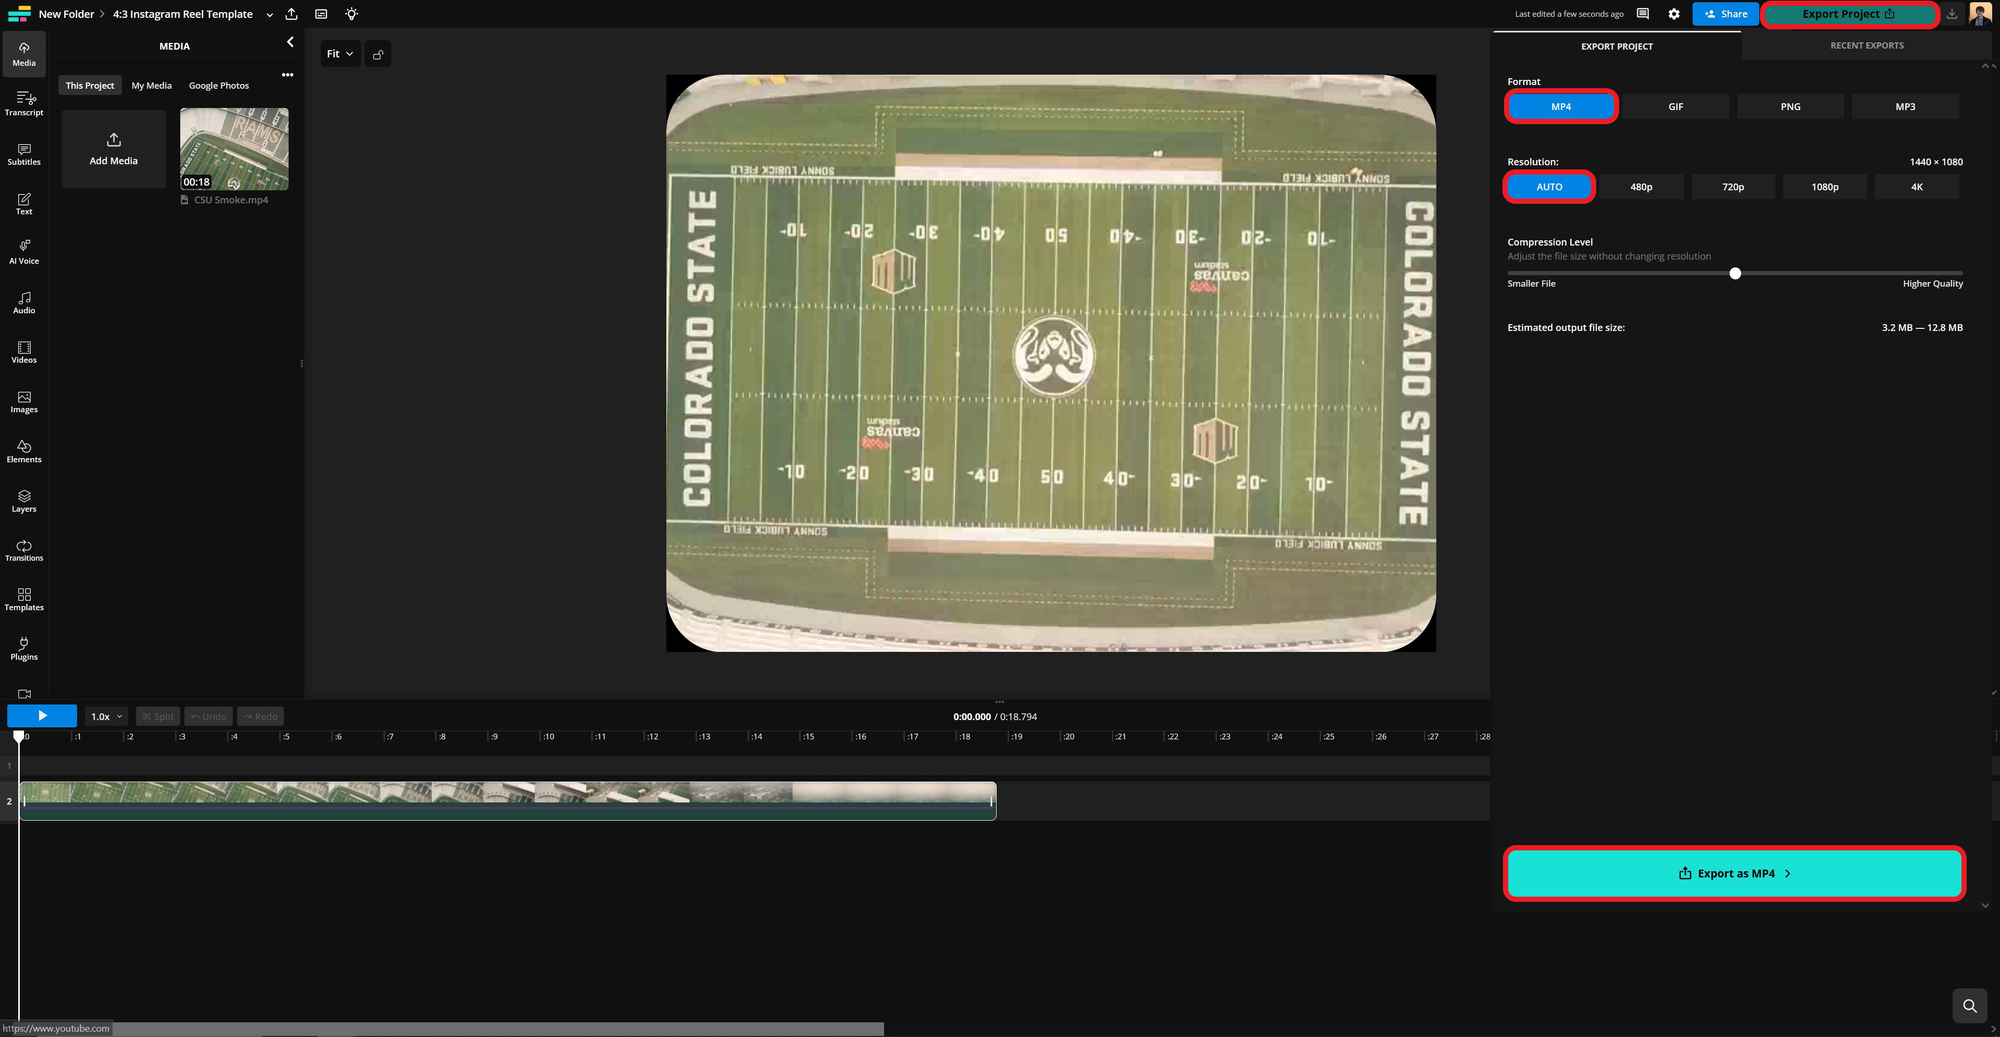
The export menu will expand, offering various options for your project. To export it as a video, choose the MP4 file type and set the resolution to "Auto." This ensures the custom aspect ratio you applied earlier remains intact.
Not sure which format works best for you? Here are some quick tips:
- GIFs: These are automatically looping and have a smaller file size, making them quicker to upload and view on platforms. However, they offer lower video quality compared to MP4s.
- MP4s: While MP4s have a larger file size and may take longer to upload, they provide higher resolution and overall better video quality.
It's also worth noting that the maximum video size upload for an Instagram Reels is 4 gigabytes and 60 seconds.
Editing Your Video on Kapwing
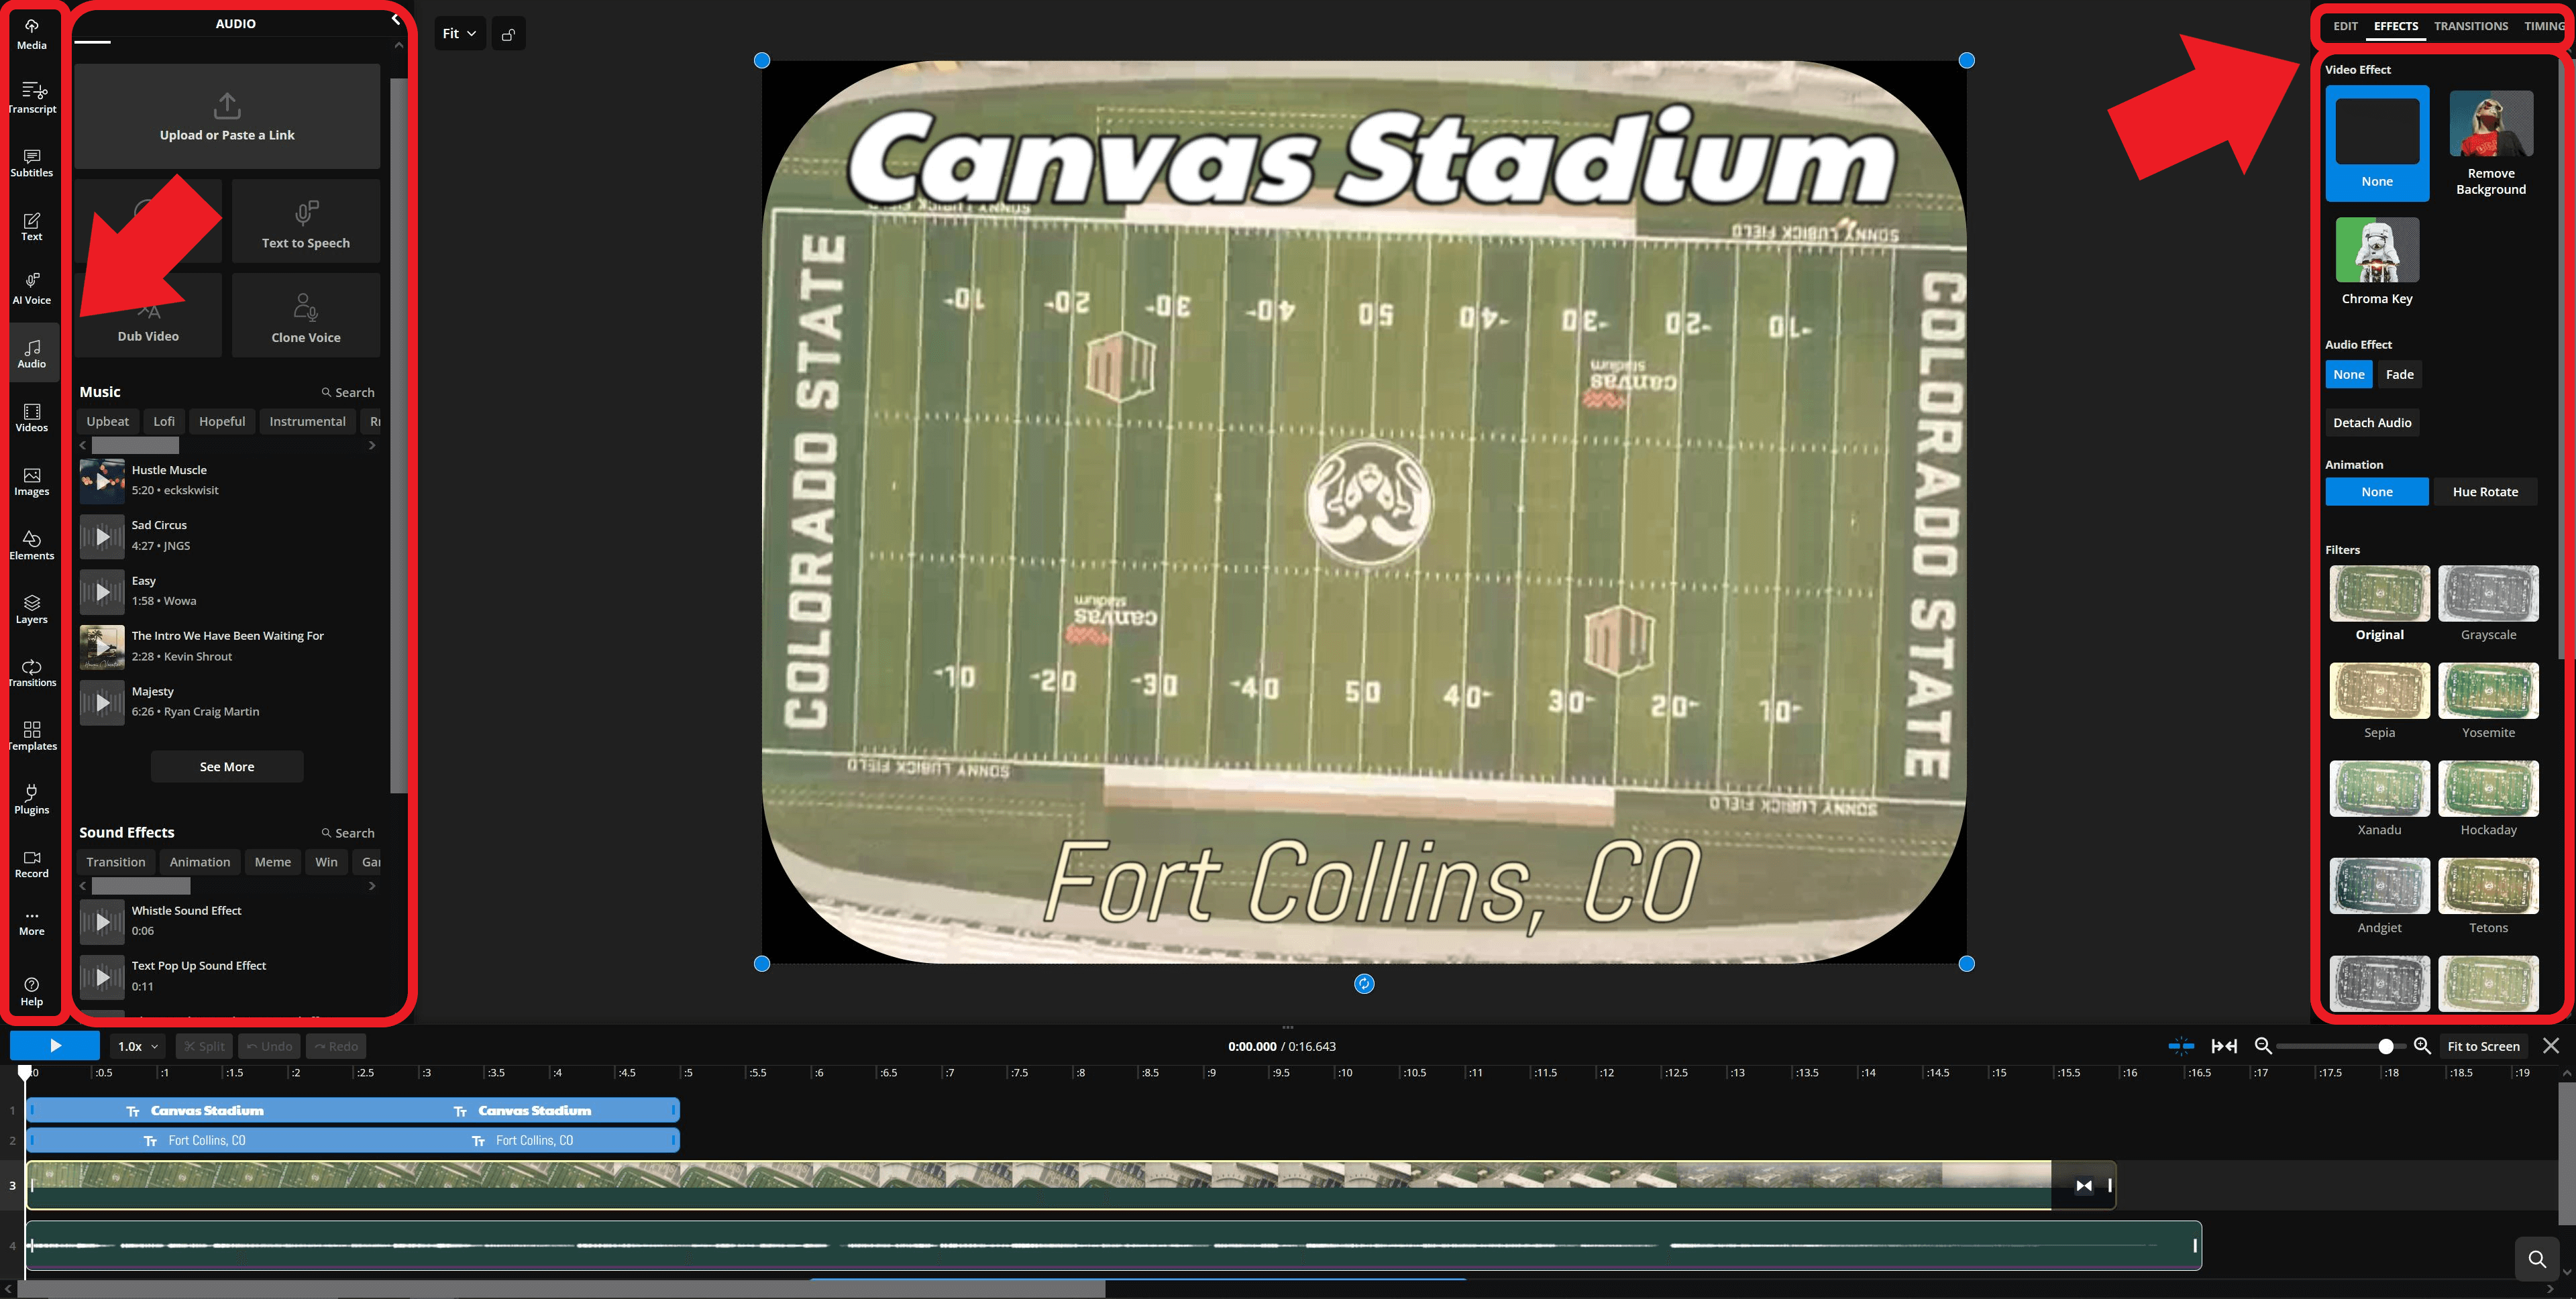
Now that you’ve resized your project, adjusted borders, and customize your background color, take your content further with Kapwing’s wide selection of image-enhancing tools.
The left sidebar provides tools to add Instagram-style fonts, audio, subtitles, graphics, templates, transitions, and more. The "Effects" menu lets you apply custom effects to individual layers, giving you full control over your video's look. The more you edit in Kapwing, the less work you'll have when it’s time to post on Instagram.
Editing and Posting on Instagram Reels
While Instagram’s built-in editor offers basic text and graphics, Kapwing provides advanced features like AI-powered voiceovers and background removal to give your content an edge over the competition. For content marketing, advertising, or branding strategies, you can easily add watermarks and logos directly in the Kapwing studio for a professional touch.
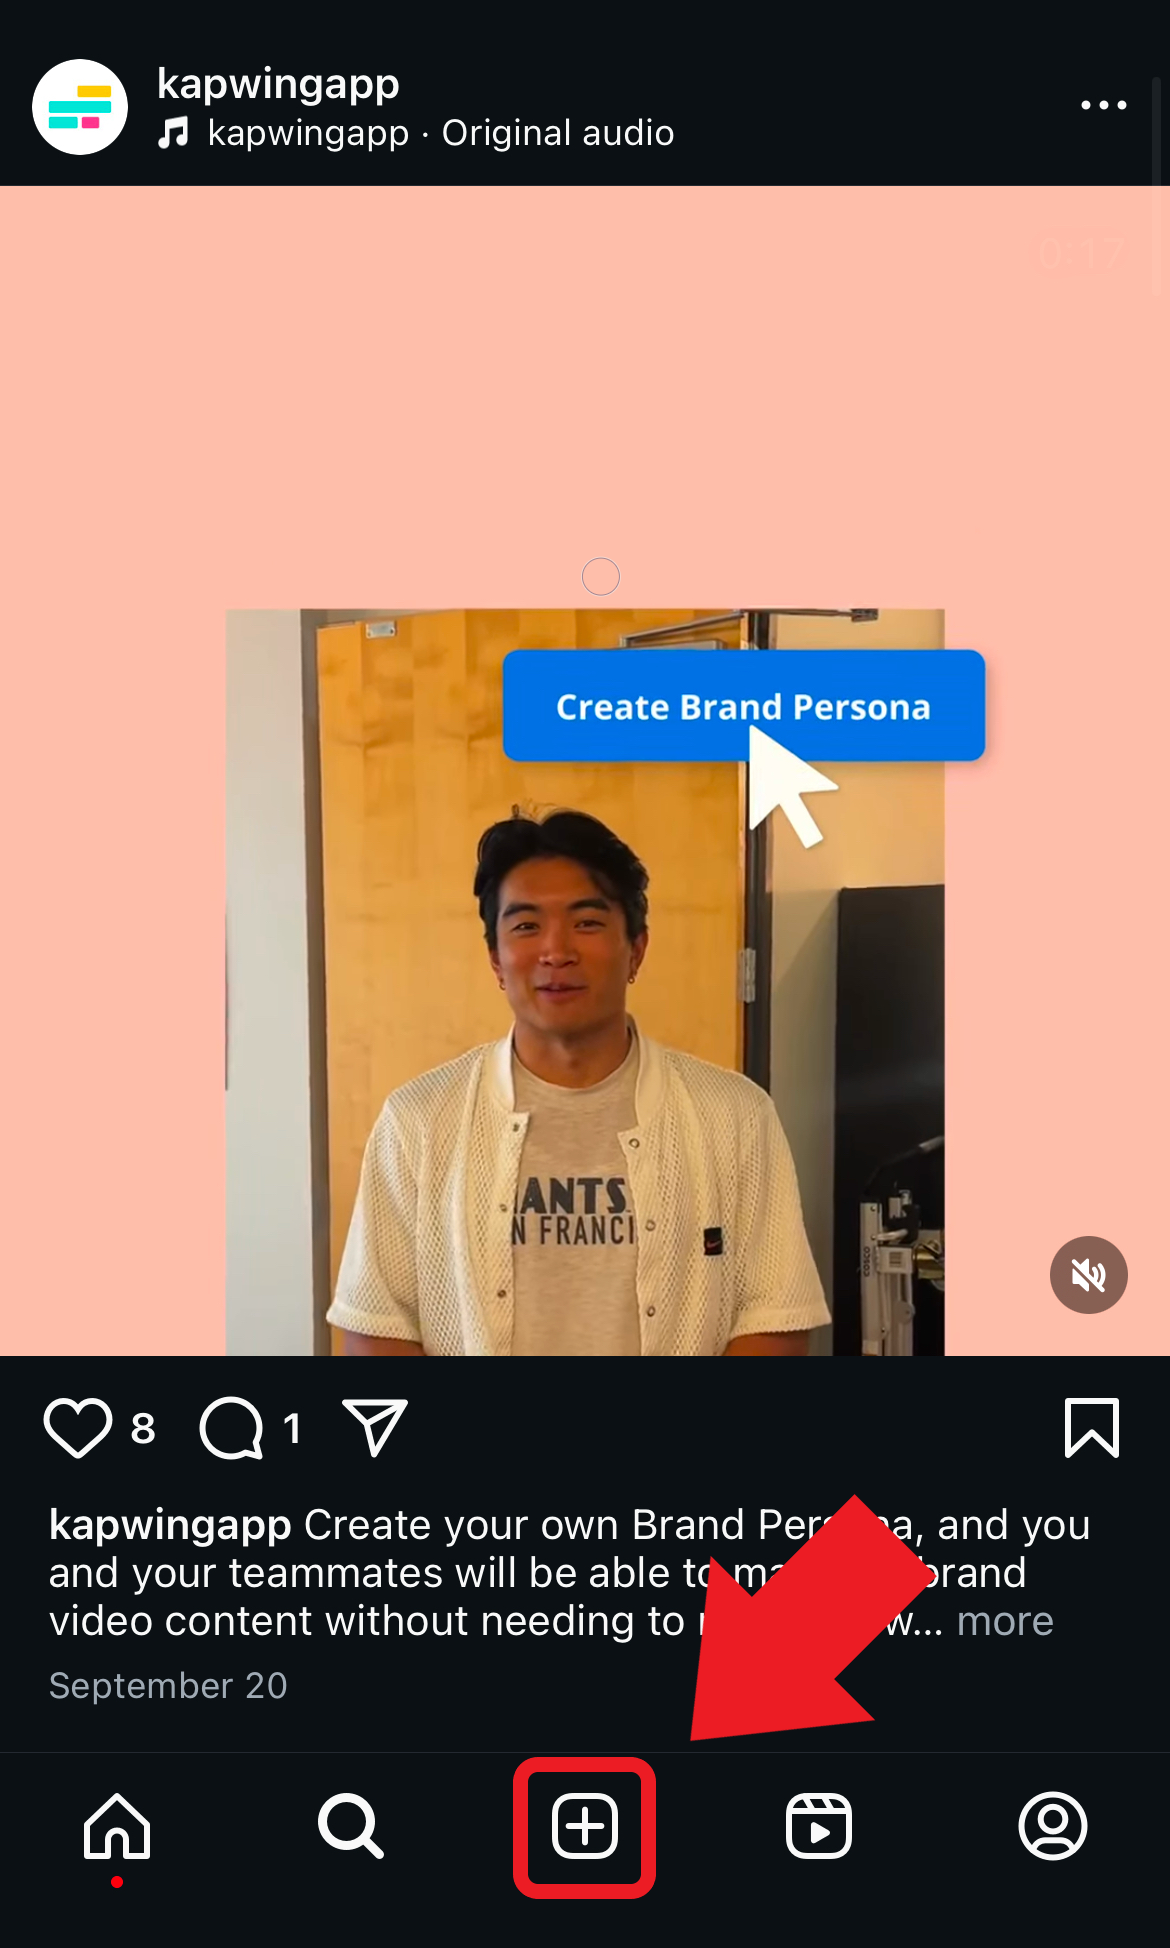
To post your Reel, open Instagram and tap the New Post icon (the "+" symbol at the bottom center of the screen).
Next, you'll be taken to a screen where you can choose the type of post (Story, Reel, or standard post). To upload the video you just edited, select "Reel."
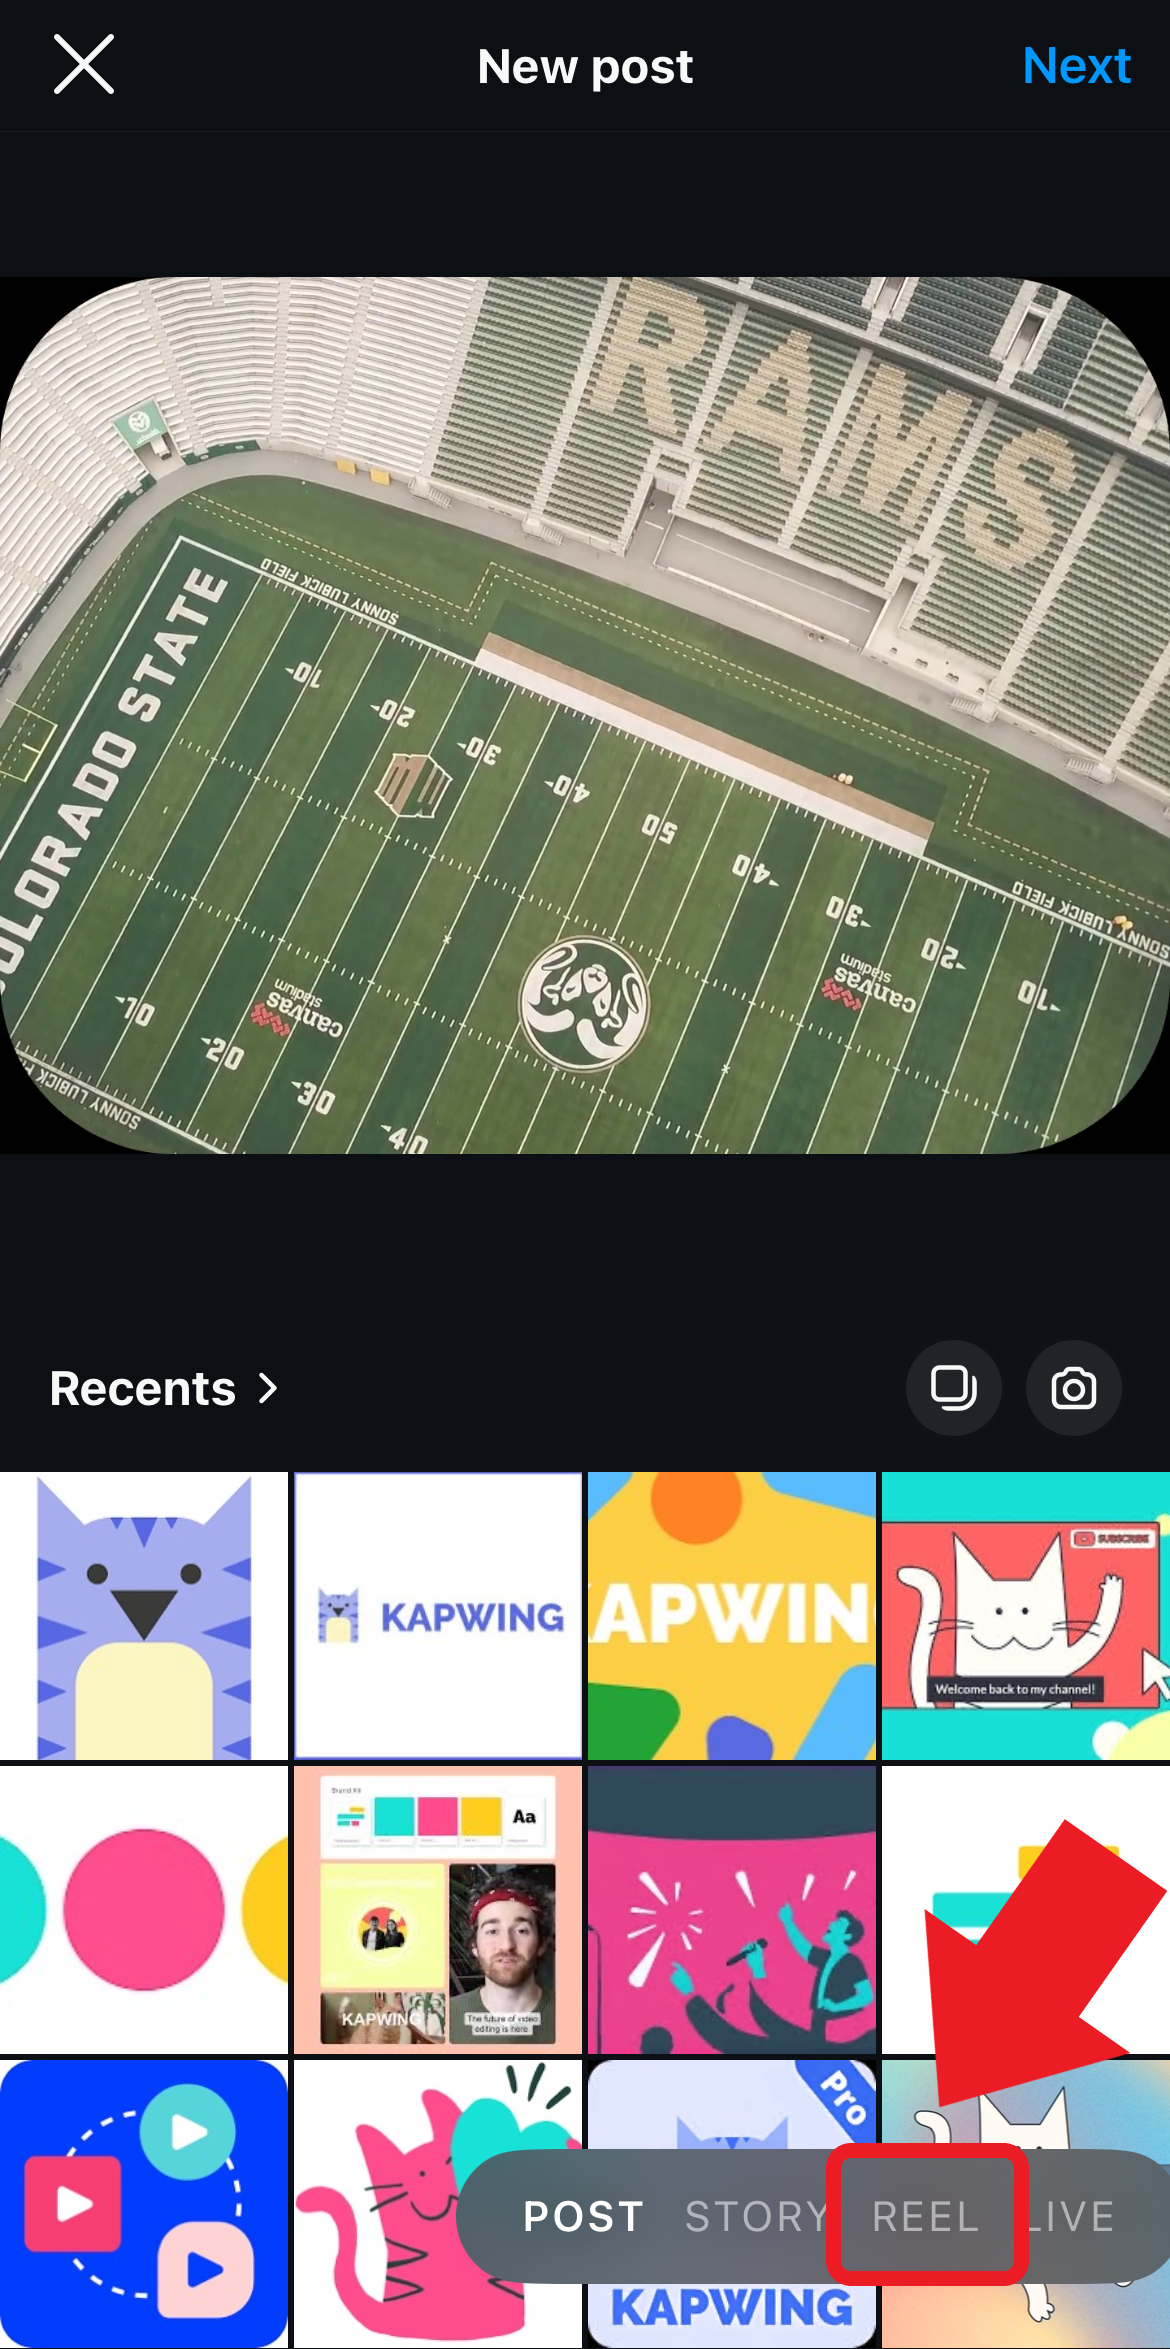
Now, you can upload your completed project and review it before posting. If you’ve already added text, audio, and effects in the Kapwing studio, no further editing is needed. Once uploaded, you're ready to post!
Example video created in the Kapwing Editor. Adding text and audio on Kapwing eliminates the need for editing on Instagram.
Looking for more ways to elevate your social media? Explore the Kapwing Resources Library for expert tips, tutorials, and inspiration.
Whether you’re a content creator, marketer, or casual user, Kapwing makes it easy to create videos that captivate and engage your audience. Try Kapwing’s video editor today to boost your engagement and grow your follower count!


