How to Print Pictures From Instagram
Download, enhance, and print your best Instagram photos
Although Instagram is one of the best platforms for sharing photos, digital content doesn’t always feel as meaningful or lasting. Whether you want to frame a favorite group photo, create a collage, or make a personalized gift, printing your Instagram photos is a great way to bring them into the real world.
This guide covers everything you need to know about printing Instagram pictures, including how to download high-quality images, resize them for the best results, and choose the right printing method.
Table of Contents
- Steps to Print Pictures From Instagram
- How to Download Pictures from Instagram to Print
- Preparing Your Instagram Pictures for Printing: Enhancing and Resizing
- Printing Your Pictures
Steps to Print Pictures From Instagram
Printing your Instagram pictures requires a few key steps to bring them from the digital platform to a physical format. Here’s a quick overview of each step:
- Downloading Your Photos: Instagram does not offer a built-in option to download images, so you will need to use a third-party tool to save your photos to your device.
- Resizing: Printed pictures come in a variety of sizes, from postcards to posters. To ensure the best quality, use editing tools to resize and enhance your photos for your desired print format. We will cover these tools in the next section.
- Printing: While home printers can handle some printing needs, they may not always produce high-quality or large-scale prints. In these cases, professional printing services offer better results.
How to Download Pictures from Instagram to Print
Since Instagram does not offer a built-in option to download photos, you'll need to use a third-party tool to save and export any pictures you want to print. There are many options available, but one of the most effective is Snapinst Instagram Downloader. This site allows you to download high-quality images without requiring an account, app installation, or payment.
Other tools, such as Inflact, offer additional features like bulk downloads and full profile exports, but they require both a paid subscription and an account setup.
Here’s a step-by-step guide on how to use Snapinst to download your Instagram pictures:
1. Copy the Post Link
To start downloading photos from an Instagram post, paste the post’s link into the URL box on Snapinst.
To find the link on both mobile and desktop, tap the three-dot icon in the top right corner of the post and select Copy Link.
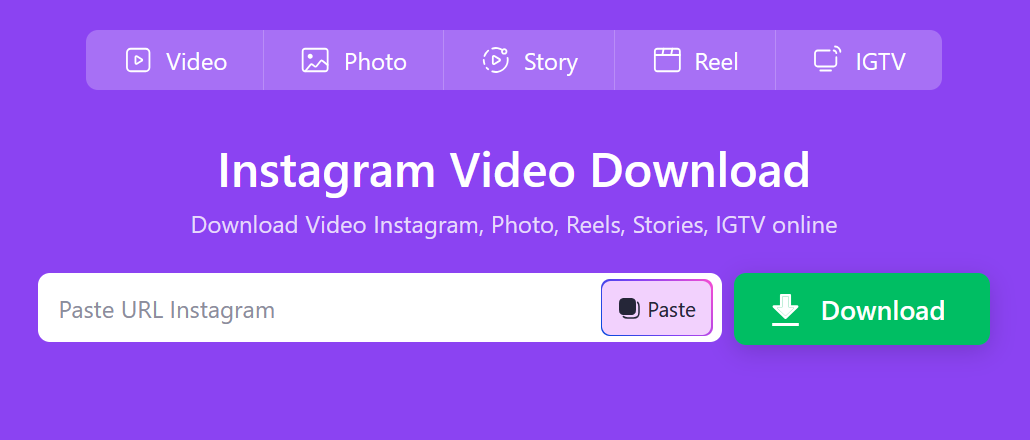
After pasting the link, press Enter on your device to begin the search. While the site mentions that this process can take up to a minute, I found it usually completes within a few seconds.
Important: This tool only works with public accounts. If your Instagram account is private, you’ll need to temporarily change your settings to allow the downloader to access your posts.
To check your Instagram account status, navigate to the settings menu and locate the Account privacy page within the "Who can see your content" section.

2. Review and Download Images
Once loaded, all photos and videos from the linked post will appear in a grid. To download a photo or video, select the blue Download Photo/Video button beneath each piece of media.
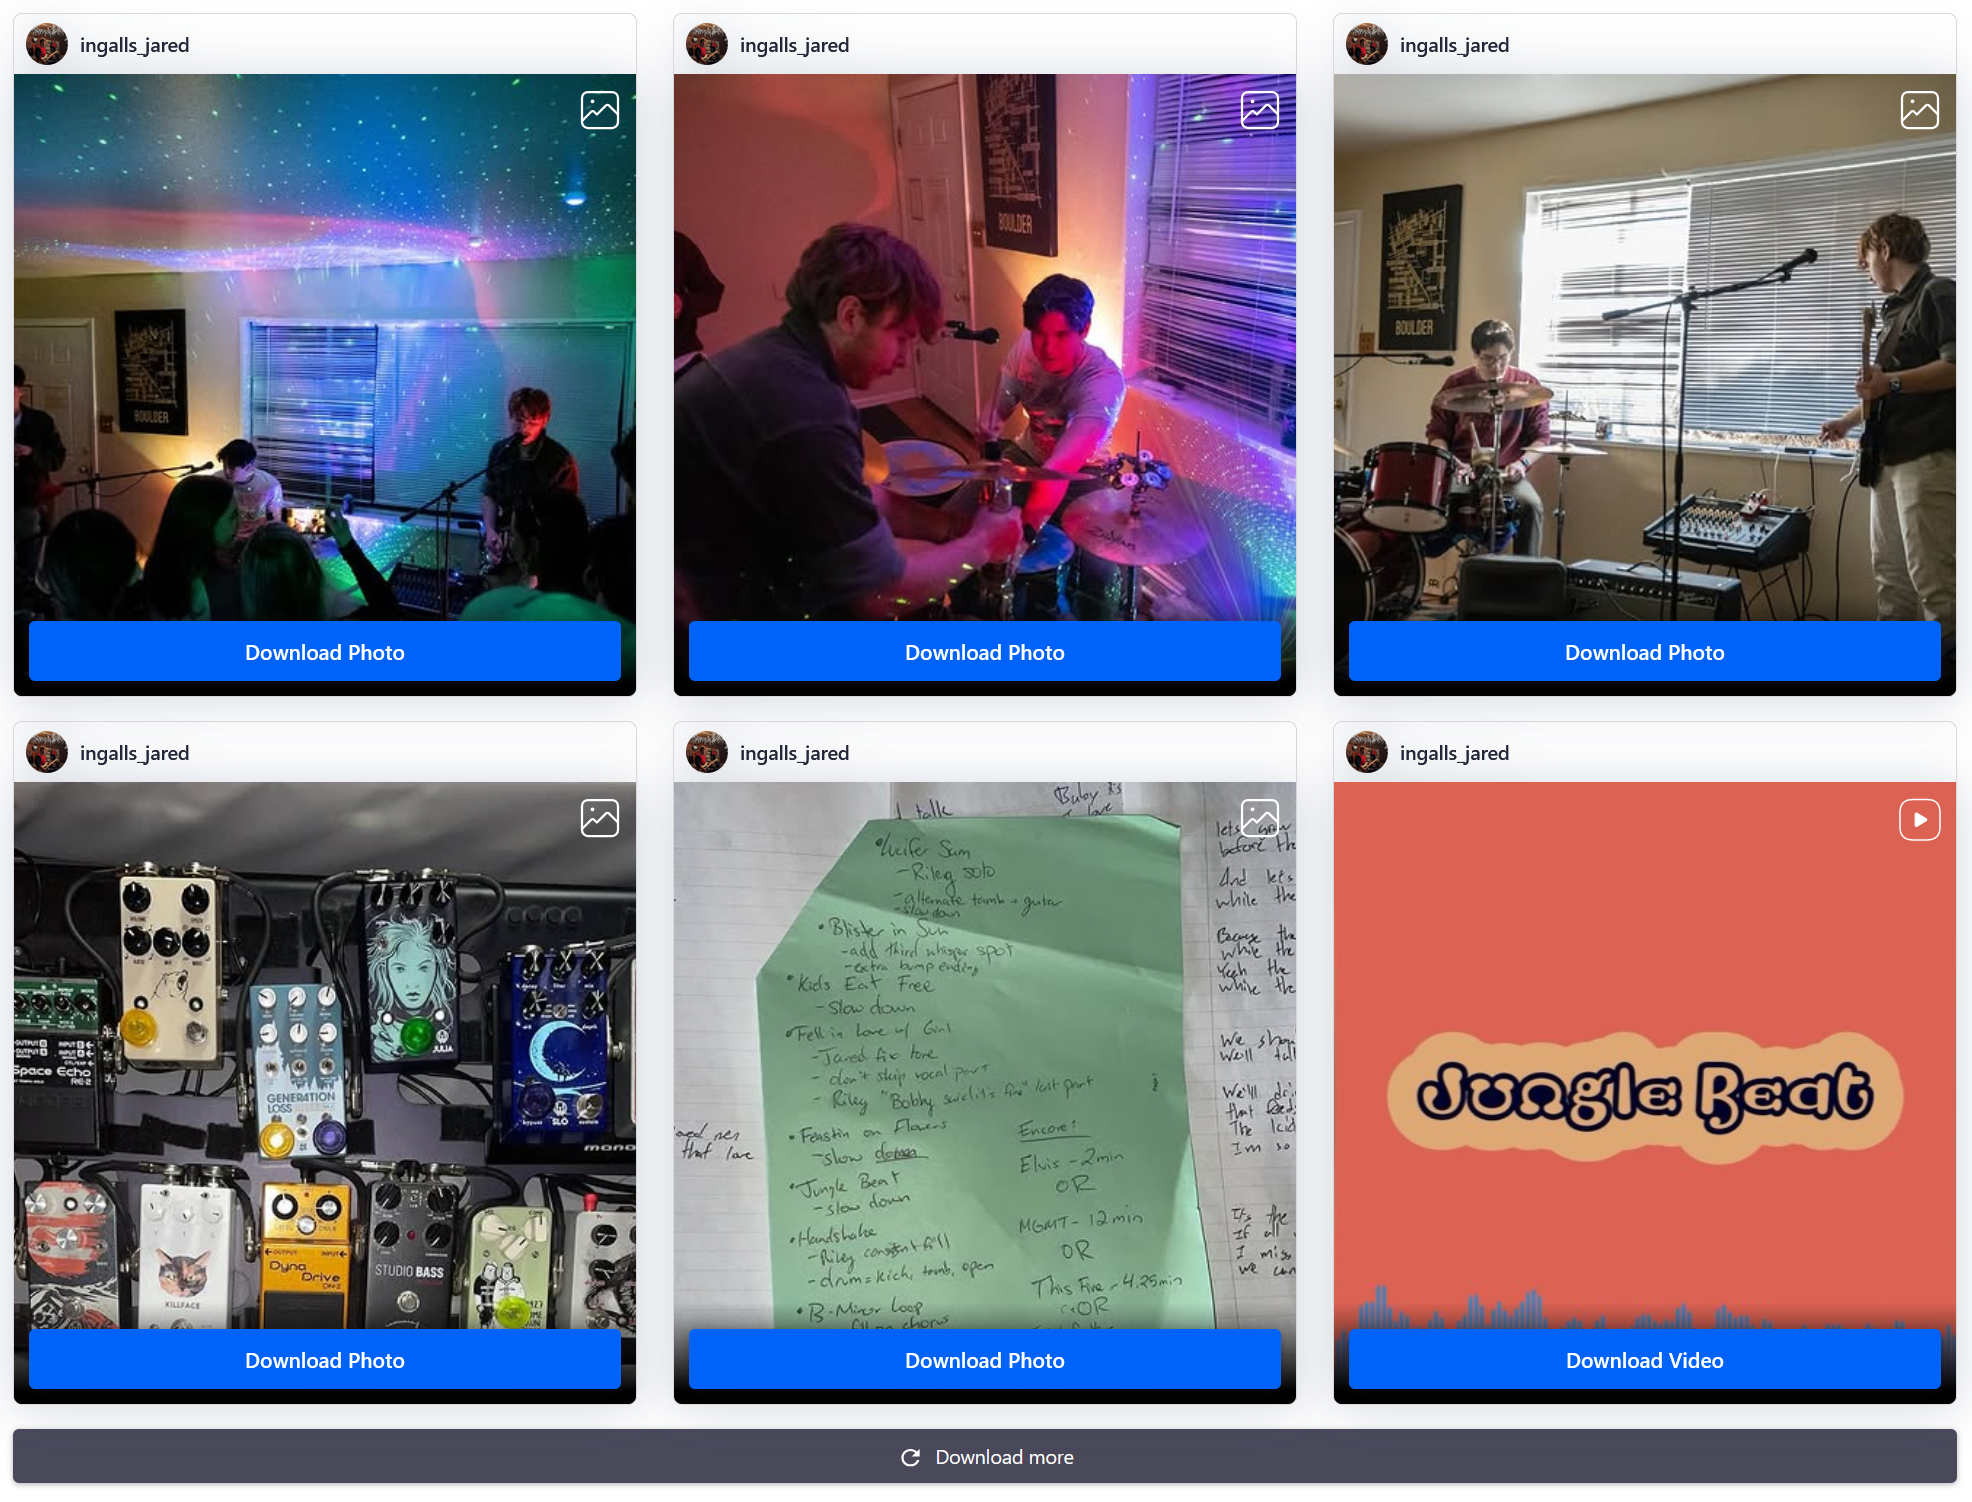
To download additional pictures from another post, click the Download More button at the bottom of the grid.
Preparing Your Instagram Pictures for Printing: Enhancing and Resizing
Printing photos is a more personal and lasting way to share and preserve memories. To ensure your images look their best, it’s important to upscale lower-resolution photos for sharper detail and resize them for optimal print quality.
The best part? You don’t need any editing experience as the tool is controlled by AI.
Upscaling Your Image (Increasing the Resolution)
To enhance an Instagram photo for printing, start by uploading it to the Kapwing editor.
Then, select your image and navigate to the Enhance option in the right-hand tools menu.
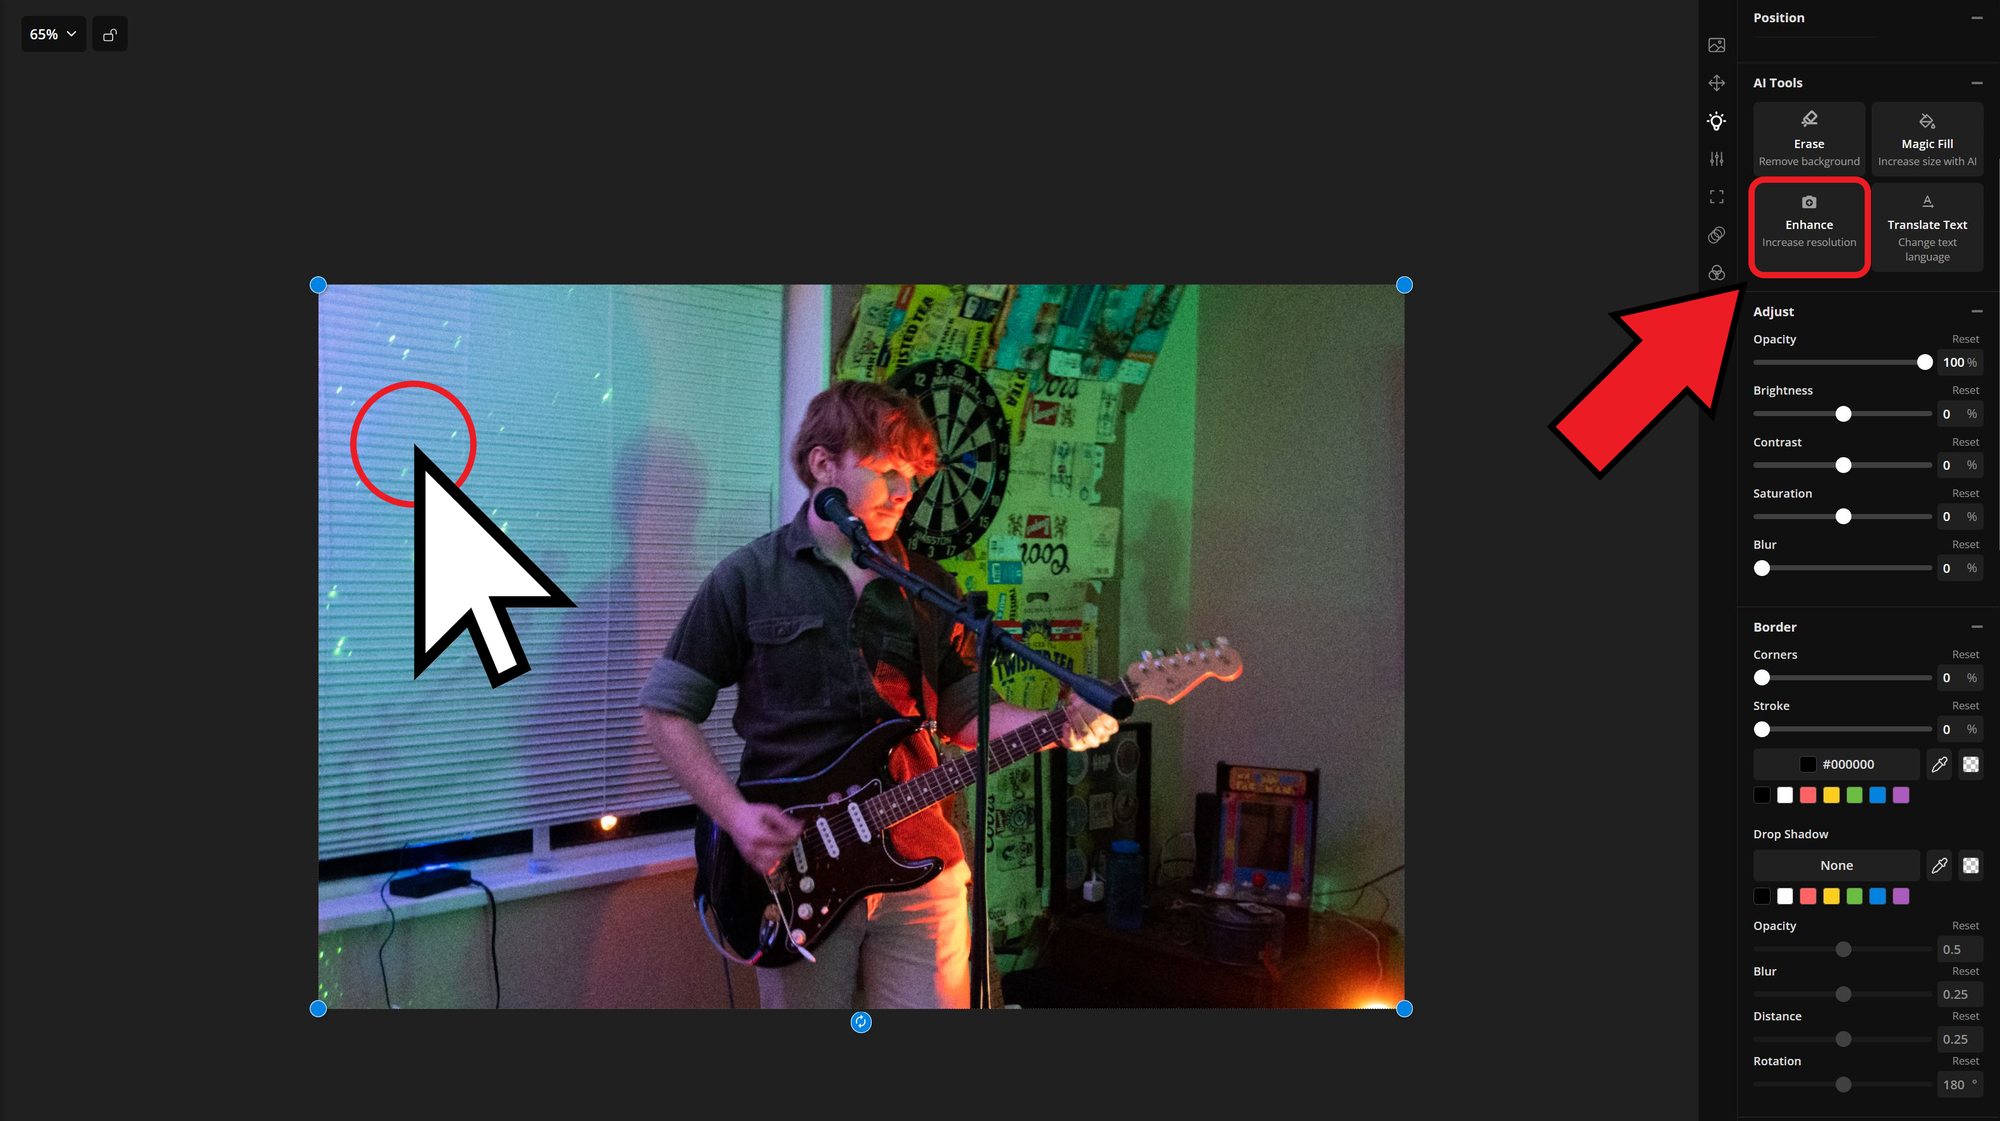
Once selected, your image will automatically begin enhancing. The processing time will vary depending on the size of your image.
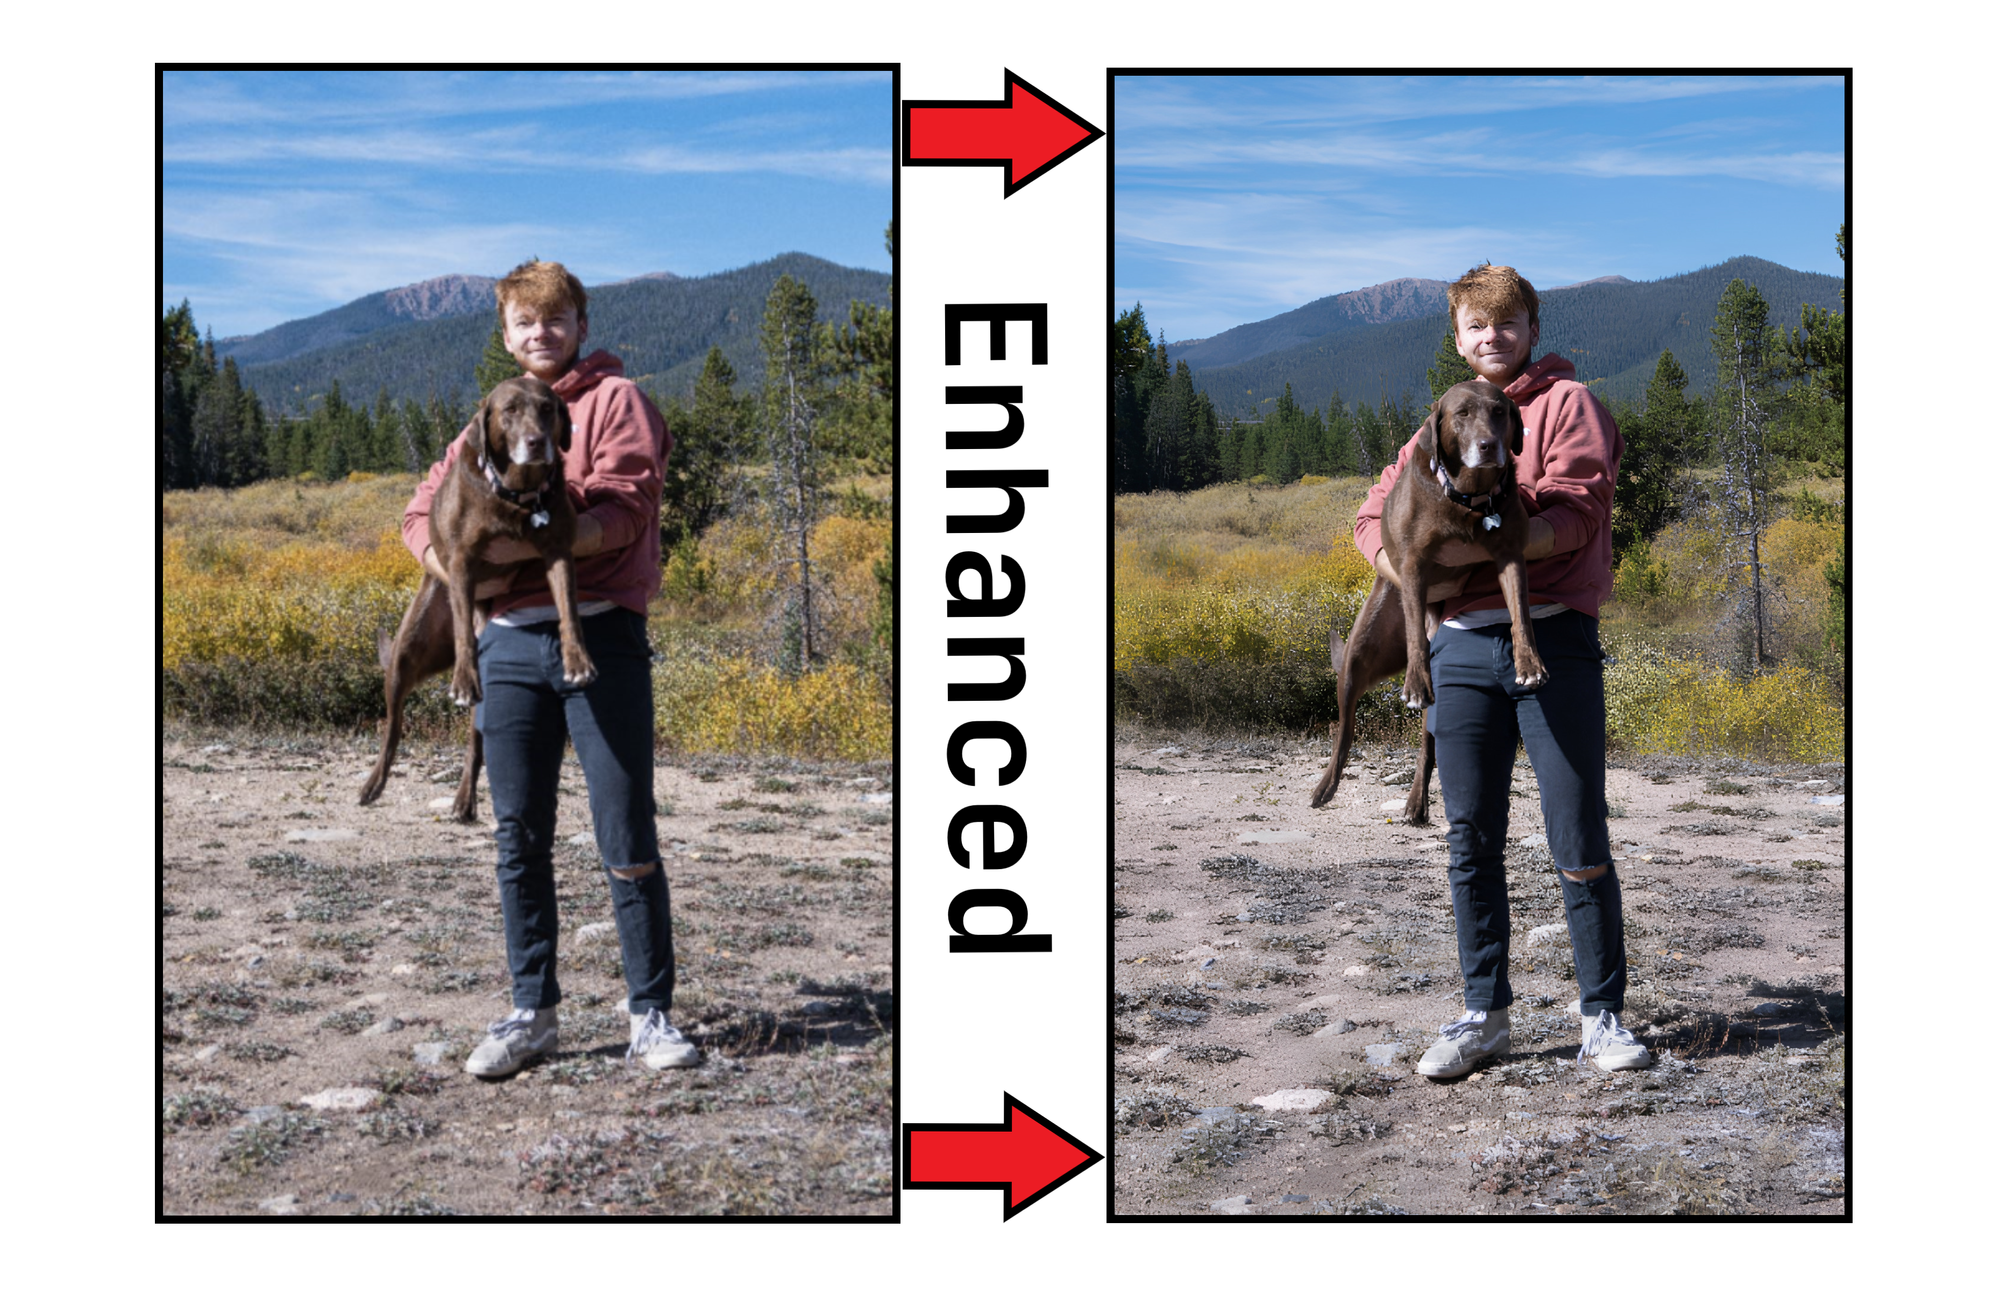
After completion, you will have an upscaled version of your original image that is better suited for cropping, sharing, and printing. Printed images are viewed at a much closer range than digital ones, making it important to ensure they look clear and crisp.
Aspect Ratio Guidelines
One of the main considerations when preparing your images for printing is their size. While most social media platforms prioritize specific aspect ratios for content, these often do not align with standard print sizes. Instagram images are most commonly posted in a square (1:1) or portrait (3:4) aspect ratio. While these formats are optimized for mobile viewing, they may not work well for all printing needs.
Below are common print aspect ratios along with their recommended resolutions in pixels:
- 4:6 (2:3) – Standard photo prints (1500 x 2250 pixels)
- 5:7 – Greeting cards and framed photos (1500 x 2100 pixels)
- 8:10 (4:5) – Portrait prints and wall art (2400 x 3000 pixels)
- 11:14 (5.5:7) – Large framed prints (1375 x 1750 pixels)
- 16:20 (4:5) – Posters and fine art prints (2000 x 2500 pixels)
- 16:24 (2:3) – Large posters and canvas prints (2400 x 3600 pixels)
- 24:36 (2:3) – Oversized posters and banners (3000 x 4500 pixels)
These aspect ratios and resolutions will help you resize your image for the best print quality. For a free conversion guide, check out this pixel chart from Nations Photo Lab.
Resizing Images for Printing
To resize an image, such as from portrait to landscape, upload it to the editor and access the Resize Project menu by selecting the background of your project.
Locate the resizing tool in the right-hand menu.

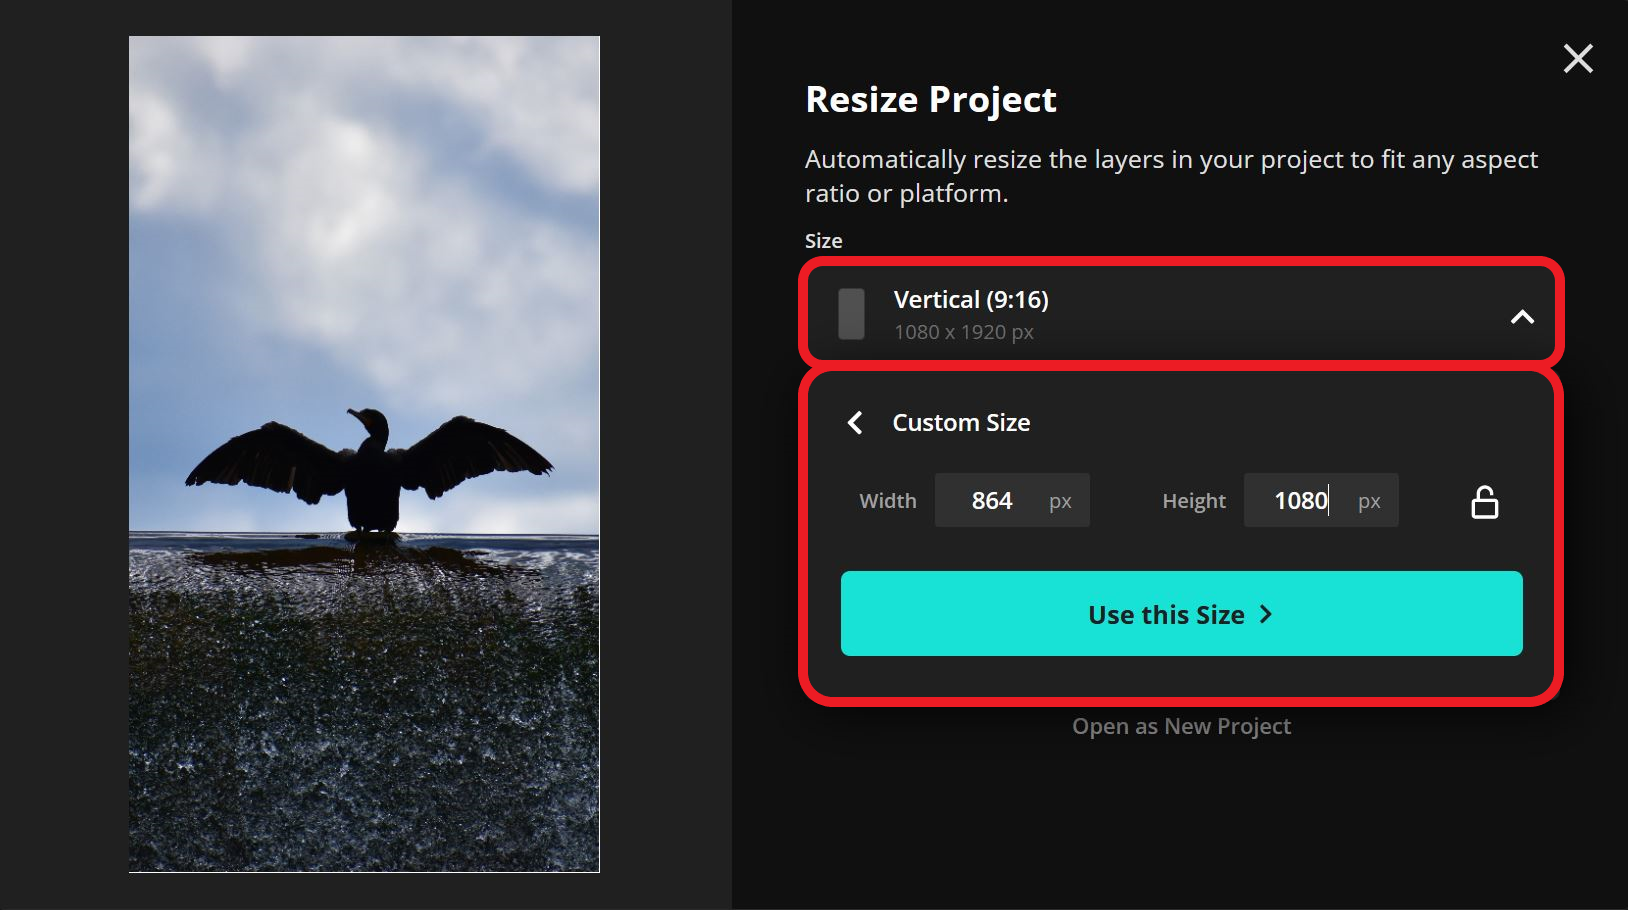
From here, expand the Size dropdown to either select a preset aspect ratio or enter custom image dimensions.
Once you have selected the desired size, confirm the changes by selecting the Resize Project button.
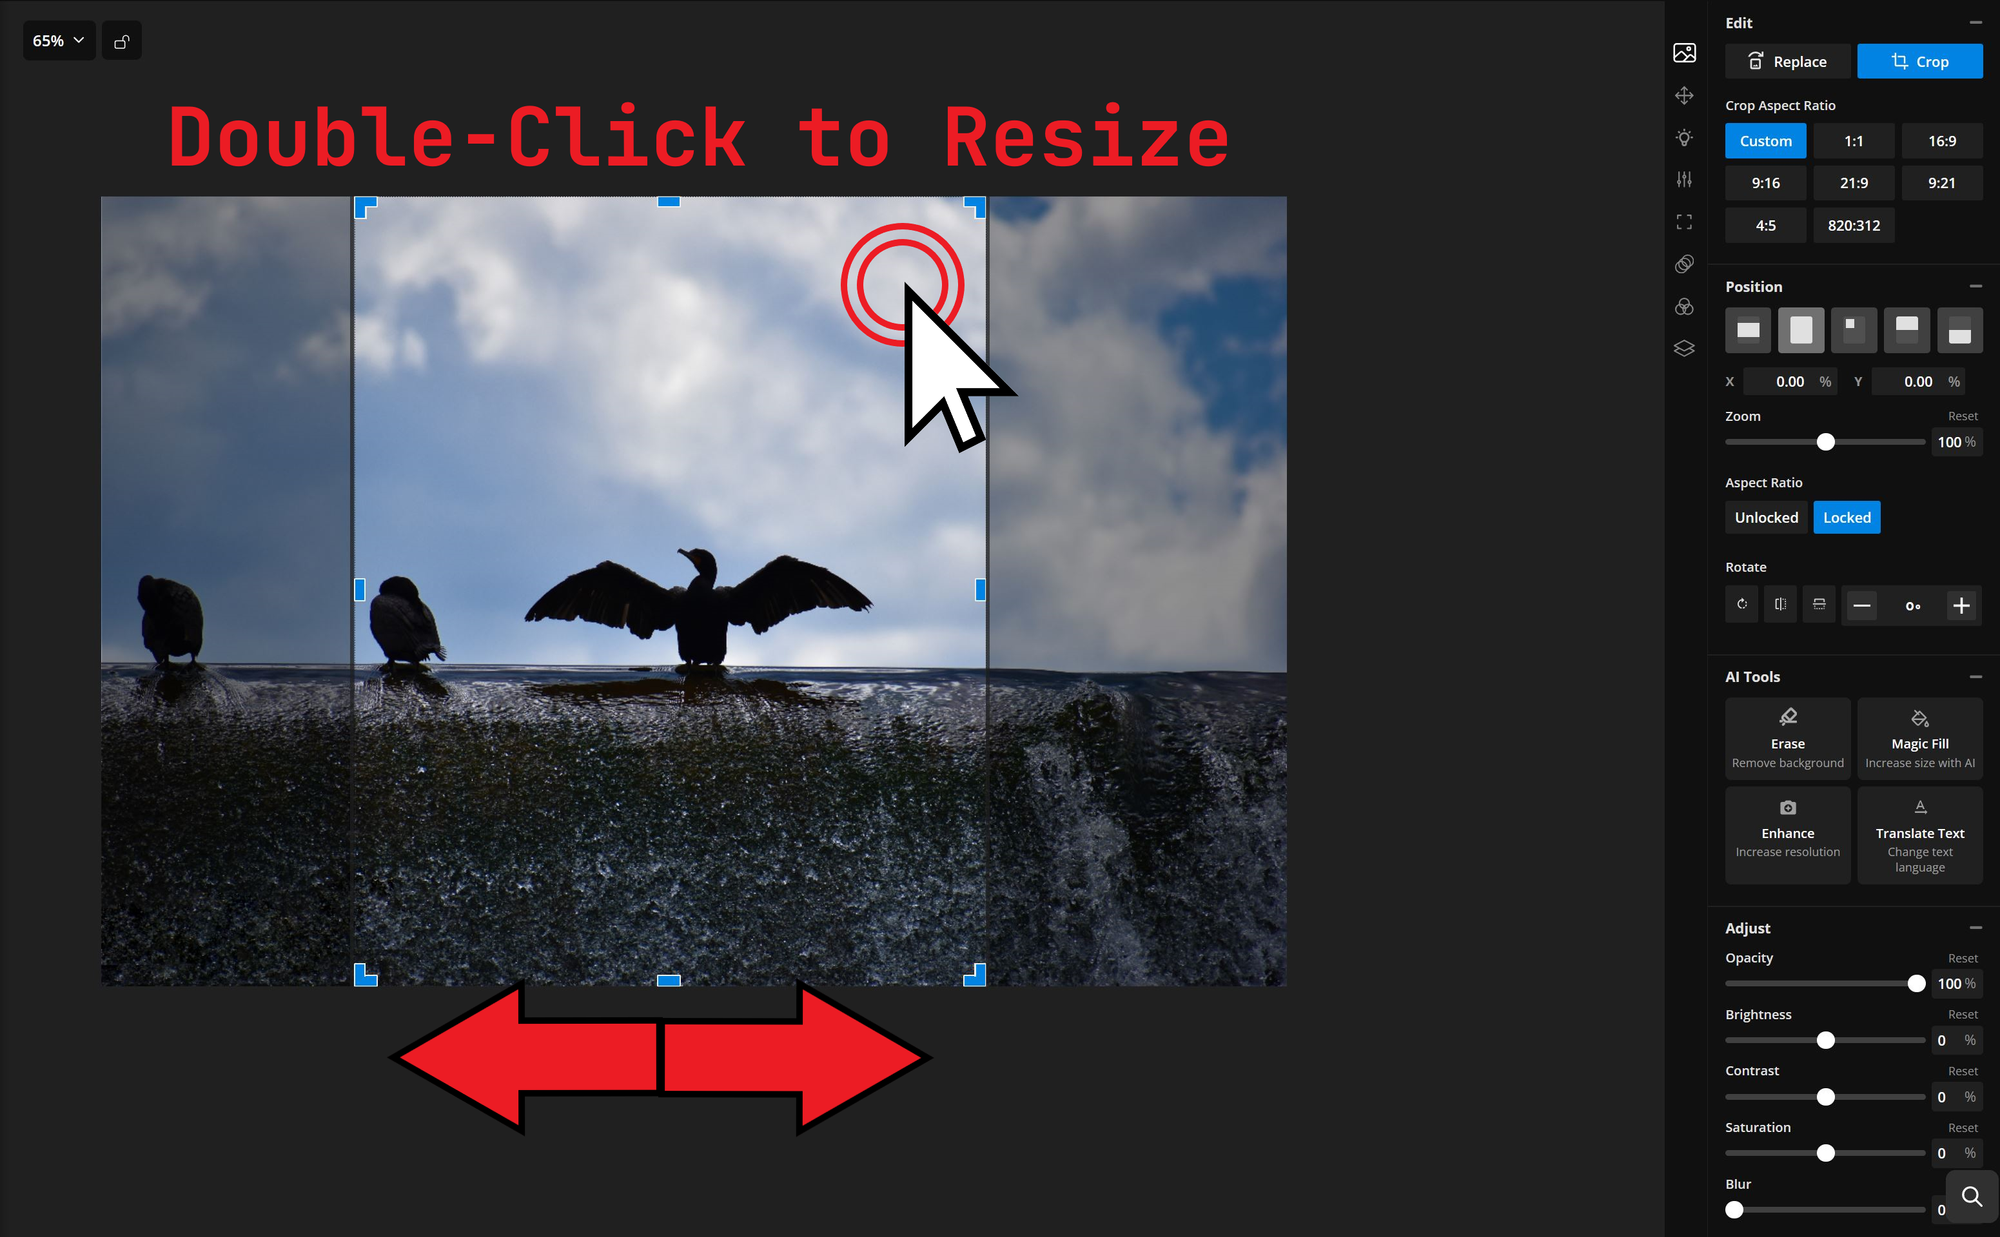
After resizing, you may need to adjust the crop to ensure all important elements of the image are properly displayed.
To do this, double-click the image and drag the frame to your preferred position.
While resizing helps adjust images to fit different aspect ratios, you may find that your image is not large enough for the resolution needed for printing. In this case, consider using an AI image extender.
Extending Images With an AI Image Extender
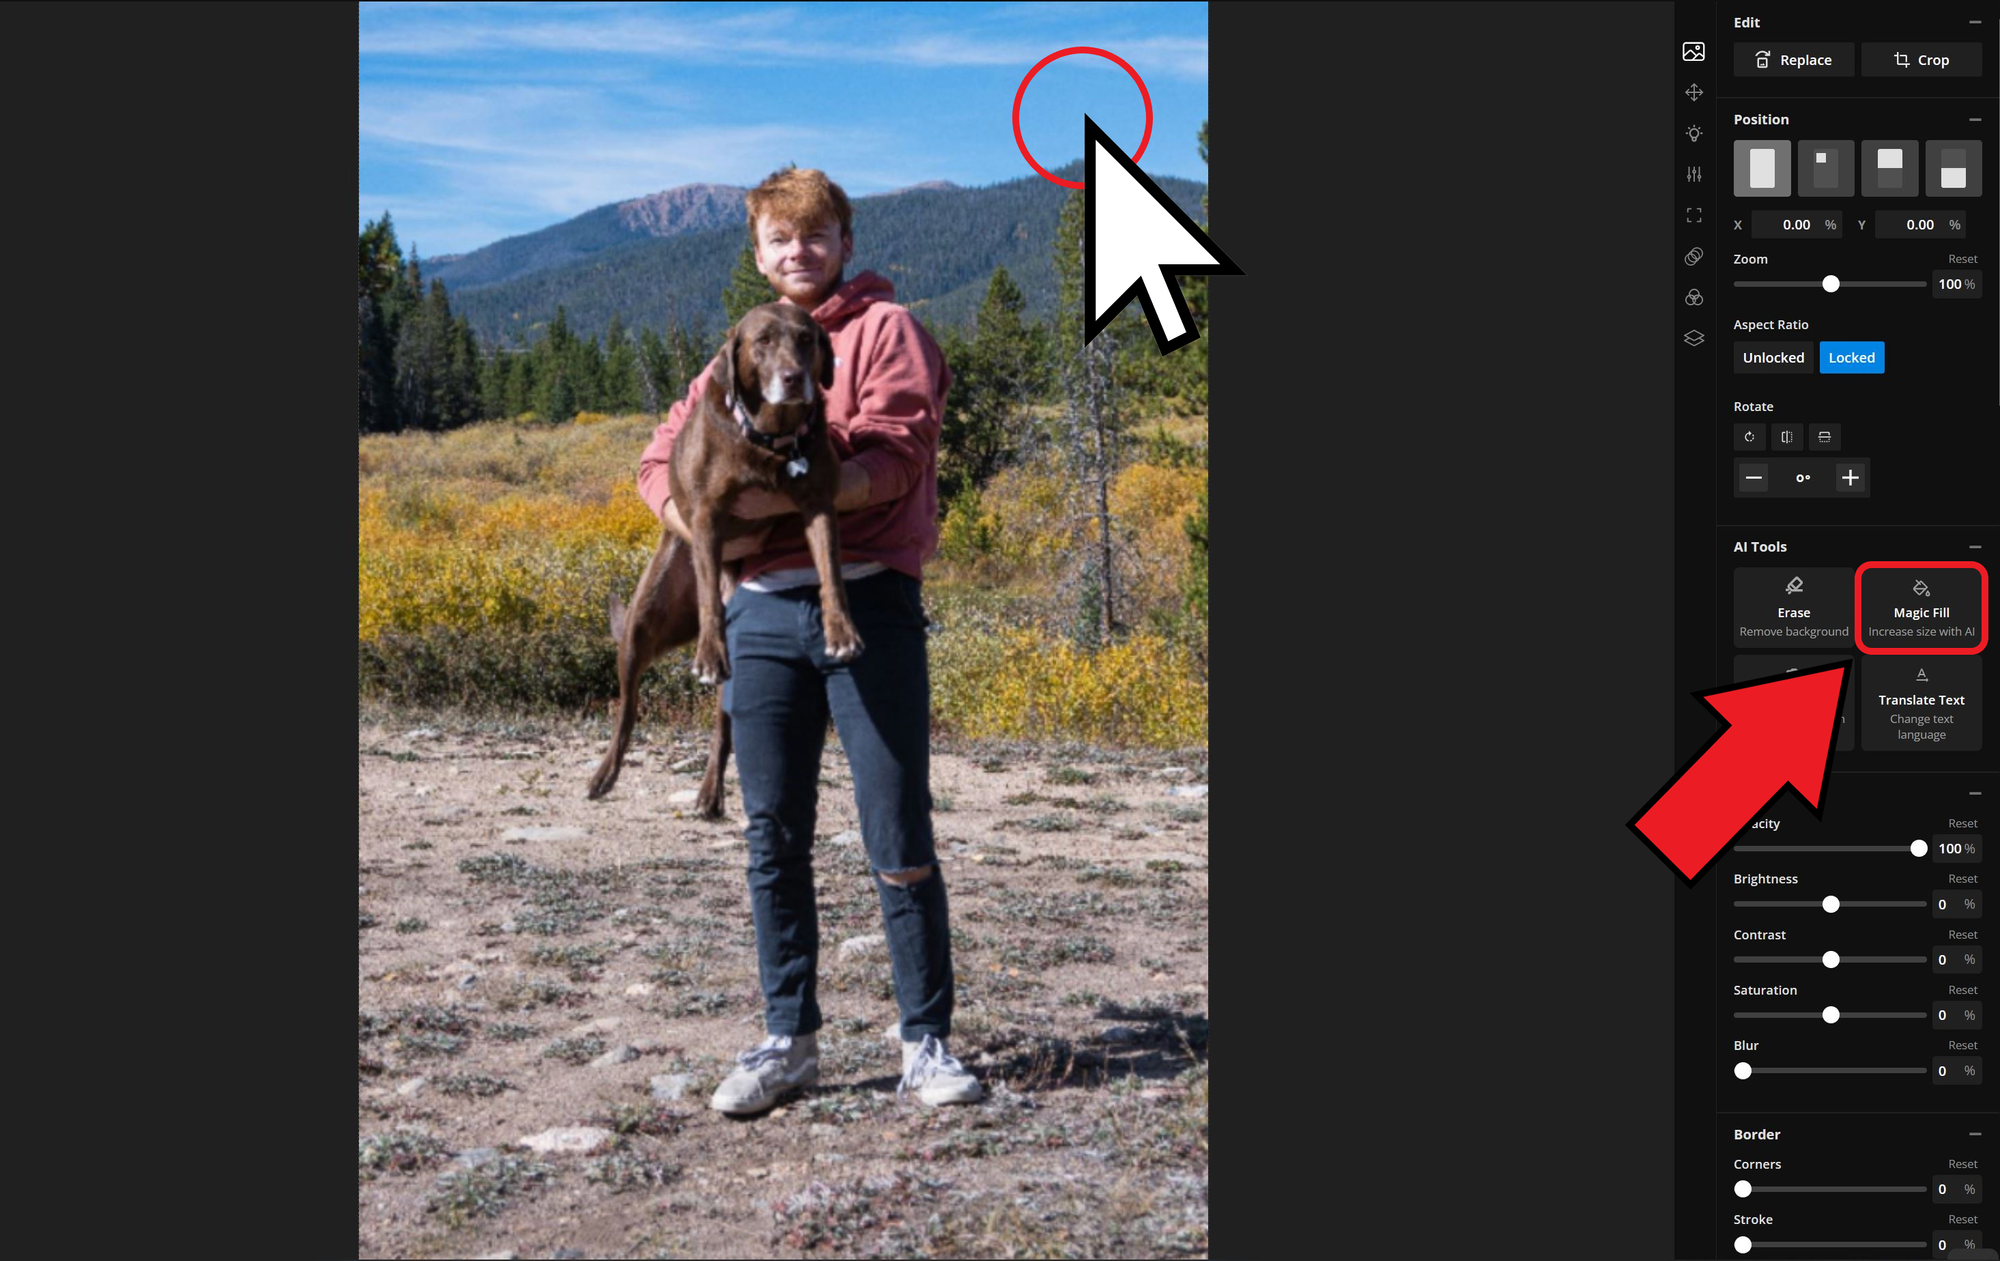
To access the Kapwing AI image extender, begin by selecting your image and navigating to the Magic Fill tool within the AI Tools menu on the right-hand side.
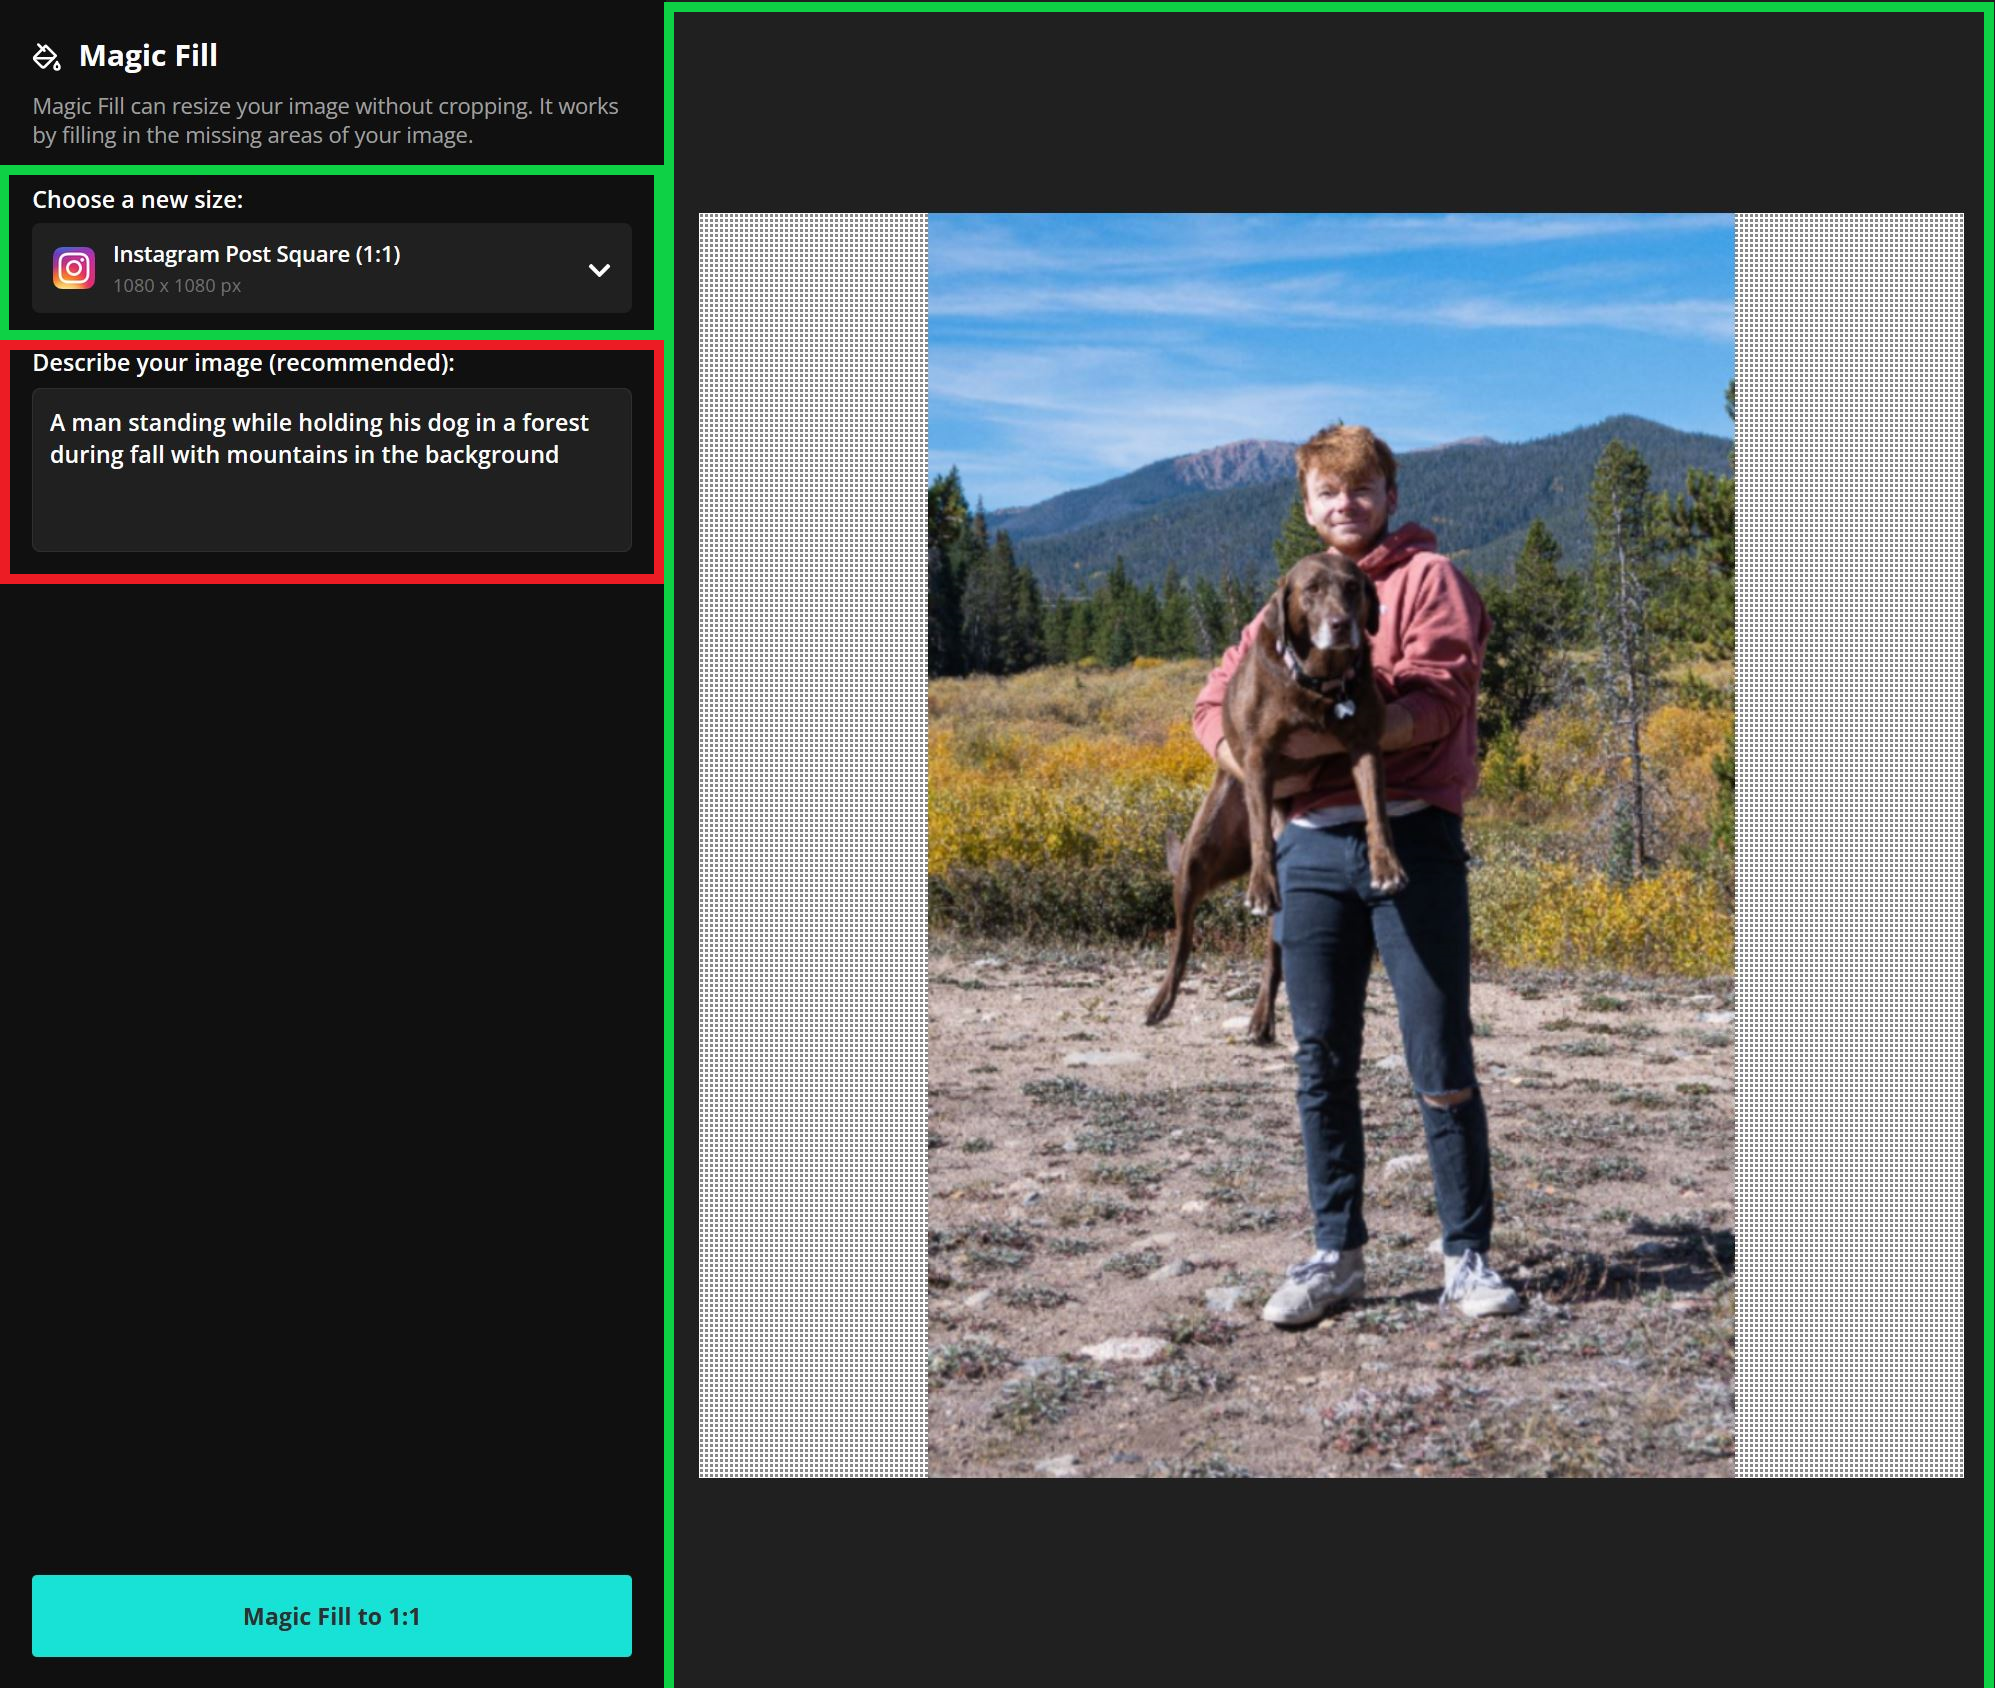
In the following menu, choose your desired image size by selecting a preset aspect ratio from the 'Choose a new size' dropdown or by entering custom dimensions.
To improve accuracy, describe your image in the text box so the AI can generate an appropriate extension.
After generating, you will receive four image variations. You can select up to all of them or choose to regenerate if the results are not satisfactory.
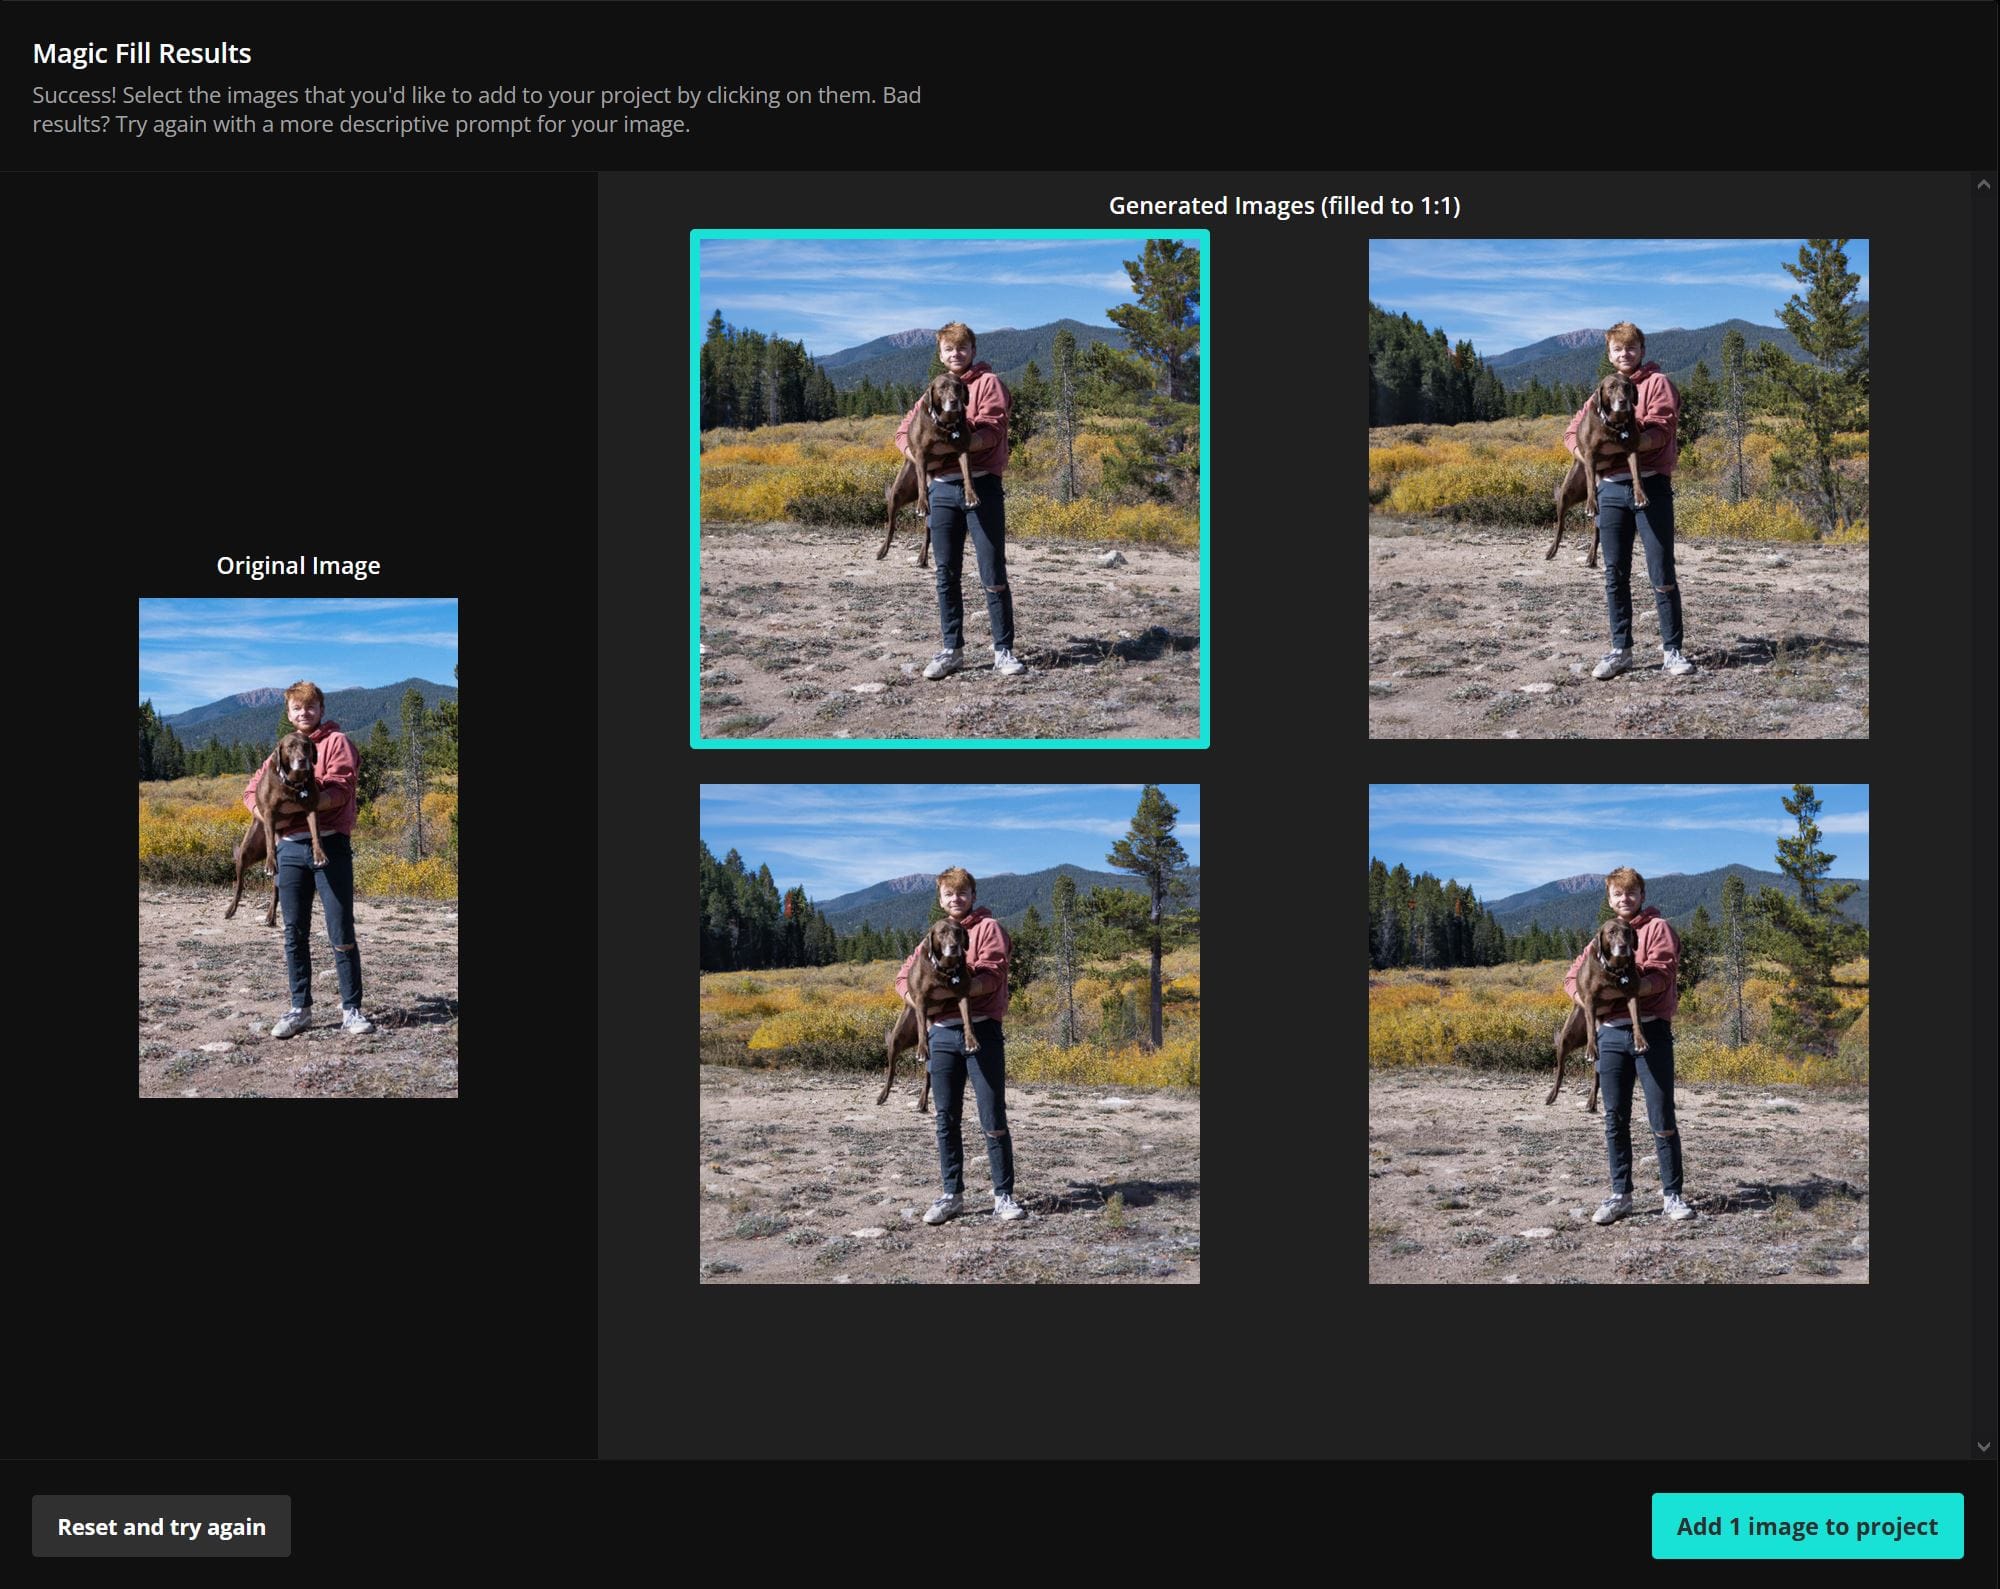
Completing this process will produce an expanded image that fits your desired aspect ratio without losing quality.
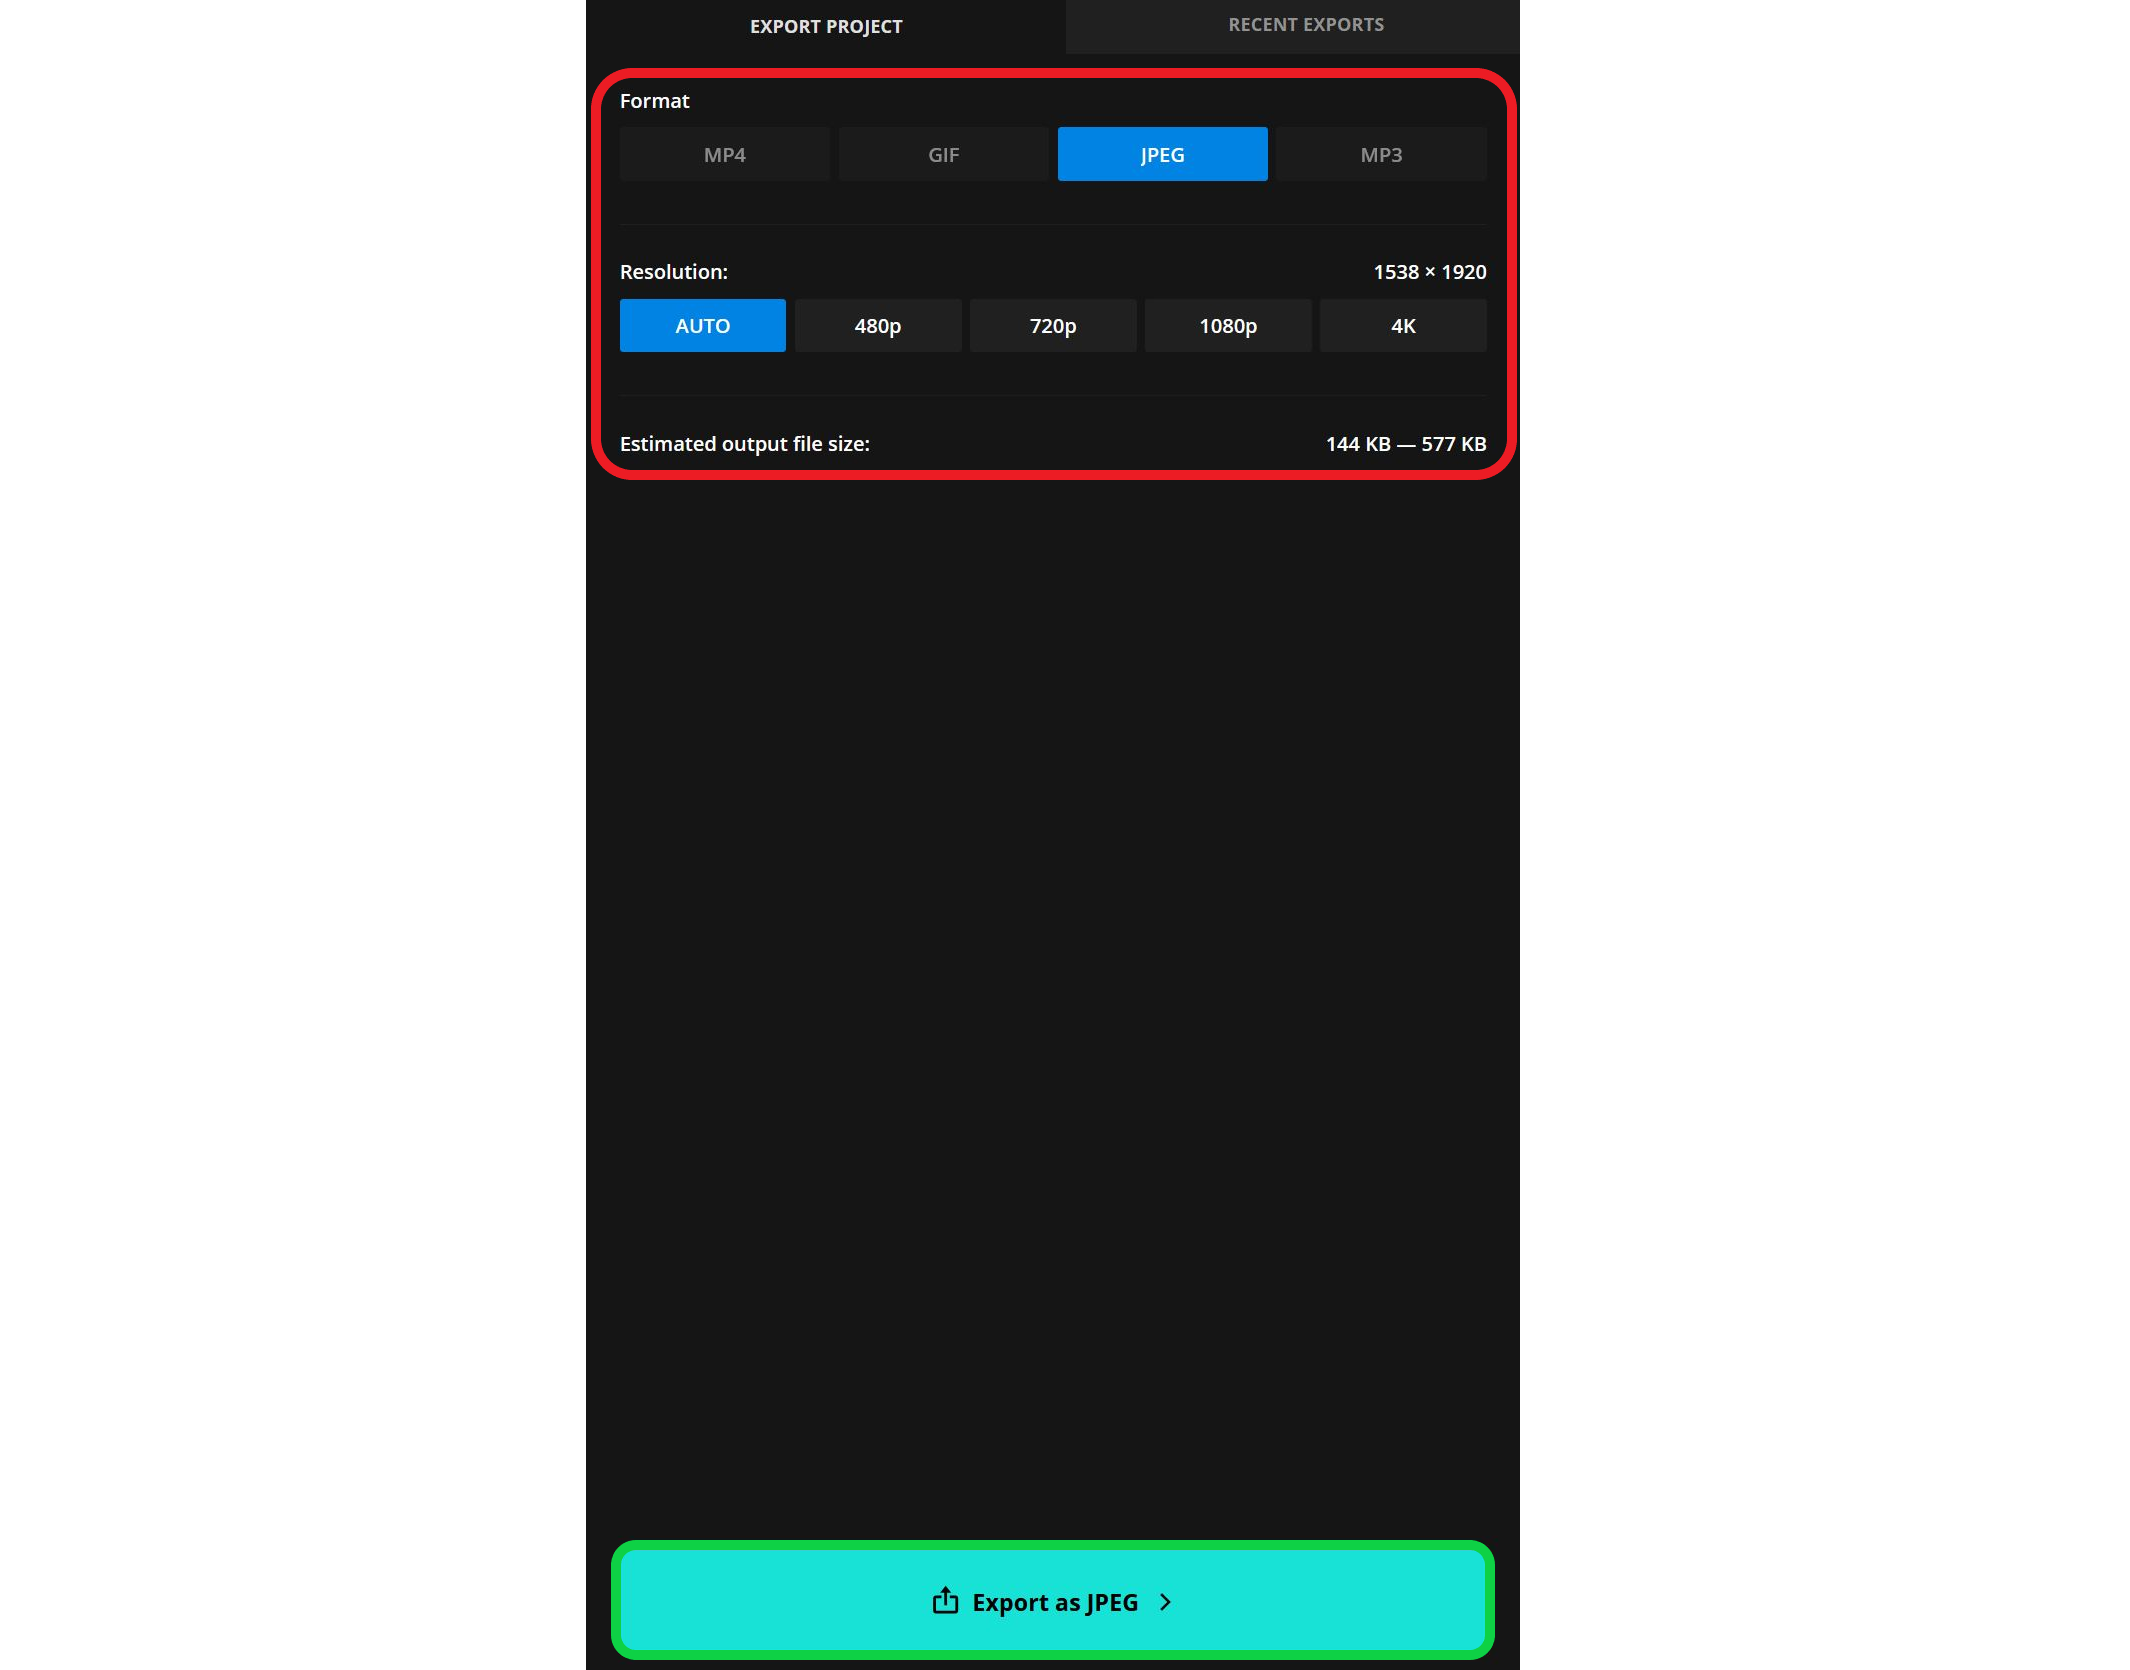
Regardless of the resizing method used, it is important to export your project in high quality to preserve details.
To do this, select the Export option in the top-right corner of the editor. Then, set the resolution to Auto to ensure the image exports at the highest possible quality.
Printing Your Pictures
Now that you have successfully exported your pictures from Instagram and ensured they are properly sized for print, you are ready to choose a printing method — either at home or through a professional printing service.
Printing at Home
If you plan to print at home, the most important factor is ensuring that your printer is designed for high-quality photo printing. Standard home printers may not produce the best results, so look for a dedicated photo printer that supports high-resolution pictures and uses pigment-based inks for better color accuracy and longevity.
You'll also need to use the right printing materials to get the best results. Glossy, matte, or luster photo paper can enhance the final look depending on your preferences. For a more premium feel, consider cardstock or specialty printing paper. Be sure to check your printer’s specifications to ensure compatibility with different paper types.
Using a Printing Service
If you prefer a professional printing service, you have several options depending on your budget, timeline, and the type of prints you need.
- Local Retail Stores: Many chain stores offer in-person printing services with quick turnaround times. Walgreens, CVS, and Walmart provide same-day photo printing at affordable prices, making them a convenient choice for last-minute prints.
- Wholesale Clubs: Membership-based stores like Sam’s Club and Costco offer a wider variety of print options beyond standard photos. These include metal prints, canvas prints, glassware, mugs, and even custom apparel. These stores often have lower prices per print, making them a good option for bulk orders.
- Online Printing Services: Websites like Shutterfly, Printique, and Mpix allow you to create customized prints from home and have them shipped directly to you. These services tend to offer the widest range of formats, including postcards, photo books, graduation announcements, framed prints, and collage designs. Online services are ideal for bulk orders or when in-store options are not practical.
Regardless of the method you choose, ensuring your images are properly sized and enhanced before printing will help you achieve the best possible results.