How to Use DeepSeek AI Image Generator (Janus Pro)
Another week, another AI tool hits the market

DeepSeek AI is a Chinese company founded by Liang Wenfeng in December 2023 although it only recently entered the spotlight as a serious ChatGPT competitor. The DeepSeek app surged in popularity, becoming the most downloaded free app in the United States in January 2025. DeepSeek is a generative AI platform built on an open-source model, aiming to match or exceed the performance of leading AI systems at a lower cost.
The platform first gained popularity with its R1 model, recognized for its "chain-of-thought" reasoning, which helps break down complex questions into detailed responses. This approach has contributed to making AI tools more accessible and user-friendly. Now, excitement is building around Janus Pro, DeepSeek’s latest image-generation tool.
In this article, we’ll guide you through creating images with Janus Pro, cover key details like recommended image sizes, and explain how to turn images into videos for social media.
Table of Contents
- What Can the Janus Pro Image Generator Do?
- How to Use DeepSeek AI Image Generators
- How to Use Janus Pro 7B Multimodal
- How to Edit Janus Pro Images
What Can the Janus Pro Image Generator Do?
The Janus Pro 7B model is more than just an image generator. Unlike popular alternatives like DALL·E and Midjourney, Janus Pro offers multimodal capabilities, including both image analysis and generation. Similar to Grok AI, it allows users to upload images alongside a text prompt to ask questions about the image or convert elements within it, such as math equations or text.
For image generation, DeepSeek provides two options:
- Flux: Customizable aspect ratios ranging from 256 to 2048 pixels in height and width, seed customization, and adjustable inference steps for refining image outputs.
- Janus Pro 7B: Creates four images simultaneously at a resolution of 768 x 768 pixels, seed customization, and prompt weight.
Overall, Janus Pro represents another major breakthrough from DeepSeek AI, providing consumer-friendly tools that require no technical expertise while still offering advanced customization through API integration and an accessible open-source framework.
How to Use DeepSeek AI Image Generators
Advanced users can access Janus Pro and Flux's code base on DeepSeek’s Hugging Face page. For general users, simple text-prompt interfaces are available on the Janus Pro website.
The first interface uses the Flux model. To generate an image, enter a descriptive prompt and select Generate Image.
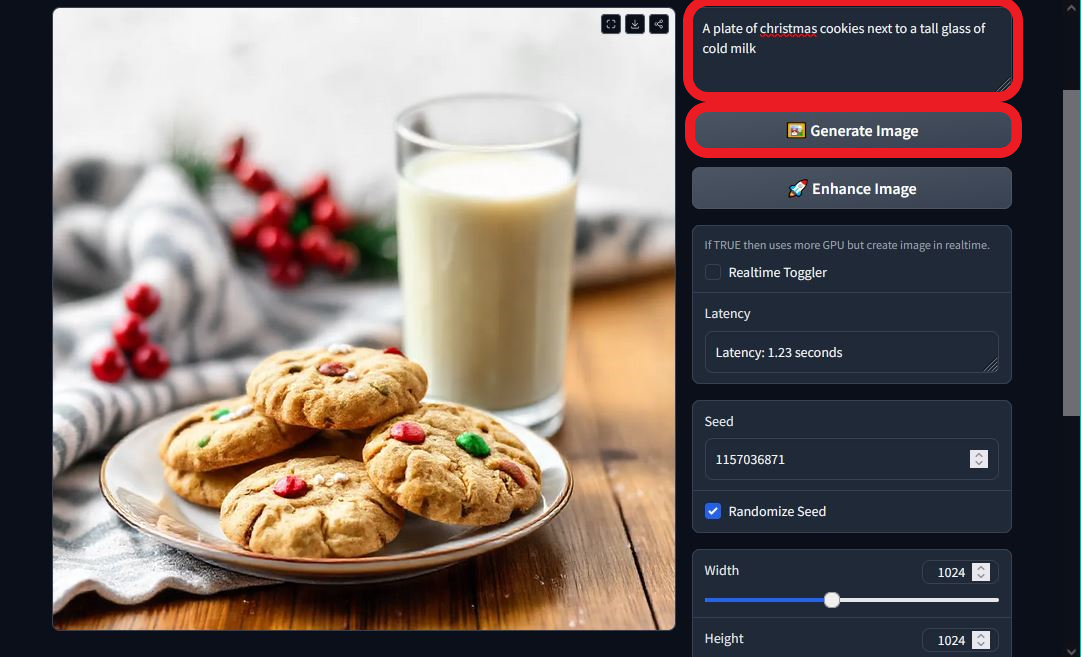
By default, images are generated in a square format (1:1) with a resolution of 1024 x 1024 pixels. If you're satisfied with the result, you can download it by hovering over the image and clicking the download icon in the top right corner.
Images are saved as WebP files by default, which some programs may not support. If needed, you can use a free online converter to change the file format to JPEG or PNG for broader compatibility.
Optionally, you can also enhance your image to improve the clarity, lighting, and overall details by selecting the Enhance Image option.
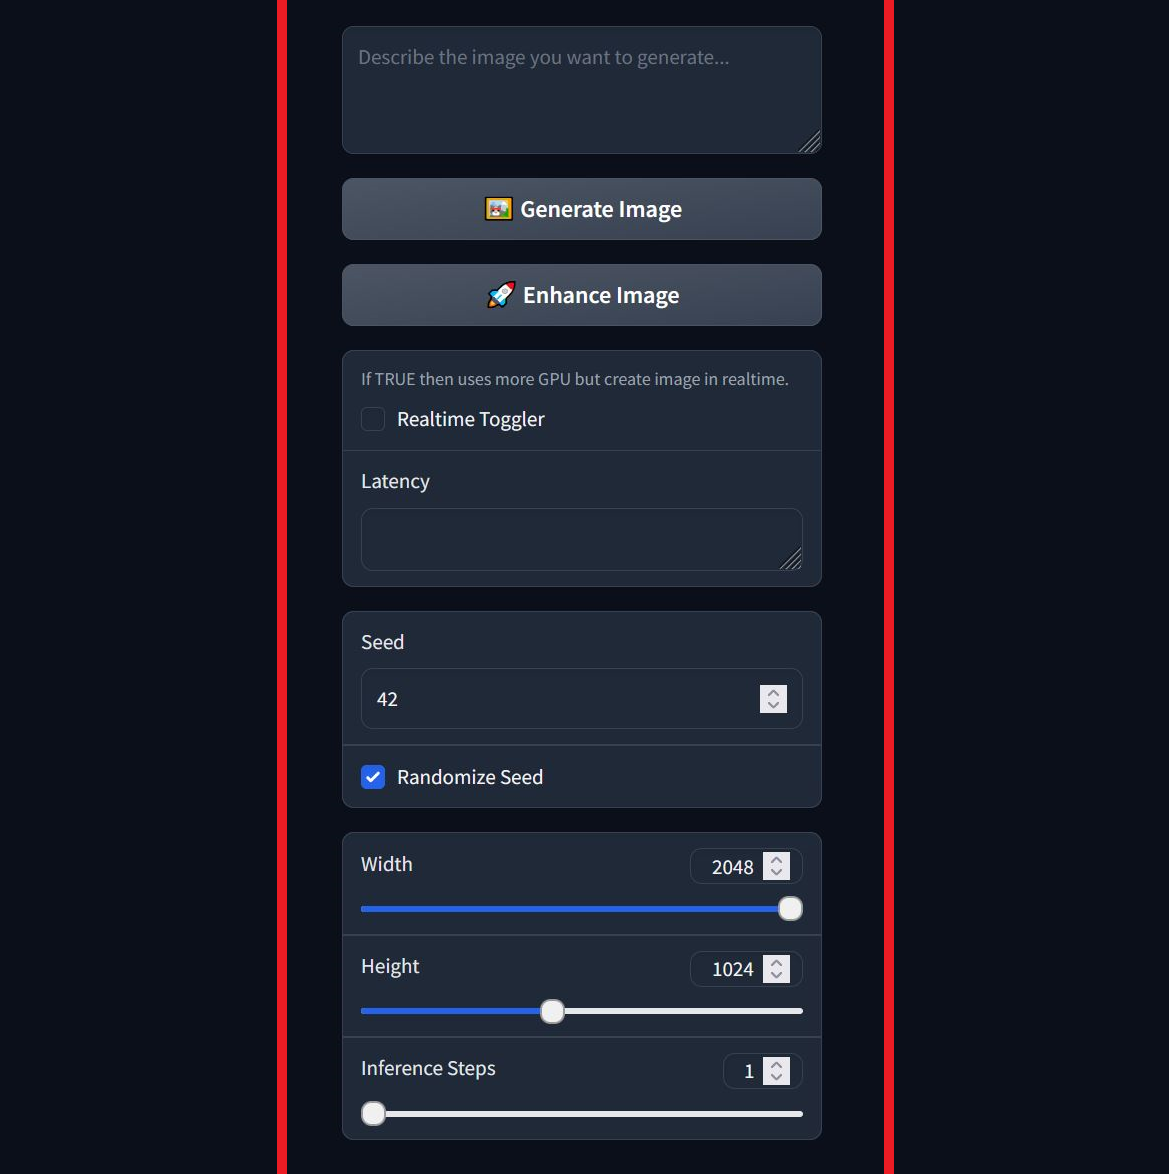
Flux Image Settings
Flux offers adjustable settings for fine-tuning images:
- Seed number: Ensures consistency across generations with the same prompt.
- Height/width: Adjust image size (256 x 256 to 2048 x 2048 pixels).
- Inference steps: More steps result in higher image detail.
The size adjustment options are helpful for users looking to generate images for specific use cases, like a profile banner or image.
Here are some common image sizes to use as a reference when generating an image using DeepSeek's image generator.
- 1080 x 1920 pixels – Vertical or mobile images
- 1920 x 1080 pixels – Horizontal or desktop images
- 1080 x 1080 pixels – Square (Instagram)
- 400 x 400 pixels – Common minimum profile picture resolution
- 1500 x 500 pixels – Widescreen banners
While Flux offers many features, it does not currently include editing tools for modifying generated images. Once an image is created, there is no built-in option to adjust or refine specific details.
How to Use Janus Pro 7B Multimodal
Located underneath the Flux image generator on the Janus Pro website is the Janus Pro 7B multimodal window. Unlike the Flux generator, this tool can generate content from scratch or perform image analysis.
Generating Images
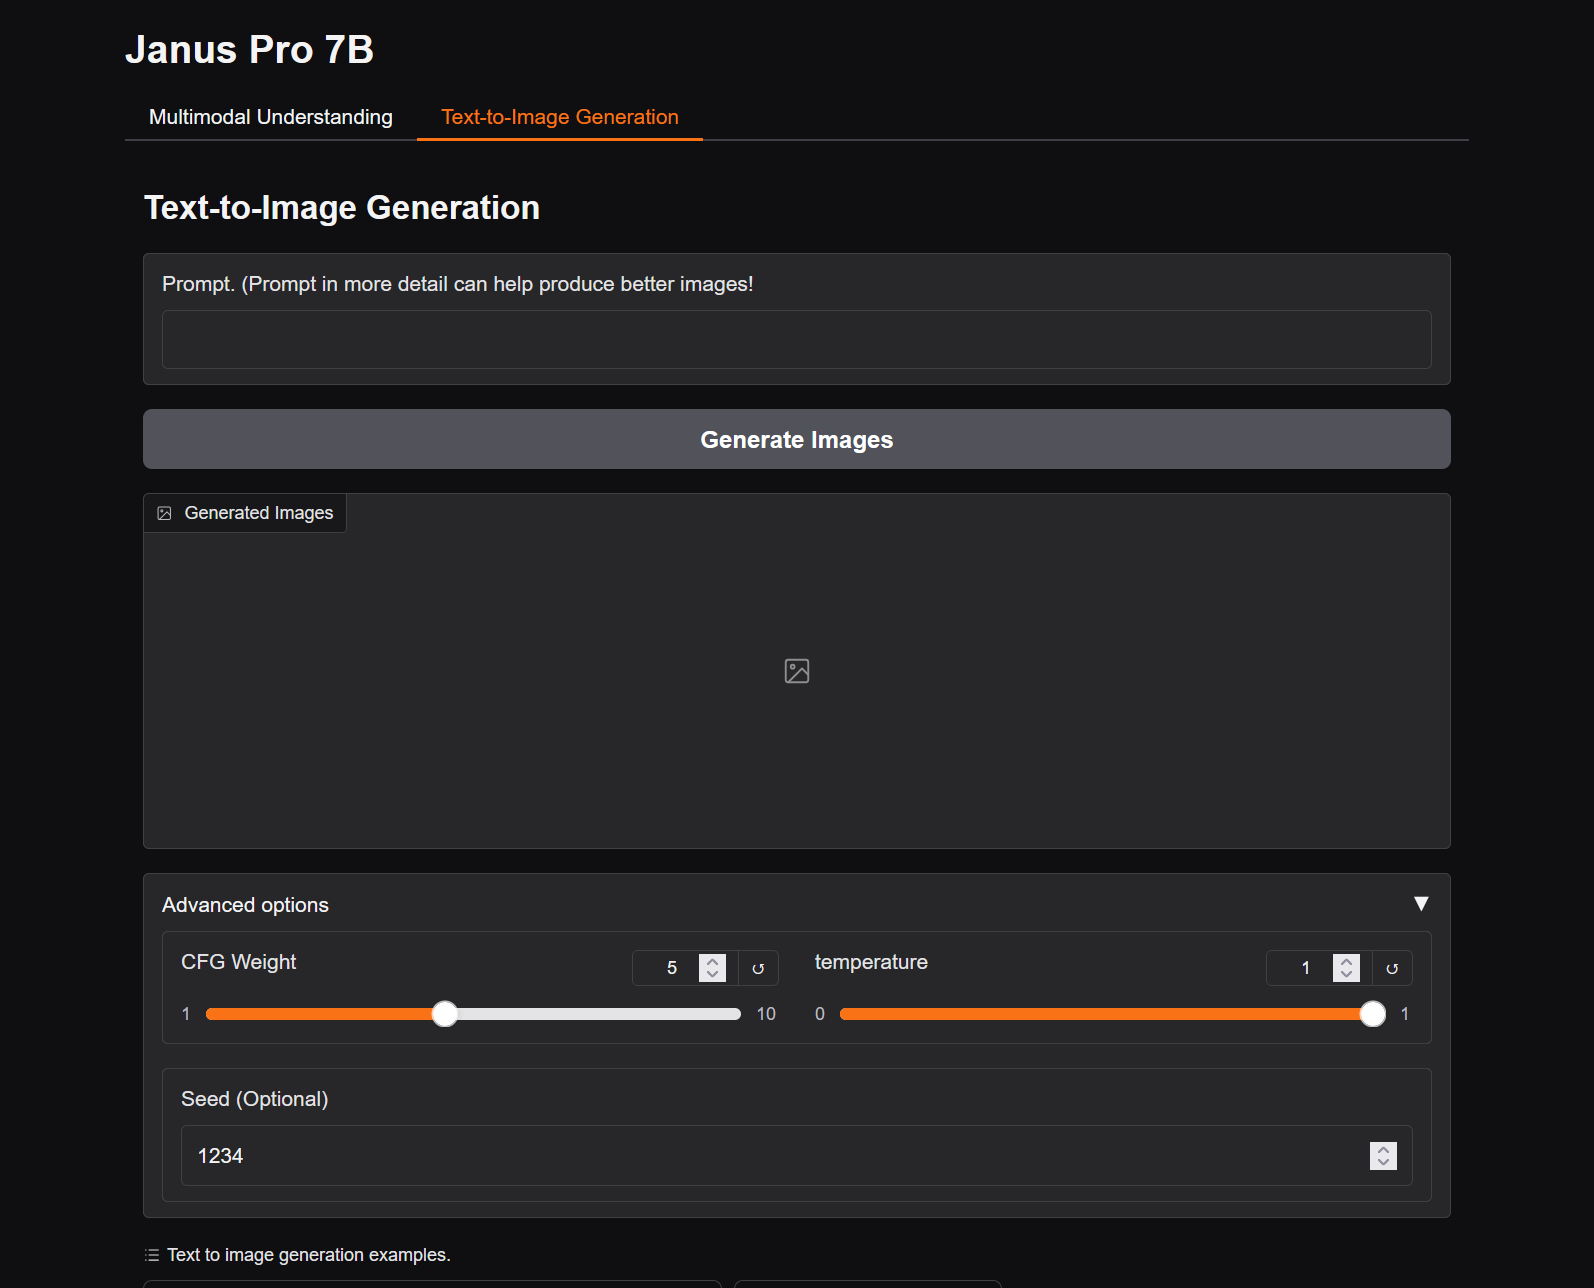
To generate an image using Janus Pro, simply enter a descriptive prompt in the text box and hit Generate Images.
Optionally, you can adjust the CFG Weight and temperature sliders to control how closely the image matches your prompt. Like the Flux model, a random seed number is generated for each image, but you can manually set it for more consistent results.
Once again, images will be downloaded in a WebP format, making them difficult to use without converting.
While the Janus Pro 7B image generator is highly detailed and accessible, it lacks features like image touch-ups, custom aspect ratios, and image-to-image generations.
Analyzing Images
To analyze an image, upload it to the dropbox and enter your prompt in the Question box. Janus Pro can interpret visual context, recognize text, and even convert code between languages, making it useful for tasks like text translation and code conversion.
When you're ready, select Chat to begin the analysis.
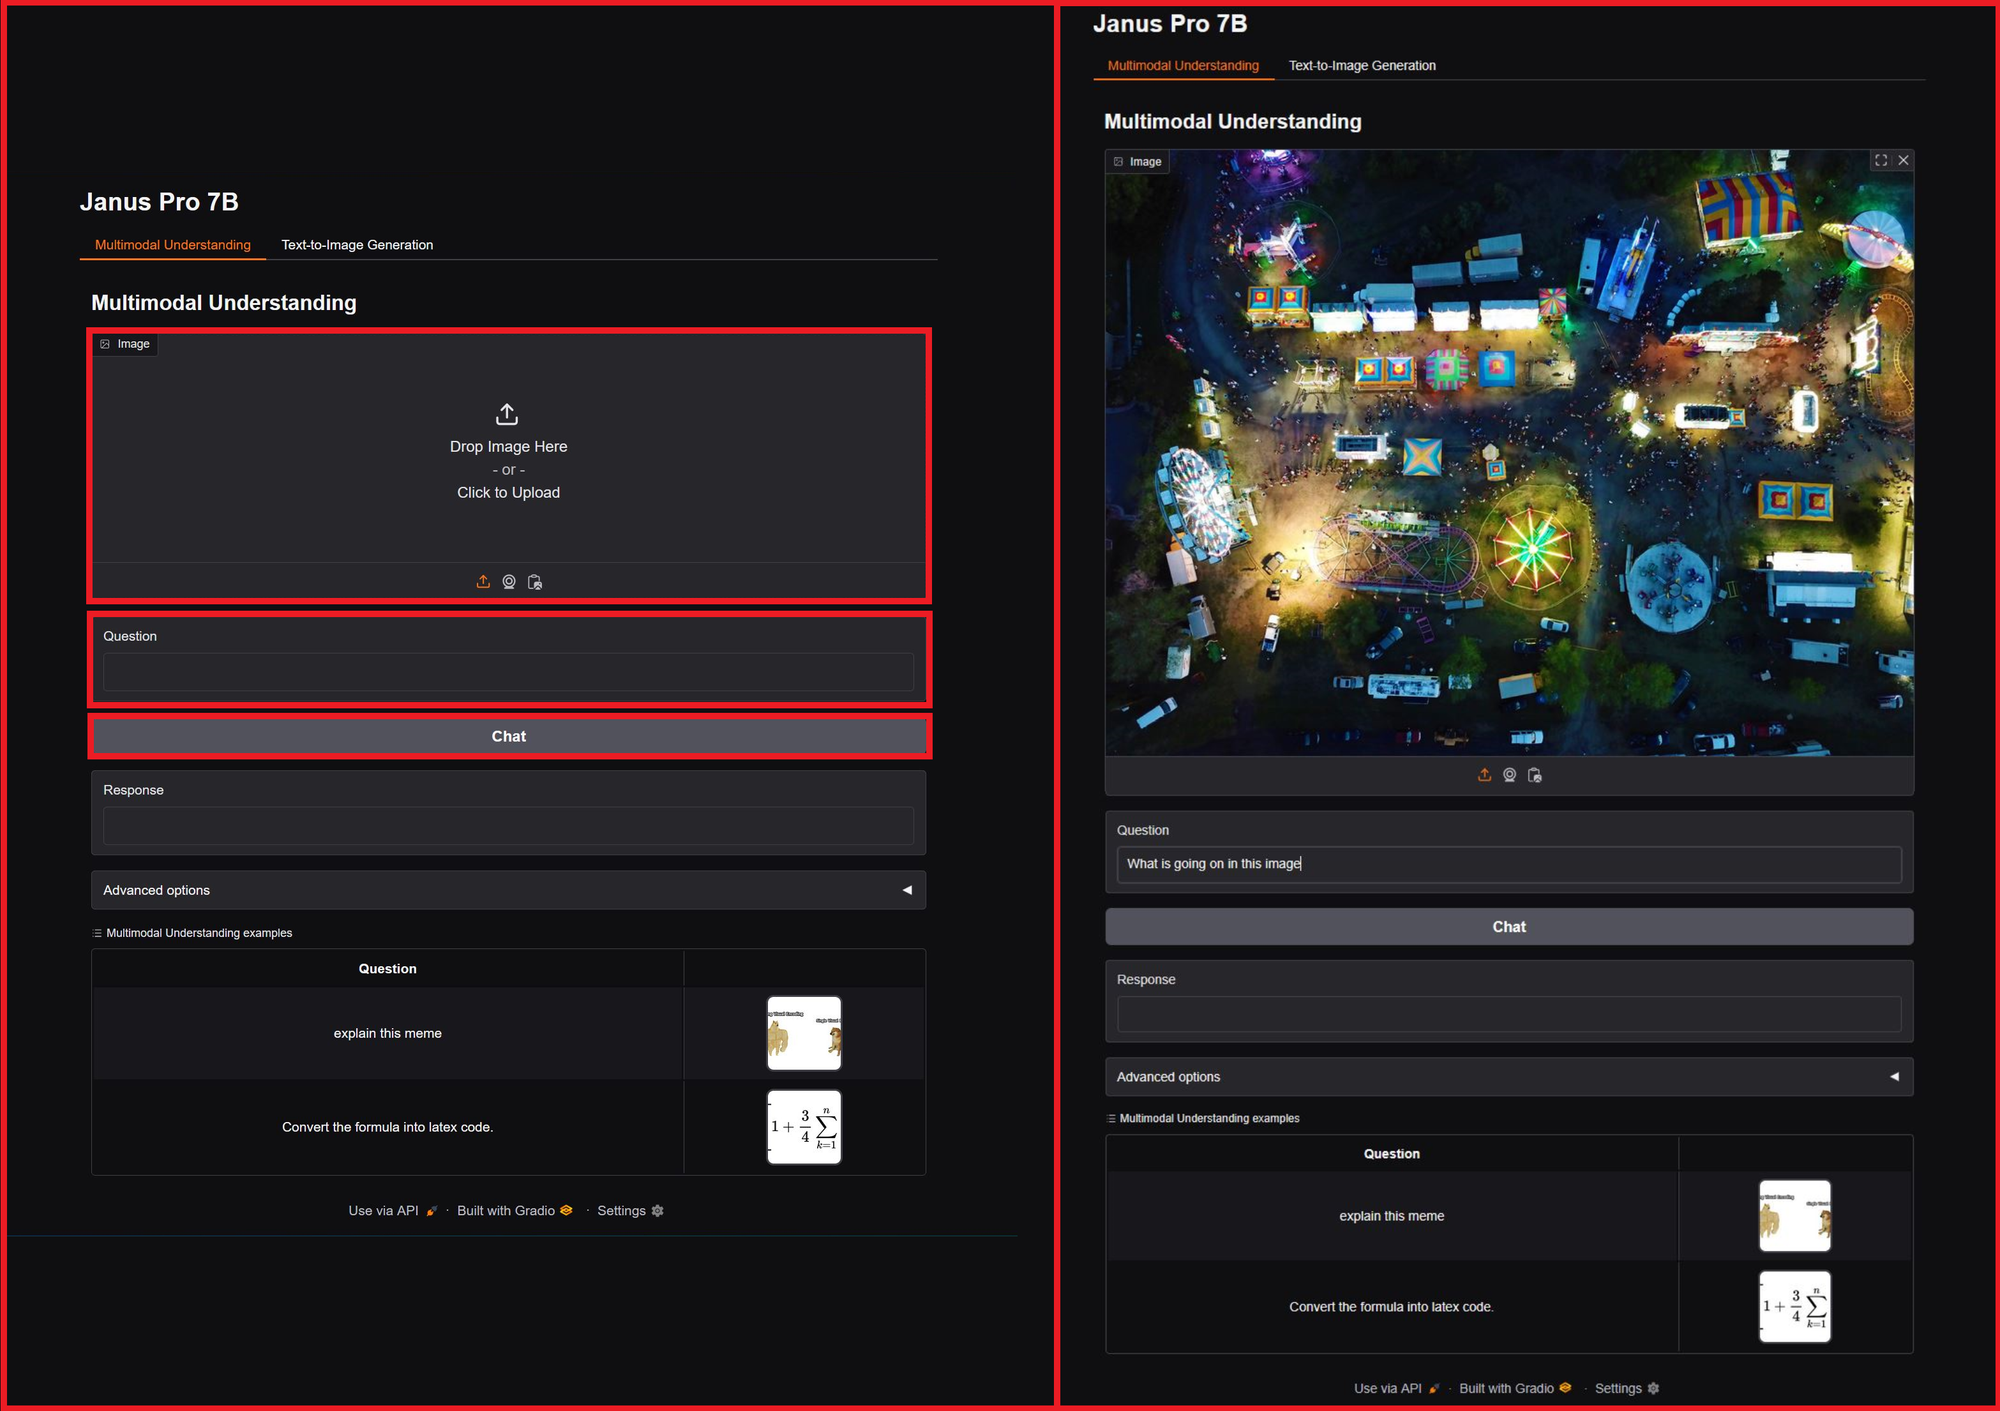
The response box will show Janus Pro’s reply based on your prompt. For example, after uploading an aerial photo of a carnival and asking, "What is going on in this image?" Janus Pro generated a detailed description of the scene.

For more precise answers, tailor your prompt to focus on specific elements within the image.
DeepSeek AI is built for accessibility, allowing developers to expand Janus Pro 7B’s capabilities by integrating API tools like web access for real-time information retrieval. This YouTube video showcases some of these features with practical examples.
For content creators, Janus Pro provides a powerful tool for generating AI-assisted visuals, but enhancing them can help your content stand out on social media.
Here’s how to turn your DeepSeek AI images into videos and ready-to-post content at no cost.
How to Edit Janus Pro Images
While Janus Pro offers advanced image generation capabilities, exports are in an uncommon file format and there is no option to customize images. Tools like Kapwing's Image Editor, however, offer comprehensive editing features, allowing you to transform your images into polished final products.
Here’s how to turn your Janus Pro images into eye-catching video thumbnails or social media posts that effectively promote your content.
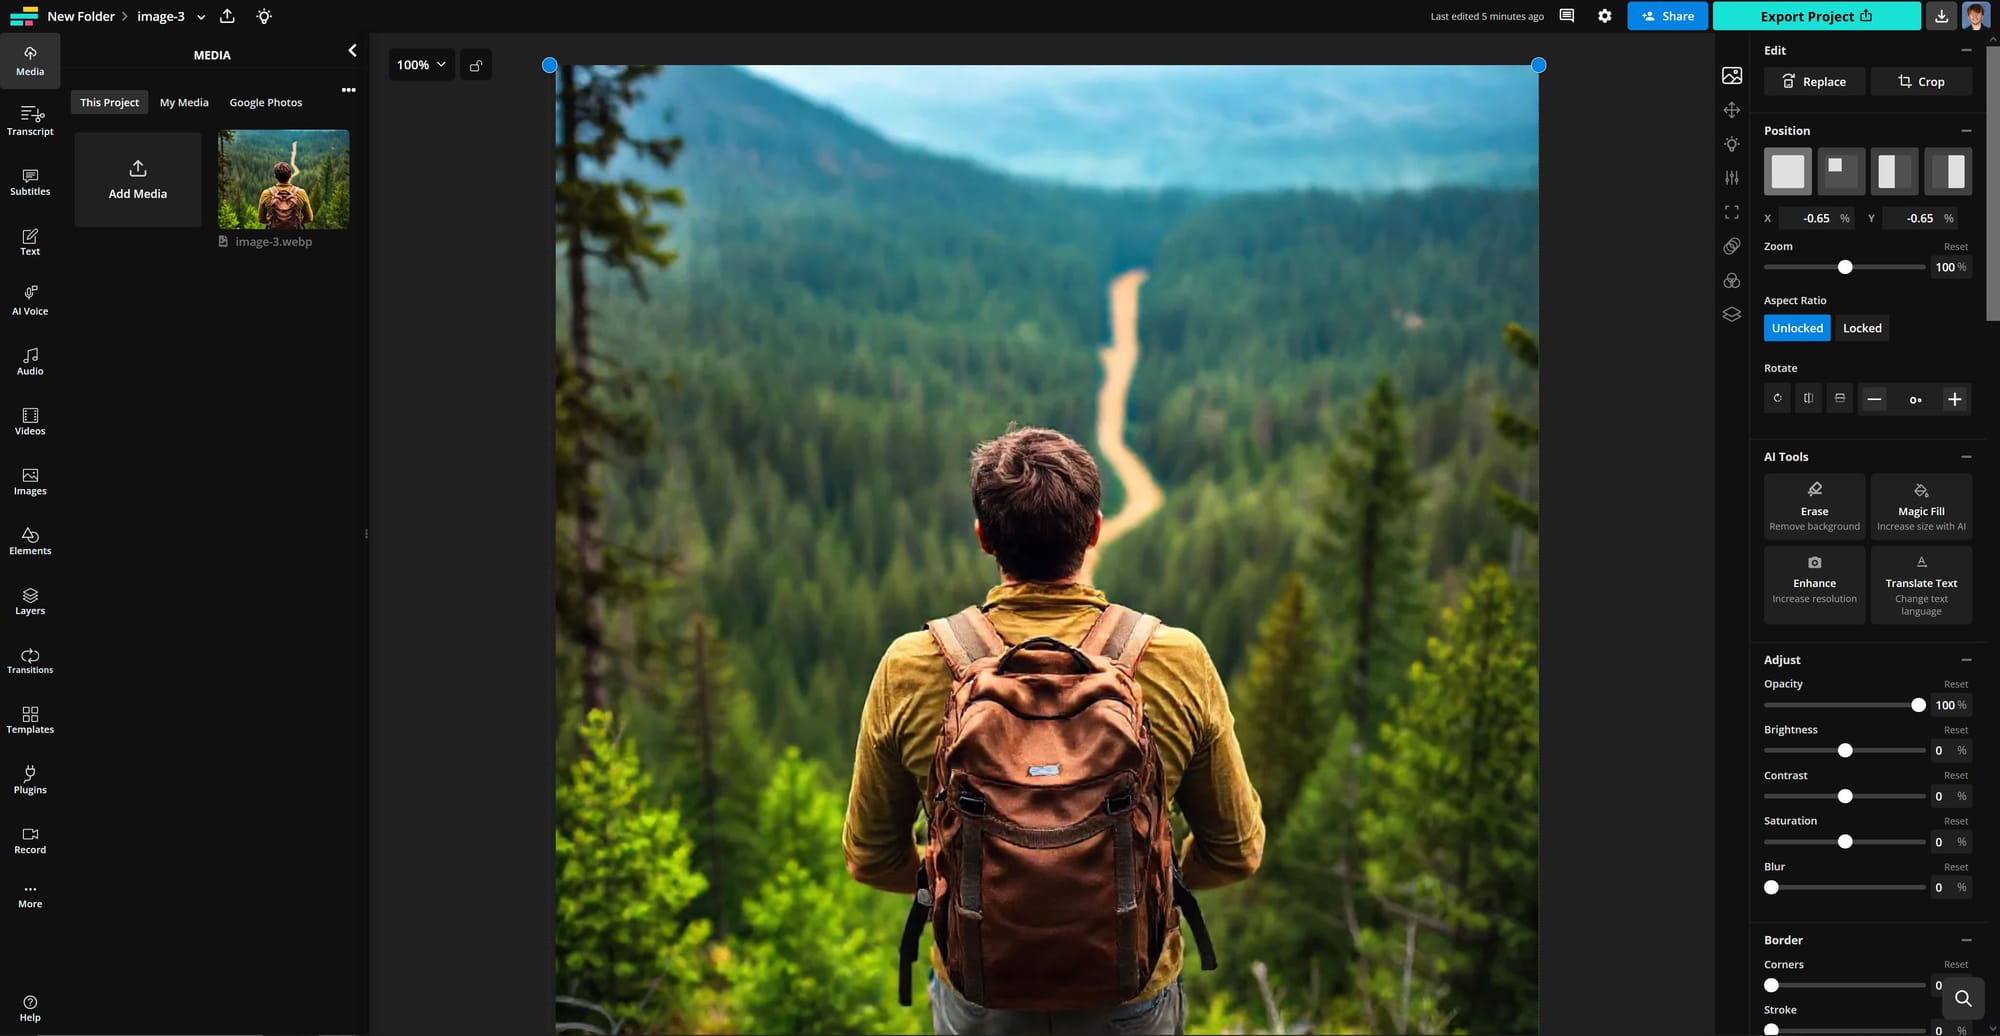
1. Upload Your Image to the Editor
Start by uploading your generated image to the Kapwing editor. Since Janus Pro and Flux images are saved as WebP files, Kapwing will automatically convert them to a more widely supported format, such as JPEG, upon export. This makes the images easier to upload to platforms like YouTube and Instagram.
Once uploaded, you're ready to start editing.
2. Resize your Project
Since the Janus Pro image generator doesn't include custom image sizes, you'll want to resize your project before exporting. To resize, select the background of the project, then click Resize Project on the right-hand side.
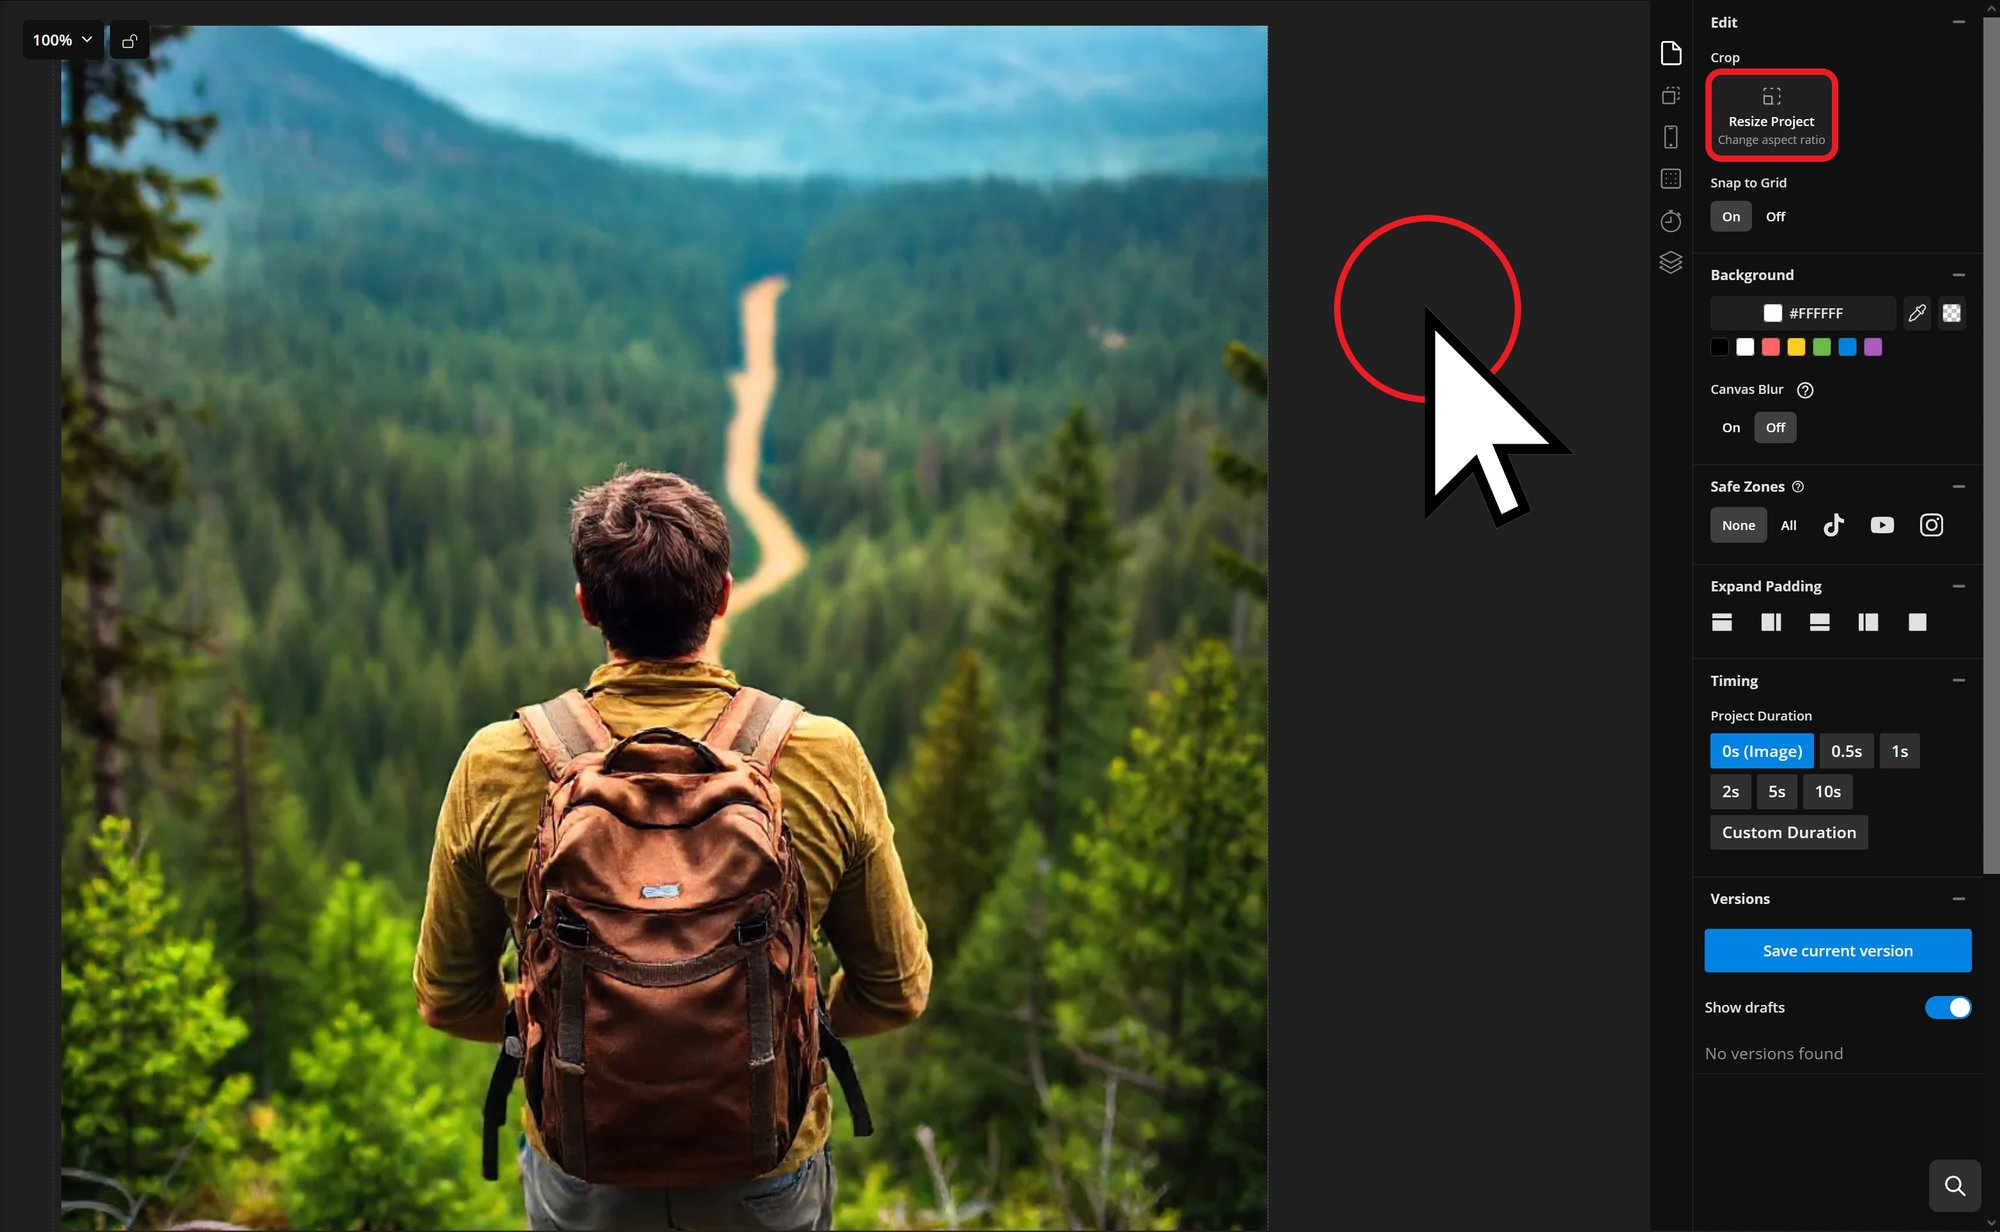
Once selected, the resize menu will open, allowing you to choose a preset size or enter custom dimensions.
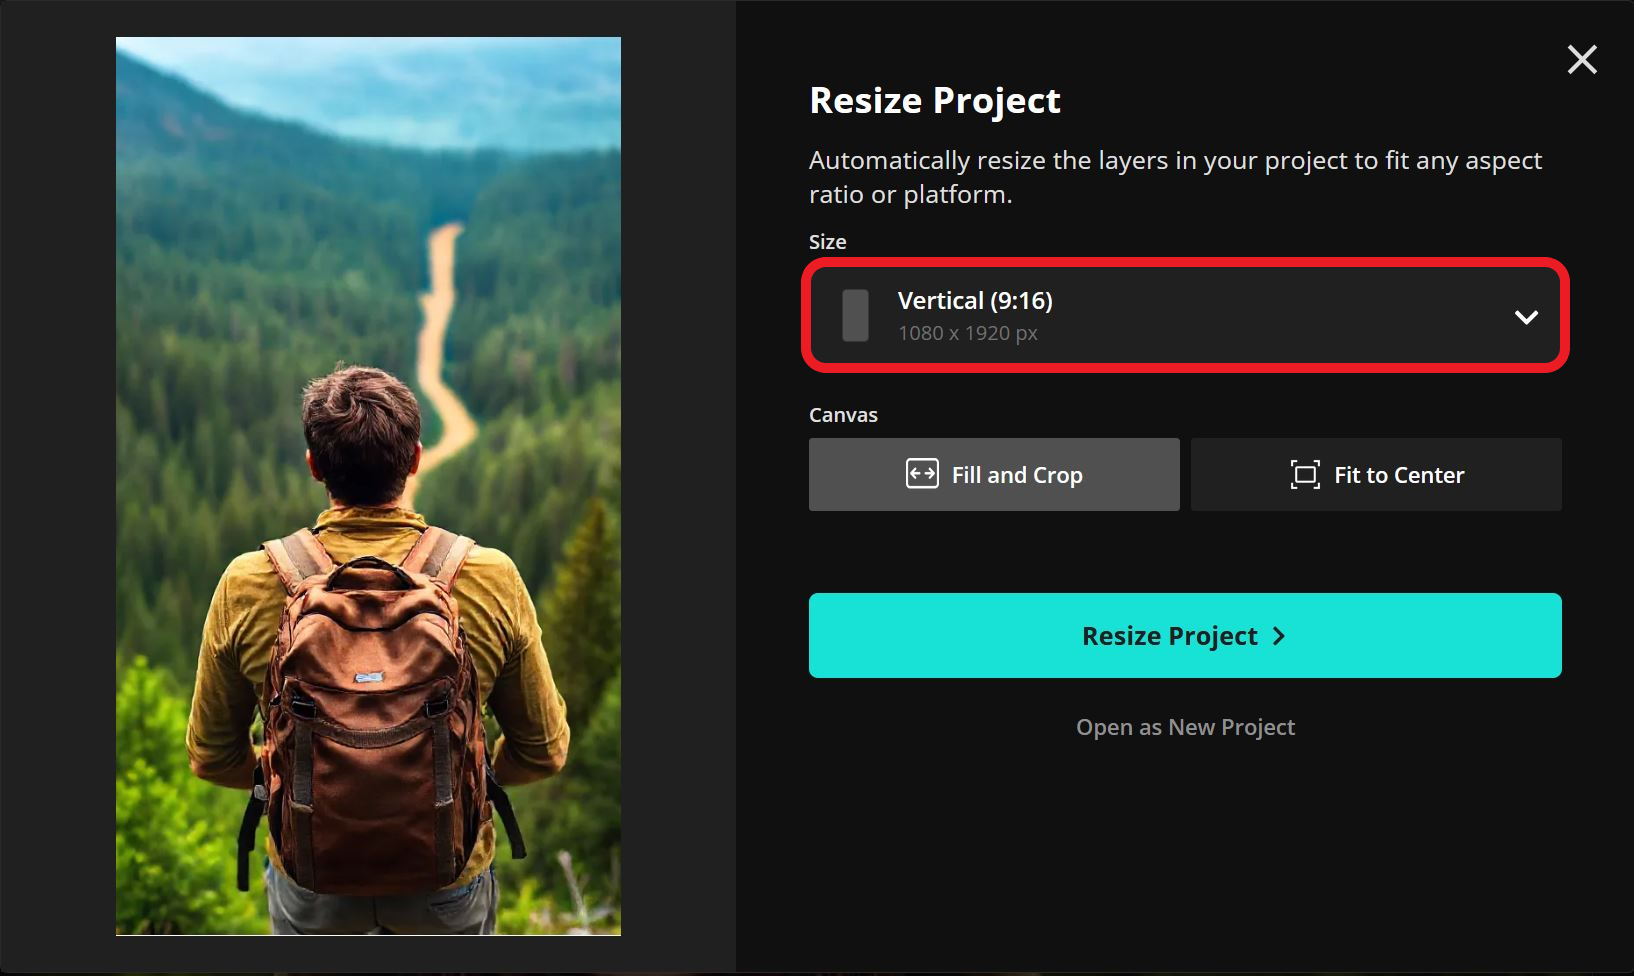
To create a thumbnail-sized for display on TikTok, Instagram, or YouTube Shorts, select the 9:16 aspect ratio.
- Pro tip: Many video platforms use different aspect ratios for their thumbnails. YouTube, for example, uses 16:9 for long-form videos. Kapwing has over 15 custom image aspect ratios available to choose from.
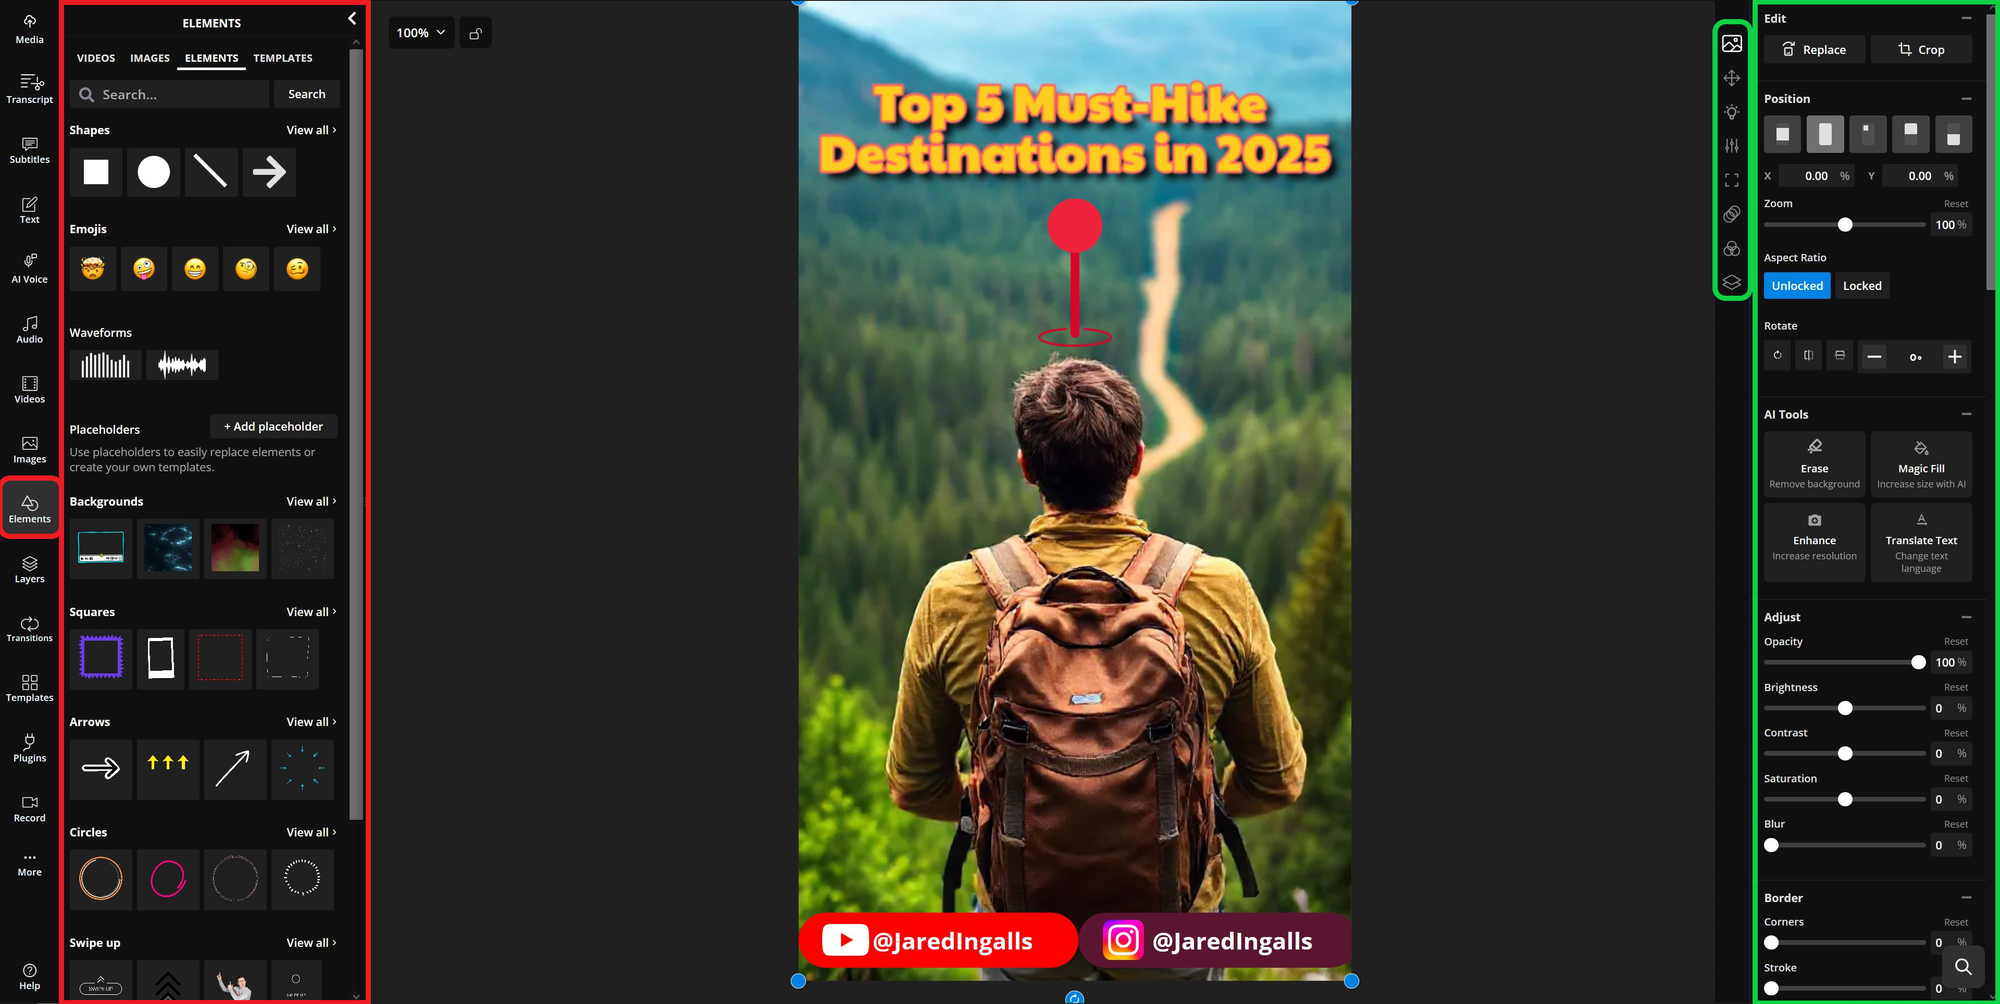
3. Add Text and Graphics
Enhance your image by adding text and graphics from the sidebar. To add an element, simply drag and drop it or double-click to apply it.
You can even edit the saturation, contrast, brightness, blur, and opacity or remove the image background in one click.
In this example, we used an AI-generated image from Janus Pro and customized it for a YouTube thumbnail by adding pre-made social handle tags, text, and other icons.
You can also transform images into videos for engaging social media posts. Kapwing's media library makes it easy to add music or sound effects, voice overs, transitions, and animations, making content even more eye-catching and dynamic.
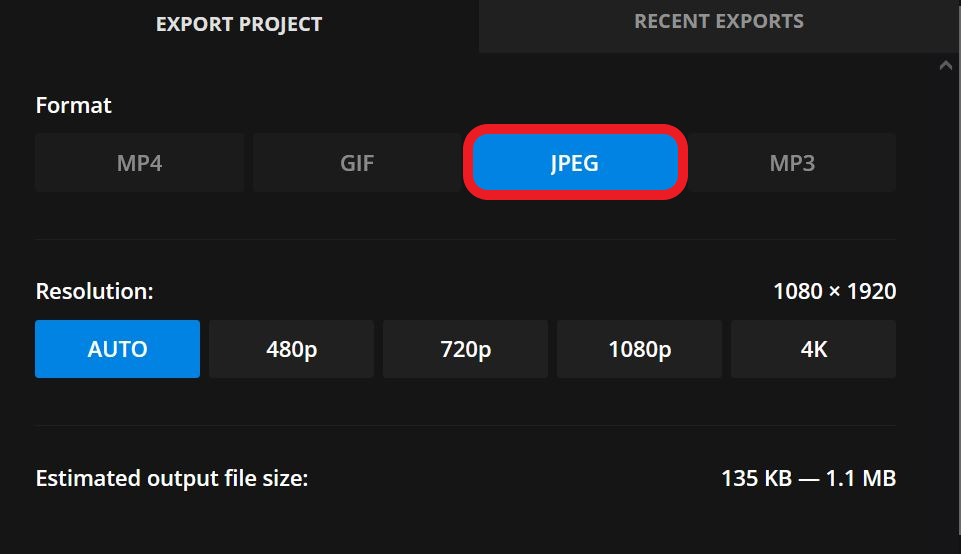
4. Export Your Video
Once you're satisfied with your edits, click Export in the top-right corner. JPEG is the most widely used image format, which will be automatically selected for export.