How to use Gemini Flash 2.0 Image Generator and Editor
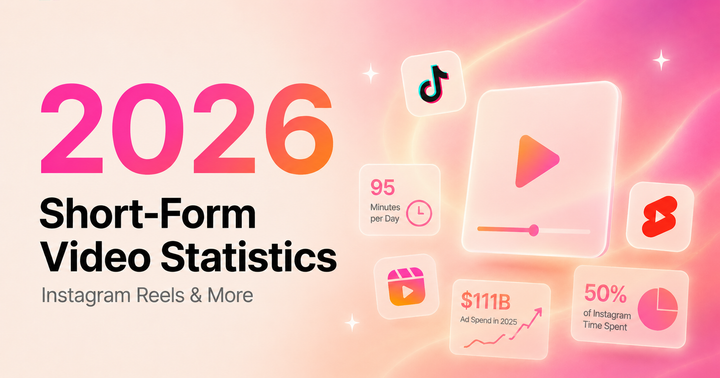
39% of marketers already use generative AI to create social media content
AI image generators are evolving rapidly, and many tools launched in 2025 have introduced built-in editing features that allow users to refine generated images or make adjustments to their content.
Google's Gemini 2.0 Flash is one of the latest to include these capabilities. It combines multimodal input, advanced reasoning, and conversational image editing, enabling users to improve and adjust images using straightforward text prompts. It also supports consistent character and scene generation, along with step-by-step refinement through dialogue.
In this guide, we’ll explain how to use Gemini 2.0 Flash for both image creation and editing, highlighting its key strengths and current limitations.
Table of Contents
- Generating Images with Gemini Flash
- Editing Images Using Gemini Flash 2.0
- Enhancing Gemini Flash Images for Free
Generating Images with Gemini Flash
Generating images with Gemini Flash is now available for both developers and personal users. To begin, visit Google AI Studio and interact with Gemini by entering a prompt in the text bar at the bottom of the page.
To generate images using Flash 2.0, ensure you have selected Gemini 2.0 Flash (Image Generation) Experimental from the Model dropdown on the right-hand side.
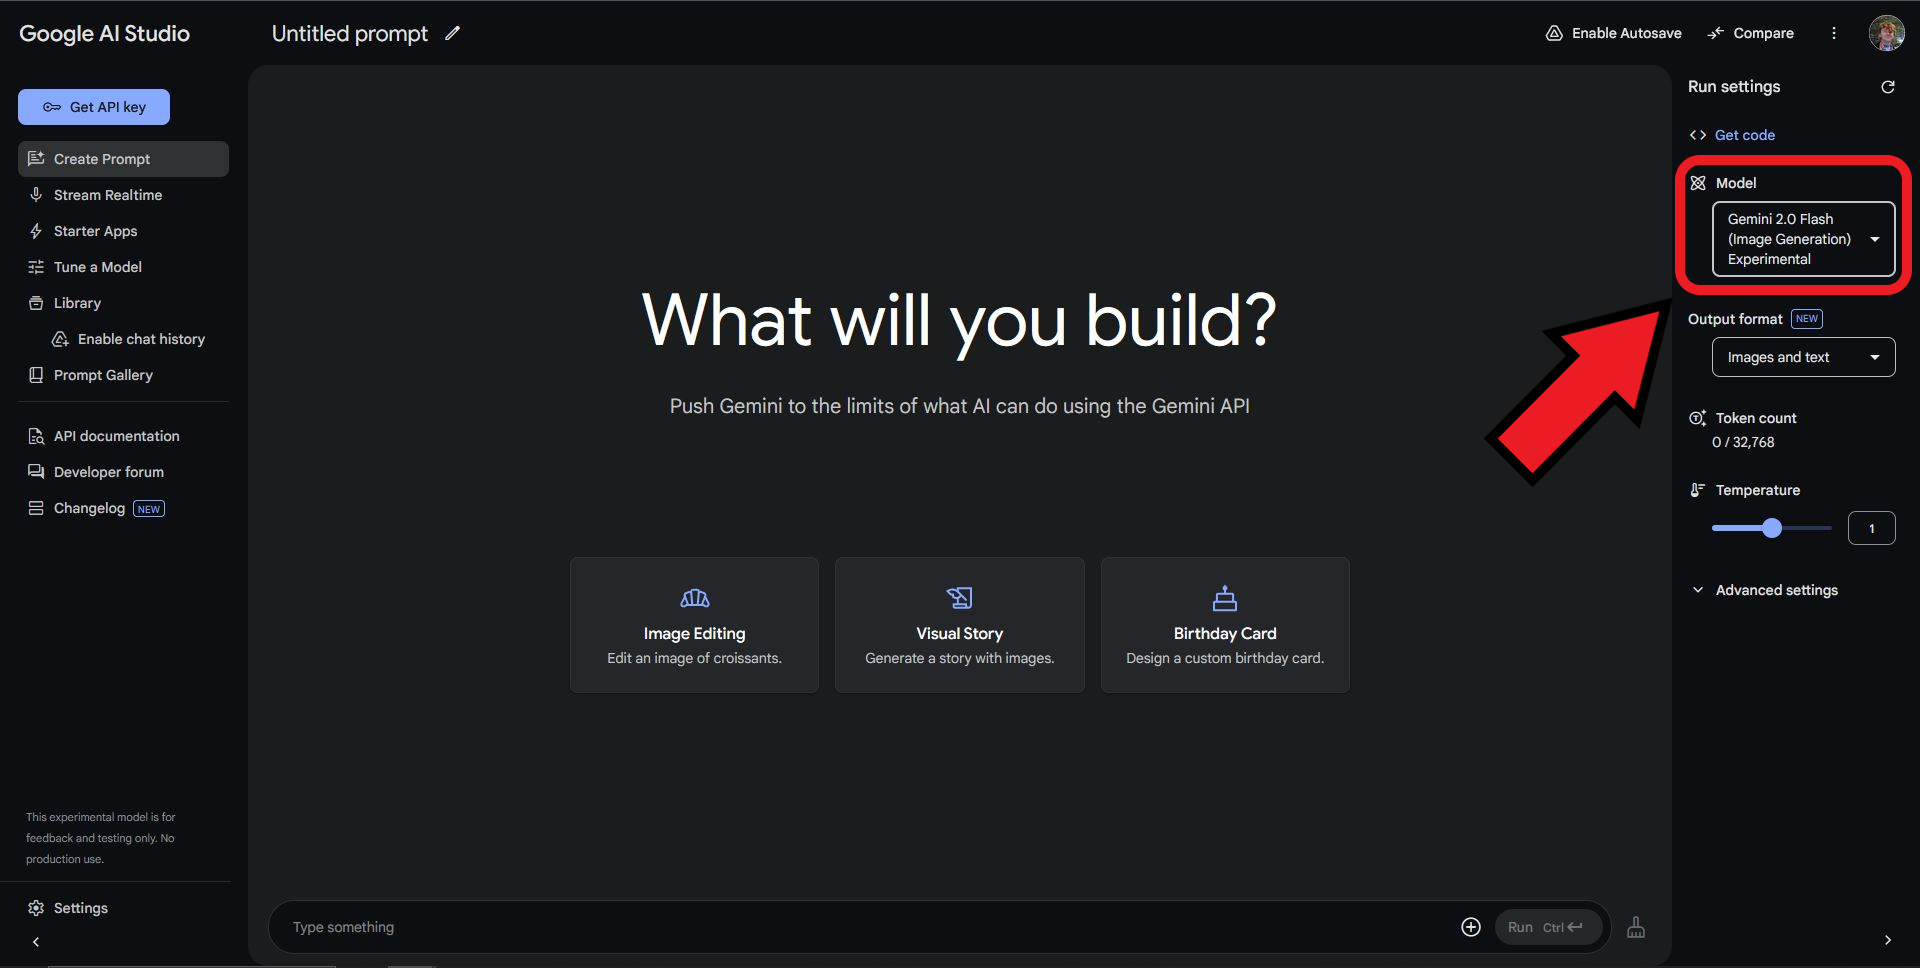
Next, generate an image by entering a prompt in the text bar.
Start with phrases like "create an image," "generate a picture," or "make a drawing" to ensure Gemini understands your request.
Keywords such as "paint" or "draw" will produce an artistic, handmade look, while "generate a picture" will result in a more realistic image.
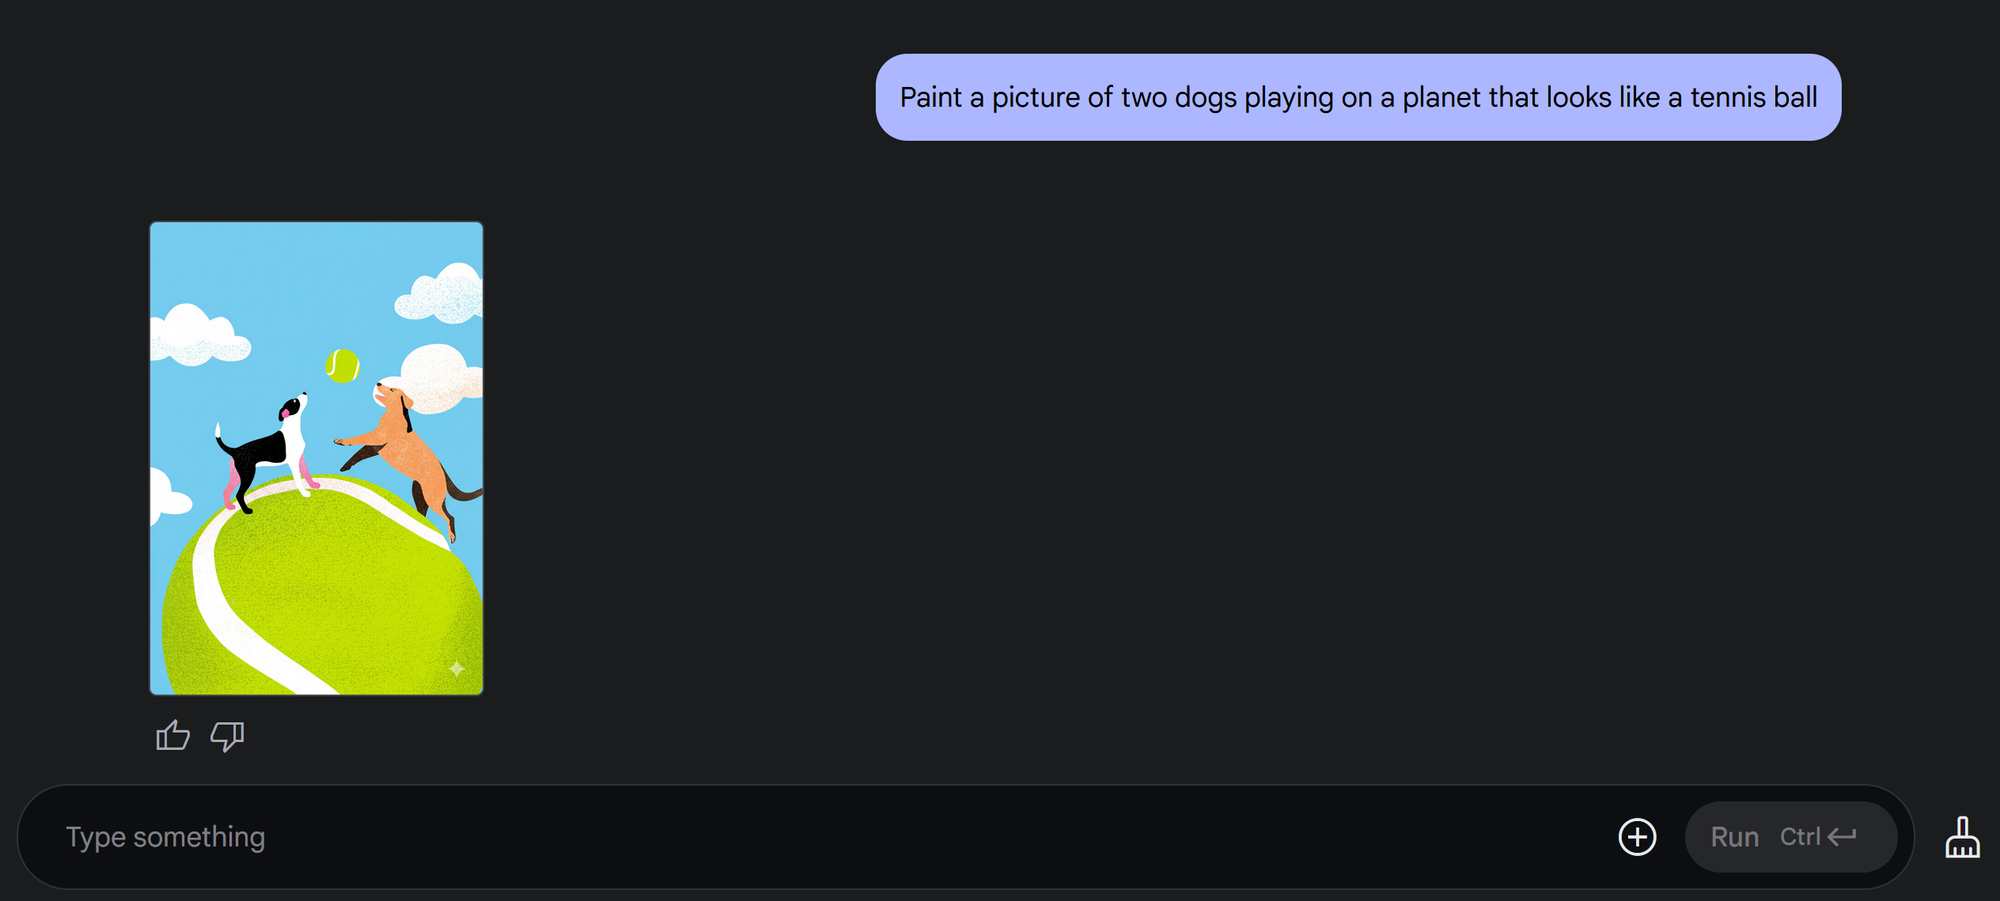
Gemini will display your image in the chat feed. While generation time may vary based on user activity and prompt complexity, all of my image generations and edits were completed in under 10 seconds.
To download a generated image, hover over it or select the full-screen icon. Then, click the download icon to save it to your device.

Regardless of your prompt, Gemini currently generates images with varying resolutions, making it harder to control the exact output. The longer dimension is always 1024 pixels, while I found the short side to fluctuate anywhere between 690 and 850 pixels.
Image Specifications
- Resolution: Maximum height/length of 1024 pixels
- File Size: Approx. 500 MB
- Format: JPEG
- Watermark: Stationary watermark in the bottom-right corner
Gemini Flash Advanced Details
For advanced users, there are additional settings that allow for greater customization of the Gemini Flash 2.0 image generator.
Settings 4-7 can be accessed by expanding the Advanced Settings menu.
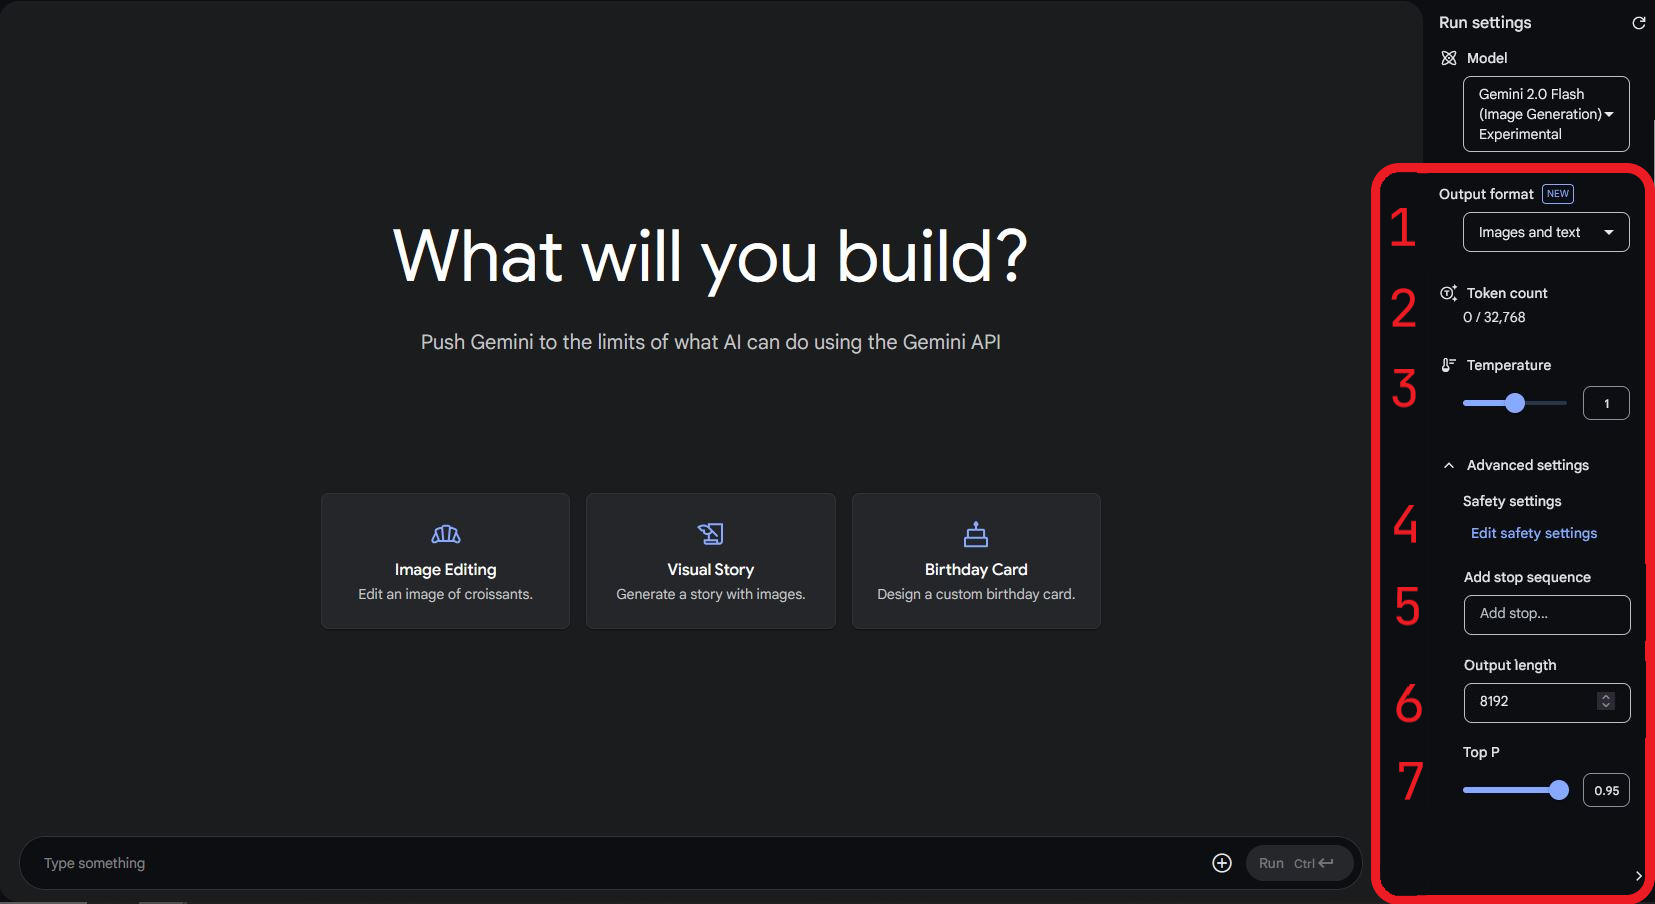
- Output Format – Choose how Gemini responds to prompts. The default setting is "Images and text."
- Token Count – Displays how many tokens you have used compared to your total balance. Generating images typically uses 150-250 tokens, while editing images requires around 500 tokens. Refreshing the page resets the token count.
- Temperature – Controls the creativity of the image generation, adjustable from 0 to 2. Higher values create more artistic results, while lower values keep images more structured. The default setting is 1.
- Safety Settings – Filters content for harassment, hate speech, sexually explicit material, dangerous content, and civic integrity issues.
- Add Stop Sequence – Allows you to set a word, phrase, or punctuation mark that stops generation beyond a certain point. This helps limit output length and preserve tokens.
- Output Length – Sets the maximum number of tokens allowed per generation. The default value is 8192.
- Top P (Probability Threshold) – Adjusts how likely Gemini is to shorten responses to conserve tokens. A higher value makes responses shorter. The default setting is 0.95.
Editing Images Using Gemini Flash 2.0
Gemini allows you to edit both generated images and uploaded images by providing text-based instructions. When editing, be as detailed as possible to guide the AI effectively. Consider subtle details that enhance realism and consistency. For example:
- When generating people or animals, specify an emotion for a more expressive image.
- When creating outdoor scenes, mention the weather to set the atmosphere.
- For large images, define what should be in the foreground vs. background—foreground objects are usually more prominent.
- Specify lighting conditions to influence shadows, contrast, and overall mood.
- Use descriptive color details to ensure consistency, such as "deep blue sky" instead of just "blue sky."
- In general, describe the desired placement of objects throughout the image for better control over the generation.

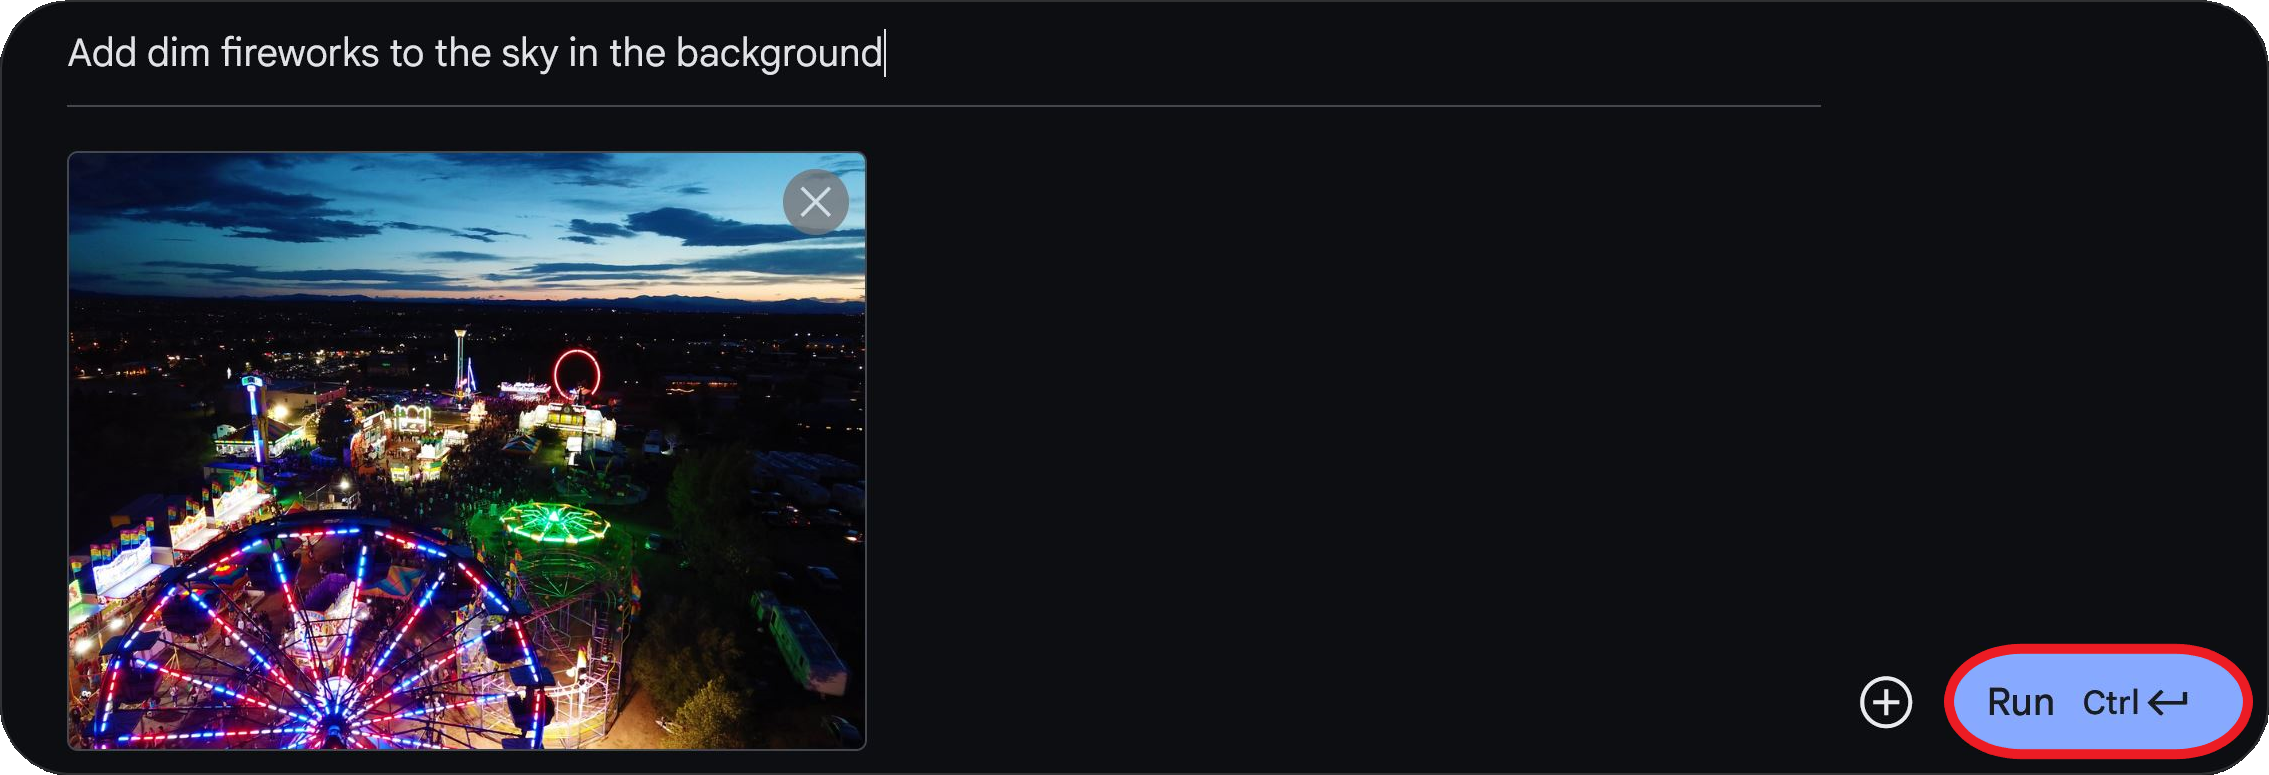
To edit an existing image using Gemini, start by uploading it to the prompt textbox.
Click the + icon on the right side of the text box and select a file to upload.
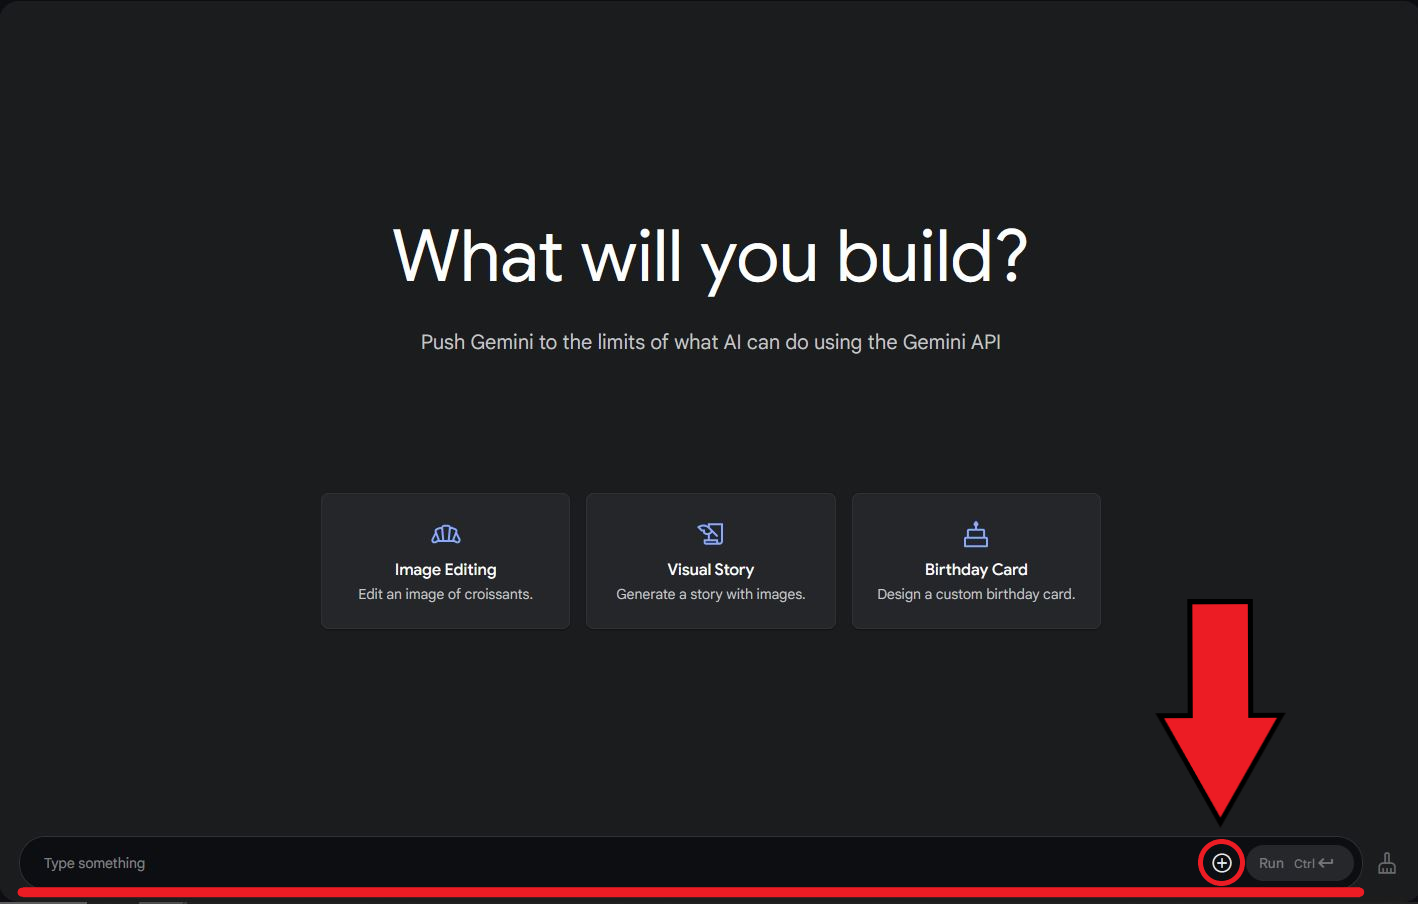
Once uploaded, enter your revision request in the prompt text bar and click Run to submit your image along with your instructions.
Like with generated images, Gemini has limited specifications when editing existing images:
Advanced Image Editing Details
- File Size Limit (Uploading): No strict limit, but larger files (20 MB and up) may cause processing errors
- Aspect ratio: Remains the same as the source image
- Resolution: Downsized to a maximum of 1024 x 1024 (or 1024 x 768 / 768 x 1024 for non-square images)
- File type: Always exported as a JPEG image
Despite these constraints, Gemini is still a great tool for adding intricate details to images — capabilities that many other AI tools lack. Most available technology primarily enhances elements around an image, while Gemini can integrate new details directly into the scene without significantly altering existing objects.
For the image below, I prompted Gemini to "add trees and distant mountains around the plane." While this successfully added depth, the edits were concentrated at the bottom, leaving the upper portion mostly unchanged. To achieve a more balanced result, I should have specified, "add tall mountains behind the plane with a forest beneath them."
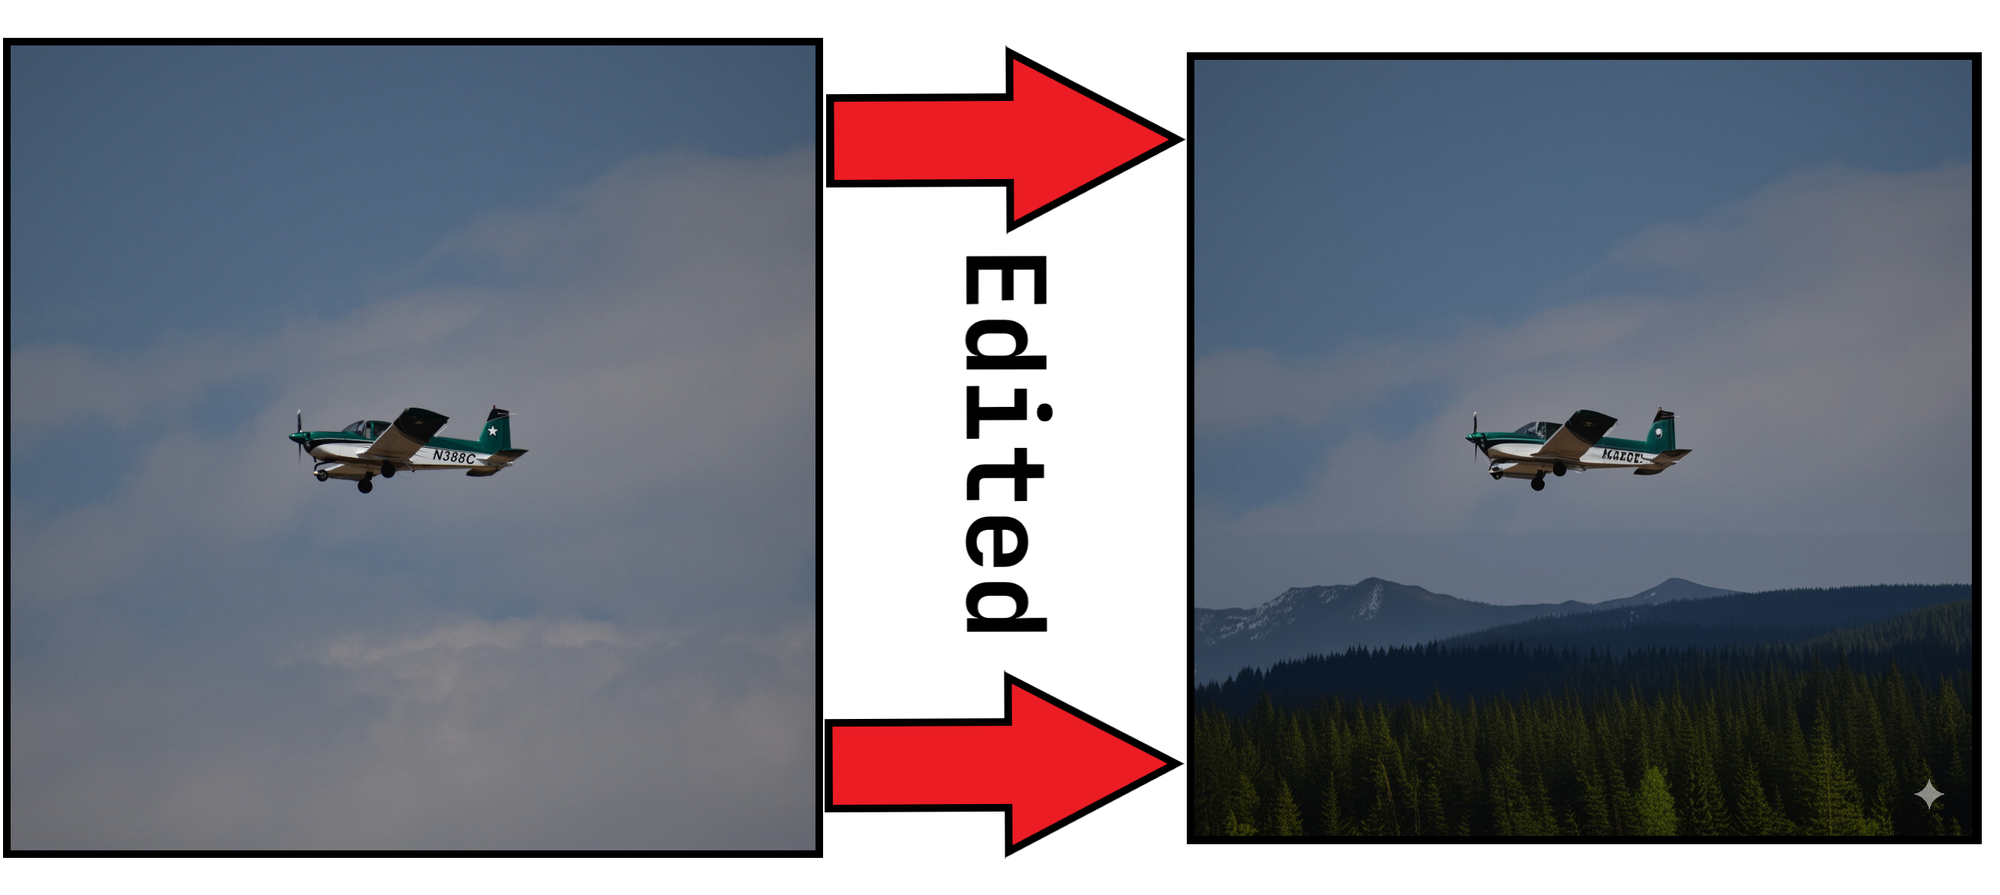
That said, Gemini Flash 2.0 does have notable drawbacks. One of its main limitations is the lack of control over aspect ratios, leading to inconsistent results when generating landscape vs. portrait images. Another issue is how Gemini handles text within images.
In the edited example, you may notice that the lettering on the side of the plane appears distorted, even though the prompt did not request changes to the plane itself. This issue is a small detail in the above image, but it would become glaringly apparent in text-based visuals such as posters, social media graphics, or promotional materials.
Editing Images with Gemini — Strengths and Weaknesses
While Gemini Flash 2.0 excels at certain editing tasks, there are still areas where manual editing is the better option. Here's a comparison:
Best for Editing with Gemini
- Adding details behind an object
- Quickly removing or moving the image subject
- Replacing an image background
- Adding subtle details like weather
- Visualizing small design changes quickly and easily
- Outlining specific items
Best for Manual Editing
- Creating a transparent background (and exporting as a PNG)
- Resizing images to fine-tuning
- Adding text
- Enhancing images through smoothing and fine-tuning adjustments
- Adjusting color correction and brightness with precision
- Layering multiple elements for complex compositions
Enhancing Gemini Flash Images for Free
Overcoming Gemini's image generation limitations is easy and can be done with a free online image editor. This allows you to use Gemini Flash as an advanced image generator while ensuring your images are polished for professional use cases like video thumbnails and promotional graphics.
To resize or add text and graphics, start by uploading your image to the Kapwing editor.
Resizing Gemini Flash Images
Once uploaded, there are two ways to resize your image. The first method is cropping.
To use this tool, select the background of your project and navigate to the Resize Project tool on the right-hand side.

This opens the Resize Project menu, where you can adjust your Gemini Flash image by selecting a preset aspect ratio from the Size dropdown or by entering custom dimensions.
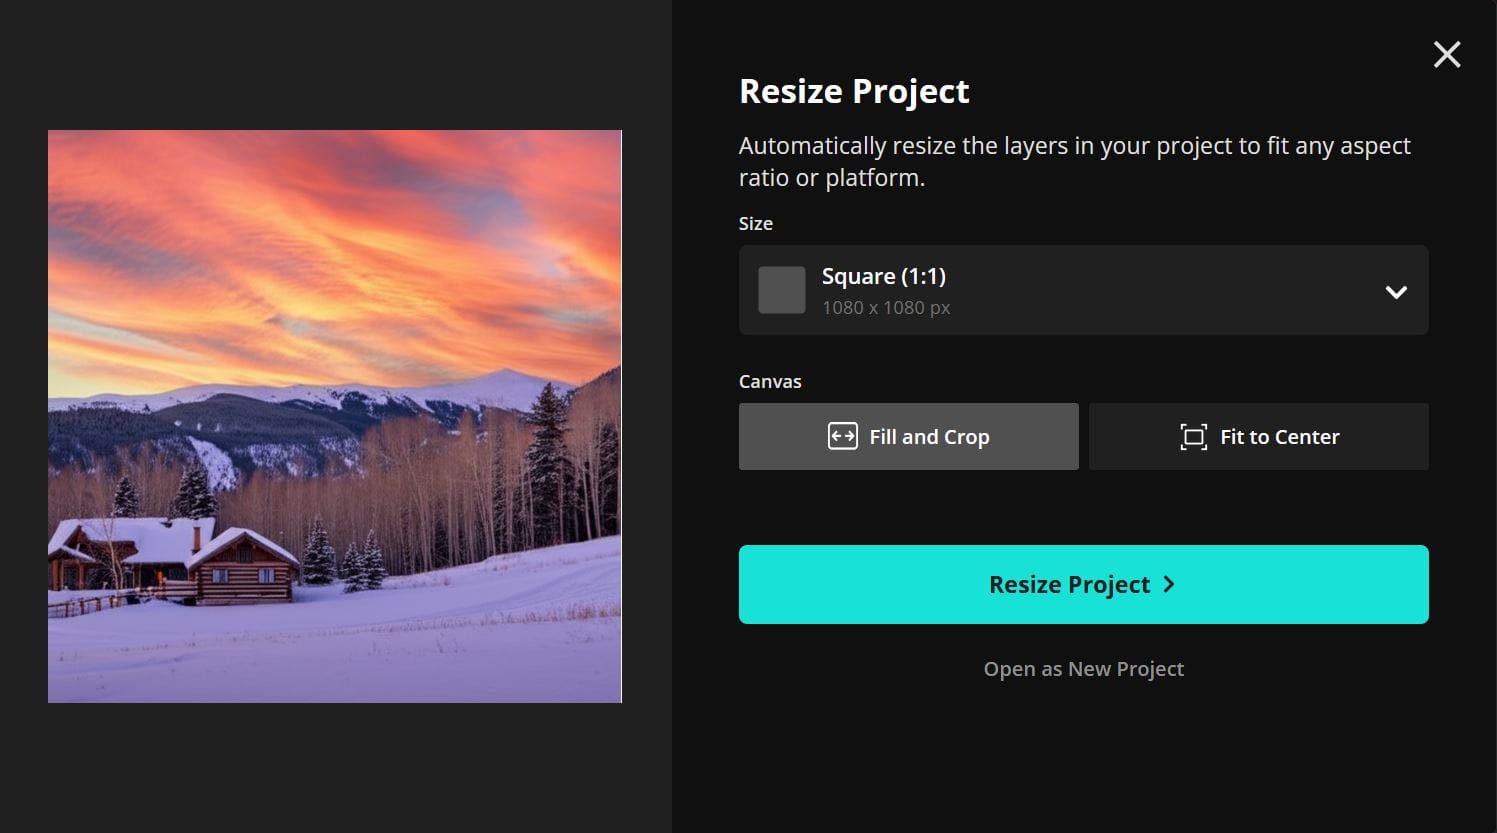
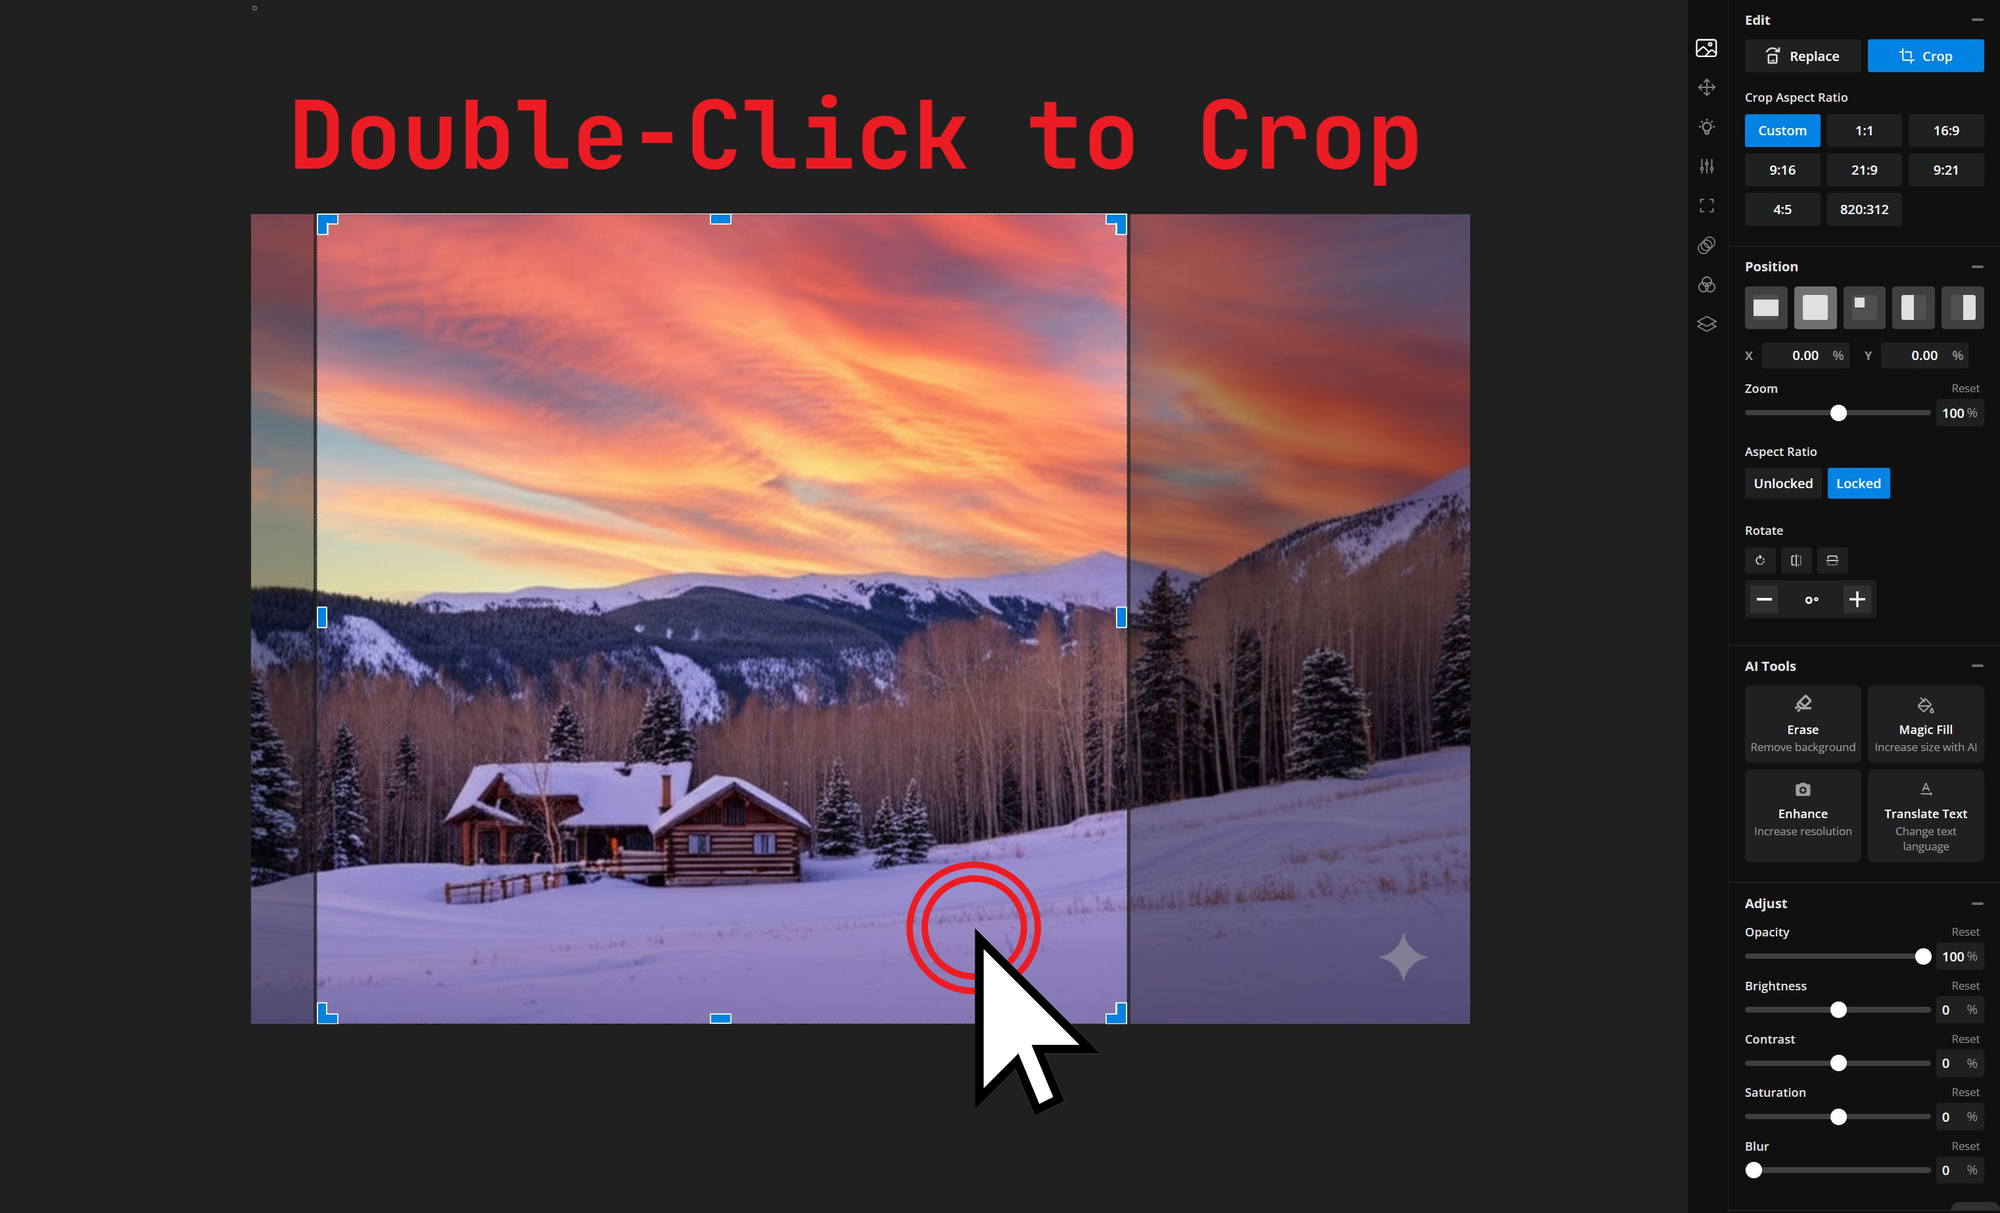
Finally, fine-tune the crop by double-clicking the image and dragging the frame to your desired area.
Cropping is also an effective way to remove the watermark from Gemini Flash 2.0 images.
Alternatively, some images may need to be extended rather than cropped. For this, Kapwing's AI Image Extender is the ideal tool.
Go to Kapwing.com and click the Generate tab. This will take you to Kapwing’s AI generation hub, where you can create and edit images, videos, and songs.
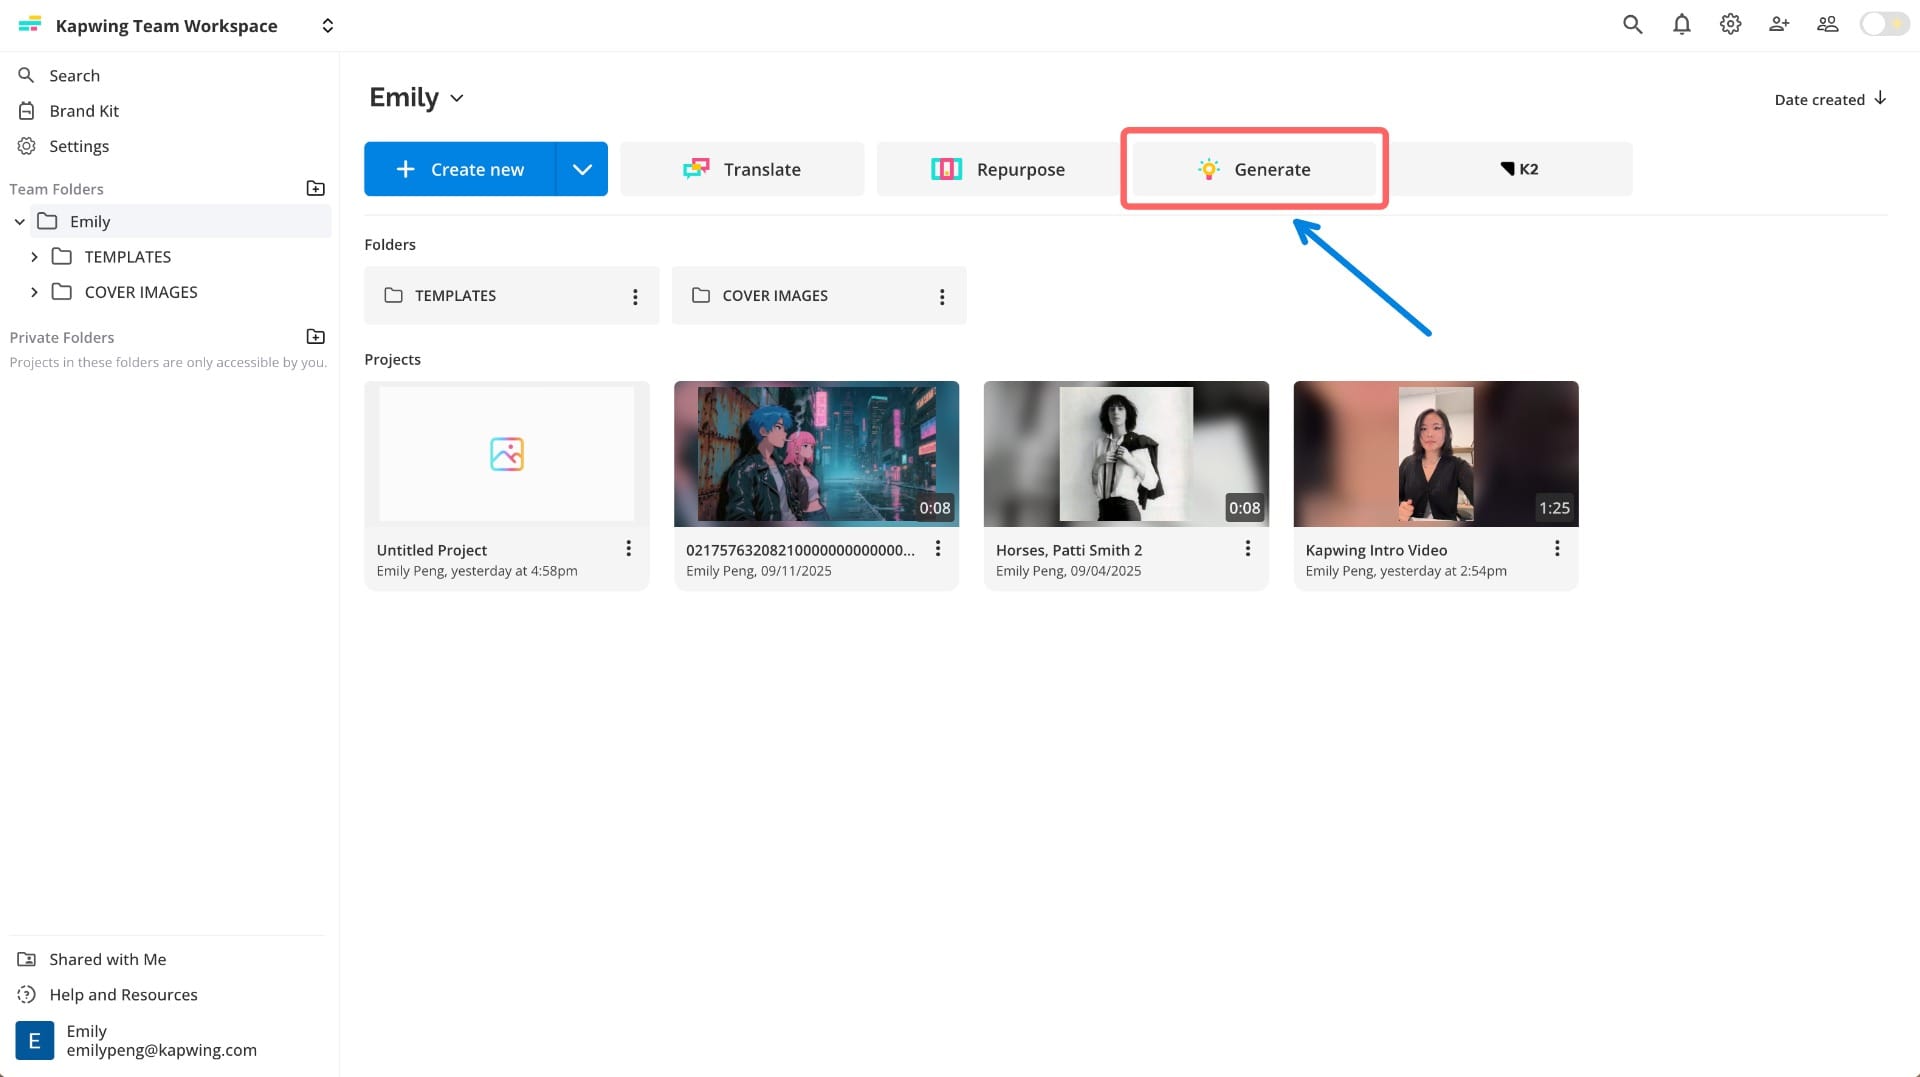
Once you’re on the Generate page, select the AI Assistant tab from the left-hand toolbar. This tool gives you more control, allowing you to make edits and see changes with each iteration.
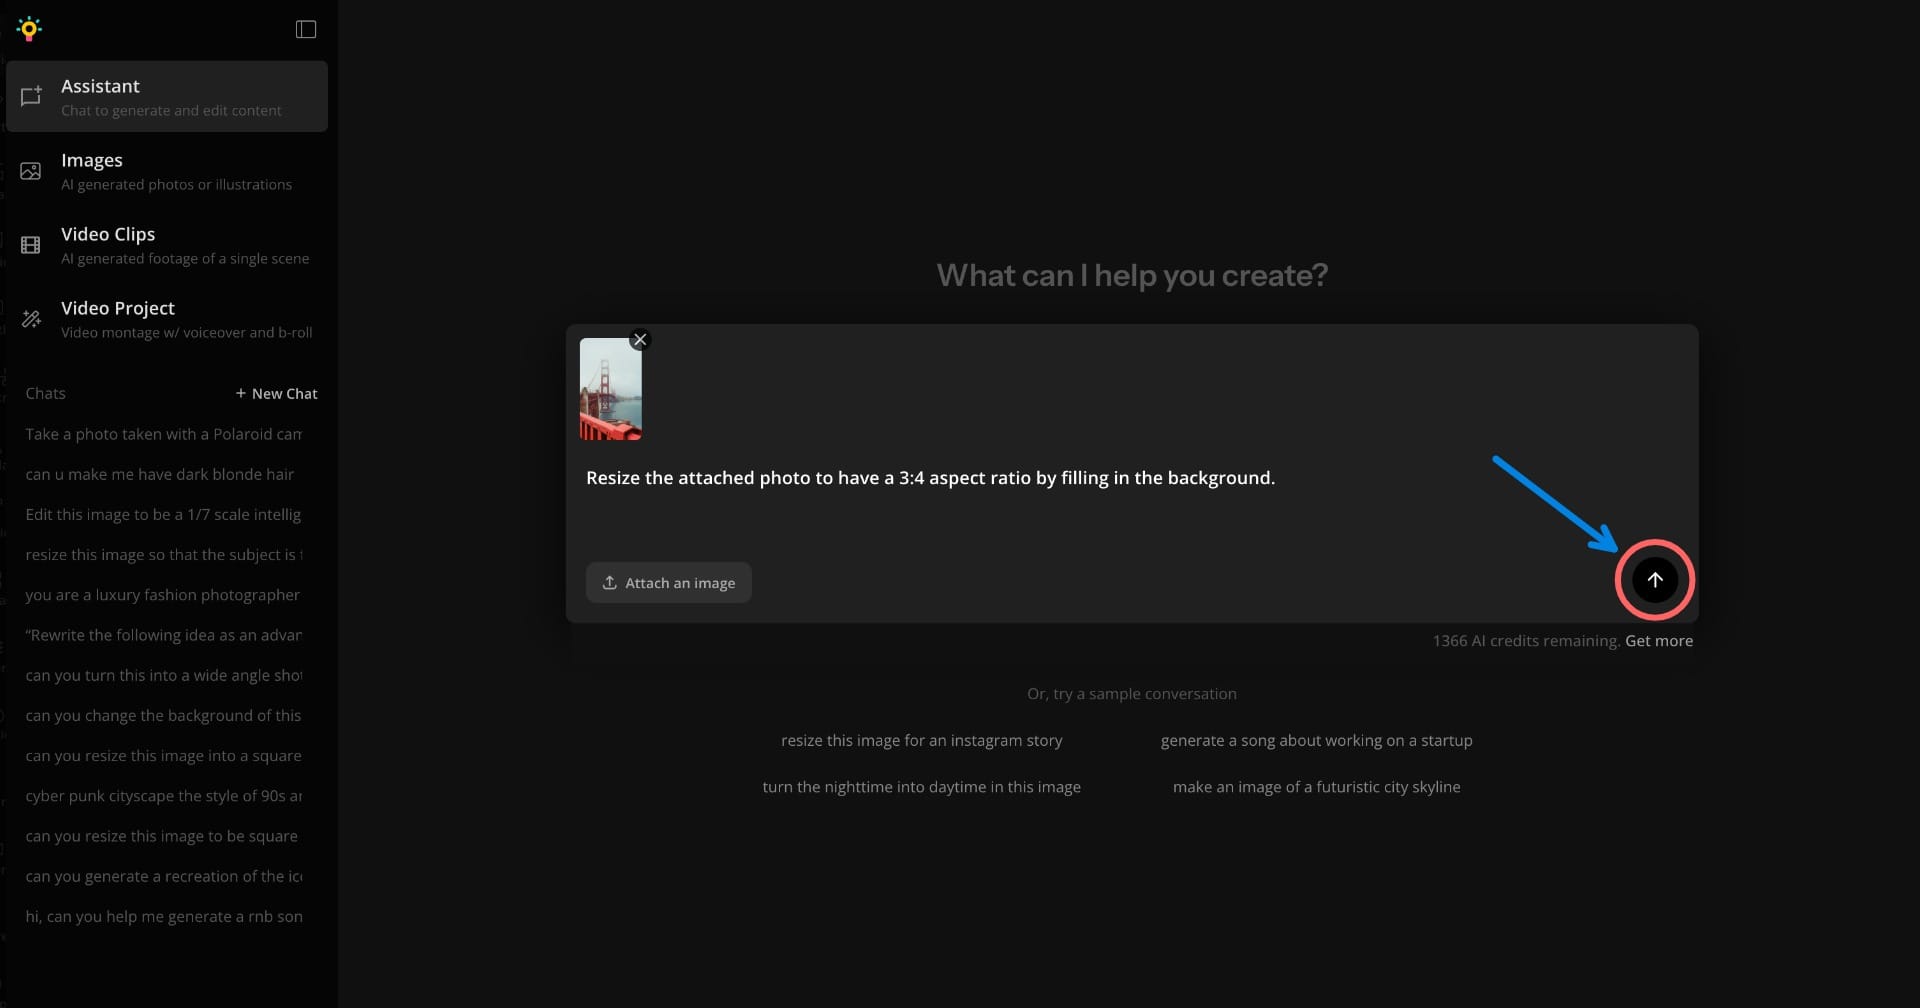
Inside the AI Assistant, you’ll see a chat-box. Start by clicking the “Attach an Image” button in the bottom-left corner and upload the photo you want to resize.
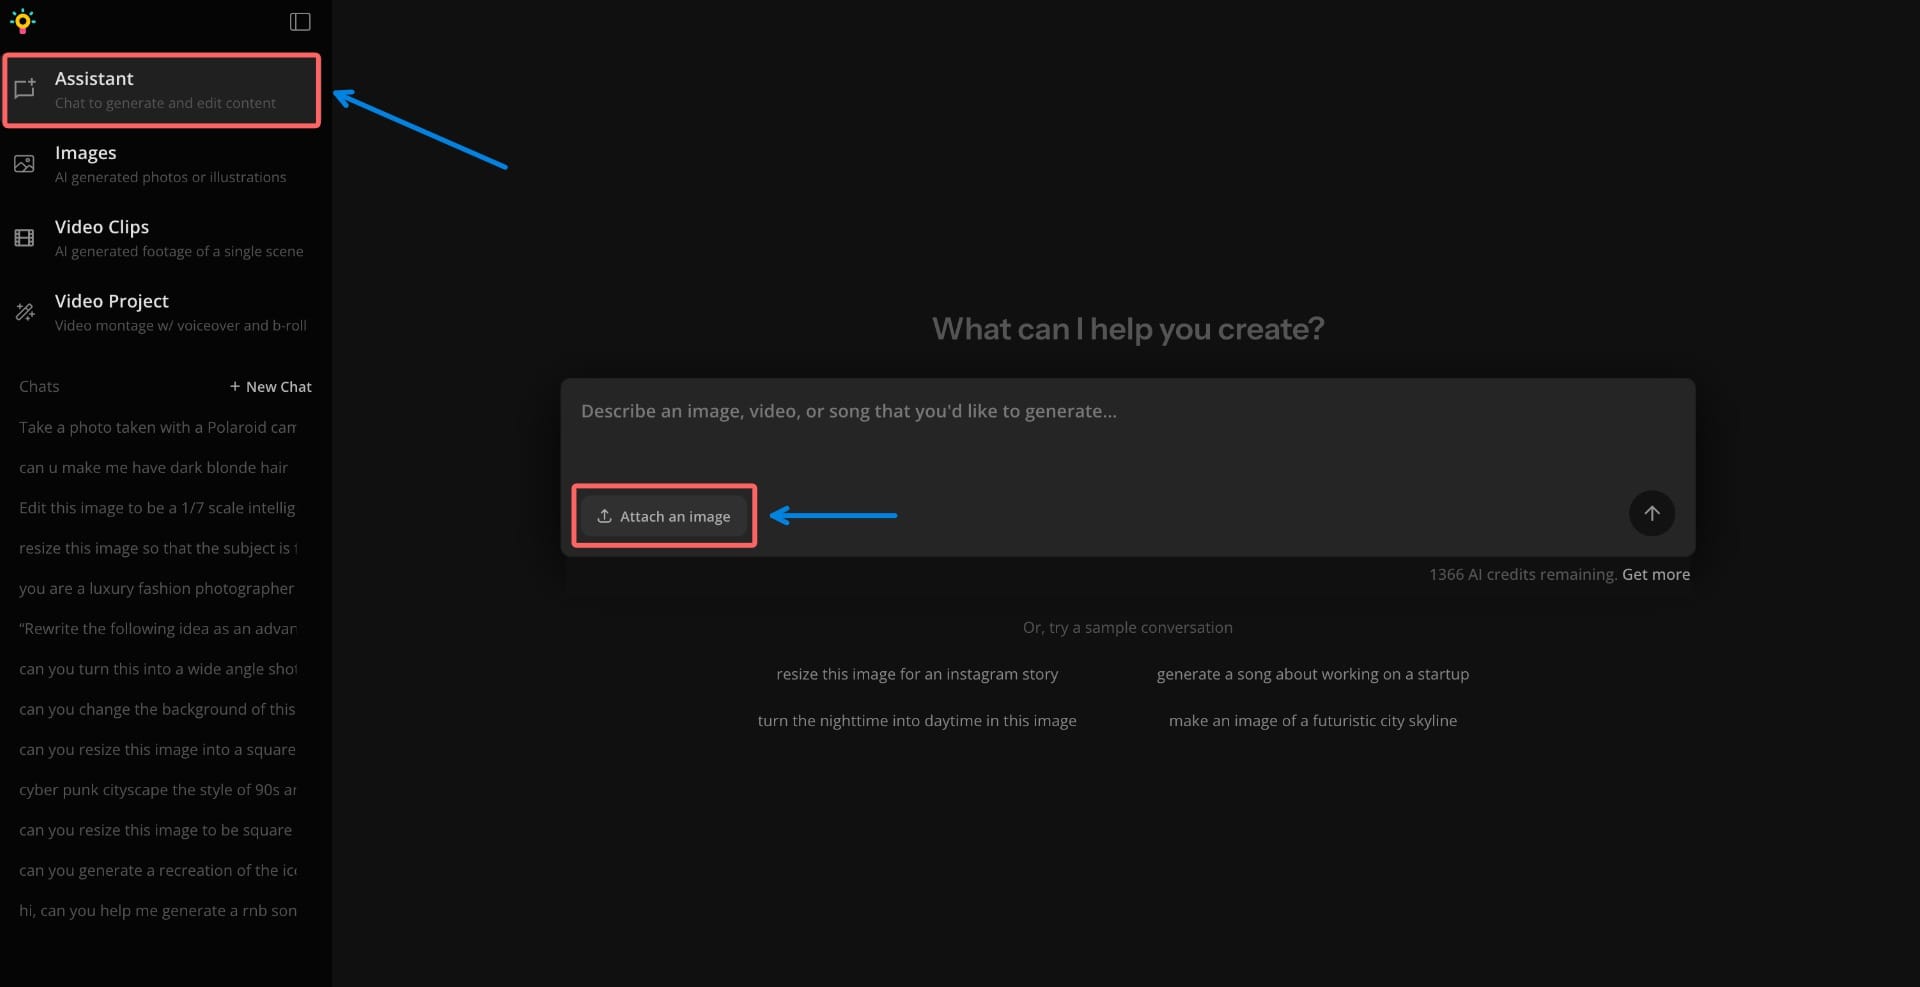
Once you've attached your photo, you can copy the following prompt:
Resize the attached photo to have a [...] aspect ratio by filling in the background.
After entering your prompt, click the arrow button to resize your photo.
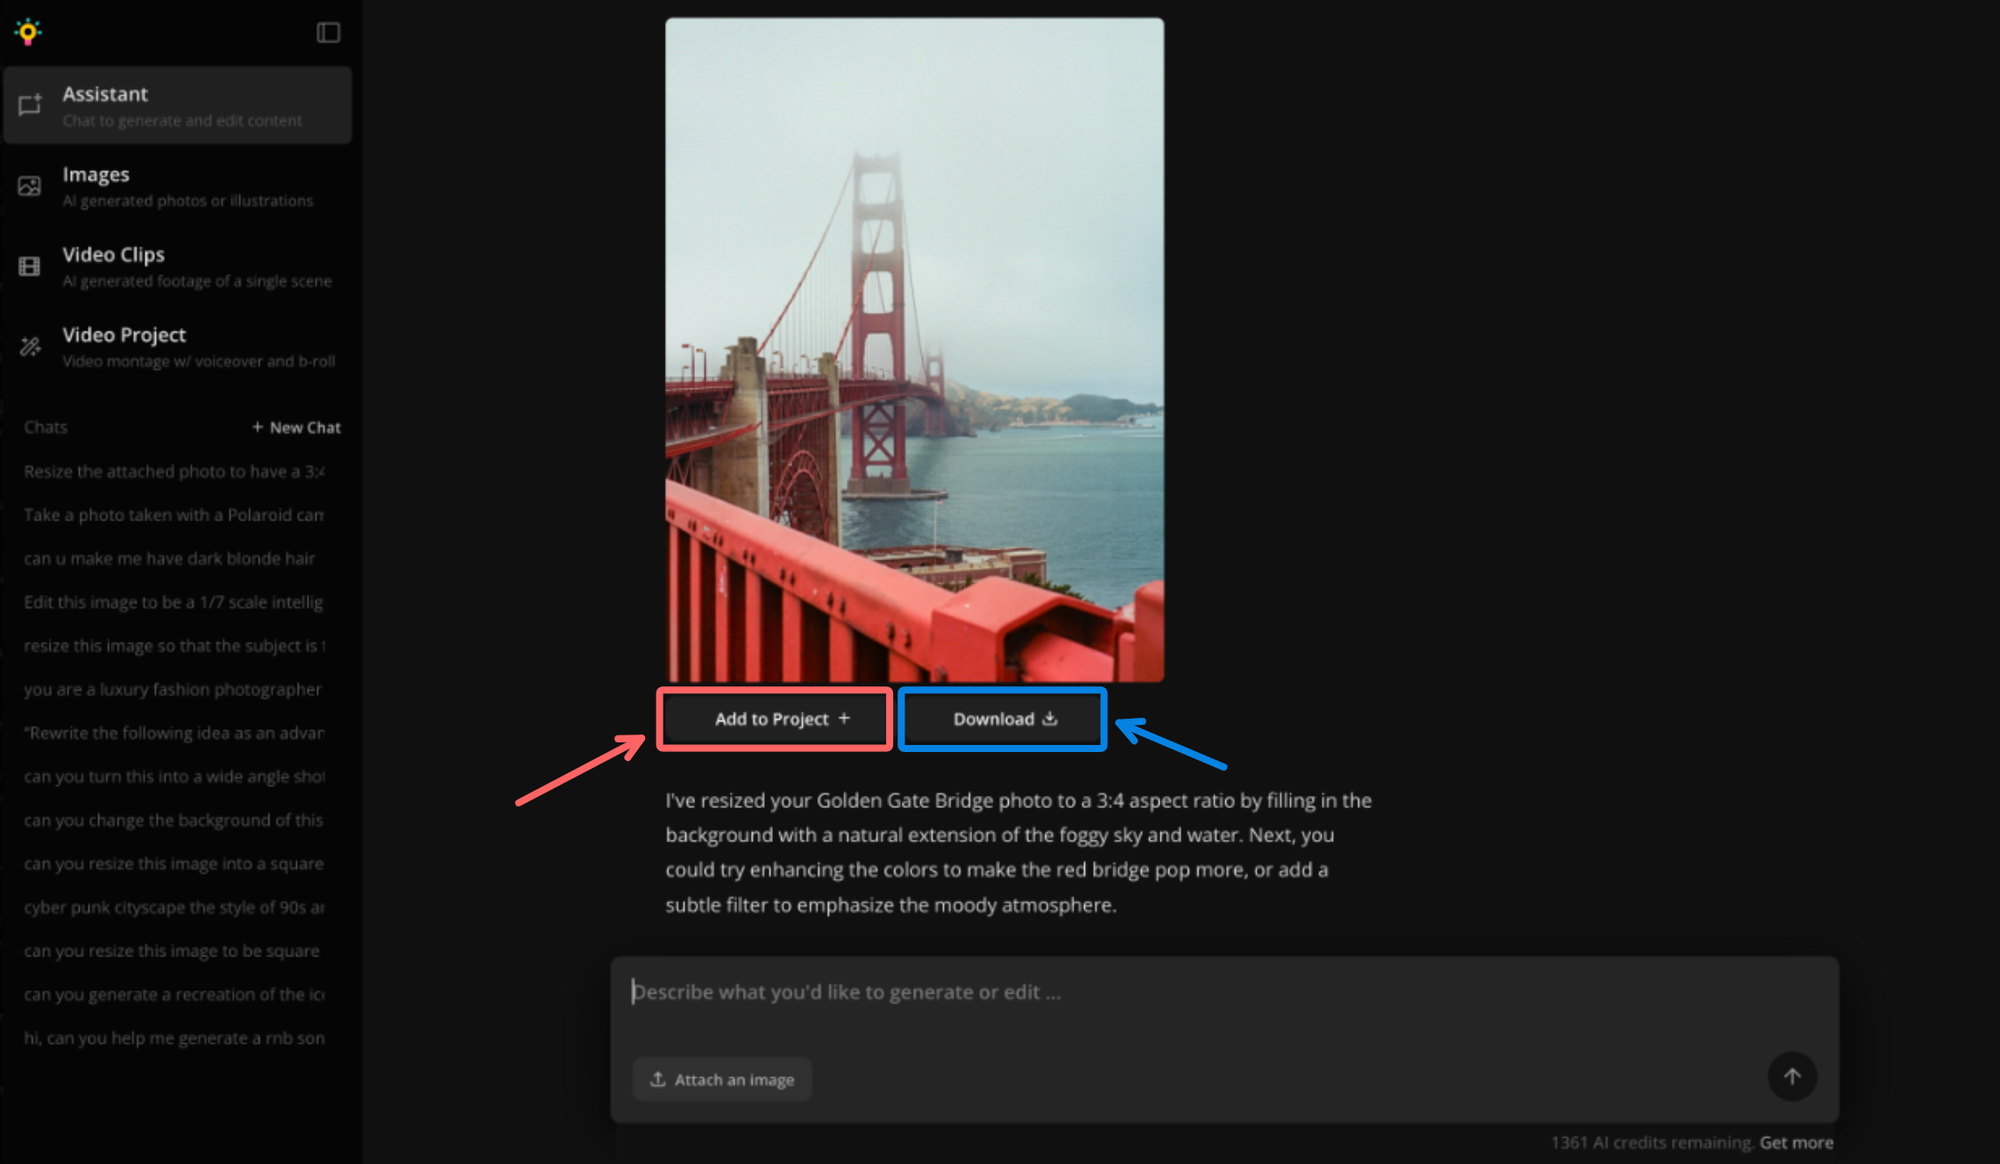
The AI Assistant will return your resized photo. If you’re not satisfied with the first result, you can type additional requests in the chat to make specific edits until it looks right.
Once you’re happy with your photo, you can either download it directly or save it to a project.
Downloading is the fastest option if you want to post the resized photo on Instagram as-is. Saving to a project lets you open the image in the Studio for further edits before posting.
Both of these resizing methods ensure that your Gemini Flash images are optimized for specific platforms, including profile banners, social media posts, and design templates.
Adding Text to Gemini Flash Images
Since Gemini struggles to generate clear and consistent text, using an online editor is the best way to add text to your images. This makes them suitable for custom video thumbnails, invitations, or promotional graphics.
To add text to a Gemini Flash image, start by uploading it to the Kapwing editor. Open the Text menu in the left-hand sidebar to browse different font styles, then click and drag a text box to your desired location.
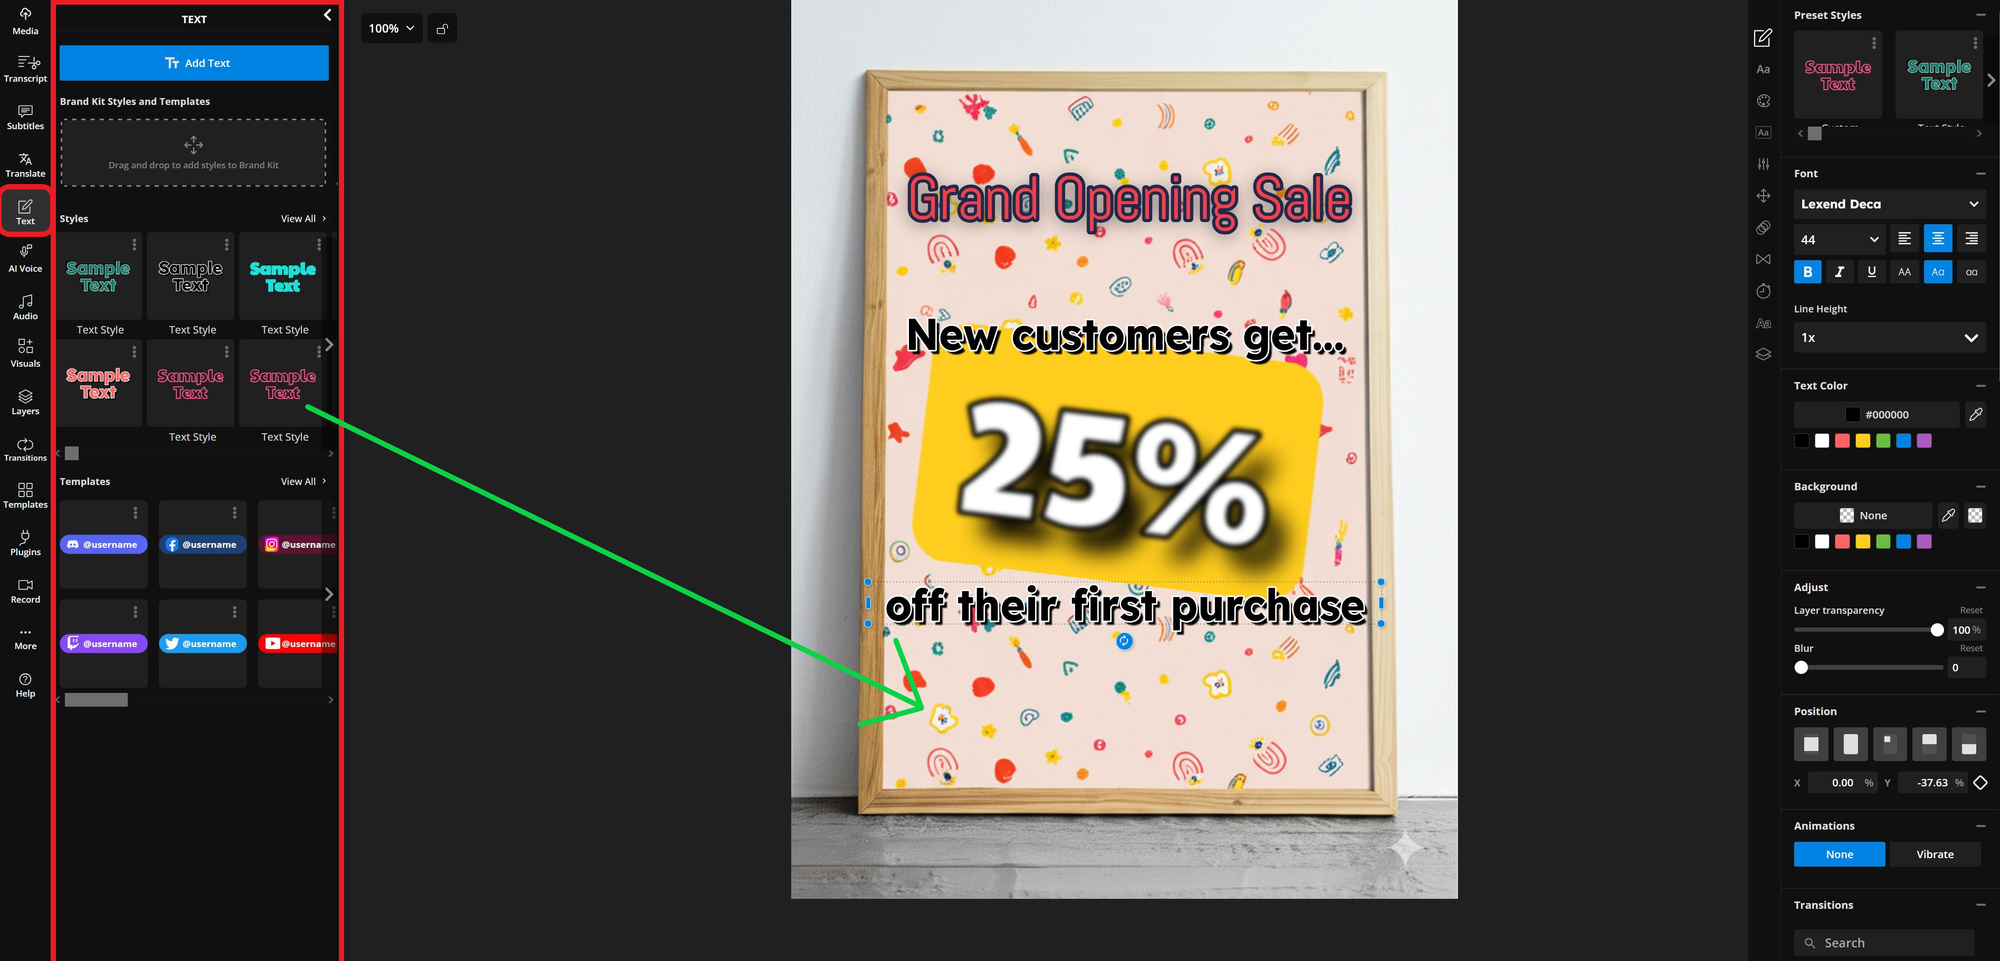
From there, use the editing tools on the right-hand side to customize size, font, color, and effects. For maximum readability, white text with a black stroke works well against any background.
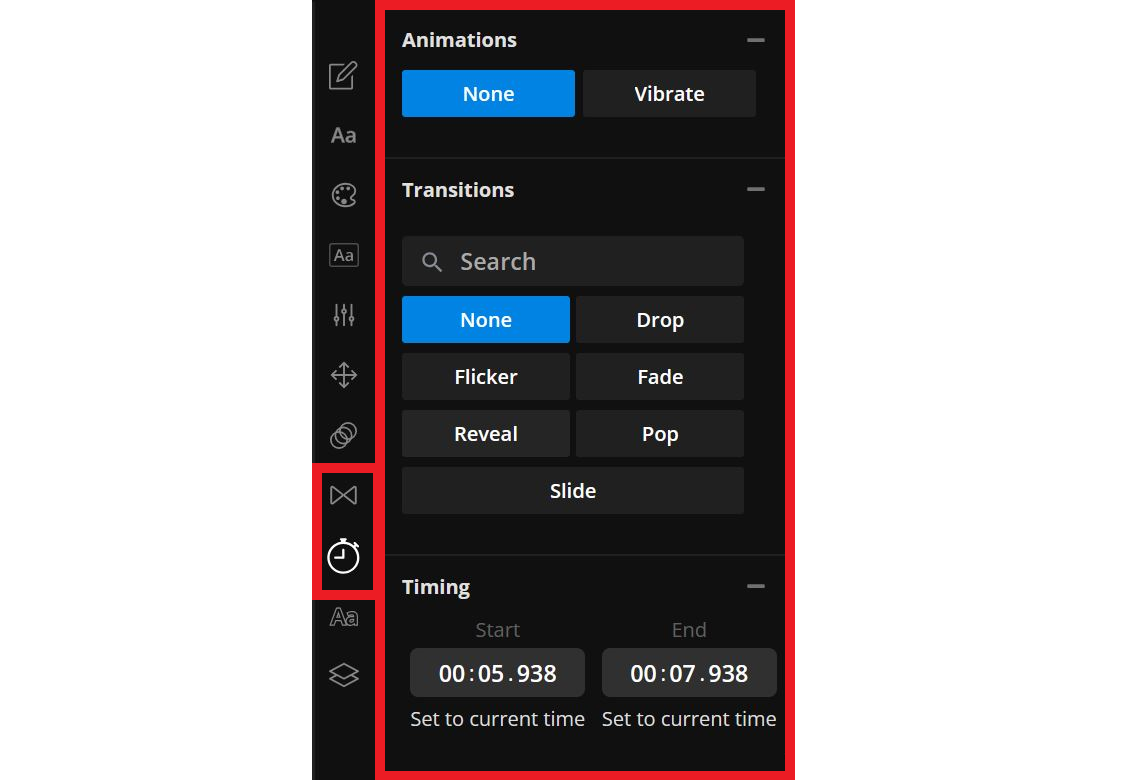
To take things a step further, consider adding animations like transitions to your text. These add movement that is visible in your final project when exported as a GIF or MP4.
Once complete, you’ll have a fully customized image — created with Gemini Flash and refined using Kapwing. Integrating these tools into your workflow will help streamline media creation and ensure you consistently produce unique, high-quality visuals for your projects.
A Gemini Flash image is the perfect canvas to quickly build promotional graphics