How to Use the Grok AI Image Generator on X - For Free
Grok 3 is here — it might change how you use AI

X (formerly Twitter) has undergone sweeping changes over the past two years, and one of the most significant is the introduction of Grok. This AI-powered tool is designed to create content, answer questions, and provide updates on current events by continuously monitoring activity on X.
As of December 5, 2024, Grok is now accessible to all X users for free. However, premium subscribers can unlock expanded limits for chatting, image generation, and media analysis. This rollout marks a significant step in X's efforts to integrate AI directly into its platform, making advanced tools available to a broader audience.
Despite the lack of an official announcement from X regarding Grok’s expanded availability, the platform’s users have already begun exploring its capabilities. Whether you're wondering how to access Grok or how to post images, here’s a complete guide to everything we know so far.
Table of Contents
- What is Grok AI?
- Grok Image Details: Sizes, Aspect Ratios, Formats
- How to Access Grok AI on X
- How to Generate Images with Grok
- How to Edit Grok Images
- Grok Frequently Asked Questions
What is Grok AI?
Grok is an AI assistant designed to provide real-time information to users without the filters commonly found in traditional AI tools, such as ChatGPT, Claude, Bing AI, or TensorFlow.
In addition, Grok stands out for its distinct personality, moving beyond the neutral, purely informative tone often seen in other AI platforms. This allows Grok to engage in discussions on potentially controversial topics and tackle a broader range of conversations.
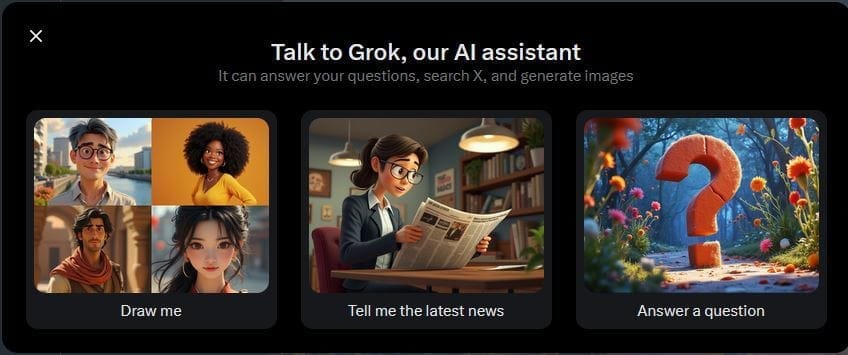
One of Grok’s most unique features is its ability to analyze posts, conversations, and media uploaded to X. This capability enables it to deliver real-time answers to user questions, provided the relevant information exists on the platform. Users can also upload media directly to Grok, who will then analyze the media and provide insight.
It’s important to note that while Grok is free for all X users, premium subscribers gain access to exclusive perks. For free users, the limits include:
- Up to 10 messages every two hours.
- Up to 10 image generations every two hours.
- Analysis of up to 3 images per day
Grok is powered by Aurora, a new autoregressive image generation model built by X.ai and launched in December 2024. Aurora is trained jointly on interleaved text and image data, meaning it generates more natural-looking results compared to Flux, with strong lifelike textures. It has fewer restrictions—capable of generating images of public figures, fictional characters, and dynamic scenes, as long as nudity is not included.
Grok Image Details: Sizes, Aspect Ratios, Formats
While subscribing to X Premium or X Premium+ increases the number of images you can generate, the specifications of Grok-generated images remain consistent across all plans. Here’s what you need to know:
- Image Dimensions: Grok generates images at 1024 x 768 pixels.
- Aspect Ratio: All images use a 4:3 aspect ratio.
- Watermark: A "GROK ⧄" watermark appears in the bottom right corner of every image, whether viewed in fullscreen or exported.
- File Format: Images are exported as JPEGs.
It’s worth noting that Grok does not support editing existing images. Any adjustments require generating a new set of images based on an updated prompt.
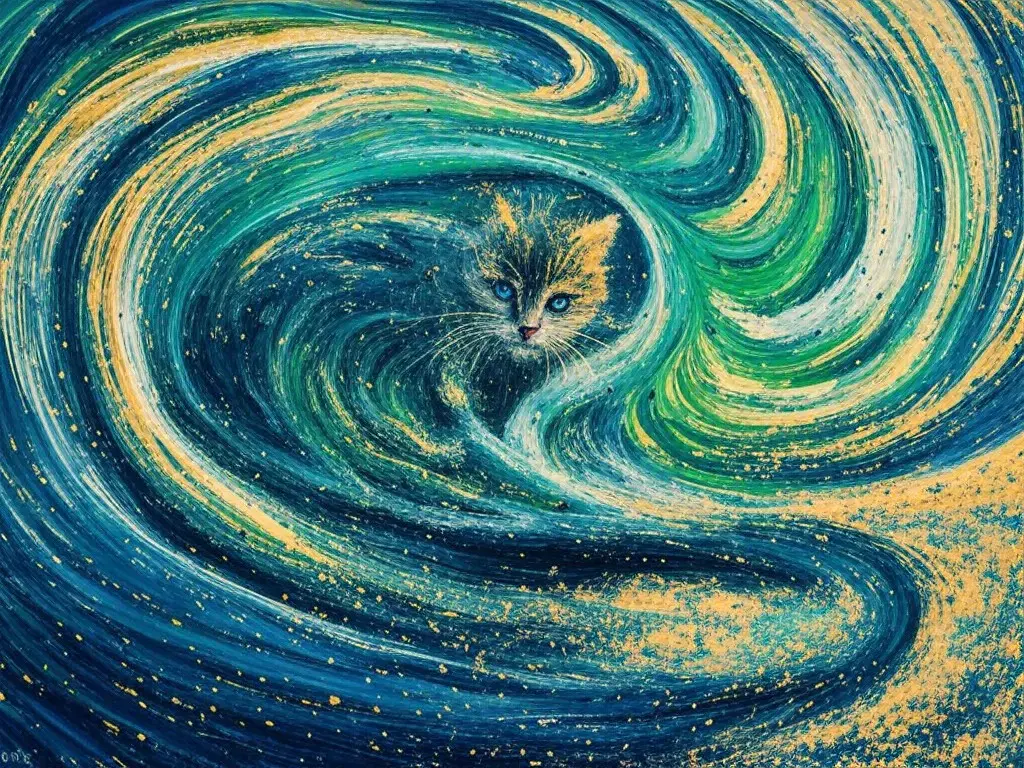


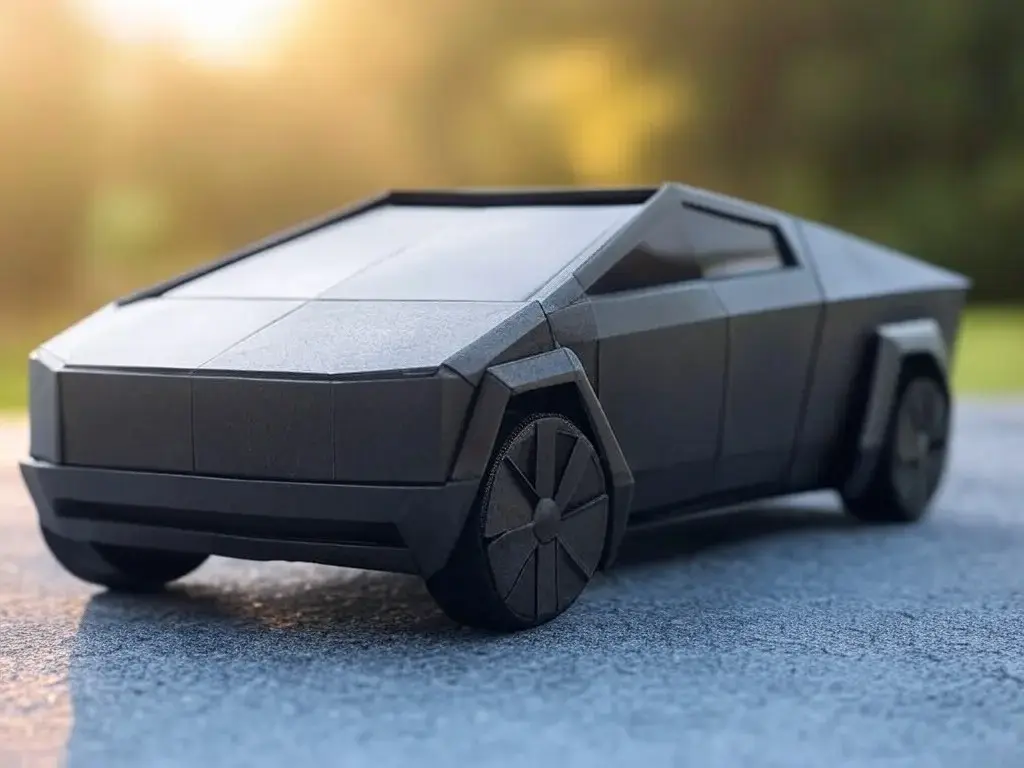

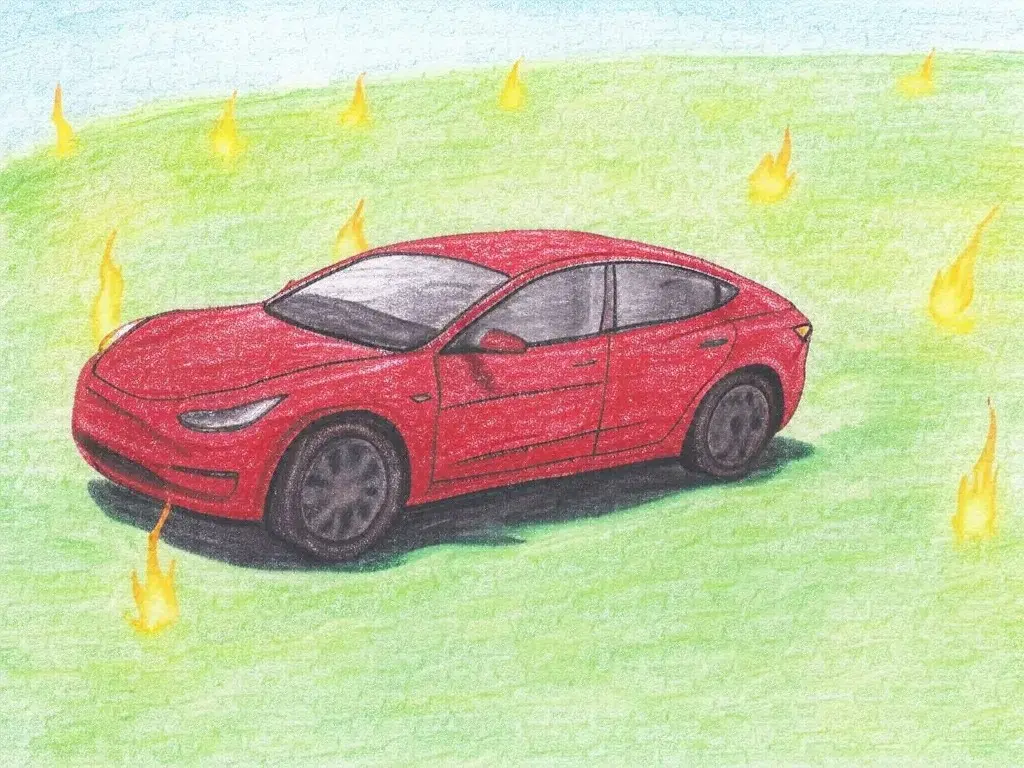
Examples from the official Grok website
How to Access Grok AI on X
To access Grok AI, start by logging into your X account via the website or the mobile app.
Once logged in, locate Grok on the X home screen. Look for the box with the forward-slash icon in the side panel. On the mobile app, this icon is found at the bottom of the screen. Selecting it opens the Grok menu, where you can upload an image, ask a question, or choose from trending prompts to explore popular topics.
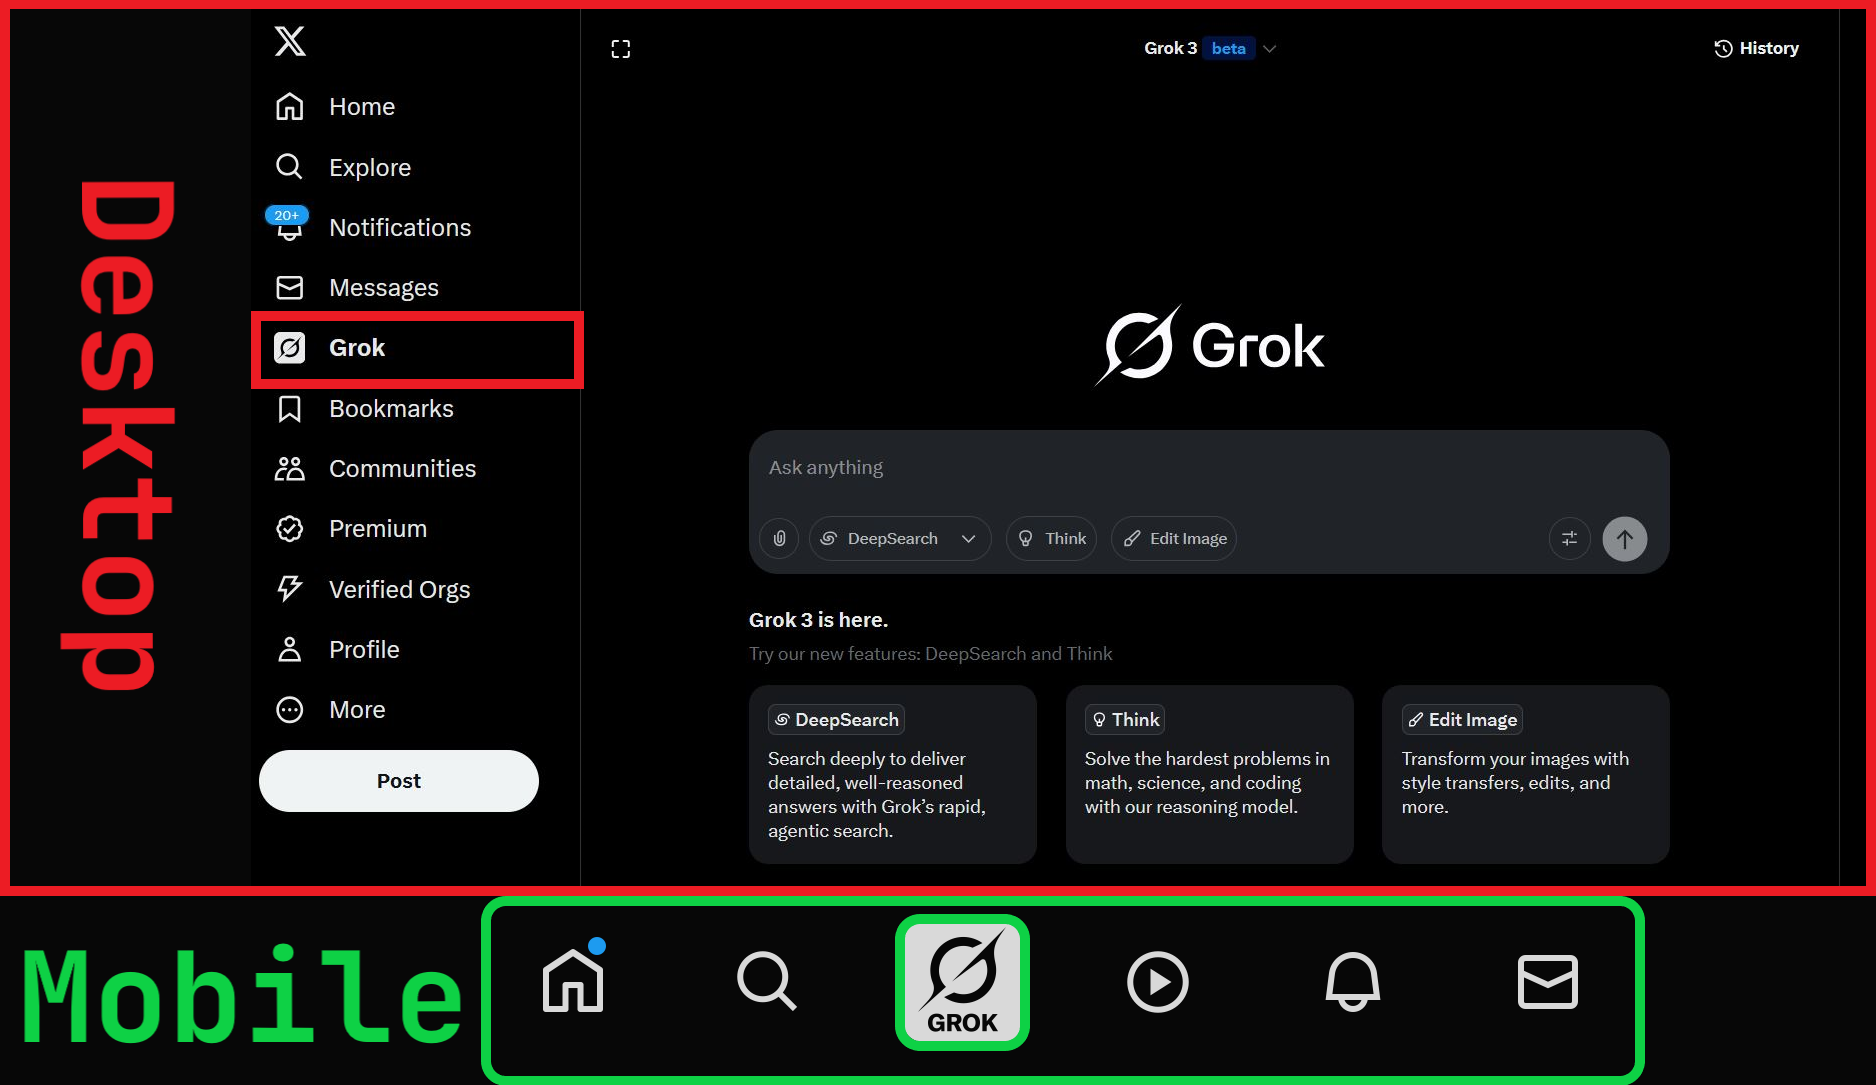
Within the Grok interface, you’ll find several tools and features to enhance your experience. Let’s break them down by platform.
Locating Key Grok Features on Desktop
When using Grok on a desktop, you’ll see several options at the top of the screen:

- Focus Mode: This icon, located in the top left, expands the Grok menu to fullscreen. In fullscreen mode, the icon changes to an "X," which you can select to revert back to the original view.
- AI Model Dropdown: Displays the current AI model in use. Currently, Grok 3 is the only available model (as of April 2025), but more models may be added in the future, making this menu useful for selecting your preferred model.
- History Icon: Access your conversation history to revisit past chats or resume previous discussions. This includes both text and image-based interactions.
At the center of the screen is the textbox, your primary tool for interacting with Grok. Here are its key features:
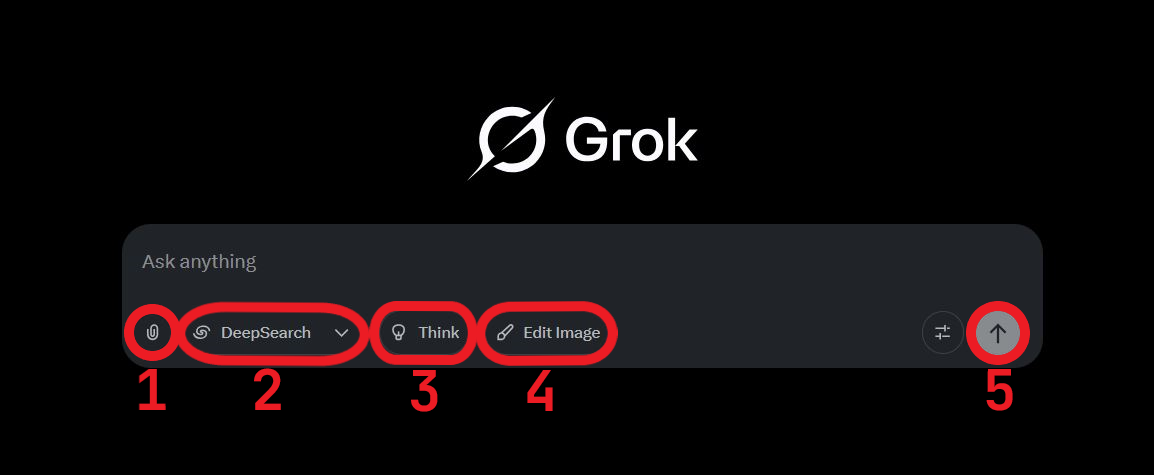
- Media Icon: Upload files, such as images and PDF documents, for analysis. Free users are allowed three media uploads per day, with PDFs capped at 5 MB and no size limits currently for images.
- DeepSearch: Receive the most current information by asking grok to "aggressively search the internet" in regards to your prompt.
- Think: Receive and in-depth explanatory answer to your question, with a step-by-step 'thinking' process laid out.
- Edit Image: Use Grok to edit existing images by uploading one to the prompt box and selecting this option.
- Send Icon: Submit your prompt or attached media to Grok by selecting this icon.
Below the textbox, you’ll find suggested prompts and trending topics. Selecting these provides quick insights or generates images based on preset ideas.
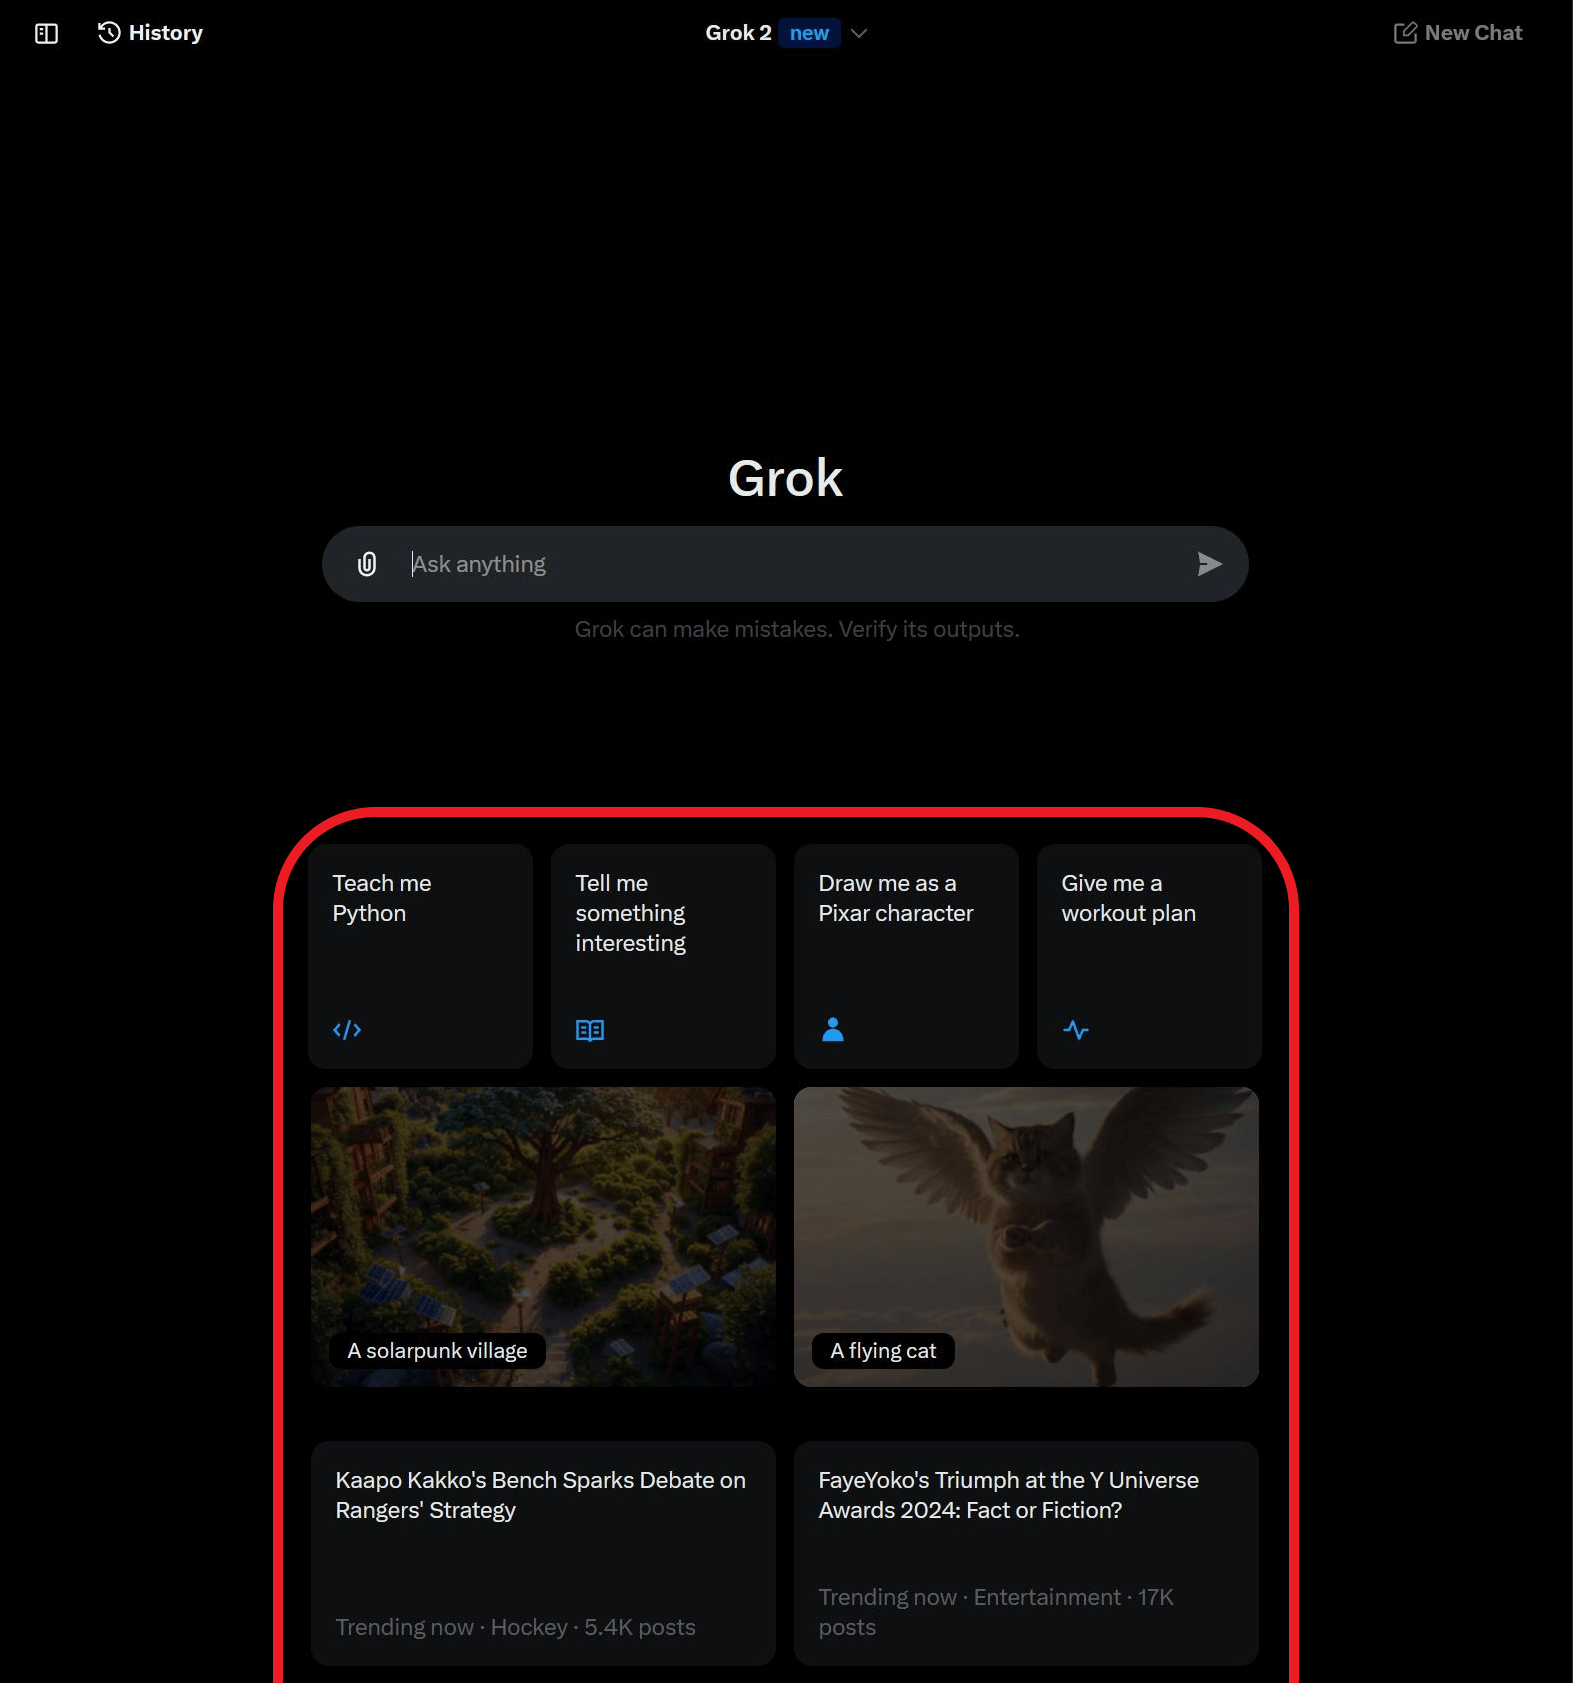
Locating Key Grok Features on Mobile
The Grok menu on the X mobile app closely mirrors the desktop version, with some key differences:
Top Menu:
- Access your profile by selecting your profile picture in the top left corner.
- The top right corner contains both the History and New Chat icons, placed next to each other.
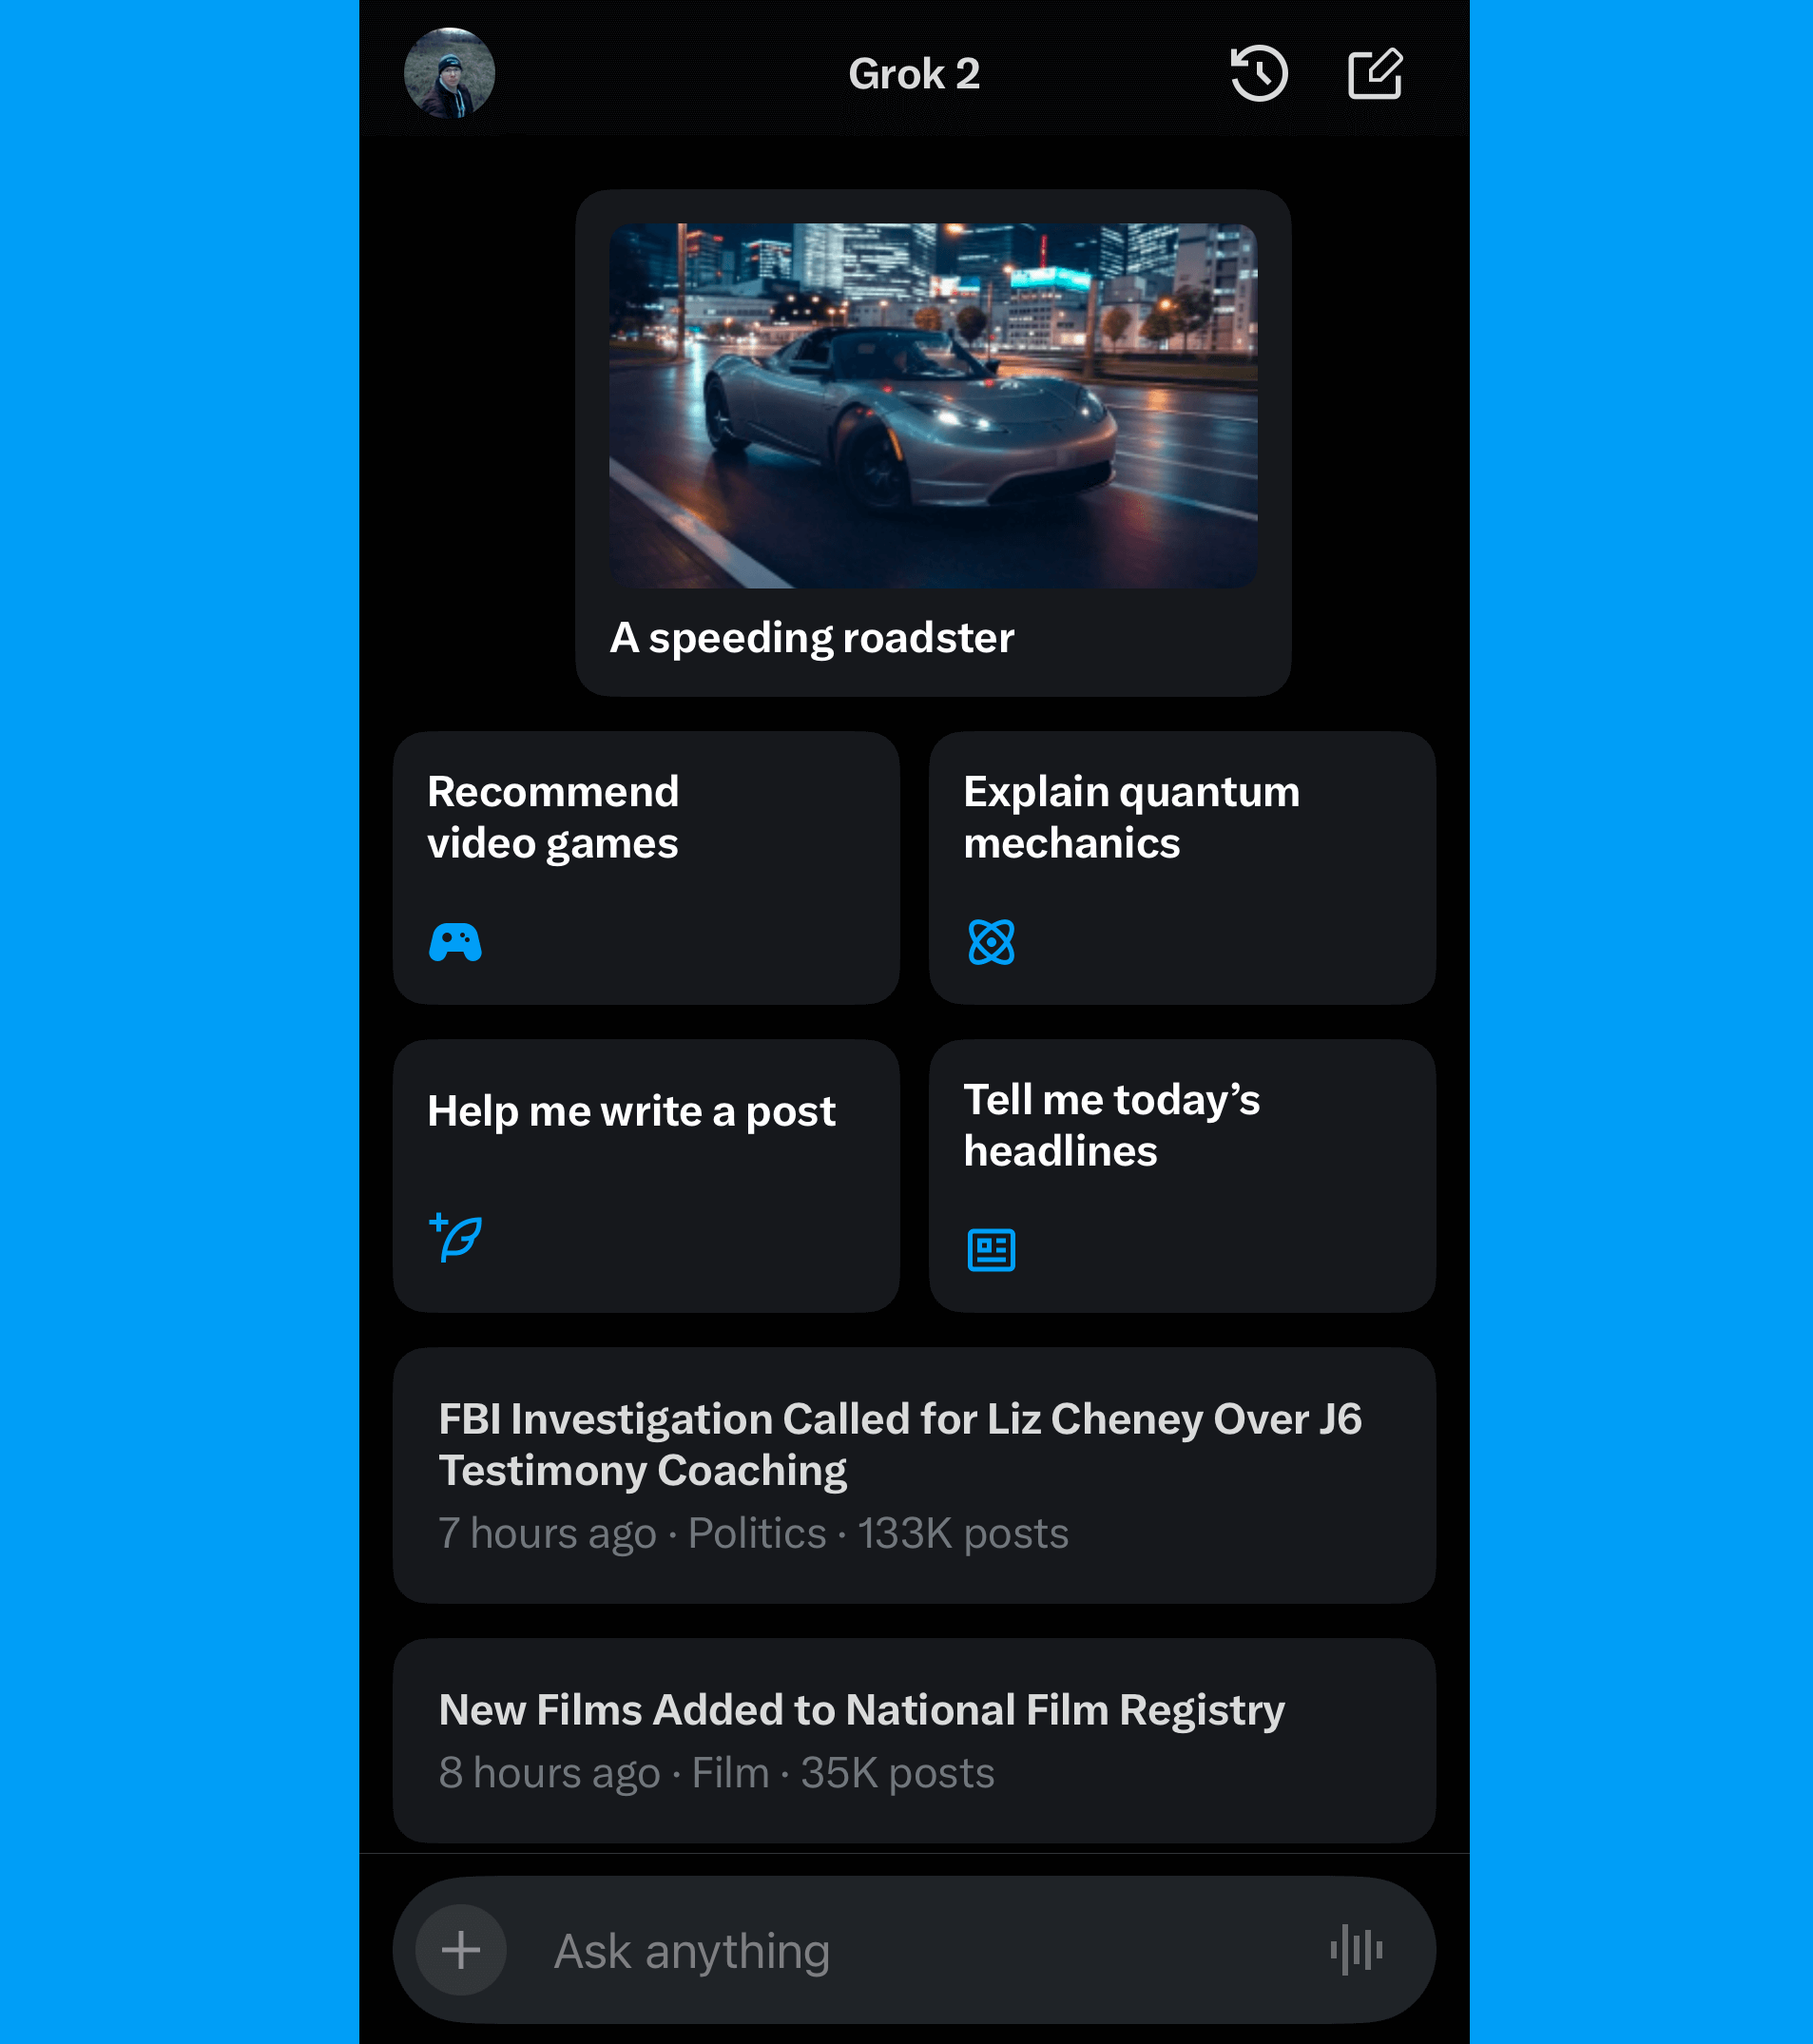
Chatbox:
- Use the "+" icon on the left-hand side to upload media for analysis, just like on desktop.
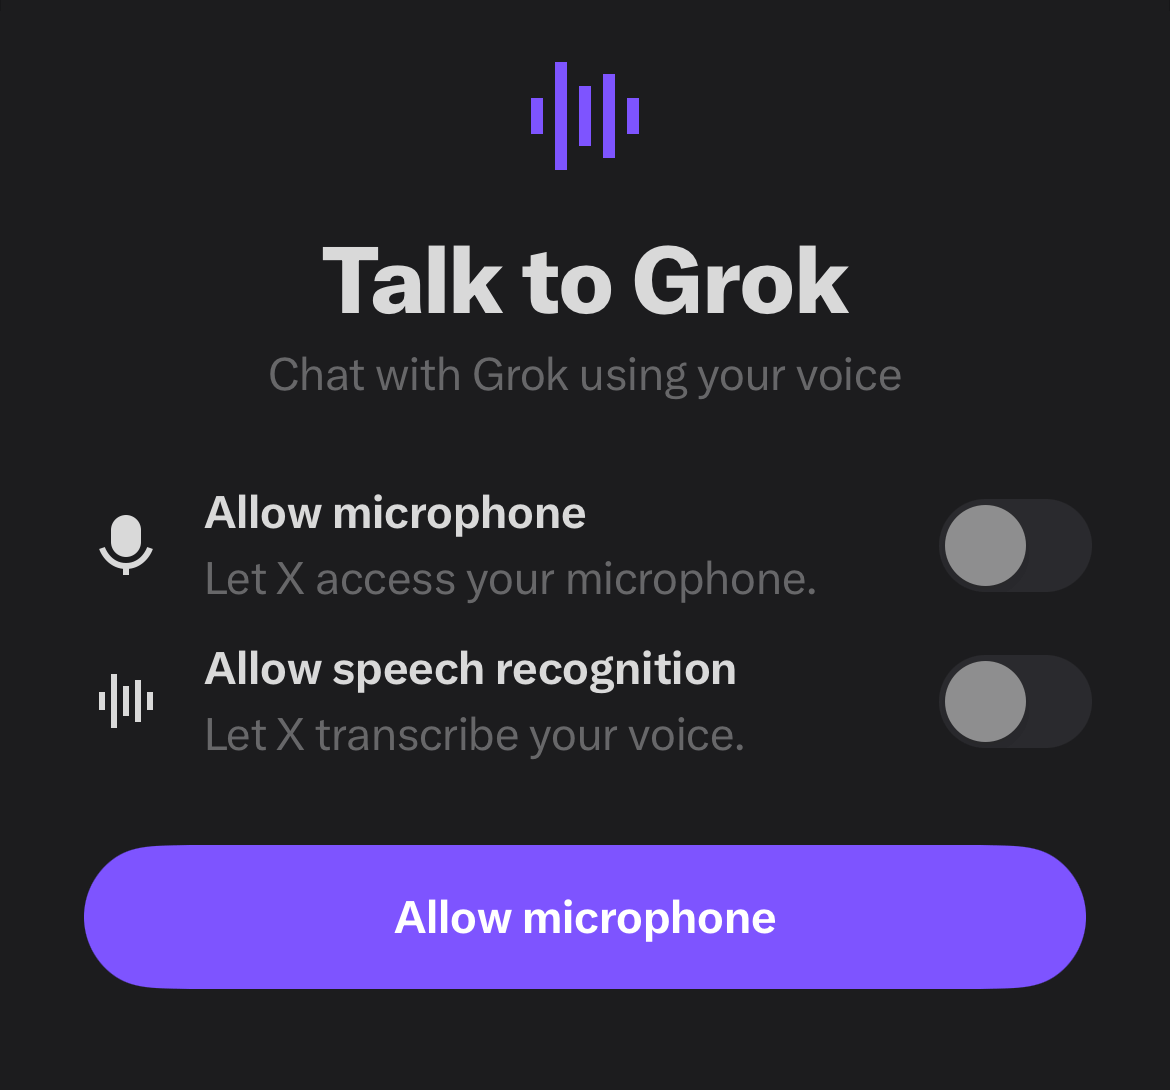
- Additionally, the mobile app includes a voice input feature. Speak your question or prompt, and Grok will transcribe your words to start a new chat. While Grok does not respond with spoken answers, this feature offers a hands-free way to interact with the AI.
How to Generate Images with Grok
Free users of Grok can generate up to 10 image prompts every two hours. While prewritten image prompts are available within the Grok menu, most users will prefer creating images using their own prompts. Here’s how you can do it:
- Access the Grok Menu: Navigate to the Grok menu on desktop or mobile and locate the textbox.

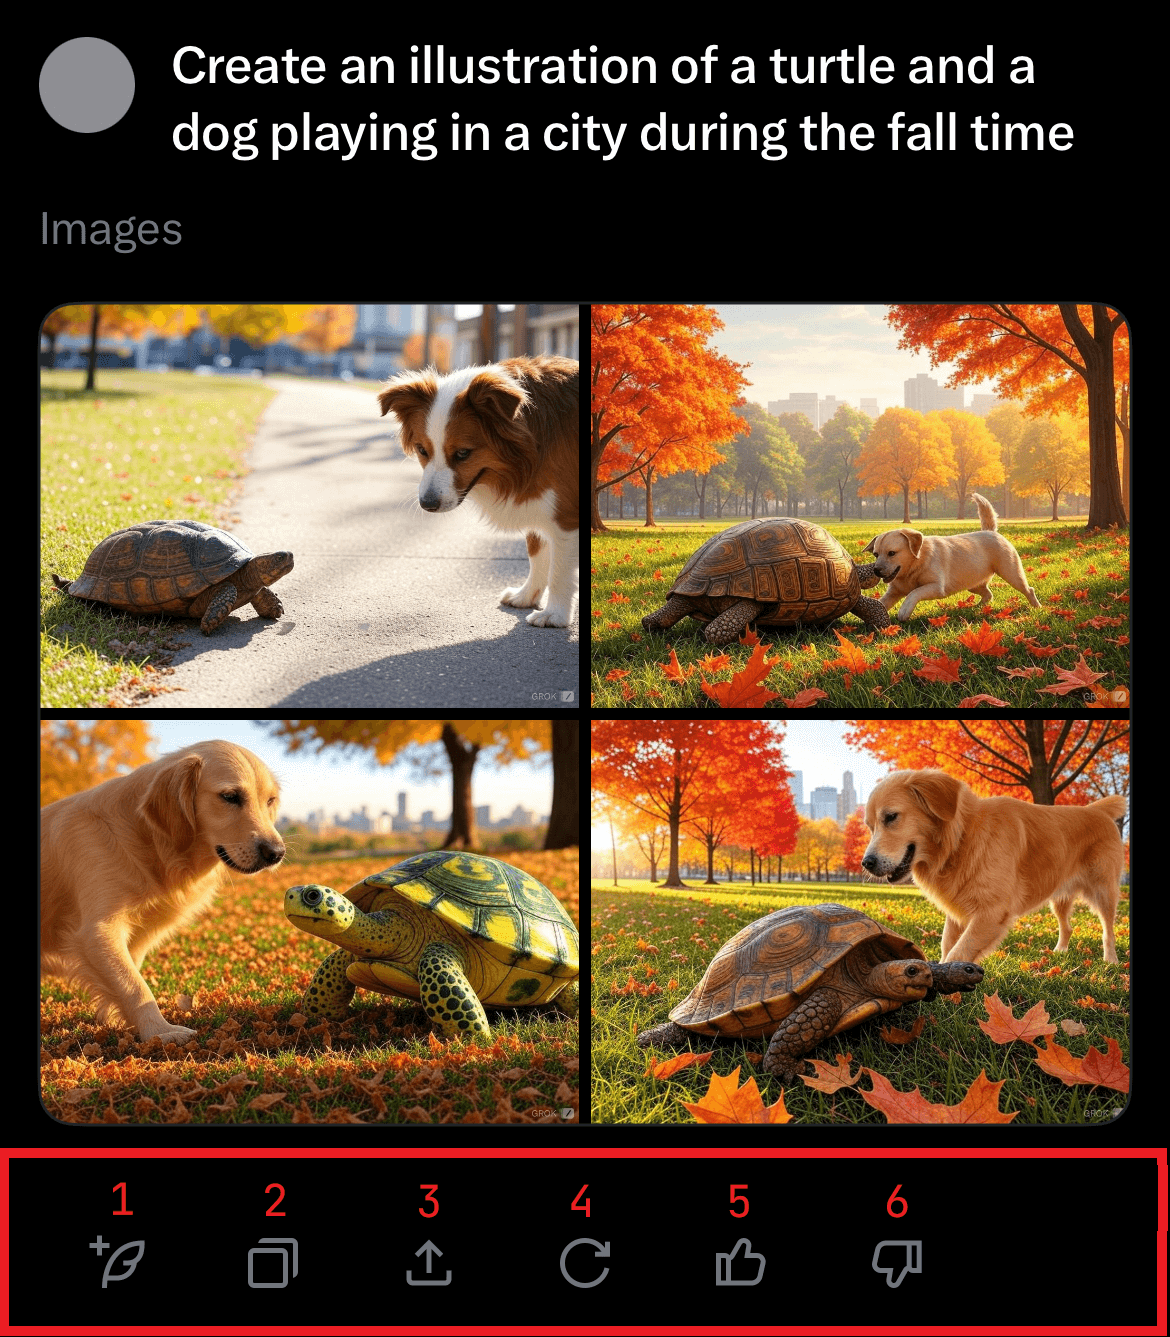
- Enter Your Prompt: Type a description of the image you’d like to create. For example, you might write, "Create an illustration of a turtle and a dog playing in a city during the fall." Grok will generate two images based on your prompt.
- Review and Select: Once generated, you can choose your favorite image or share both images.
Understanding Grok's Image Tools
Below the generated images, you’ll find six key icons to enhance your experience:
- Post link: Use this option to post an AI-generated image directly to X.
- Copy to Clipboard: Copy a link to your image generations, which can be shared on or outside of X.
- Share: Send your image generations via other platforms, such as email, SMS, or messaging apps.
- Regenerate Images: If the initial set of images doesn’t meet your expectations, regenerate both with the same prompt.
- Like: Train Grok by liking images that closely match your intended prompt.
- Dislike: Conversely, train Grok by disliking images that don't match your desired output.
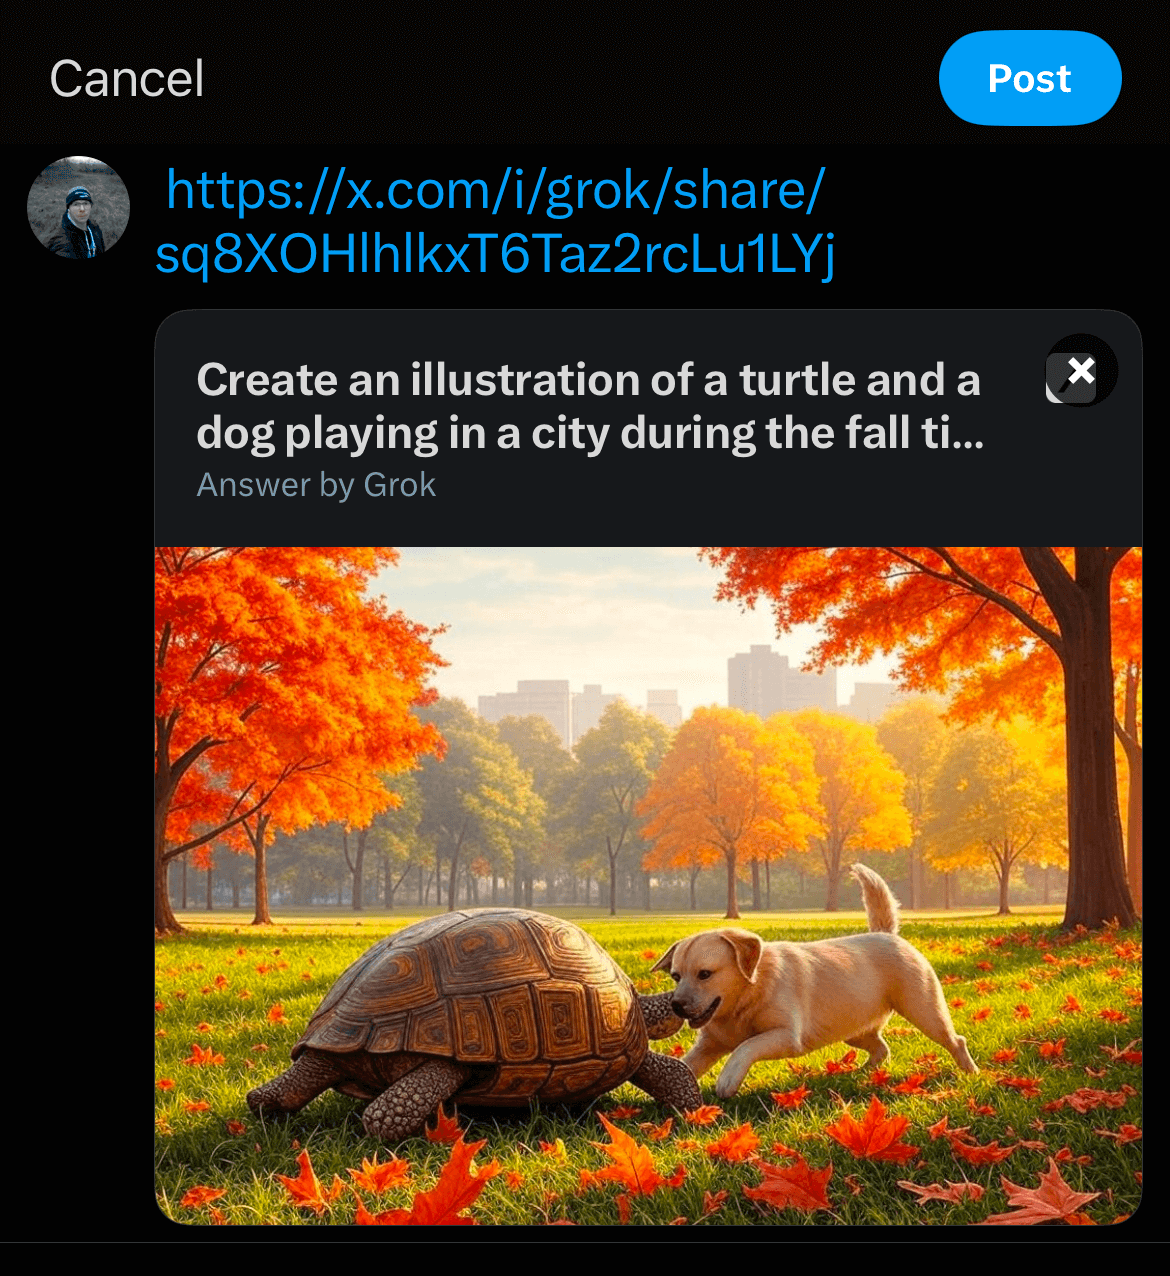
When you select Post Link, Grok will automatically create an X post featuring your image along with the prompt you used to generate it. This post will be visible on your account for others to view and engage with.
Posting Grok Images on Desktop
Unlike the mobile app, the desktop version of Grok does not have a direct posting option. However, posting is still straightforward:
- Use the Share Button: After generating images, click the Share button to open a new menu.
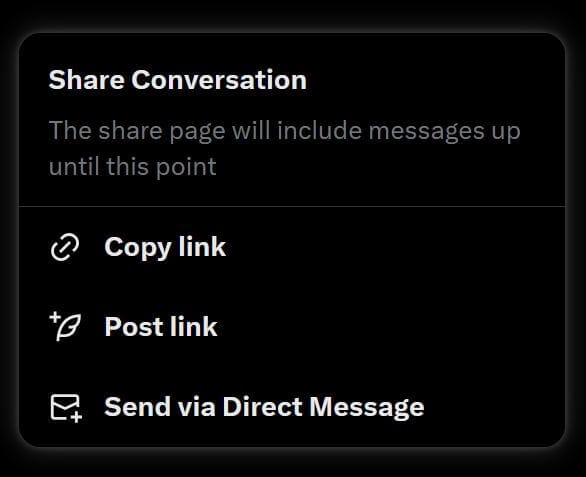
- Post Link: Within the menu, select the Post Link option (identified by the same icon as on mobile). This will automatically create an X post with your generated images.
With these tools, generating and posting AI images on X has never been easier, whether you’re using desktop or mobile.
How to Edit Grok Images
Grok recently introduced image editing to its photo generation tool, offering a few ways to modify your creations.
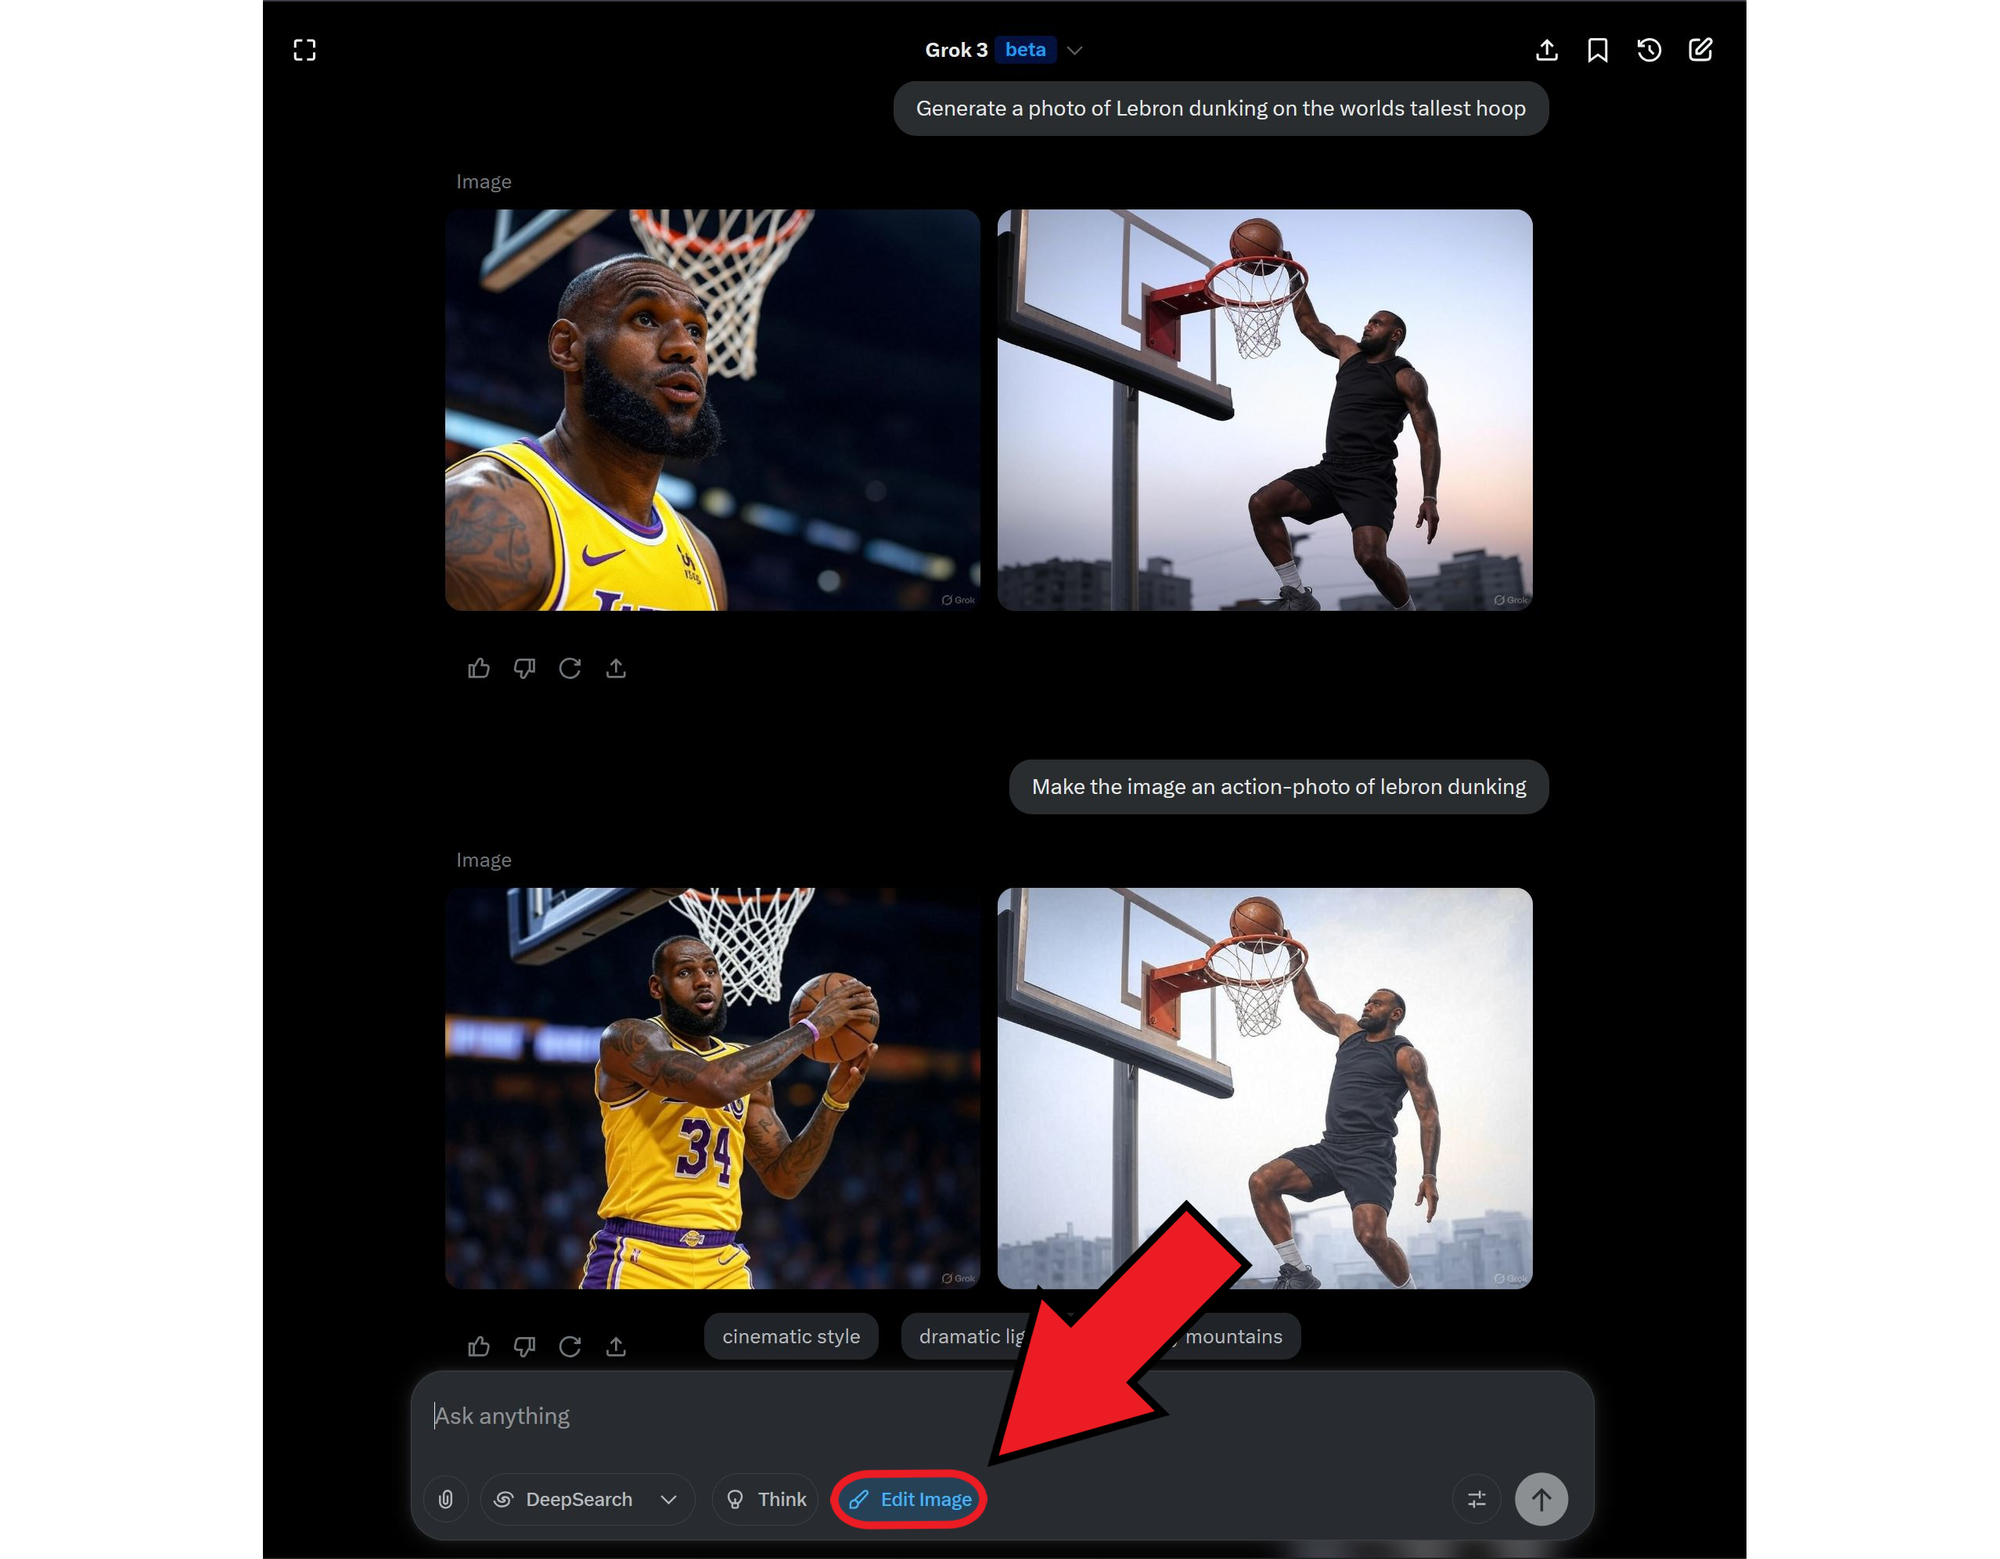
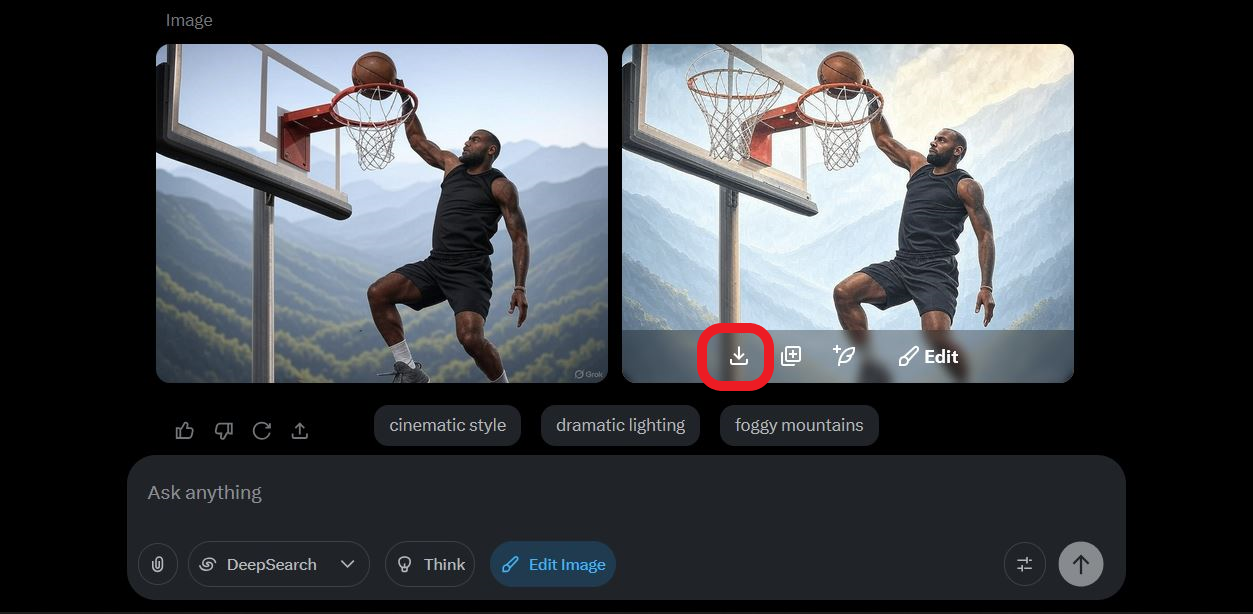
First, you can apply a general edit to both generated images by selecting the Edit Image button in the prompt menu before entering a revision prompt. However, this method applies the prompt equally to both images and may not always produce convincing results.
Alternatively, you can edit individual images by hovering over them and selecting Edit. This temporarily opens an editing window where you can enter a revision prompt specific to that image.
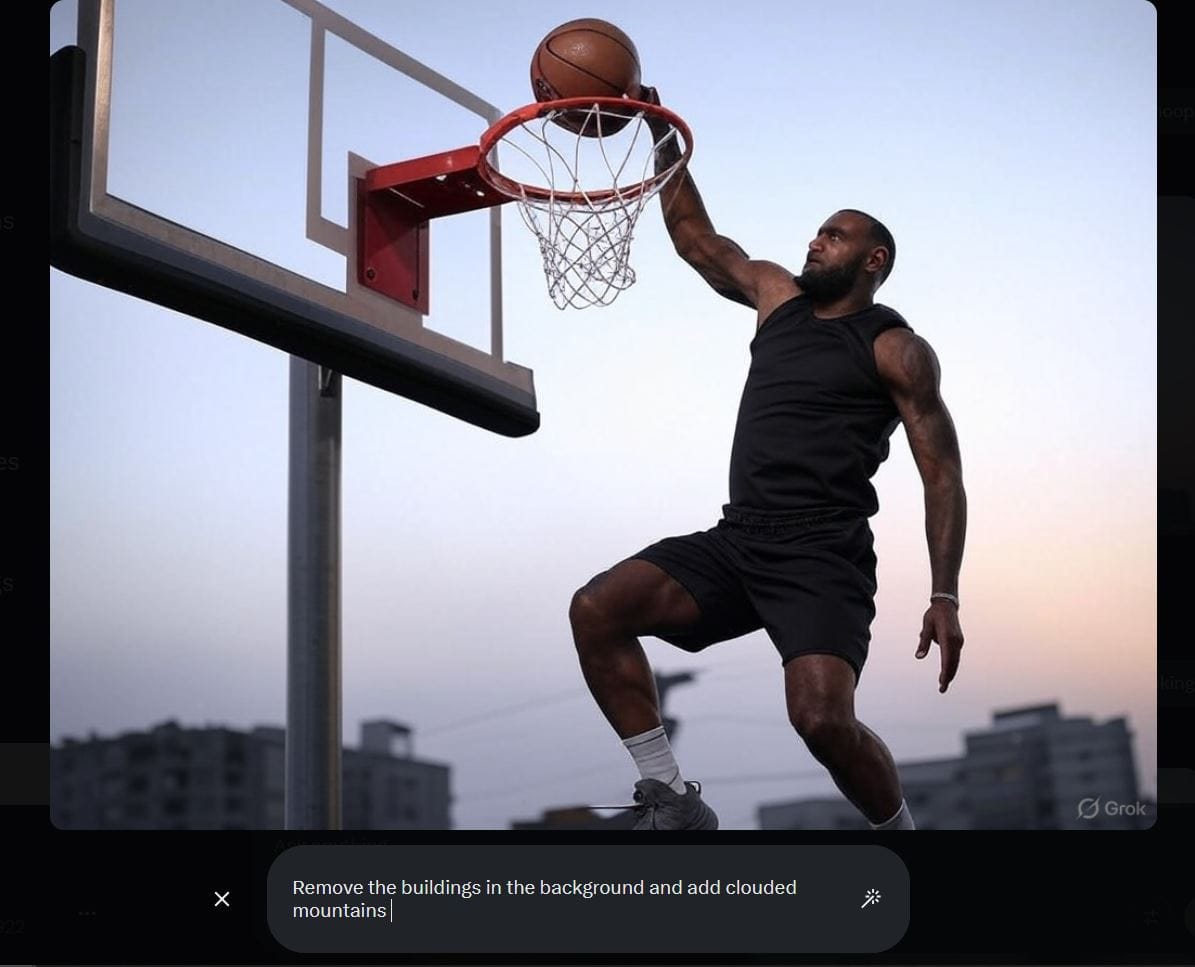
This method is more effective for refining specific details, such as background elements or overall image style. Additionally, Grok generates two variations of the revised image, allowing you to choose the better option or continue refining one of them further.
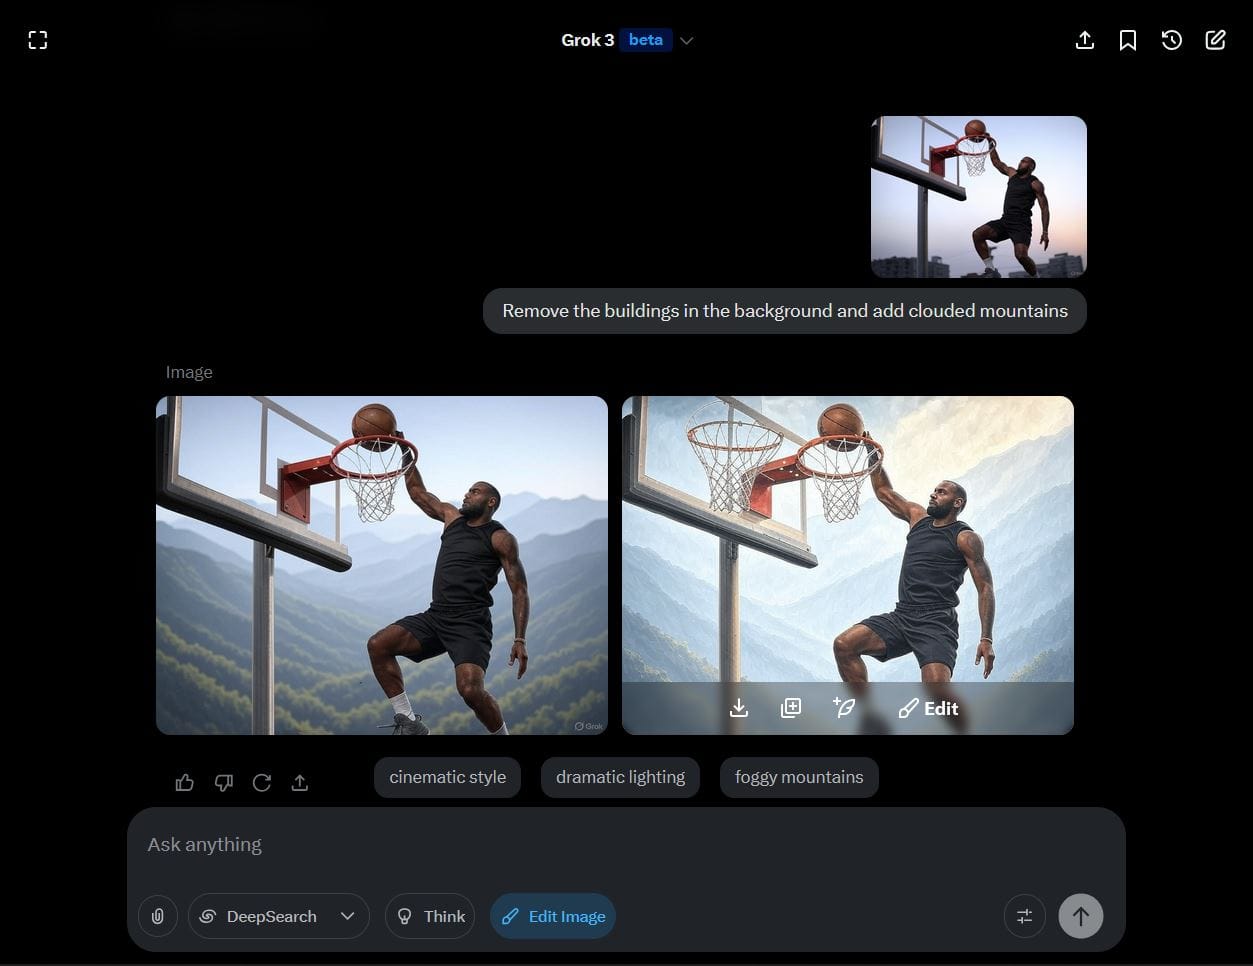
While Grok excels at generating custom images, it currently lacks essential editing tools like resizing, overlaying media, and adjusting layers individually. Because of these limitations, using an external AI image editor is necessary to refine Grok-generated images into platform-ready content.
Here is how to better edit your edit your Grok AI images to resize and customize them with greater control.
Resizing Images with Grok
All images generated by Grok are 960x640 by default. If you edit an image, by default grok will make an output that is the same dimensions.
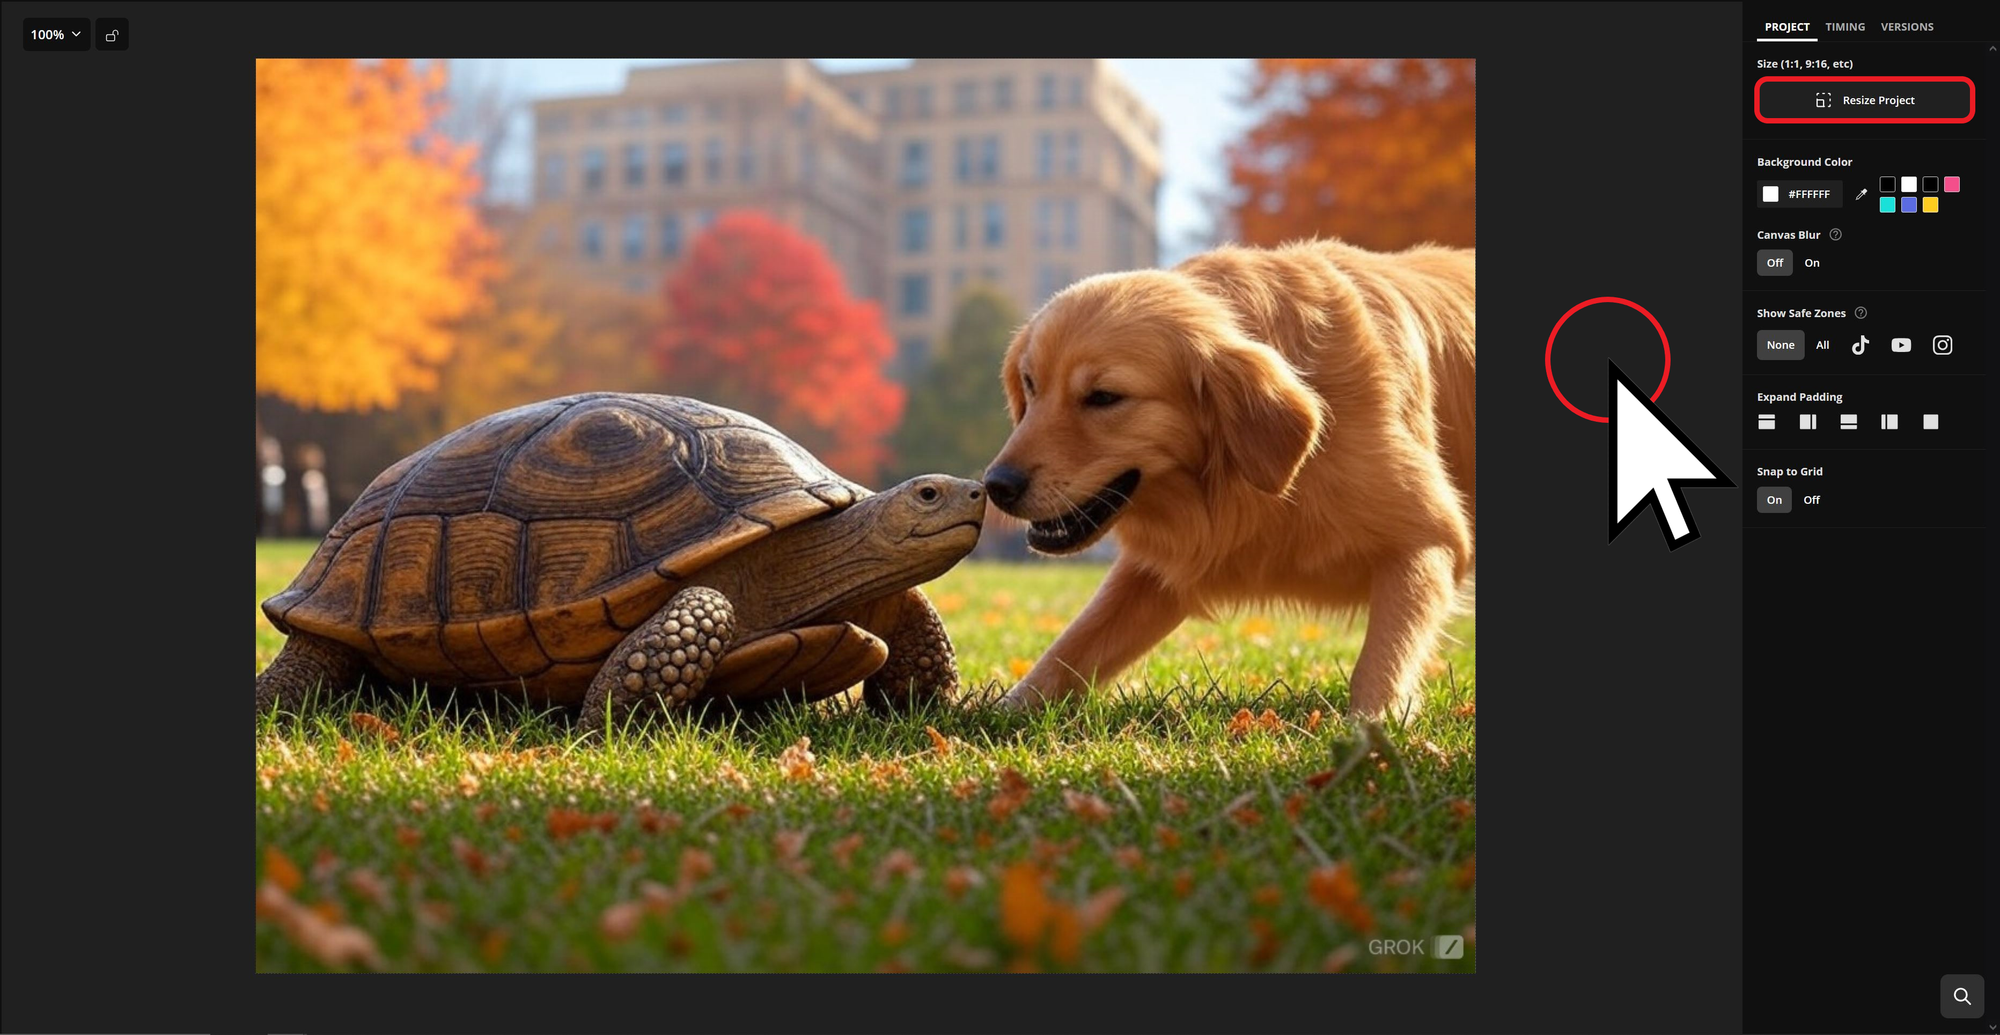
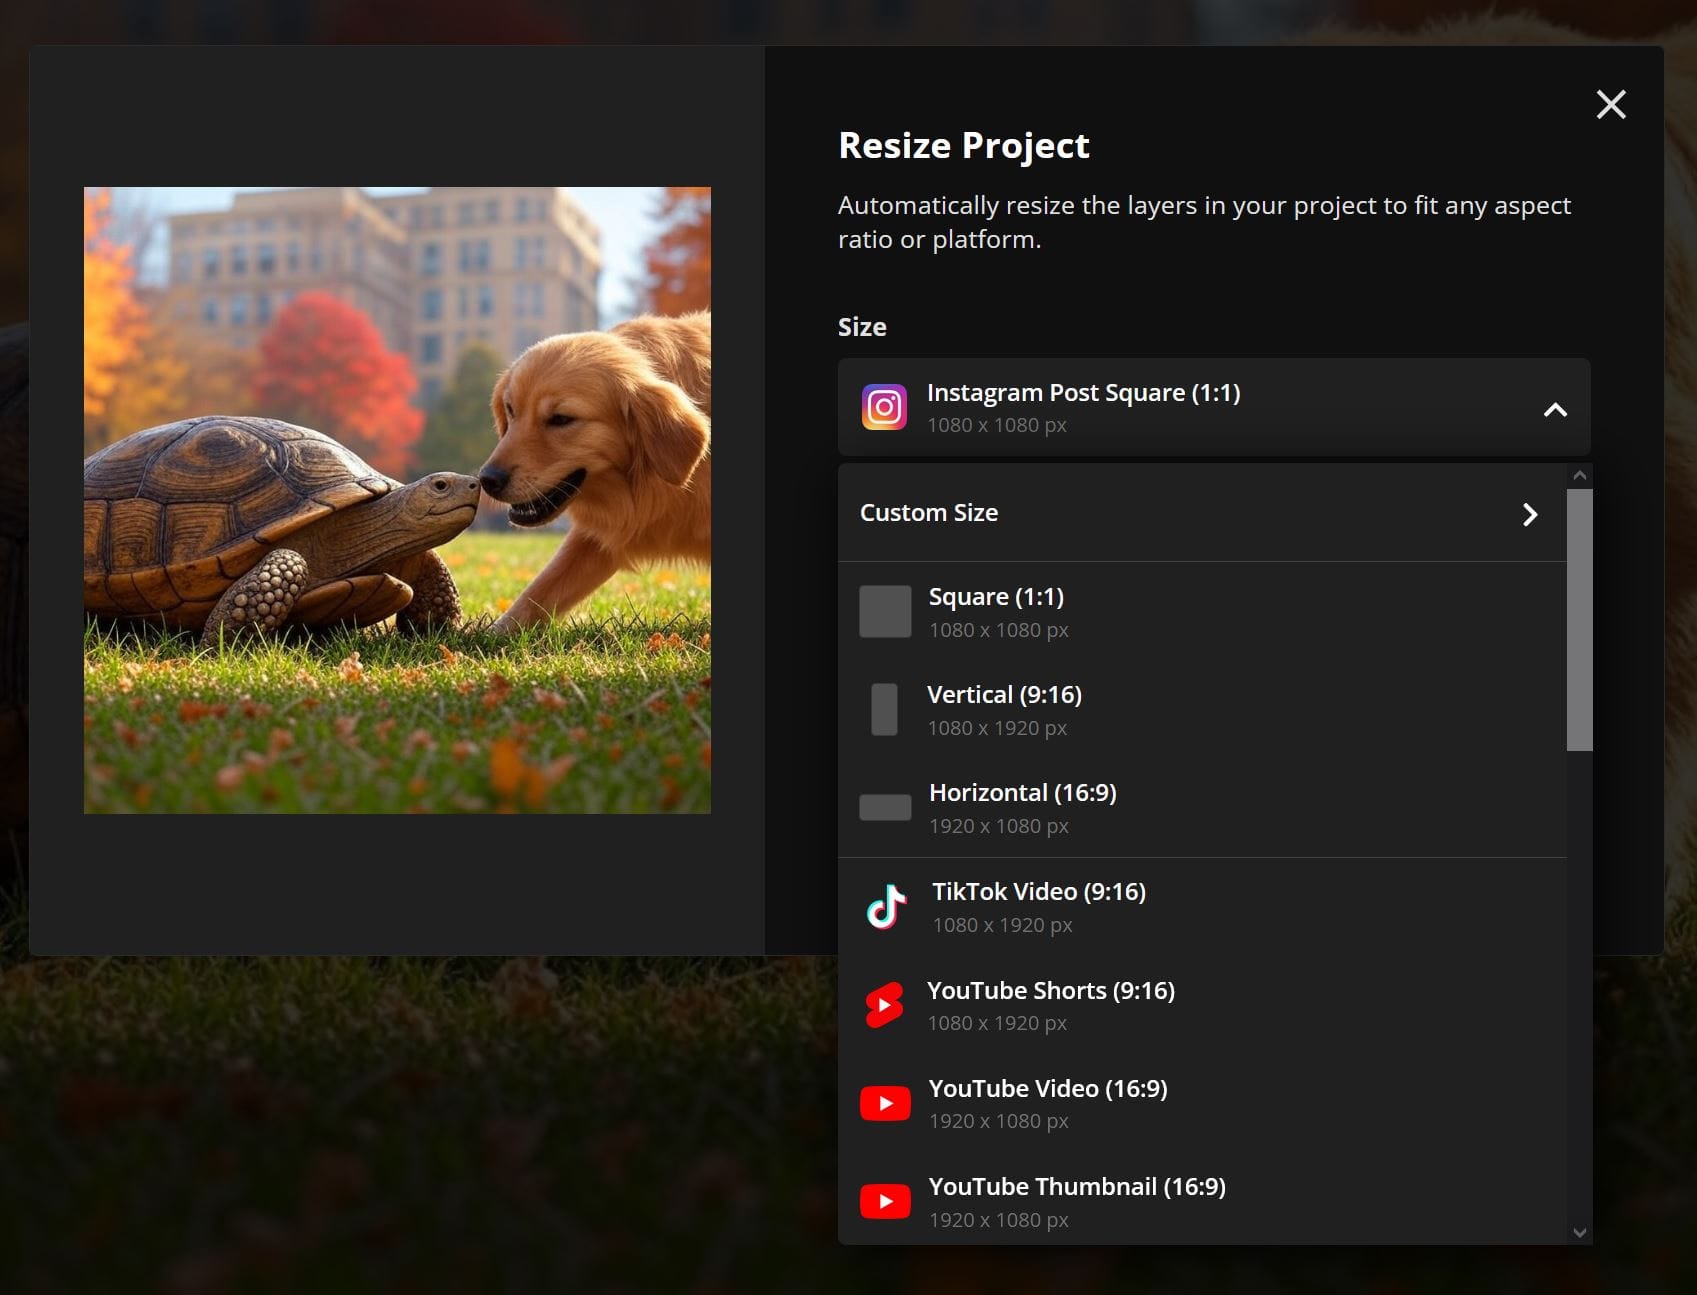
To resize your image, you'll need to use an outside image editor. On Kapwing, upload the Grok image and use the right hand "Resize Image" options to adjust the dimensions of the canvas.
- Ai Image Expander: Use AI to extend the image, generating a background scene that blends in with the image. This technique is called "outpainting"
- Social Media Presets: Quickly adjust an image ratio so it fits the correct dimensions for TikTok, Instagram, YouTube, X, LinkedIn, Facebook, and more.
- Custom Dimensions: Enter specific sizes like 1024 x 768 pixels to match Grok’s default resolution.
3. Enhance Your Image with Kapwing’s Editing Tools
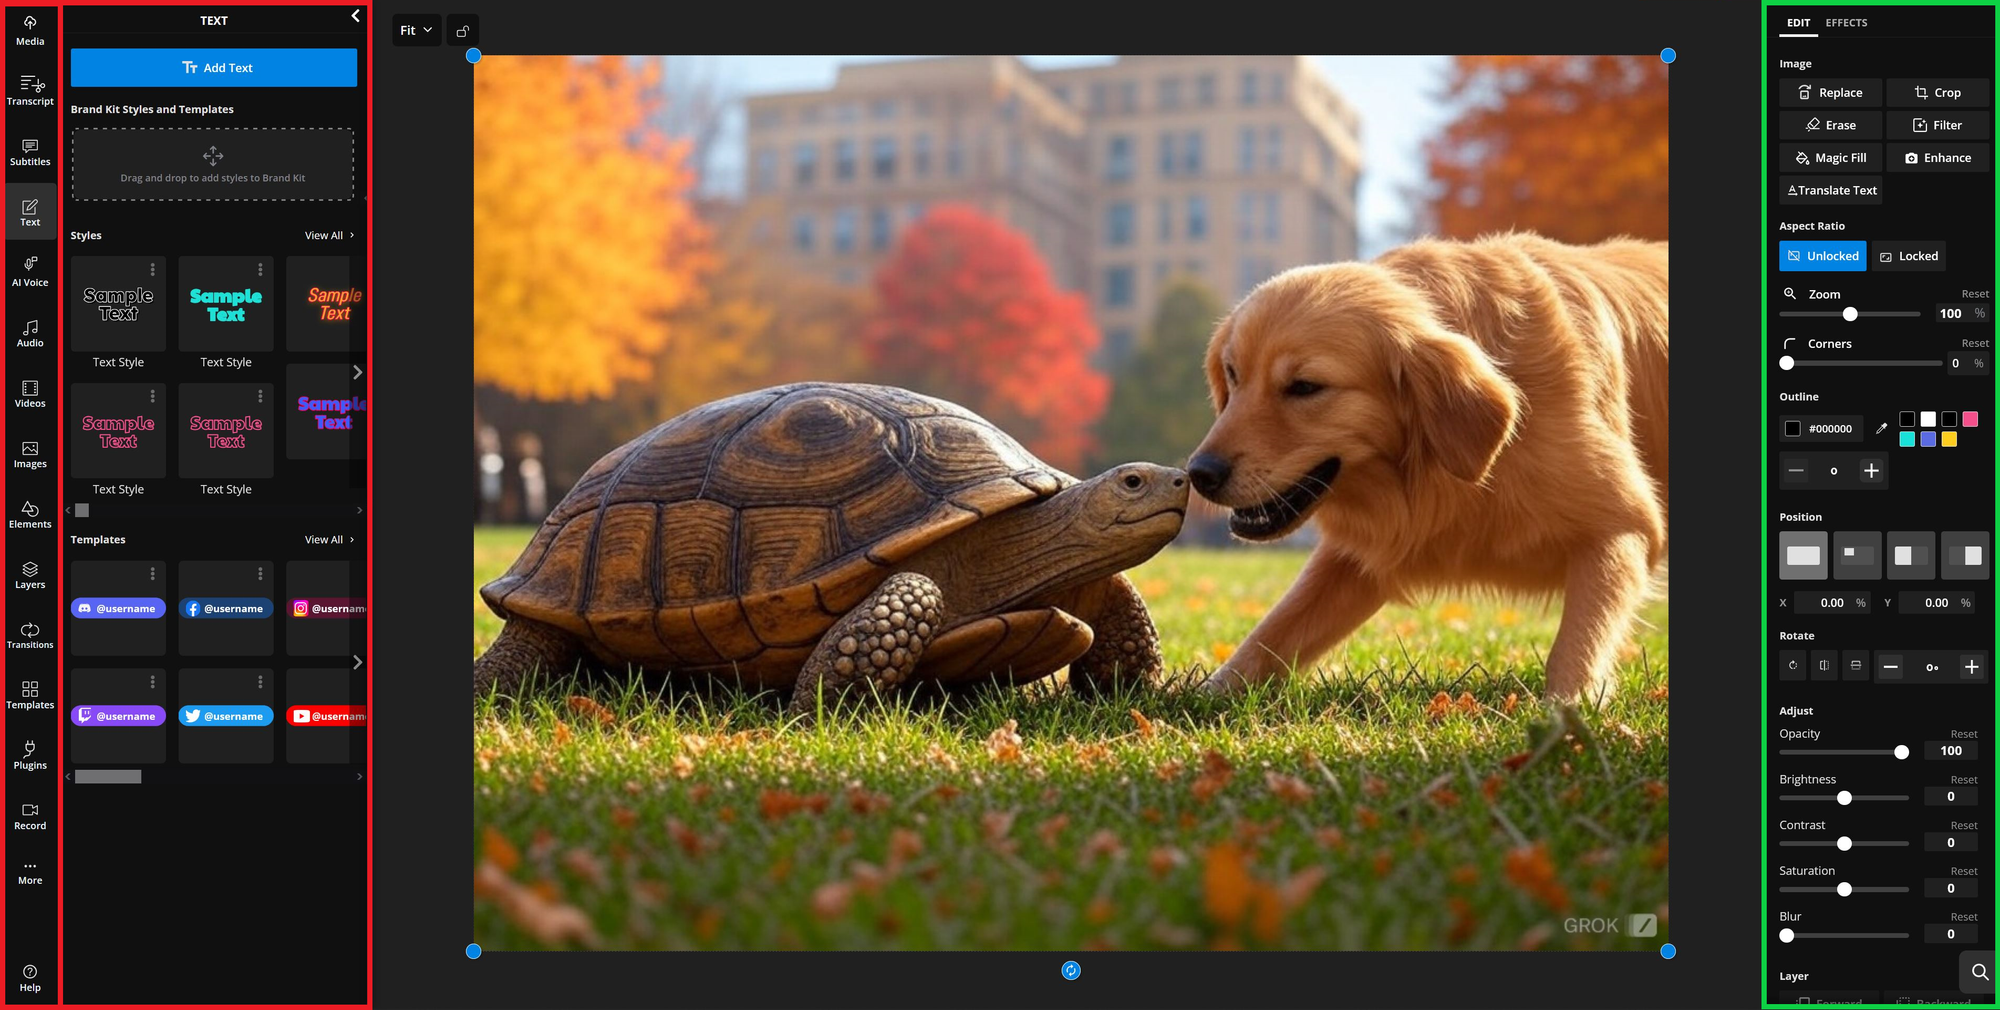
Kapwing provides a variety of features to customize your images. To add elements to your image, select from the editing sidebar on the left
- Text Overlay: Add and stylize text with customizable fonts, colors, outlines, and positioning. Upload your own fonts to strengthen your branding.
- Shapes and Elements: Incorporate shapes, icons, and graphics to make your content stand out.
- Background Removal: Quickly remove backgrounds for cleaner designs or layering effects.
- Layer Adjustments: Rearrange elements to create depth or follow a visual hierarchy.
- Templates: Start with pre-designed layouts to save time and maintain a polished look, such as a meme template.
- Visual Adjustments: Tweak the opacity, brightness, contrast, saturation, and blur of your Grok image.
4. Export and Share
Once your edits are complete, export your final design and share it directly to your social media platforms or download it for future use. Simply select "Export project" in the top right-hand corner.
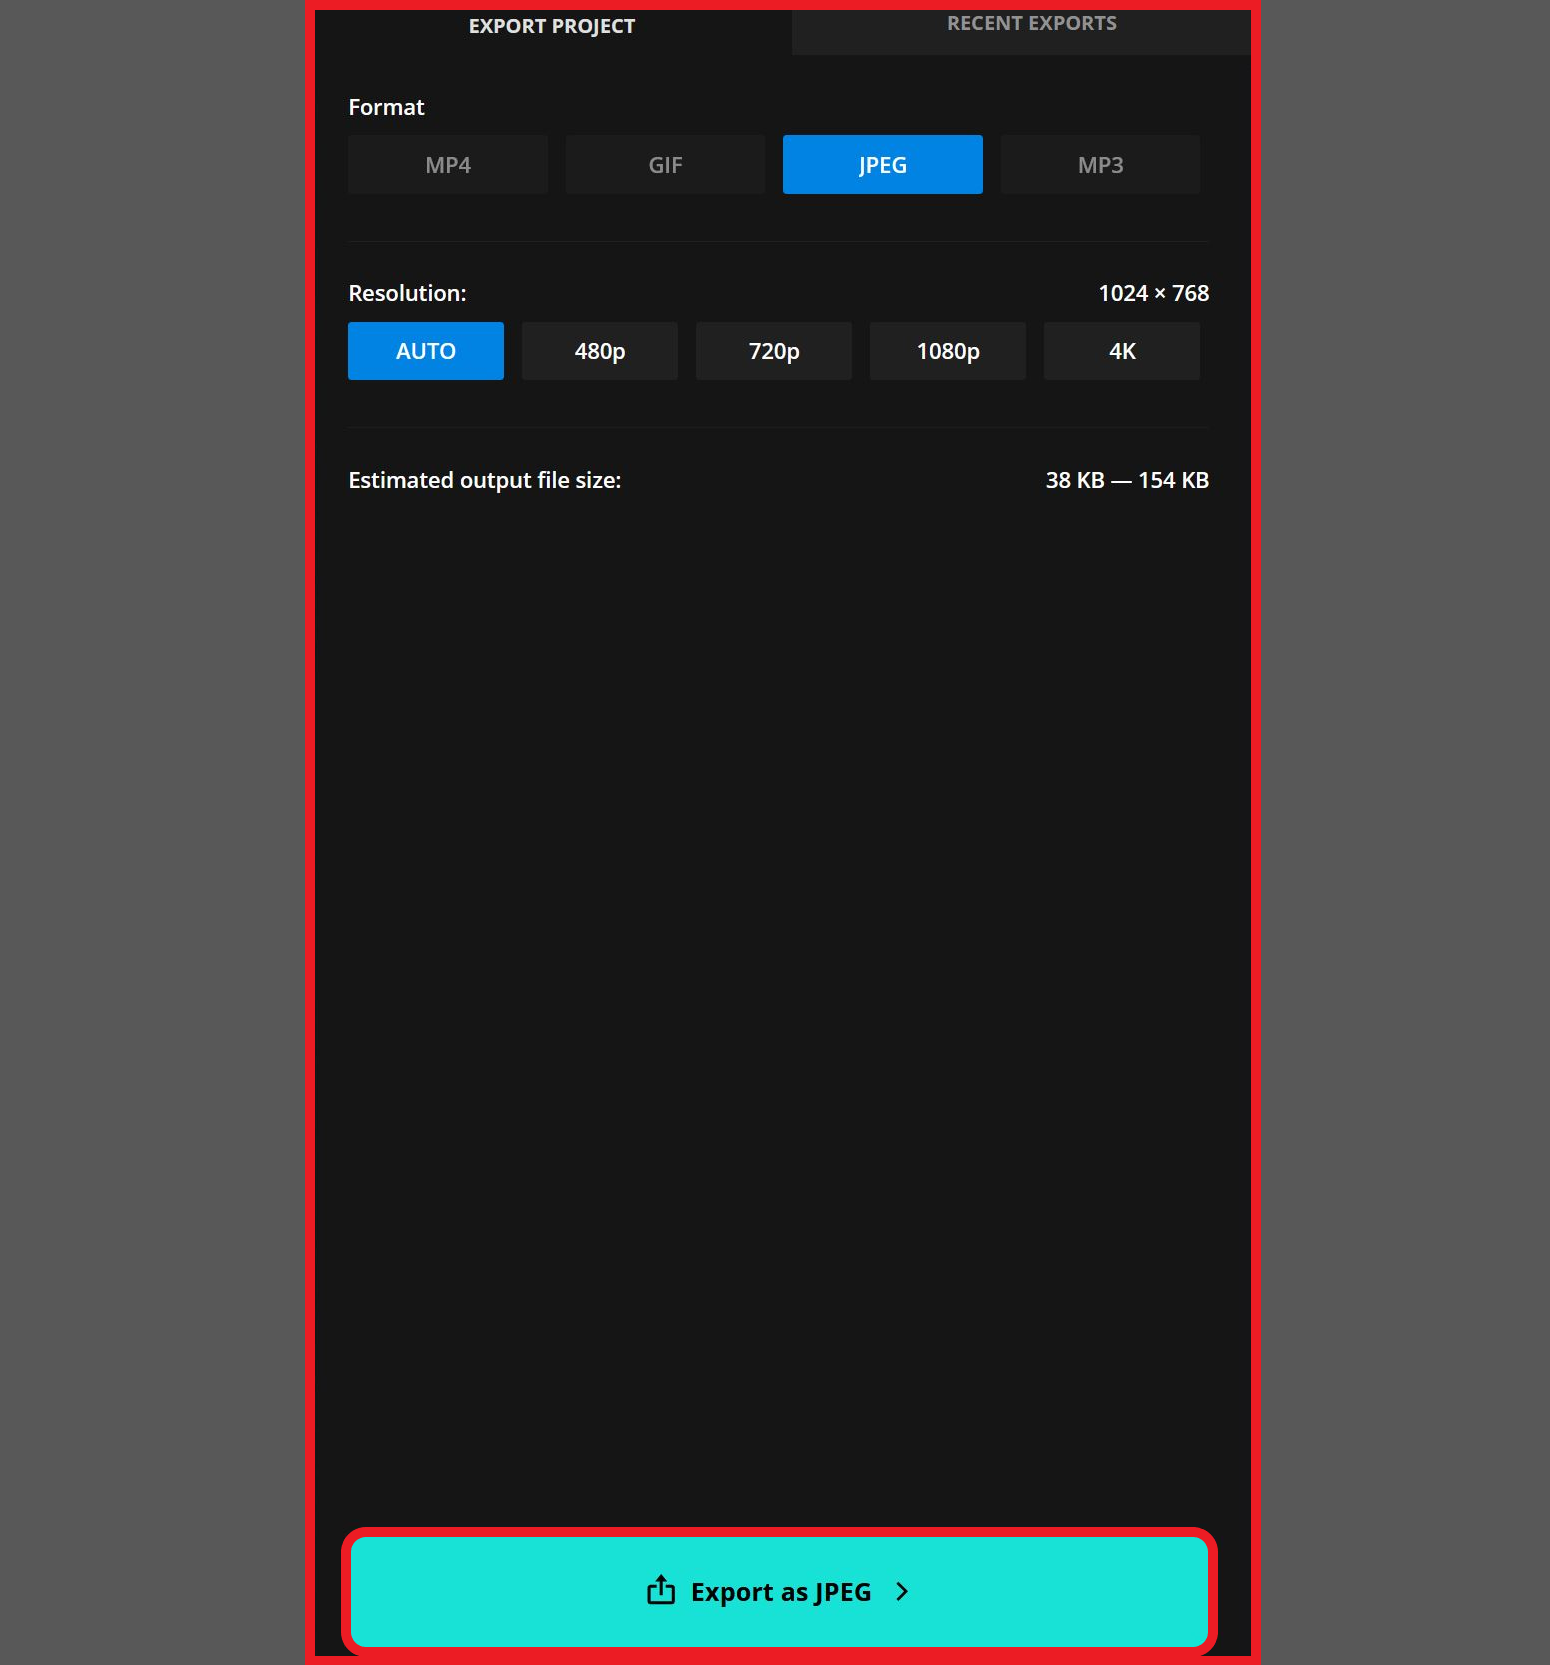
Kapwing empowers creators to produce polished, professional content efficiently, making it the perfect companion for Grok-generated images and beyond.
Whether you’re crafting brand visuals, thumbnails, or multi-platform campaigns, Kapwing streamlines your workflow and enhances your creative output.
Grok Frequently Asked Questions
Is Grok AI free?
Grok is available for free to all X users with a phone-verified account that has been active for at least 7 days.
What is Grok, and how does it compare to ChatGPT?
Grok is an AI tool integrated into the X platform, offering free image generation and chat capabilities. Compared to ChatGPT, Grok has unique advantages:
- Real-Time Awareness: Grok scans X content to stay updated on current events and trends.
- Opinionated Responses: It provides subjective and opinionated answers, even on controversial topics.
- Platform Integration: Grok tailors interactions using insights from posts, conversations, and media on X.
What are Grok's limitations?
Grok's limitations include:
- Single Model: It is restricted to Grok 2, while ChatGPT offers multiple switchable models.
- Limited Image Generation: Grok does not use advanced generators like DALL·E and is confined to its built-in system.
- No Integrated Image Editing Capabilities: Grok AI images must be exported and edited on third-party sites like Kapwing.
How much does X Premium cost?
As of December 17, 2024, X Premium subscriptions are priced as follows:
- X Premium Basic: $3/month or $32 annually
- X Premium: $8/month or $84 annually
- X Premium+: $16/month or $168 annually
Does X Premium provide more Grok features?
X has stated that each premium subscription provides an increase in features like image and text credits, but has not yet listed the exact amounts per tier.


